Using multiple GitHub accounts from the Command Line with Environment Variables (using `direnv`) and per-account SSH keys

I recently was in the situation where I had two github profiles (one work, one personal) that I needed to incorporate in projects.

My work account on this device is my “default”, I use it to push, pull and so on, but the occasional personal activities (like terminate-notice) all should be attributed to my personal account.

To make this happen, I used direnv which reads a .envrcfile in the parents of the directory you’re currently in. I created a directory for my personal projects – ~/Code/Personaland placed a .envrc file which contains:

export GIT_AUTHOR_EMAIL=jon@sprig.gs
export GIT_COMMITTER_EMAIL=jon@sprig.gs
export GIT_SSH_COMMAND="ssh -i ~/.ssh/personal.id_ed25519"
export SSH_AUTH_SOCK=

This means that I have a specific SSH key just for my personal activities (~/.ssh/personal.id_ed25519) and I’ve got my email address defined as two environment variables – AUTHOR (who wrote the code) and COMMITTER (who added it to the tree) – both are required when you’re changing them like this!

Because I don’t ever want it to try to use my SSH Agent, I’ve added the fact that SSH_AUTH_SOCK should be empty.

As an aside, work also require Commit Signing, but I don’t want to use that for my personal projects right now, so I also discovered a new feature as-of 2020 – the environment variables GIT_CONFIG_KEY_x, GIT_CONFIG_VALUE_x and GIT_CONFIG_COUNT=x

By using these, you can override any system, global and repo-level configuration values, like this:

export GIT_CONFIG_KEY_0=commit.gpgSign
export GIT_CONFIG_VALUE_0=false
export GIT_CONFIG_KEY_1=push.gpgSign
export GIT_CONFIG_VALUE_1=false
export GIT_CONFIG_KEY_2=tag.gpgSign
export GIT_CONFIG_VALUE_2=false
export GIT_CONFIG_COUNT=2

This ensures that I *will not* GPG Sign commits, tags or pushes.

If I accidentally cloned a repo into an unusual location, or on purpose need to make a directory or submodule a personal repo, I just copy the .envrc file into that part of the tree, run direnv allowand hey-presto! I’ve turned that area into a personal repo, without having to remember the .gitconfigstring to mark a new part of my tree as a personal one.

The direnv and SSH part was largely inspired by : Handle multiple github accounts while the GIT_CONFIG_* bit was found via this StackOverflow answer.

Featured image is “Mirrored Lotus” by “Faye Mozingo” on Flickr and is released under a CC-BY-SA license.

"Exam" by "Alberto G." on Flickr

My no-spoilers thoughts on the GitLab Certified Associate certification course and exam

On Wednesday, 21st April, I saw a link to a blog post in a chat group for the Linux Lads podcast. This blog post included a discount code to make the GitLab Certified Associate course and exam free. I signed up, and then shared the post to colleagues.

Free GitLab certification course and exam – until 30th April 2021.

GitLab has created a “Certified Associate” certification course which normally costs $650, but is available for free until 30th April using the discount code listed on this blog post and is available for one year after purchase (or free purchase).

I’ve signed up for the course today, and will be taking the 6 hour course, which covers:

Section 1: Self-Study – Introduction to GitLab

* GitLab Overview
* GitLab Comparison
* GitLab Components and Navigation
* Demos and Hands On Exercises

Section 2: Self-Study – Using Git and GitLab

* Git Basics
* Basic Code Creation in GitLab
* GitLab’s CI/CD Functions
* GitLab’s Package and Release Functions
* GitLab Security Scanning

Section 3: Certification Assessments

* GitLab Certified Associate Exam Instructions
* GitLab Certified Associate Knowledge Exam
* GitLab Certified Associate Hands On Exam
* Final Steps

You don’t need your own GitLab environment – you get one provided to you as part of the course.

Another benefit to this course is that you’ll learn about Git as part of the course, so if you’re looking to do any code development, infrastructure as code, documentation as code, or just learning how to store any content in a version control system – this will teach you how 😀

Good luck to everyone participating in the course!

After sharing this post, the GitLab team amended the post to remove the discount code as they were significantly oversubscribed! I’ve heard rumours that it’s possible to find the code, either on Gitlab’s own source code repository, or perhaps using Archive.org’s wayback machine, but I’ve not tried!

On Friday I started the course and completed it yesterday. The rest of this post will be my thoughts on the course itself, and the exam.

Signing up for the course and getting started

Signing up was pretty straightforward. It wasn’t clear that you had a year between when you enrolled for the course and until you first opened the content, but that once you’d opened the link to use the Gitlab demo environment, you had 21 days to use it. You’re encouraged to sign up for the demo environment on the first stage, thereby limiting you to the 21 days from that point. I suspect that if you re-visit that link on a second or third time, you’d get fresh credentials, so no real disaster there, but it does make you feel a bit under pressure to use the environment.

First impressions

The training environment is pretty standard, as far as corporate training goes. You have a side-bar showing the modules you need to complete before the end of the course, and as you scroll down through each module, you get various different media-types arriving, including youtube videos, fade-in text, flashcards which require clicking on and side-scrolling presentation cards. (Honestly, I do wonder whether this is particularly accessible to those with visual or motor impairments… I hope so, but I don’t know how I’d check!)

As you progress through each module, in the sidebar to the left, a circle outline is slowly turned from grey to purple, and when you finish a module the outline is replaced by a filled circle with a white tick in it. At the bottom of each module is a link to the next module.

The content

You have a series of 3 sections:

  • “Introduction to Gitlab” (aka, “Corporate Propaganda” 😉) which includes the history of the GitLab project and product, how many contributors it has, what it’s primary objective is, and so on. There’s even an “Infotainment” QVC-like advert about how amazing GitLab is in this section, which is quite cute. At the end of this first section, you get a “Hands On” section, where you’re encouraged to use GitLab to create a new Project. I’ll come back to the Hands on sections after this.
  • “Using Git and Gitlab”, which you’d expect to be more hands-on but is largely more flashcards and presentation cards, each with a hands on section at the end.
  • “Certification Assessments” has two modules to explain what needs to happen (one before, one after) and then two parts to the “assessment” – a multiple-choice section which has to be answered 100% correctly to proceed, and a “hands on” exam, which is basically a collection of “perform this task” questions, which you are expected to perform in the demo environment.

Hands-on sections focus on a specific task – “create a project”, “commit code”, “create an issue”, “create a merge request” and so-on. There are no tasks which will stretch even the freshest Git user, and seeing the sorts of things that the “Auto DevOps” function can enable might interest someone who wants to use GitLab. I was somewhat disappointed that there was barely any focus on the fact that GitLab can be self-hosted, and what it takes to set something like that up.

We also get to witness the entire power (apparently) of upgrading to the “Premium” and “Ultimate” packages of GitLab’s proprietary add-ons… Epics. I jest of course, I’ve looked and there’s loads more to that upgrade!

The final exams (No Spoilers)

This is in two parts, a multiple-choice selection on a fixed set of 14 questions, with 100% accuracy required to move on to the next stage that can be retaken indefinitely, and a hands-on set of… from memory… 14ish tasks which must be completed on a project you create.

The exam is generally things about GitLab which you’ve covered in the course, but included two questions about using Git that were not covered in any of the modules. For this reason, I’d suggest when you get to those questions, open a git environment, and try each of the commands offered given the specific scenario.

Once you’ve finished the hands-on section, using the credentials you were given, you’re asked to complete a Google Forms page which includes the URL of the GitLab Project you’ve performed your work in, and the username for your GitLab Demo Environment. You submit this form, and in 7 days (apparently, although, given the take-up of the course, I’m not convinced this is an accurate number) you’ll get your result. If you fail, apparently, you’ll be invited to re-try your hands-on exam again.

At least some of the hands-on section tasks are a bit ambiguous, suggesting you should make this change on the first question, and then “merge that change into this branch” (again, from memory) in the next task.

My final thoughts

So, was it worth $650 to take this course? No, absolutely not. I realise that people have put time and effort into the content and there will be people within GitLab Inc checking the results at the end… but at most it’s worth maybe $200, and even that is probably a stretch.

If this course was listed at any price (other than free) would I have taken it? …. Probably not. It’s useful to show you can drive a GitLab environment, but if I were going for a job that needed to use Git, I’d probably point them at a project I’ve created on GitHub or GitLab, as the basics of Git are more likely to be what I’d need to show capabilities in.

Does this course teach you anything new about Git or GitLab that just using the products wouldn’t have done? Tentatively, yes. I didn’t know anything about the “Auto DevOps” feature of GitLab, I’d never used the “Quick Actions” in either issues or merge requests, and there were a couple of git command lines that were new to me… but on the whole, the course is about using a web based version control system, which I’ve been doing for >10 years.

Would this course have taught you anything about Git and GitLab if you were new to both? Yes! But I wouldn’t have considered paying $650… or even $65 for this, when YouTube has this sort of content for free!

What changes would you make to this course? For me, I’d probably introduce more content about the CI/CD elements of GitLab, I might introduce a couple of questions or a module about self-hosting and differences about the tiers (to explain why it would be worth paying $99/user/month for the additional features in the software). I’d probably also split the course up into several pieces, where each of those pieces goes towards a larger target… so perhaps there might be a “basic user” track, which is just “GitLab inc history”, “using git” and “using Gitlab for issues and changes”, then an advanced user, covering “GitLab tiers”, “GitLab CI/CD”, “Auto DevOps”, running “Git Runners”, and perhaps a Self Hosting course which adds running the service yourself, integrating GitLab with other services, and so on. You might also (as GitLab are a very open company) have a “marketing GitLab” course (for TAMs, Pre-Sales and Sales) which could also be consumed externally.

Have you passed? Yep

Read More
"Status" by "Doug Letterman" on Flickr

Adding your Git Status to your Bash prompt

I was watching Lorna Mitchell‘s Open Source Hour twitch stream this morning, and noticed that she had a line in her prompt showing what her git status was.

A snip from Lorna’s screen during the Open Source Hour stream.

Git, for those of you who aren’t aware, is the version control software which has dominated software development and documentation for over 10 years now. It’s used for almost everything now, supplanting it’s competitors like Subversion, Visual Source Safe, Mercurial and Bazaar. While many people are only aware of Git using GitHub, before there was GitHub, there was the Git command line. I’m using the git command in a Bash shell all the time because I find it easier to use that for the sorts of things I do, than it is to use the GUI tools.
However, the thing that often stumbles me is what state I’m in with the project, and this line showed me just how potentially powerful this command can be.

During the video, I started researching how I could get this prompt set up on my machine, and finally realised that actually, git prompt was installed as part of the git package on my Ubuntu 20.04 install. To use it, I just had to add this string $(__git_ps1) into my prompt. This showed me which branch I was on, but I wanted more detail than that!

So, then I started looking into how to configure this prompt. I found this article from 2014, called “Git Prompt Variables” which showed me how to configure which features I wanted to enable:

GIT_PS1_DESCRIBE_STYLE='contains'
GIT_PS1_SHOWCOLORHINTS='y'
GIT_PS1_SHOWDIRTYSTATE='y'
GIT_PS1_SHOWSTASHSTATE='y'
GIT_PS1_SHOWUNTRACKEDFILES='y'
GIT_PS1_SHOWUPSTREAM='auto'

To turn this on, I edited ~/.bashrc (again, this is Ubuntu 20.04, I’ve not tested this on CentOS, Fedora, Slackware or any other distro). Here’s the lines I’m looking for:

The lines in the middle, between the two red lines are the lines in question – the lines above and below are for context in the standard .bashrc file shipped with Ubuntu 20.04

I edited each line starting PS1=, to add this: $(__git_ps1), so this now looks like this:

The content of those two highlighted lines in .bashrc

I’m aware that line is pretty hard to read in many cases, so here’s just the text for each PS1 line:

PS1='${debian_chroot:+($debian_chroot)}\[\033[01;32m\]\u@\h\[\033[00m\]:\[\033[01;34m\]\w$(__git_ps1)\[\033[00m\]\$ '
PS1='${debian_chroot:+($debian_chroot)}\u@\h:\w$(__git_ps1)\$ '

The first of those is the version that is triggered when if [ "$color_prompt" = yes ] is true, the second is when it isn’t.

What does this look like?

Let’s run through a “standard” work-flow of “conditions”. Yes, this is a really trivial example, and quite (I would imagine) different from how most people approach things like this… but it gives you a series of conditions so you can see what it looks like.

Note, as I’m still running a slightly older version of git, and I’ve not adjusted my defaults, the “initial” branch created is still called “master”, not “main”. For the purposes of this demonstration, it’s fine, but I should really have fixed this from the outset. My apologies.

First, we create and git init a directory, called git_test in /tmp.

Following a git init, the prompt ends (master #). Following the git init of the master branch, we are in a state where there is “No HEAD to compare against”, so the git prompt fragment ends #.

Next, we create a file in here. It’s unstaged.

Following the creation of an empty file, using the touch command, the prompt ends (master #%). We’re on the master branch, with no HEAD to compare against (#), and we have an untracked file (%).

And then we add that to the staging area.

Following a git add, the prompt ends (master +). We’re on the master branch, with a staged change (+).

Next we commit the file to the repository.

Following a git commit, the prompt ends (master). We’re on the master branch with a clean staging and unstaged area.

We add some content to the README file.

Following the change of a tracked file, by echoing content into the file, the prompt ends (master *). We’re on the master branch with an unstaged change (*).

We realise that we can’t use this change right now, let’s stash it for later.

Following the git stash of a tracked file, the prompt ends (master $). We’re on the master branch with stashed files ($).

We check out a new branch, so we can use that stash in there.

Following the creation of a new branch with git checkout -b, the prompt ends (My-New-Feature $). We’re on the My-New-Feature branch with stashed files ($).

And then pop the stashed file out.

Following the restoration of a stashed file, using git stash pop, the prompt ends (My-New-Feature *). We’re on the My-New-Feature branch with stashed files (*).

We then add the file and commit it.

Following a git add and git commit of the previously stashed file, the prompt ends (My-New-Feature). We’re on the My-New-Feature branch with a clean staged and unstaged area.

How about working with remote sources? Let’s change to back to the /tmp directory and fork git_test to git_local_fork.

Following the clone of the repository in a new path using git clone, and then changing into that directory with the cd command, the prompt ends (My-New-Feature=). We’re on the My-New-Feature branch, which is in an identical state to it’s default remote tracked branch (=).

We’ve checked it out at the feature branch instead of master, let’s check out master instead.

Subsequent to checking out the master branch in the repository using git checkout master, the prompt ends (master=). We’re on the master branch, which is in an identical state to it’s default remote tracked branch (=).

In the meantime, upstream, someone merged “My-New-Feature” into “master” on our original git_test repo.

Following the merge of a feature branch, using git merge, the prompt ends (master). We’re on the master branch with a clean staged and unstaged area.

On our local branch again, let’s fetch the state of our “upstream” into git_local_fork.

After we fetch the state of our default upstream repository, the prompt ends (master<). We’re on the master branch with a clean staged and unstaged area, but we’re behind the default remote tracked branch (<).

And then pull, to make sure we’re in-line with upstream’s master branch.

Once we perform a git pull to bring this branch up-to-date with the upstream repository, the prompt ends (master=). We’re on the master branch, which is back in an identical state to it’s default remote tracked branch (=).

We should probably make some local changes to this repository.

The prompt changes from (master=) to (master *=) to (master +=) and then (master>) as we create an unstaged change (*), stage it (+) and then bring the branch ahead of the default remote tracked branch (>).

Meanwhile, someone made some changes to the upstream repository.

The prompt changes from (master) to (master *) to (master +) and then (master) as we create an unstaged change (*) with echo, stage it (+) with git add and then end up with a clear staged and unstaged area following a git commit.

So, before we try and push, let’s quickly fetch their tree to see what’s going on.

After a git fetch to pull the latest state from the remote repository, the prompt ends (master <>). We’re on the master branch, but our branch has diverged from the default remote and won’t merge cleanly (<>).

Oh no, we’ve got a divergence. We need to fix this! Let’s pull the upstream master branch.

We do git pull and end up with the prompt ending (master *+|MERGING<>). We have unstaged (*) and staged (+) changes, and we’re in a “merging” state (MERGING) to try to resolve our diverged branches (<>).

Let’s fix the failed merge.

We resolve the merge conflict with nano, and confirm it has worked with cat, and then stage the merge resolution change using git add. The prompt ends (master +|MERGING<>). We have staged (+) changes, and we’re in a “merging” state (MERGING) to try to resolve our diverged branches (<>).

I think we’re ready to go with the merge.

We perform a git commit and the prompt ends as (master>). We have resolved our diverged master branches, have exited the “merging” state and are simply ahead of the default remote branch (>).

If the remote were a system like github, at this point we’d just do a git push. But… it’s not, so we’d need to do a git pull /tmp/git_local_fork in /tmp/git_test and then a git fetch in /tmp/git_local_fork… but that’s an implementation detail 😉

Featured image is “Status” by “Doug Letterman” on Flickr and is released under a CC-BY license.

"Salmon leaping" by "openpad" on Flickr

Using public #git sources in private projects

The last post I made was about using submodules to work with code that is being developed, either in isolation from other aspects of a project, or so components can be reused without requiring lots of copy-and-paste activities. It was inspired by a question from a colleague. After asking a few more questions, it turns out that may be what that colleague needed was to consume code from other repositories and store them in their own project.

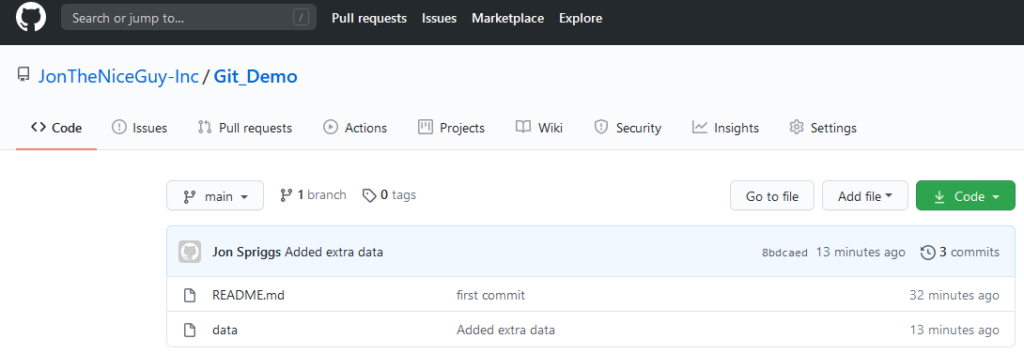
In this case, I’ve created two repositories, both on GitHub (which will both be removed by the time this post is published) called JonTheNiceGuy/Git_Demo (the “upstream”, open source project) and JonTheNiceGuy-Inc/Git_Demo (the private project, referred to as “mine”).

Getting the “Open Source” project started

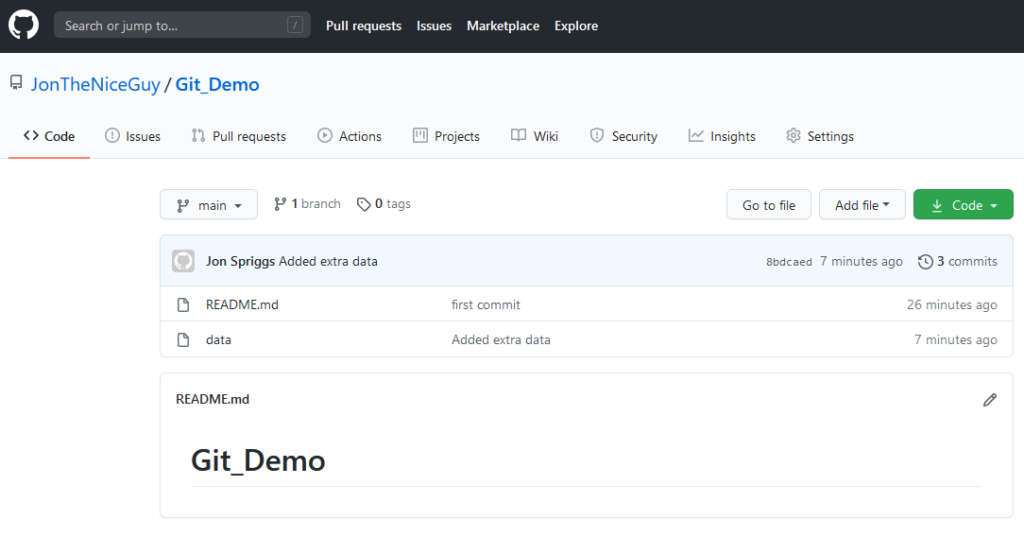
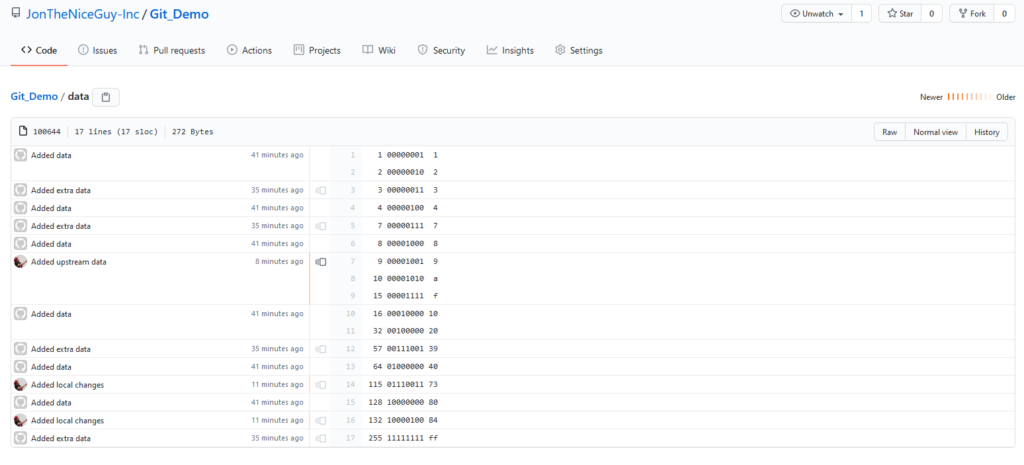
Here we have a simple repository, showing the README file for the project (which is likely, in the real world, to show what license that code has been released under, some explaination on what it’s for, etc.) and the actual data source. In this demo, the data source is a series of numbers, showing the decimal number in the first column, the binary representation of that number in the second column, and the hexedecimal representation in the third column.

Our “upstream” repository, showing the README.md file and the data source we want to use.
The data source itself. Note, I forgot to take a screen shot of this file, so I’ve had to “go back to a previous commit” to collect this particular image.

Elsewhere in the world, a private project has started! It’s going to use this data source as some element of this project, and to ensure that the code they’re relying on doesn’t go away, they create their own repository which this code will go into.

Preparing the private project

If both repositories are using GitHub, or if both repositories are using GitLab, then you should be able to “just” Fork the repository, using the “Fork” button in the top right corner:

The “Fork” button

And then select the organisation or account to place the forked repo into.

A list of potential targets to fork the repository into. Your view may differ if you are part of less organisations.

Gitlab has a similar workflow – they have a similar “fork” button, but the list of potential targets is different (but still works the same way).

Gitlab’s list of potential targets to fork the repository into.

Note that you can’t “easily” fork between different Version Control Services! To do something similar, you need to create a new repository in the target service, and then, run some commands to move the code over.

The screen you see immediately after you’ve created a new project – here I’ve created it in the “JonTheNiceGuy-Inc” Organisation. You can see the “quick setup” panel which has the URL to use for the repository.
Here we see the results of running five commands, which are: git clone <url> ; cd <target-dir> ; git remote rename origin upstream ; git remote add mine <url> ; git push –set-upstream mine main

If you’re using the command line method, here’s the commands you issue:

  • git clone http://service/user/repo – This command clones the repository from your service of choice to your local file system. It usually places it into the name of the repository you specified. In this case, “repo”, but in the above context (cloning from Git_Demo.git) it goes into “Git_Demo”. Note, HTTP(S) isn’t the only git transport, another common one is SSH, so if you prefer using SSH instead of HTTP, the URL in this case will be something like git@service:user/repo or service:user/repo. If you’re using submodules, however, I’d strongly recommend using HTTP(S) over SSH for at least the initial pull, as this is much easier for clients to navigate.
  • cd repo – Move into the directory where the cloned repository has been placed.
  • OPTIONAL: git remote rename origin upstream – Rename the remote source of the repository. By default, when you git clone or use git submodule add, the name of the remote resource is called “origin”. I prefer to give a descriptive name for my remote sources, so using “upstream” makes more sense to me. In later commands, I’ll use the remote name “upstream” again. If you don’t want to run this command, and leave the remote name as “origin”, you’ll just have to remember to change it back to “origin”.
  • git remote add mine http://new-service/user/repo – this adds a new remote source, to which you can push new commits, or pull code from your peers. Again, like in the git clone command above, you may use another URL format instead of HTTP(S). You may want to use a different name for the new remote, but again, I tend to prefer “mine” for anything I’m personally working on.
  • git push --set-upstream mine main – This sends the entire commit tree for the branch you’re currently on to your remote source.
Once we’ve run the git push, you can now see that the code has all been pushed to your private project.
Issuing a git log command, shows the current tip on the branch “main” in the “upstream” repository is equal to the current tip on the branch “main” in the “mine” repository, as well as the tip of the “main” repository locally.

Making your local changes

So, while you could just keep using just the upstream project’s code (and doing the above groundwork is good practice to keep you from putting yourself into the situation that the NPM world got into with “left-pad”). What’s more likely is that you want to make your own, local changes to this repository. I’ve done this in the past where I wanted to demonstrate a software build using a public machine image, but internally at work we used our own images. Using this method, I can consume the code I’ve created in public, and just update the assets we use at work.

In this example, let’s update that data file. I’ve added two new lines, “115” (and it’s binary/hex representations) and “132”. I can use the git diff command to confirm the changes I want to make – it’s all good!

Next, I stage the changes with git add, use git commit to write it to the branch, and git push to push it up to my repository. This is all fairly standard stuff in the Git world.

Here we make a change to the data source, confirm there is a difference, add and commit it, and then push it to our default branch (mine/main).

When I then check the git log, we see that there’s a divergence, between my local main branch and the upstream main branch. You could also use git log -p to see the exact code changes, if you wanted… but we know what’s changed already.

The git log, showing that we have a “local” change from the “upstream” source, and that we’ve pushed that local change to the “mine” source.

Bringing data from the upstream source

Oh joy! The upstream project (“JonTheNiceGuy” not “JonTheNiceGuy-Inc”) have updated their Git_Demo repository – they’ve had the audacity to add three new numbers – 9, 10 and 15 – to the data source.

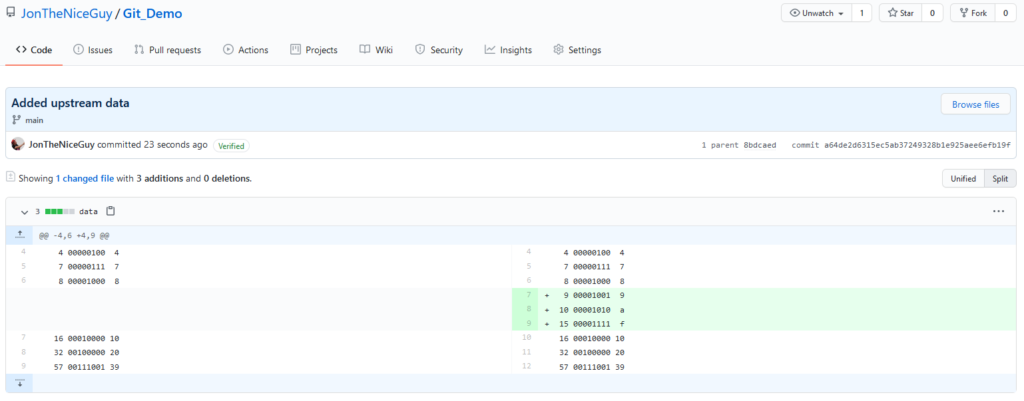
The patch that was applied to this branch. We can check the difference here before we try to do anything with it! It’s something we want!

Well, actually we want to use that data, so let’s start bringing it in. We use the git pull command.

The git pull command, with the remote source (“upstream”) and the branch (“main”) to use.

Because this makes a change to a file that you’ve amended as part of your work, it can’t perform a “Fast forward” of these changes, so Git has to perform a merge commit. This means there’s a new commit in the log, so it’s clear that we’ve updated files because of this merge.

If there were a conflict in this file (which, fortunately, there isn’t!) you’d also be prompted to fix the merge conflicts too. This is a bit bigger than what I’m trying to explain, so instead, I’ll link to a tutorial by Atlassian on merge conflicts. You may also want to take a quick look at the rebasing page on the Git Project’s documentation site, and see whether this might have made your life easier in the case of a conflict!

Anyway, let’s use the default merge message.

The default message when performing a git pull where the change can’t be fast-forwarded.

Once the merge message is done, the merge completes. Yey!

We successfully merged our change, and it’s now part of our local tree

And to prove it, we can now see that we have all the changes from the upstream (commits starting 3b75eb, 8ad9ae, 8bdcae and the new one at a64de2) and our local changes (starting 02e40e).

Because we performed a merge, not a fast forward, our local branch is at a different commit than either of our remote sources – the commit starting 6f4db6 is on our local version, “upstream” is at a64de2 and “mine” is at 02e40e. So we need to fix at least our “mine/main” branch. We do this with a git push.

We do our git push here to get the code into our “mine/main” branch.

And now we can see the git log on our service.

The list of commits on Github for our “mine/main” branch.

And locally, we can see that the remote state has changed too. Let’s look at that git log again.

The result of the git log command on our local machine, showing the new position of the pointers for “upstream/main”, “mine/main” and the local “main” branches.

We can also look at the git blame on the service.

The git blame screen on GitHub, showing who made the various commits.

Or on our local machine.

git blame run locally, showing the commit reference, the author, the date and time of the commit, and the line number, followed by the line in question.

Featured image is “Salmon leaping” by “openpad” on Flickr and is released under a CC-BY license.

"Submarine" by "NH53" on Flickr

Recursive Git Submodules

One of my colleagues asked today about using recursive git submodules. First, let’s quickly drill into what a Submodule is.

Git Submodules

A submodule is a separate git repository, attached to the git repository you’re working on via two “touch points” – a file in the root directory called .gitmodules, and, when checked out, the HEAD file in the .git directory.

When you clone a repository with a submodule attached, it creates the directory the submodule will be cloned into, but leave it empty, unless you either do git submodule update --init --recursive or, when you clone the repository initially, you can ask it to pull any recursive submodules, like this git clone https://your.vcs.example.org/someorg/somerepo.git --recursive.

Git stores the commit reference of the submodule (via a file in .git/modules/$SUBMODULE_NAME/HEAD which contains the commit reference). If you change a file in that submodule, it marks the path of the submodule as “dirty” (because you have an uncommitted change), and if you either commit that change, or pull an updated commit from the source repository, then it will mark the path of the submodule as having changed.

In other words, you can track two separate but linked parts of your code in the same tree, working on each in turn, and without impacting each other code base.

I’ve used this, mostly with Ansible playbooks, where I’ve consumed someone else’s role, like this:

My_Project
|
+- Roles
|  |
|  +- <SUBMODULE> someorg.some_role
|  +- <SUBMODULE> anotherorg.another_role
+- inventory
+- playbook.yml
+- .git
|  |
|  +- HEAD
|  +- modules
|  +- etc
+- .gitmodules

In .gitmodules the file looks like this:

[submodule "module1"]
 path = module1
 url = https://your.vcs.example.org/someorg/module1.git

Once you’ve checked out this submodule, you can do any normal operations in this submodule, like pulls, pushes, commits, tags, etc.

So, what happens when you want to nest this stuff?

Nesting Submodule Recursion

So, my colleague wanted to have files in three layers of directories. In this instance, I’ve simulated this by creating three directories, root, module1 and module2. Typically these would be pulled from their respective Git Service paths, like GitHub or GitLab, but here I’m just using everything on my local file system. Where, in the following screen shot, you see /tmp/ you could easily replace that with https://your.vcs.example.org/someorg/.

The output of running mkdir {root,module1,module2} ; cd root ; git init ; cd ../module1 ; git init ; cd ../module2 ; git init ; touch README.md ; git add README.md ; git commit -m 'Added README.md' ; cd ../module1 ; git submodule add /tmp/module2 module2 ; git commit -m 'Added module2' ; cd ../root ; git submodule add /tmp/module1 module1 ; git submodule update --init --recursive ; tree showing the resulting tree of submodules under the root directory.
The output of running mkdir {root,module1,module2} ; cd root ; git init ; cd ../module1 ; git init ; cd ../module2 ; git init ; touch README.md ; git add README.md ; git commit -m ‘Added README.md’ ; cd ../module1 ; git submodule add /tmp/module2 module2 ; git commit -m ‘Added module2’ ; cd ../root ; git submodule add /tmp/module1 module1 ; git submodule update –init –recursive ; tree showing the resulting tree of submodules under the root directory.

So, here, we’ve created these three paths (basically to initiate the repositories), added a basic commit to the furthest submodule (module2), then done a submodule add into the next furthest submodule (module1) and finally added that into the root tree.

Note, however, when you perform the submodule add it doesn’t automatically clone any submodules, and if you were to, from another machine, perform git clone https://your.vcs.example.org/someorg/root.git you wouldn’t get any of the submodules (neither module1 nor module2) without adding either --recursive to the clone command (like this: git clone --recursive https://your.vcs.example.org/someorg/root.git), or by running the follow-up command git submodule update --init --recursive.

Oh, and if any of these submodules are updated? You need to go in and pull those updates, and then commit that change, like this!

The workflow of pulling updates for each of the submodules, with git add, git commit, and git pull, also noting that when a module has been changed, it shows as having “new commits”.
And here we have the finish of the workflow, updating the other submodules. Note that some of these steps (probably the ones in the earlier image) are likely to have been performed by some other developer on another system, so having all the updates on one machine is pretty rare!

The only thing which isn’t in these submodules is if you’ve done a git clone of the root repo (using the terms from the above screen images), the submodules won’t be using the “master” branch (or a particular “tag” or “branch hame”, for that matter), but will instead be using the commit reference. If you wanted to switch to a specific branch or tag, then you’d need to issue the command git checkout some_remote/some_branch or git checkout master instead of (in the above screen captures) git pull.

If you have any questions or issues with this post, please either add a comment, or contact me via one of the methods at the top or side of this page!

Featured image is “Submarine” by “NH53” on Flickr and is released under a CC-BY license.

Opening to my video: Screencast 003 - Gitlab

Screencast 003: Gitlab

I’ve done a new mentoring style video, talking about how to use a self-hosted version of Gitlab for basic group projects and individual projects.

Screencast 003: Gitlab

Also available on Archive.org and LBRY.

Late edit 2020-03-25: To build the Gitlab environment I created, take a look at this git repository, which uses Terraform, some cloud init scripts and an ansible playbook. In particular, look at the following files:

If you just want to build the Gitlab environment, then it’s worth removing or renaming (to anything that isn’t .tf – I use .tf_unload) the files load_aws_module.tf, load_awx_module.tf, load_azure_module.tf

Opening to my video: Screencast 002 - A quick walk through Git

Screencast 002: A quick walk through Git (a mentoring style video)

I have done a follow-up Mentoring style video to support my last one. This video shows how to fix some of the issues in Git I came across in my last mentoring video!

Screencast 002: A quick walk through Git

I took some advice from a colleague who noticed that I skipped past a couple of issues with my Git setup, so I re-did them :) I hope this makes sense, and at 35 minutes, is a bit more understandable than the last 1h15 video!

Also on LBRY and Archive.org

Opening to my video: Screencast 001 - Ansible and Inspec using Vagrant

Screencast 001: Ansible and Inspec with Vagrant and Git (a mentoring style video)

If you’ve ever wondered how I use Ansible and Inspec, or wondered why some of my Vagrant files look like they do, well, I want to start recording some “mentor” style videos… You know how, if you were sitting next to someone who’s a mentor to you, and you watch how they build a solution.

The first one was released last night!

I recently saw a video by Chris Hartjes on how he creates his TDD (Test driven development) based PHP projects, and I really wanted to emulate that style, but talking about the things I use.

This was my second attempt at recording a mentoring style video yesterday, the first was shown to the Admin Admin Podcast listeners group on Telegram, and then sacrificed to the demo gods (there were lots of issues in that first video) never to be seen again.

From a tooling perspective, I’m using a remote virtual machine running Ubuntu Mate 18.04 over RDP (to improve performance) with xrdp and Remmina, OBS is running locally to record the content, and I’m using Visual Studio Code, git, Vagrant and Virtualbox, as well as Ansible and Inspec.

Late edit 2020-02-29: Like videos like this, hate YouTube? It’s also on archive.org: https://archive.org/details/JonTheNiceGuyScreencast001

Late edit 2020-03-01: Popey told me about LBRY.tv when I announced this on the Admin Admin Podcast telegram channel, and so I’ve also copied the video to there: https://lbry.tv/@JonTheNiceGuy:b/Screencast001-Ansible-and-Inspec-with-Vagrant:8

A git log from a personal repository

One to read: “A guide to understand the importance of [ #git ] commit messages and how to write them well”

One to read: “RomuloOliveira/commit-messages-guide: A guide to understand the importance of commit messages and how to write them well”

I’ve talked a lot recently with colleagues and peers about writing git commit messages (particularly in the wake of Hacktoberfest, but also following this recent post: One to read: “My favourite Git commit”), but this is a useful document that lists the standards to follow, no matter where your commits are going!

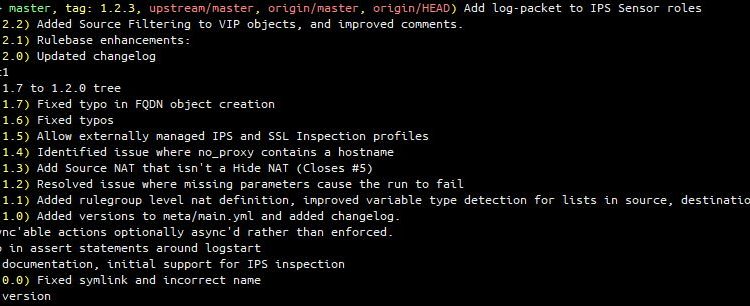
I try to follow these guides (heading no more than 50 characters, body containing the changes that occurred and why) but I don’t always succeed. But, it’s a goal to aim for!