"Wifi Here on a Blackboard" by "Jem Stone" on Flickr

Free Wi-Fi does not need to be password-less!

Recently a friend of mine forwarded an email to me about a Wi-fi service he wanted to use from a firm, but he raised some technical questions with them which they seemed to completely misunderstand!

So, let’s talk about the misconceptions of Wi-fi passwords.

Many people assume that when you log into a system, it means that system is secure. For example, logging into a website makes sure that your data is secure and protected, right? Not necessarily – the password you entered could be on a web page that is not secured by TLS, or perhaps the web server doesn’t properly transfer it’s contents to a database. Maybe the website was badly written, and means it’s vulnerable to one of a handful of common attacks (with fun names like “Cross Site Scripting” or “SQL Injection Attacks”)…

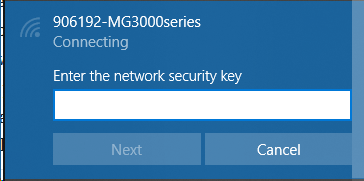
People also assume the same thing about Wi-fi. You reached a log in page, so it must be secure, right? It depends. If you didn’t put in a password to access the Wi-fi in the first place (like in the image of the Windows 10 screen, or on my KDE Desktop) then you’re probably using Unsecured Wi-fi.

An example of a secured Wi-fi sign-in box on Windows 10
The same Wi-fi sign in box on KDE Neon

People like to compare network traffic to “sending things through the post”, notablycomparing E-Mail to “sending a postcard”, versus PGP encrypted E-Mail being compared to “sending a sealed letter”. Unencrypted Wi-fi is like using CB. Anyone who can hear your signal can understand what you are saying… but if you visit a website which uses HTTPS, then it’s like listening to someone saying random numbers over the radio.

And, if you’re using Unencrypted Wi-fi, it’s also possible for an attacker to see what website you visited, because the request for the address to reach on the Internet (e.g. “Google.com” = 172.217.23.14) is sent in the clear. Also because of the way that DNS works (that name to address matching thing) means that if someone knows you’re visiting a “site of interest” (like, perhaps a bank website), they can reply *before* the real DNS server, and tell you that the server on their machine is actually your bank’s website.

So, many of these things can be protected against by using a simple method, that many people who provide Wi-fi don’t do.

Turn on WPA2 (the authentication bit). Even if *everyone* uses the same password (which they’d have to for WPA2), the fact you’re logging into the Access Point means it creates a unique shared secret for your session.

“But hang on”, I hear the guy at the back cry, “you used the same password – how does that work?”

OK, so this is where the fun stuff starts. The password is just part of how you negotiate to get on to the network. There’s a complex beast of a method that explains how get a shared unique secret when you’re passing stuff around “in the clear”, and so as a result, when you first connect to that Wi-fi access point, and you hand over your password, it “Authorises” you on to the network, but then hands you over to the encryption part, where you generate a key and then use that to talk to each other. The encryption is the bit like “HTTPS”, where you make it so that people can’t see what you’re looking at.

“I got told that if everyone used the same password” said a hipster in the front row, “I wouldn’t be able to tell them apart.” Aha, not true. You can have a separate passphrase to access the Wi-fi from the Login page, after all, you’ve got to make sure that people aren’t breaking the rules (which they *TOTALLY* read, before clicking “I agree, just get me on the damn Wi-fi already”) by using your network.

“OK”, says the lady over on the right, “but when I connected to the Wi-fi, they asked me to log in using Facebook – that’s secure, right?”

Um, no. Well, maybe. See, if they gave you a WPA2 password to log into the Wi-fi, and then the first thing you got to was that login screen, then yep, it’s all good! {*} You can browse with (relative) impunity. But if they didn’t… well, not only are they asking you to shout your secrets on the radio, but if you’re really unlucky, the page asking you to log into Facebook might *also* not actually be Facebook, but another website that just looks like Facebook… after all, I’m sure that page you went to complained that it wasn’t Google or Facebook when you tried to open it…

{*} Except for the fact they’re asking you to tell them not only who you are, but who you’re also friends with, where you went to school, what your hobbies are, what groups you’re in, your date of birth and so on.

But anyway. I understand why those login screens are there. They’re asserting that not only do you understand that you mustn’t use their network for bad things, but that if the police come and ask them who used their network to do something naughty, they can say “He said his name was ‘Bob Smith’ and his email address was ‘bob@example.com’, Officer”…

It also means that the “free” service they provide to you, usually at some great expense (*eye roll*) can get them some return on investment (like, they just got your totally-real-and-not-at-all-made-up-email-address… honest, and they also know what websites you visited while you were there, which they can sell on).

So… What to do the next time you “need” Wi-fi, and there’s a free service there? Always use a VPN when you’re not using a network you trust. If the Wi-fi isn’t using WPA2 encryption (even something as simple as “Buy a drink first” is a great passphrase to use!) point them to this page, and tell them it’s virtually pain free (as long as the passphrase is easy to remember, easy to type and doesn’t have too many weird symbols in) and makes their service more safe and secure for their customers…

Featured image is “Wifi Here on a Blackboard” by “Jem Stone” on Flickr and is released under a CC-BY license.

"Juniper NetScreen 25 Firewall front" by "jackthegag" on Flickr

Standard Firewall Rules

One of the things I like to do is to explain how I set things up, but a firewall is one of those things that’s a bit complicated, because it depends on your situation, and what you’re trying to do in your environment. That said, there’s a template that you can probably get away with deploying, and see if it works for your content, and then you’ll see where to add the extra stuff from there. Firewall policies typically work from the top down.

This document will assume you have a simple boundary firewall. This simple firewall has two interfaces, the first being an “Outside” interface, connected to your ISP, with an IPv4 address of 192.0.2.2/24 and a default gateway of 192.0.2.1, it also has a IPv6 address of 2001:db8:123c:abd::2/64 and a default gateway address of 2001:db8:123c:abd::1. The second “Inside” interface, where your protected network is attached, has an IPv4 address of 198.51.100.1/24 and an IPv6 address of 2001:db8:123d:abc::1/64. On this inside interface, the firewall is the default gateway for the inside network.

I’ll be using simple text rules to describe firewall policies, following this format:

Source Interface: <outside | inside>
Source IP Address: <x.x.x.x/x | "any">
NAT Source IP Address: <x.x.x.x/x | no>
Destination Interface: <outside | inside>
Destination IP Address: <x.x.x.x/x | "any">
NAT Destination IP Address: <x.x.x.x/x | no>
Destination Port: <tcp | udp | icmp | ip>/<x>
Action: <allow | deny | reject>
Log: <yes | no>
Notes: <some commentary if required>

In this model, if you want to describe HTTP access to a web server, you might write the following policy:

Source Interface: outside
Source IP Address: 0.0.0.0/0 (Any IP)
NAT Source IP Address: no
Destination Interface: inside
Destination IP Address: 192.0.2.2 (External IP)
NAT Destination IP Address: 198.51.100.2 (Internal IP)
Destination Port: tcp/80
Action: allow
Log: yes

So, without further waffling, let’s build a policy. By default all traffic will be logged. In high-traffic environments, you may wish to prevent certain traffic from being logged, but on the whole, I think you shouldn’t really lose firewall logs unless you need to!

Allowing established, related and same-host traffic

This rule is only really needed on iptables based firewalls, as all the commercial vendors (as far as I can tell, at least) already cover this as “standard”. If you’re using UFW (a wrapper to iptables), this rule is covered off already, but essentially it goes a bit like this:

Source Interface: lo (short for "local", where the traffic never leaves the device)
Source IP Address: any
NAT Source IP Address: no
Destination Interface: lo
Destination IP Address: any
NAT Destination IP Address: no
Destination Port: any
Action: allow
Log: no
Notes: This above rule permits traffic between localhost addresses (127.0.0.0/8) or between public addresses on the same host, for example, between two processes without being blocked.
flags: Established OR Related
Action: allow
Log: no
Notes: This above rule is somewhat special, as it looks for specific flags on the packet, that says "If we've already got a session open, let it carry on talking".

Dropping Noisy Traffic

In a network, some proportion of the traffic is going to be “noisy”. Whether it’s broadcast traffic from your application that uses mDNS, or the Windows File Share trying to find like-minded hosts to exchange data… these can fill up your logs, so lets drop the broadcast and multicast IPv4 traffic, and not log them.

Source Interface: any
Source IP Address: 0.0.0.0/0
NAT Source IP Address: no
Destination Interface: any
Destination IP Address: 255.255.255.255 (global broadcast), 192.0.2.255 ("outside" broadcast), 198.51.100.255 ("inside" broadcast) and 224.0.0.0/4 (multicast)
NAT Destination IP Address: no
Destination Port: any
Action: deny
Log: no
Notes: The global and local broadcast addresses are used to "find" other hosts in a network, whether that's a DHCP server or something like mDNS. Dropping this prevents the traffic from appearing in your logs later.

Permitting Management Traffic

Typically you want to trust certain machines to access or be accessed by this host – whether it’s your SYSLOG collector, or the box that can manage the firewall policy, so here we’ll create a policy that lets these in.

Source Interface: inside
Source IP Address: 198.51.100.2 and 2001:db8:123d:abc::2 (Management IP)
NAT Source IP Address: no
Destination Interface: inside
Destination IP Address: 198.51.100.1 and 2001:db8:123d:abc::1 (Firewall IP)
NAT Destination IP Address: no
Destination Port: SSH (tcp/22)
Action: permit
Log: yes
Notes: Allow inbound SSH access. You're unlikely to need more inbound ports, but if you do - customise them here.
Source Interface: inside
Source IP Address: 198.51.100.1 and 2001:db8:123d:abc::1 (Firewall IP)
NAT Source IP Address: no
Destination Interface: inside
Destination IP Address: 198.51.100.2 and 2001:db8:123d:abc::2 (Management IP)
NAT Destination IP Address: no
Destination Port: SYSLOG (udp/514)
Action: permit
Log: yes
Notes: Allow outbound SYSLOG access. Tailor this to outbound ports you need.

Allowing Control Traffic

ICMP is a protocol that is fundamental to IPv4 and IPv6. Commonly used for Traceroute and Ping, but also used to perform REJECT responses and that sort of thing. We’re only going to let it be initiated *out* not in. Some people won’t allow this rule, or tailor it to more specific destinations.

Source Interface: inside
Source IP Address: any
NAT Source IP Address: 192.0.2.2 (The firewall IP address which may be replaced with 0.0.0.0 indicating "whatever IP address is bound to the outbound interface")
Destination Interface: outside
Destination IP Address: any
NAT Destination IP Address: no
Destination Port: icmp
Action: allow
Log: yes
Notes: ICMPv4 and ICMPv6 are different things. This is just the ICMPv4 version. IPv4 does require NAT, hence the difference from the IPv6 version below.
Source Interface: inside
Source IP Address: any
NAT Source IP Address: no
Destination Interface: outside
Destination IP Address: any
NAT Destination IP Address: no
Destination Port: icmpv6
Action: allow
Log: yes
Notes: ICMPv4 and ICMPv6 may be treated as different things. This is just the ICMPv6 version. IPv6 does not require NAT.

Protect the Firewall

There should be no other traffic going to the Firewall, so let’s drop everything. There are two types of “Deny” message – a “Reject” and a “Drop”. A Reject sends a message back from the host which is refusing the connection – usually the end server to say that the service didn’t want to reply to you, but if there’s a box in the middle – like a firewall – this reject (actually an ICMP packet) comes from the firewall instead. In this case it’s identifying that the firewall was refusing the connection for the node, so it advertises the fact the end server is protected by a security box. Instead, firewall administrators tend to use Drop, which just silently discards the initial request, leaving the initiating end to “Time Out”. You’re free to either “Reject” or “Drop” whenever we show “Deny” in the below policies, but bear it in mind that it’s less secure to use Reject than it is to Drop.

Source Interface: any
Source IP Address: any
NAT Source IP Address: no
Destination Interface: any
Destination IP Address: 192.0.2.2, 2001:db8:123c:abd::2, 198.51.100.1 and 2001:db8:123d:abc::1 (may also be represented as :: or 0.0.0.0 depending on the platform)
NAT Destination IP Address: no
Destination Port: any
Action: deny
Log: no
Notes: Drop everything targetted at the firewall IPs. If you have more NICs or additional IP addresses on the firewall, these will also need blocking.

“Normal” Inbound Traffic

After you’ve got your firewall protected, now you can sort out your “normal” traffic flows. I’m going to add a single inbound policy to represent the sort of traffic you might want to configure (in this case a simple web server), but bear in mind some environments don’t have any “inbound” rules (for example, most homes would be in this case), and some might need lots and lots of inbound rules. This is just to give you a flavour on what you might see here.

Source Interface: outside
Source IP Address: any
NAT Source IP Address: no
Destination Interface: inside
Destination IP Address: 192.0.2.2 (External IP)
NAT Destination IP Address: 198.51.100.2 (Internal IP)
Destination Port: tcp/80 (HTTP), tcp/443 (HTTPS)
Action: allow
Log: yes
Notes: This is the IPv4-only rule. Note a NAT MUST be applied here.
Source Interface: outside
Source IP Address: any
NAT Source IP Address: no
Destination Interface: inside
Destination IP Address: 2001:db8:123d:abc::2
NAT Destination IP Address: no
Destination Port: tcp/80 (HTTP), tcp/443 (HTTPS)
Action: allow
Log: yes
Notes: This is the IPv6-only rule. Note that NO NAT is required (but, you may wish to perform NAT, depending on your environment).

“Normal” Outbound Traffic

If you’re used to a DSL router, that basically just allows all outbound traffic. We’re going to implement that here. If you want to be more specific about things, you’d define your outbound rules like the inbound rules in the block above… but if you’re not that worried, then this rule below is generally going to be all OK :)

Source Interface: inside
Source IP Address: any
NAT Source IP Address: 192.0.2.2 (The firewall IP address which may be replaced with 0.0.0.0 indicating "whatever IP address is bound to the outbound interface")
Destination Interface: outside
Destination IP Address: any
NAT Destination IP Address: no
Destination Port: any
Action: allow
Log: yes
Notes: This is just the IPv4 version. IPv4 does require NAT, hence the difference from the IPv6 version below.
Source Interface: inside
Source IP Address: any
NAT Source IP Address: no
Destination Interface: outside
Destination IP Address: any
NAT Destination IP Address: no
Destination Port: any
Action: allow
Log: yes
Notes: This is just the IPv6 version. IPv6 does not require NAT.

Drop Rule

Following your permit rules above, you now need to drop everything else. Fortunately, by now, you’ve “white-listed” all the permitted traffic, so now we can just drop “everything”. So, let’s do that!

Source Interface: any
Source IP Address: any
NAT Source IP Address: no
Destination Interface: any
Destination IP Address: any
NAT Destination IP Address: no
Destination Port: any
Action: deny
Log: yes

And so that is a basic firewall policy… or at least, it’s the template I tend to stick to! :)

Talk Summary – How the internet works

Format: Freeform speech based on slides (AV issue). Theatre layout chairs. 50 attendees.

Slides: None

Video: None

Slot: Day 1 (Saturday), Slot 7 (15:00-15:30)

Notes: Covered ARP resolution of MAC addresses, routing (IPv4), DHCP, DNS and UDP. Missed TCP and HTTP but out of time. Mentioned IPv6.