I was watching Lorna Mitchell‘s Open Source Hour twitch stream this morning, and noticed that she had a line in her prompt showing what her git status was.

Git, for those of you who aren’t aware, is the version control software which has dominated software development and documentation for over 10 years now. It’s used for almost everything now, supplanting it’s competitors like Subversion, Visual Source Safe, Mercurial and Bazaar. While many people are only aware of Git using GitHub, before there was GitHub, there was the Git command line. I’m using the git command in a Bash shell all the time because I find it easier to use that for the sorts of things I do, than it is to use the GUI tools.
However, the thing that often stumbles me is what state I’m in with the project, and this line showed me just how potentially powerful this command can be.
During the video, I started researching how I could get this prompt set up on my machine, and finally realised that actually, git prompt was installed as part of the git package on my Ubuntu 20.04 install. To use it, I just had to add this string $(__git_ps1) into my prompt. This showed me which branch I was on, but I wanted more detail than that!
So, then I started looking into how to configure this prompt. I found this article from 2014, called “Git Prompt Variables” which showed me how to configure which features I wanted to enable:
GIT_PS1_DESCRIBE_STYLE='contains'
GIT_PS1_SHOWCOLORHINTS='y'
GIT_PS1_SHOWDIRTYSTATE='y'
GIT_PS1_SHOWSTASHSTATE='y'
GIT_PS1_SHOWUNTRACKEDFILES='y'
GIT_PS1_SHOWUPSTREAM='auto'
To turn this on, I edited ~/.bashrc (again, this is Ubuntu 20.04, I’ve not tested this on CentOS, Fedora, Slackware or any other distro). Here’s the lines I’m looking for:
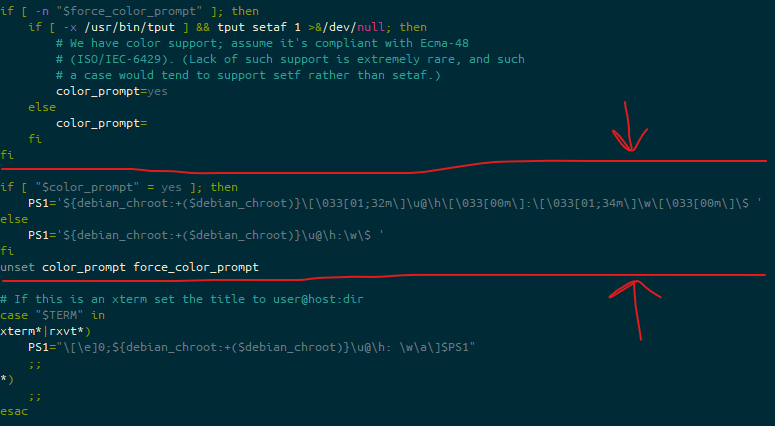
I edited each line starting PS1=, to add this: $(__git_ps1), so this now looks like this:

.bashrcI’m aware that line is pretty hard to read in many cases, so here’s just the text for each PS1 line:
PS1='${debian_chroot:+($debian_chroot)}\[\033[01;32m\]\u@\h\[\033[00m\]:\[\033[01;34m\]\w$(__git_ps1)\[\033[00m\]\$ 'PS1='${debian_chroot:+($debian_chroot)}\u@\h:\w$(__git_ps1)\$ 'The first of those is the version that is triggered when if [ "$color_prompt" = yes ] is true, the second is when it isn’t.
What does this look like?
Let’s run through a “standard” work-flow of “conditions”. Yes, this is a really trivial example, and quite (I would imagine) different from how most people approach things like this… but it gives you a series of conditions so you can see what it looks like.
Note, as I’m still running a slightly older version of git, and I’ve not adjusted my defaults, the “initial” branch created is still called “master”, not “main”. For the purposes of this demonstration, it’s fine, but I should really have fixed this from the outset. My apologies.
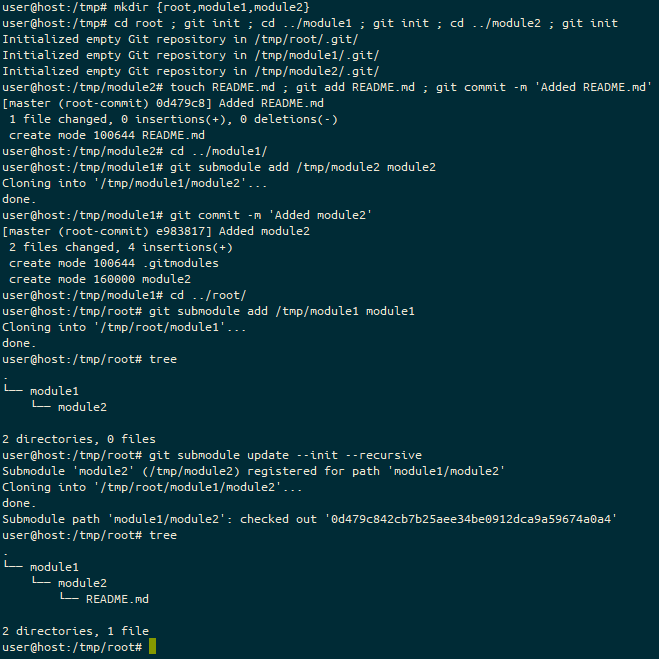
First, we create and git init a directory, called git_test in /tmp.
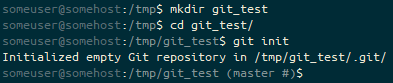
git init, the prompt ends (master #). Following the git init of the master branch, we are in a state where there is “No HEAD to compare against”, so the git prompt fragment ends #.Next, we create a file in here. It’s unstaged.

touch command, the prompt ends (master #%). We’re on the master branch, with no HEAD to compare against (#), and we have an untracked file (%).And then we add that to the staging area.

git add, the prompt ends (master +). We’re on the master branch, with a staged change (+).Next we commit the file to the repository.

git commit, the prompt ends (master). We’re on the master branch with a clean staging and unstaged area.We add some content to the README file.

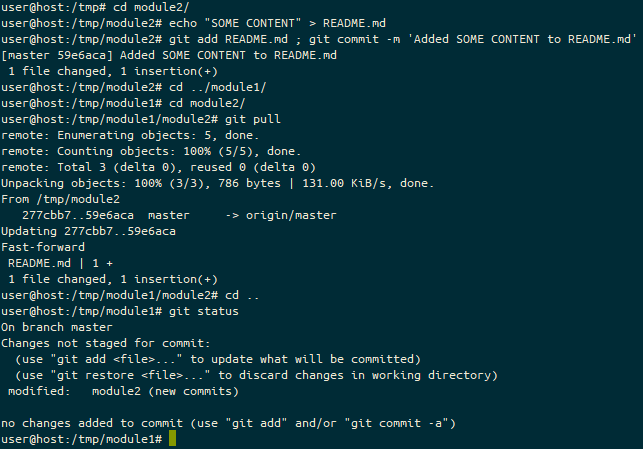
echoing content into the file, the prompt ends (master *). We’re on the master branch with an unstaged change (*).We realise that we can’t use this change right now, let’s stash it for later.

git stash of a tracked file, the prompt ends (master $). We’re on the master branch with stashed files ($).We check out a new branch, so we can use that stash in there.

git checkout -b, the prompt ends (My-New-Feature $). We’re on the My-New-Feature branch with stashed files ($).And then pop the stashed file out.
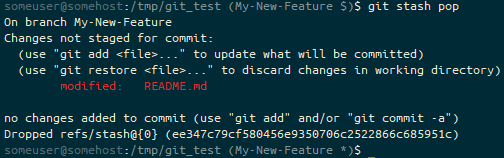
git stash pop, the prompt ends (My-New-Feature *). We’re on the My-New-Feature branch with stashed files (*).We then add the file and commit it.

git add and git commit of the previously stashed file, the prompt ends (My-New-Feature). We’re on the My-New-Feature branch with a clean staged and unstaged area.How about working with remote sources? Let’s change to back to the /tmp directory and fork git_test to git_local_fork.
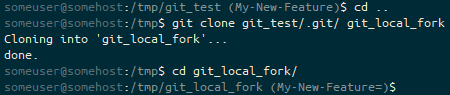
git clone, and then changing into that directory with the cd command, the prompt ends (My-New-Feature=). We’re on the My-New-Feature branch, which is in an identical state to it’s default remote tracked branch (=).We’ve checked it out at the feature branch instead of master, let’s check out master instead.

master branch in the repository using git checkout master, the prompt ends (master=). We’re on the master branch, which is in an identical state to it’s default remote tracked branch (=).In the meantime, upstream, someone merged “My-New-Feature” into “master” on our original git_test repo.
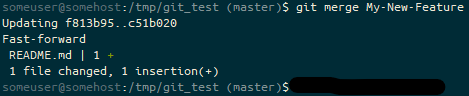
git merge, the prompt ends (master). We’re on the masterOn our local branch again, let’s fetch the state of our “upstream” into git_local_fork.

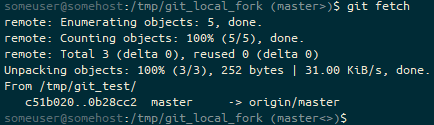
(master<). We’re on the master<).And then pull, to make sure we’re in-line with upstream’s master branch.

git pull to bring this branch up-to-date with the upstream repository, the prompt ends (master=). We’re on the master branch, which is back in an identical state to it’s default remote tracked branch (=).We should probably make some local changes to this repository.

(master=) to (master *=) to (master +=) and then (master>) as we create an unstaged change (*), stage it (+) and then bring the branch ahead of the default remote tracked branch (>).Meanwhile, someone made some changes to the upstream repository.

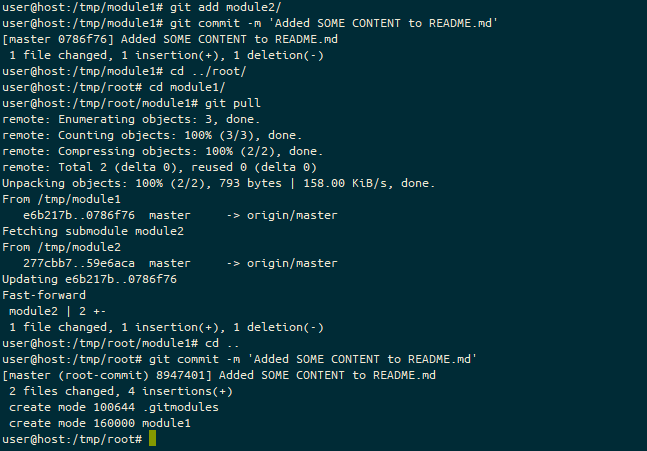
(master) to (master *) to (master +) and then (master) as we create an unstaged change (*) with echo, stage it (+) with git add and then end up with a clear staged and unstaged area following a git commit.So, before we try and push, let’s quickly fetch their tree to see what’s going on.
git fetch to pull the latest state from the remote repository, the prompt ends (master <>). We’re on the master branch, but our branch has diverged from the default remote and won’t merge cleanly (<>).Oh no, we’ve got a divergence. We need to fix this! Let’s pull the upstream master branch.
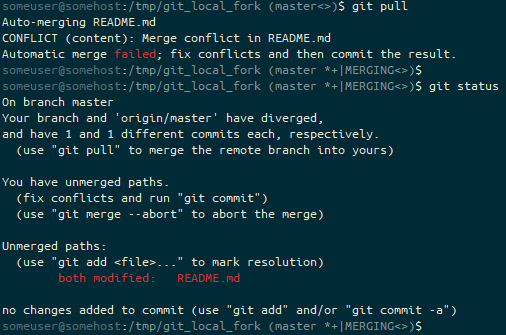
git pull and end up with the prompt ending (master *+|MERGING<>). We have unstaged (*) and staged (+) changes, and we’re in a “merging” state (MERGING) to try to resolve our diverged branches (<>).Let’s fix the failed merge.

nano, and confirm it has worked with cat, and then stage the merge resolution change using git add. The prompt ends (master +|MERGING<>). We have staged (+) changes, and we’re in a “merging” state (MERGING) to try to resolve our diverged branches (<>).I think we’re ready to go with the merge.
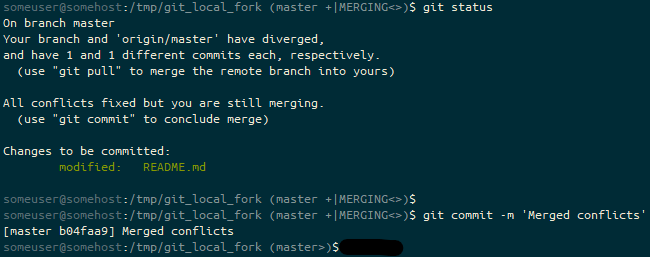
git commit and the prompt ends as (master>). We have resolved our diverged master branches, have exited the “merging” state and are simply ahead of the default remote branch (>).If the remote were a system like github, at this point we’d just do a git push. But… it’s not, so we’d need to do a git pull /tmp/git_local_fork in /tmp/git_test and then a git fetch in /tmp/git_local_fork… but that’s an implementation detail 😉
Featured image is “Status” by “Doug Letterman” on Flickr and is released under a CC-BY license.