A colour photograph of a series of cogs and gears interlinked to create a machine

Making .bashrc more manageable

How many times have you seen an instruction in a setup script which says “Now add source <(somescript completion bash) to your ~/.bashrc file” or “Add export SOMEVAR=abc123 to your .bashrc file”?

This is great when it’s one or two lines, but for a big chunk of them? Whew!

Instead, I created this block in mine:

if [ -d ~/.bash_extensions.d ]; then
    for extension in ~/.bash_extensions.d/[a-zA-Z0-9]*
    do
        . "$extension"
    done
fi

This dynamically loads all the files in ~/.bash_extensions.d/ which start with a letter or a digit, so it means I can manage when things get loaded in, or removed from my bash shell.

For example, I recently installed the pre-release of Atuin, so my ~/.bash_extensions.d/atuin file looks like this:

source $HOME/.atuin/bin/env
eval "$(atuin init bash --disable-up-arrow)"

And when I installed direnv, I created ~/.bash_extensions.d/direnv which has this in it:

eval "$(direnv hook bash)"

This is dead simple, and now I know that if I stop using direnv, I just need to remove that file, rather than hunting for a line in .bashrc.

Featured image is “Gears gears cogs bits n pieces” by “Les Chatfield” on Flickr and is released under a CC-BY license.

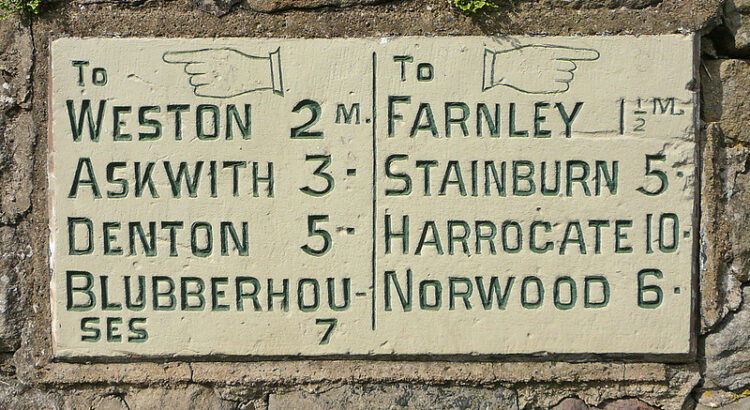
"Milestone, Otley" by "Tim Green" on Flickr

Changing the default routing metric with Netplan, NetworkManager and ifupdown

In the past few months I’ve been working on a project, and I’ve been doing the bulk of that work using Vagrant.

By default and convention, all Vagrant machines, set up using Virtualbox have a “NAT” interface defined as the first network interface, but I like to configure a second interface as a “Bridged” interface which gives the host a “Real” IP address on the network as this means that any security appliances I have on my network can see what device is causing what traffic, and I can quickly identify which hosts are misbehaving.

By default, Virtualbox uses the network 10.0.2.0/24 for the NAT interface, and runs a DHCP server for that interface. In the past, I’ve removed the default route which uses 10.0.2.2 (the IP address of the NAT interface on the host device), but with Ubuntu 20.04, this route keeps being re-injected, so I had to come up with a solution.

Fixing Netplan

Ubuntu, in at least 20.04, but (according to Wikipedia) probably since 17.10, has used Netplan to define network interfaces, superseding the earlier ifupdown package (which uses /etc/network/interfaces and /etc/network/interface.d/* files to define the network). Netplan is a kind of meta-script which, instructs systemd or NetworkManager to reconfigure the network interfaces, and so making the configuration changes here seemed most sensible.

Vagrant configures the file /etc/netplan/50-cloud-init.yml with a network configuration to support this DHCP interface, and then applies it. To fix it, we need to rewrite this file completely.

#!/bin/bash

# Find details about the interface
ifname="$(grep -A1 ethernets "/etc/netplan/50-cloud-init.yaml" | tail -n1 | sed -Ee 's/[ ]*//' | cut -d: -f1)"
match="$(grep macaddress "/etc/netplan/50-cloud-init.yaml" | sed -Ee 's/[ ]*//' | cut -d\  -f2)"

# Configure the netplan file
{
  echo "network:"
  echo "  ethernets:"
  echo "    ${ifname}:"
  echo "      dhcp4: true"
  echo "      dhcp4-overrides:"
  echo "        route-metric: 250"
  echo "      match:"
  echo "        macaddress: ${match}"
  echo "      set-name: ${ifname}"
  echo "  version: 2"
} >/etc/netplan/50-cloud-init.yaml

# Apply the config
netplan apply

When I then came to a box running Fedora, I had a similar issue, except now I don’t have NetPlan to work with? How do I resolve this one?!

Actually, this is a four line script!

#!/bin/bash

# Get the name of the interface which has the IP address 10.0.2.2
netname="$(ip route | grep 10.0.2.2 | head -n 1 | sed -Ee 's/^(.*dev )(.*)$/\2/;s/proto [A-Za-z0-9]+//;s/metric [0-9]+//;s/[ \t]+$//')"

# Ask NetworkManager for a list of all the active connections, look for the string "eth0" and then just get the connection name.
nm="$(nmcli connection show --active | grep "${netname}" | sed -Ee 's/^(.*)([ \t][-0-9a-f]{36})(.*)$/\1/;s/[\t ]+$//g')"
# Set the network to have a metric of 250
nmcli connection modify "$nm" ipv4.route-metric 250
# And then re-apply the network config
nmcli connection up "$nm"

The last major interface management tool I’ve experienced on standard server Linux is “ifupdown” – /etc/network/interfaces. This is mostly used on Debian. How do we fix that one? Well, that’s a bit more tricky!

#!/bin/bash

# Get the name of the interface with the IP address 10.0.2.2
netname="$(ip route | grep 10.0.2.2 | head -n 1 | sed -Ee 's/^(.*dev )(.*)$/\2/;s/proto [A-Za-z0-9]+//;s/metric [0-9]+//;s/[ \t]+$//')"

# Create a new /etc/network/interfaces file which just looks in "interfaces.d"
echo "source /etc/network/interfaces.d/*" > /etc/network/interfaces

# Create the loopback interface file
{
  echo "auto lo"
  echo "iface lo inet loopback"
} > "/etc/network/interfaces.d/lo"
# Bounce the interface
ifdown lo ; ifup lo

# Create the first "real" interface file
{
  echo "allow-hotplug ${netname}"
  echo "iface ${netname} inet dhcp"
  echo "  metric 1000"
} > "/etc/network/interfaces.d/${netname}"
# Bounce the interface
ifdown "${netname}" ; ifup "${netname}"

# Loop through the rest of the interfaces
ip link | grep UP | grep -v lo | grep -v "${netname}" | cut -d: -f2 | sed -Ee 's/[ \t]+([A-Za-z0-9.]+)[ \t]*/\1/' | while IFS= read -r int
do
  # Create the interface file for this interface, assuming DHCP
  {
    echo "allow-hotplug ${int}"
    echo "iface ${int} inet dhcp"
  } > "/etc/network/interfaces.d/${int}"
  # Bounce the interface
  ifdown "${int}" ; ifup "${int}"
done

Looking for one consistent script which does this all?

#!/bin/bash
# This script ensures that the metric of the first "NAT" interface is set to 1000,
# while resetting the rest of the interfaces to "whatever" the DHCP server offers.

function netname() {
  ip route | grep 10.0.2.2 | head -n 1 | sed -Ee 's/^(.*dev )(.*)$/\2/;s/proto [A-Za-z0-9]+//;s/metric [0-9]+//;s/[ \t]+$//'
}

if command -v netplan
then
  ################################################
  # NETPLAN
  ################################################

  # Find details about the interface
  ifname="$(grep -A1 ethernets "/etc/netplan/50-cloud-init.yaml" | tail -n1 | sed -Ee 's/[ ]*//' | cut -d: -f1)"
  match="$(grep macaddress "/etc/netplan/50-cloud-init.yaml" | sed -Ee 's/[ ]*//' | cut -d\  -f2)"

  # Configure the netplan file
  {
    echo "network:"
    echo "  ethernets:"
    echo "    ${ifname}:"
    echo "      dhcp4: true"
    echo "      dhcp4-overrides:"
    echo "        route-metric: 1000"
    echo "      match:"
    echo "        macaddress: ${match}"
    echo "      set-name: ${ifname}"
    echo "  version: 2"
  } >/etc/netplan/50-cloud-init.yaml

  # Apply the config
  netplan apply
elif command -v nmcli
then
  ################################################
  # NETWORKMANAGER
  ################################################

  # Ask NetworkManager for a list of all the active connections, look for the string "eth0" and then just get the connection name.
  nm="$(nmcli connection show --active | grep "$(netname)" | sed -Ee 's/^(.*)([ \t][-0-9a-f]{36})(.*)$/\1/;s/[\t ]+$//g')"
  # Set the network to have a metric of 250
  nmcli connection modify "$nm" ipv4.route-metric 1000
  nmcli connection modify "$nm" ipv6.route-metric 1000
  # And then re-apply the network config
  nmcli connection up "$nm"
elif command -v ifup
then
  ################################################
  # IFUPDOWN
  ################################################

  # Get the name of the interface with the IP address 10.0.2.2
  netname="$(netname)"
  # Create a new /etc/network/interfaces file which just looks in "interfaces.d"
  echo "source /etc/network/interfaces.d/*" > /etc/network/interfaces
  # Create the loopback interface file
  {
    echo "auto lo"
    echo "iface lo inet loopback"
  } > "/etc/network/interfaces.d/lo"
  # Bounce the interface
  ifdown lo ; ifup lo
  # Create the first "real" interface file
  {
    echo "allow-hotplug ${netname}"
    echo "iface ${netname} inet dhcp"
    echo "  metric 1000"
  } > "/etc/network/interfaces.d/${netname}"
  # Bounce the interface
  ifdown "${netname}" ; ifup "${netname}"
  # Loop through the rest of the interfaces
  ip link | grep UP | grep -v lo | grep -v "${netname}" | cut -d: -f2 | sed -Ee 's/[ \t]+([A-Za-z0-9.]+)[ \t]*/\1/' | while IFS= read -r int
  do
    # Create the interface file for this interface, assuming DHCP
    {
      echo "allow-hotplug ${int}"
      echo "iface ${int} inet dhcp"
    } > "/etc/network/interfaces.d/${int}"
    # Bounce the interface
    ifdown "${int}" ; ifup "${int}"
  done
fi

Featured image is “Milestone, Otley” by “Tim Green” on Flickr and is released under a CC-BY license.

"Bat Keychain" by "Nishant Khurana" on Flickr

Unit Testing Bash scripts with BATS-Core

I’m taking a renewed look into Unit Testing the scripts I’m writing, because (amongst other reasons) it’s important to know what expected behaviours you break when you make a change to a script!

A quick detour – what is Unit Testing?

A unit test is where you take one component of your script, and prove that, given specific valid or invalid tests, it works in an expected way.

For example, if you normally run sum_two_digits 1 1 and expect to see 2 as the result, with a unit test, you might write the following tests:

  • sum_two_digits should fail (no arguments)
  • sum_two_digits 1 should fail (no arguments)
  • sum_two_digits 1 1 should pass!
  • sum_two_digits 1 1 1 may fail (too many arguments), may pass (only sum the first two digits)
  • sum_two_digits a b should fail (not numbers)

and so on… you might have seen this tweet, for example

https://twitter.com/sempf/status/514473420277694465
Things you might unit test in a bar.

Preparing your environment

Everyone’s development methodology differs slightly, but I create my scripts in a git repository.

I start from a new repo, like this:

mkdir my_script
cd my_script
git init

echo '# `my_script`' > README.md
echo "" >> README.md
echo "This script does awesome things for awesome people. CC-0 licensed." >> README.md
git add README.md
git commit -m 'Added README'

echo '#!/bin/bash' > my_script.sh
chmod +x my_script.sh
git add my_script.sh
git commit -m 'Added initial commit of "my_script.sh"'

OK, so far, so awesome. Now let’s start adding BATS. (Yes, this is not necessarily the “best” way to create your “test_all.sh” script, but it works for my case!)

git submodule add https://github.com/bats-core/bats-core.git test/libs/bats
git commit -m 'Added BATS library'
echo '#!/bin/bash' > test/test_all.sh
echo 'cd "$(dirname "$0")" || true' >> test/test_all.sh
echo 'libs/bats/bin/bats $(find *.bats -maxdepth 0 | sort)' >> test/test_all.sh
chmod +x test/test_all.sh
git add test/test_all.sh
git commit -m 'Added test runner'

Now, let’s write two simple tests, one which fails and one which passes, so I can show you what this looks like. Create a file called test/prove_bats.bats

#!/usr/bin/env ./libs/bats/bin/bats

@test "This will fail" {
  run false
  [ "$status" -eq 0 ]
}

@test "This will pass" {
  run true
  [ "$status" -eq 0 ]
}

And now, when we run this with test/test_all.sh we get the following:

 ✗ This will fail
   (in test file prove_bats.bats, line 5)
     `[ "$status" -eq 0 ]' failed
 ✓ This will pass

2 tests, 1 failure

Excellent, now we know that our test library works, and we have a rough idea of what a test looks like. Let’s build something a bit more awesome. But first, let’s remove prove_bats.bats file, with rm test/prove_bats.bats.

Starting to develop “real” tests

Let’s create a new file, test/path_checking.bats. Our amazing script needs to have a configuration file, but we’re not really sure where in the path it is! Let’s get building!

#!/usr/bin/env ./libs/bats/bin/bats

# This runs before each of the following tests are executed.
setup() {
  source "../my_script.sh"
  cd "$BATS_TEST_TMPDIR"
}

@test "No configuration file is found" {
  run find_config_file
  echo "Status received: $status"
  echo "Actual output:"
  echo "$output"
  [ "$output" == "No configuration file found." ]
  [ "$status" -eq 1 ]
}

When we run this test (using test/test_all.sh), we get this response:

 ✗ No configuration file is found
   (in test file path_checking.bats, line 14)
     `[ "$output" == "No configuration file found." ]' failed with status 127
   Status received: 127
   Actual output:
   /tmp/my_script/test/libs/bats/lib/bats-core/test_functions.bash: line 39: find_config_file: command not found

1 test, 1 failure

Uh oh! Well, I guess that’s because we don’t have a function called find_config_file yet in that script. Ah, yes, let’s quickly divert into making your script more testable, by making use of functions!

Bash script testing with functions

When many people write a bash script, you’ll see something like this:

#!/bin/bash
echo "Validate 'uname -a' returns a string: "
read_some_value="$(uname -a)"
if [ -n "$read_some_value" ]
then
  echo "Yep"
fi

While this works, what it’s not good for is testing each of those bits (and also, as a sideline, if your script is edited while you’re running it, it’ll break, because Bash parses each line as it gets to it!)

A good way of making this “better” is to break this down into functions. At the very least, create a “main” function, and put everything into there, like this:

#!/bin/bash
function main() {
  echo "Validate 'uname -a' returns a string: "
  read_some_value="$(uname -a)"
  if [ -n "$read_some_value" ]
  then
    echo "Yep"
  fi
}

main

By splitting this into a “main” function, which is called when it runs, at the very least, a change to the script during operation won’t break it… but it’s still not very testable. Let’s break down some more of this functionality.

#!/bin/bash
function read_uname() {
  echo "$(uname -a)"
}
function test_response() {
  if [ -n "$1" ]
  then
    echo "Yep"
  fi
}
function main() {
  echo "Validate 'uname -a' returns a string: "
  read_some_value="$(read_uname)"
  test_response "$read_some_value"
}

main

So, what does this give us? Well, in theory we can test each part of this in isolation, but at the moment, bash will execute all those functions straight away, because they’re being called under “main”… so we need to abstract main out a bit further. Let’s replace that last line, main into a quick check.

if [[ "${BASH_SOURCE[0]}" == "${0}" ]]
then
  main
fi

Stopping your code from running by default with some helper variables

The special value $BASH_SOURCE[0] will return the name of the file that’s being read at this point, while $0 is the name of the script that was executed. As a little example, I’ve created two files, source_file.sh and test_sourcing.sh. Here’s source_file.sh:

#!/bin/bash

echo "Source: ${BASH_SOURCE[0]}"
echo "File: ${0}"

And here’s test_sourcing.sh:

#!/bin/bash
source ./source_file.sh

What happens when we run the two of them?

user@host:/tmp/my_script$ ./source_file.sh
Source: ./source_file.sh
File: ./source_file.sh
user@host:/tmp/my_script$ ./test_sourcing.sh
Source: ./source_file.sh
File: ./test_sourcing.sh

So, this means if we source our script (which we’ll do with our testing framework), $BASH_SOURCE[0] will return a different value from $0, so it knows not to invoke the “main” function, and we can abstract that all into more test code.

Now we’ve addressed all that lot, we need to start writing code… where did we get to? Oh yes, find_config_file: command not found

Walking up a filesystem tree

The function we want needs to look in this path, and all the parent paths for a file called “.myscript-config“. To do this, we need two functions – one to get the directory name of the “real” directory, and the other to do the walking up the path.

function _absolute_directory() {
  # Change to the directory provided, or if we can't, return with error 1
  cd "$1" || return 1
  # Return the full pathname, resolving symbolic links to "real" paths
  pwd -P
}

function find_config_file() {
  # Get the "real" directory name for this path
  absolute_directory="$(_absolute_directory ".")"
  # As long as the directory name isn't "/" (the root directory), and the
  #  return value (config_path) isn't empty, check for the config file.
  while [ "$absolute_directory" != "/" ] && 
        [ -n "$absolute_directory" ] && 
        [ -z "$config_path" ]
  do
    # Is the file we're looking for here?
    if [ -f "$absolute_directory/.myscript-config" ]
    then
      # Store the value
      config_path="$absolute_directory/.myscript-config"
    else
      # Get the directory name for the parent directory, ready to loop.
      absolute_directory="$(_absolute_directory "$absolute_directory/..")"
    fi
  done
  # If we've exited the loop, but have no return value, exit with an error
  if [ -z "$config_path" ]
  then
    echo "No config found. Please create .myscript-config in your project's root directory."
    # Failure states return an exit code of anything greater than 0. Success is 0.
    exit 1
  else
    # Output the result
    echo "$config_path"
  fi
}

Let’s re-run our test!

 ✗ No configuration file is found
   (in test file path_checking.bats, line 14)
     `[ "$output" == "No configuration file found." ]' failed
   Status received: 1
   Actual output:
   No config found. Please create .myscript-config in your project's root directory.

1 test, 1 failure

Uh oh! Our output isn’t what we told it to use. Fortunately, we’ve recorded the output it sent (“No config found. Please...“) so we can fix our test (or, find that output line and fix that).

Let’s fix the test! (The BATS test file just shows the test we’re amending)

@test "No configuration file is found" {
  run find_config_file
  echo "Status received: $status"
  echo "Actual output:"
  echo "$output"
  [ "$output" == "No config found. Please create .myscript-config in your project's root directory." ]
  [ "$status" -eq 1 ]
}

Fab, and now when we run it, it’s all good!

user@host:/tmp/my_script$ test/test_all.sh
 ✓ No configuration file is found

1 test, 0 failures

So, how do we test what happens when the file is there? We make a new test! Add this to your test file, or create a new one, ending .bats in the test directory.

@test "Configuration file is found and is OK" {
  touch .myscript-config
  run find_config_file
  echo "Status received: $status"
  echo "Actual output:"
  echo "$output"
  [ "$output" == "$BATS_TEST_TMPDIR/.myscript-config" ]
  [ "$status" -eq 0 ]
}

And now, when you run your test, you’ll see this:

user@host:/tmp/my_script$ test/test_all.sh
 ✓ No configuration file is found
 ✓ Configuration file is found and is OK

2 tests, 0 failures

Extending BATS

There are some extra BATS tests you can run – at the moment you’re doing manual checks of output and success or failure checks which aren’t very pretty. Let’s include the “assert” library for BATS.

Firstly, we need this library added as a submodule again.

# This module provides the formatting for the other non-core libraries
git submodule add https://github.com/bats-core/bats-support.git test/libs/bats-support
# This is the actual assertion tests library
git submodule add https://github.com/bats-core/bats-assert.git test/libs/bats-assert

And now we need to update our test. At the top of the file, under the #!/usr/bin/env line, add these:

load "libs/bats-support/load"
load "libs/bats-assert/load"

And then update your tests:

@test "No configuration file is found" {
  run find_config_file
  assert_output "No config found. Please create .myscript-config in your project's root directory."
  assert_failure
}

@test "Configuration file is found and is OK" {
  touch .myscript-config
  run find_config_file
  assert_output "$BATS_TEST_TMPDIR/.myscript-config"
  assert_success
}

Note that we removed the “echo” statements in this file. I’ve purposefully broken both types of tests (exit 1 became exit 0 and the file I’m looking for is $absolute_directory/.config instead of $absolute_directory/.myscript-config) in the source file, and now you can see what this looks like:

 ✗ No configuration file is found
   (from function `assert_failure' in file libs/bats-assert/src/assert_failure.bash, line 66,
    in test file path_checking.bats, line 15)
     `assert_failure' failed

   -- command succeeded, but it was expected to fail --
   output : No config found. Please create .myscript-config in your project's root directory.
   --

 ✗ Configuration file is found and is OK
   (from function `assert_output' in file libs/bats-assert/src/assert_output.bash, line 194,
    in test file path_checking.bats, line 21)
     `assert_output "$BATS_TEST_TMPDIR/.myscript-config"' failed

   -- output differs --
   expected : /tmp/bats-run-21332-1130Ph/suite-tmpdir-QMDmz6/file-tmpdir-path_checking.bats-nQf7jh/test-tmpdir--I3pJYk/.myscript-config
   actual   : No config found. Please create .myscript-config in your project's root directory.
   --

And so now you can see some of how to do unit testing with Bash and BATS. BATS also says you can unit test any command that can be run in a Bash environment, so have fun!

Featured image is “Bat Keychain” by “Nishant Khurana” on Flickr and is released under a CC-BY license.

"DeBugged!" by "Randy Heinitz" on Flickr

Debugging Bash Scripts

Yesterday I was struggling a bit with a bash script I was writing. I needed to stop it from running flat out through every loop, and I wanted to see what certain values were at key points in the script.

Yes, I know I could use “read” to pause the script and “echo” to print values, but that leaves a lot of mess that I need to clean up afterwards… so I went looking for something else I could try.

You can have extensive debug statements, which are enabled with a --debug flag or environment variable… but again, messy.

You can run bash -x ./myscript.sh – and, indeed, I do frequently do that… but that shows you the commands which were run at each point, not what the outcome is of each of those commands.

If my problem had been a syntax one, I could have installed shellcheck, which is basically a linter for Bash and other shell scripting languages, but no, I needed more detail about what was happening during the processing.

Instead, I wanted something like xdebug (from PHP)… and I found Bash Debug for VSCode. This doesn’t even need you to install any scripts or services on the target machine – it’s interactive, and has a “watch” section, where you either highlight and right-click a variable expression (like $somevar or ${somevar}) to see when it changes. You can see where in the “callstack” you are and see what values are registered by that script.

Shellcheck shows me problems in my code…
But Bash Debug helps me to find out what values are at specific points in the code.

All in all, a worthy addition to my toolbelt!

Featured image is “DeBugged!” by “Randy Heinitz” on Flickr and is released under a CC-BY license.
"Observatories Combine to Crack Open the Crab Nebula" by "NASA Goddard Space Flight Center" on Flickr

Nebula Offline Certificate Management with a Raspberry Pi using Bash

I have been playing again, recently, with Nebula, an Open Source Peer-to-Peer VPN product which boasts speed, simplicity and in-built firewalling. Although I only have a few nodes to play with (my VPS, my NAS, my home server and my laptop), I still wanted to simplify, for me, the process of onboarding devices. So, naturally, I spent a few evenings writing a bash script that helps me to automate the creation of my Nebula nodes.

Nebula Certificates

Nebula have implemented their own certificate structure. It’s similar to an x509 “TLS Certificate” (like you’d use to access an HTTPS website, or to establish an OpenVPN connection), but has a few custom fields.

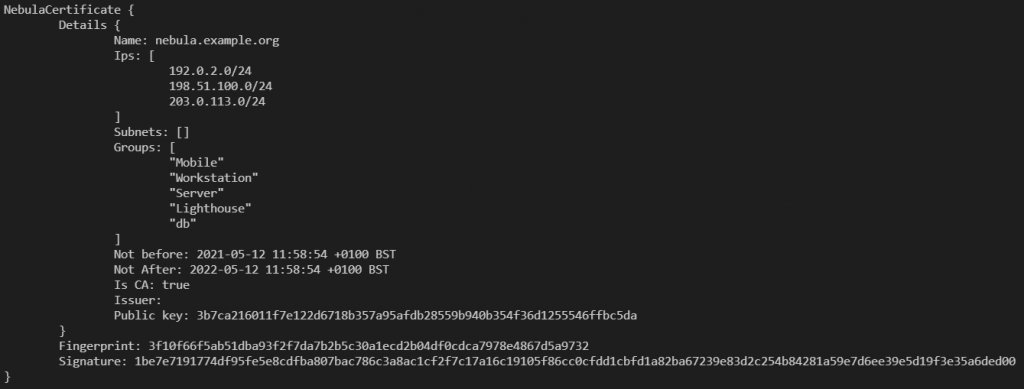
The result of typing “nebula-cert print -path ca.crt” to print the custom fields

In this context, I’ve created a nebula Certificate Authority (CA), using this command:

nebula-cert ca -name nebula.example.org -ips 192.0.2.0/24,198.51.100.0/24,203.0.113.0/24 -groups Mobile,Workstation,Server,Lighthouse,db

So, what does this do?

Well, it creates the certificate and private key files, storing the name for the CA as “nebula.example.org” (there’s a reason for this!) and limiting the subnets and groups (like AWS or Azure Tags) the CA can issue certificates with.

Here, I’ve limited the CA to only issue IP addresses in the RFC5737 “Documentation” ranges, which are 192.0.2.0/24, 198.51.100.0/24 and 203.0.113.0/24, but this can easily be expanded to 10.0.0.0/8 or lots of individual subnets (I tested, and proved 1026 separate subnets which worked fine).

Groups, in Nebula parlance, are building blocks of the Security product, and can act like source or destination filters. In this case, I limited the CA to only being allowed to issue certificates with the groups of “Mobile”, “Workstation”, “Server”, “Lighthouse” and “db”.

As this certificate authority requires no internet access, and only enough access to read and write files, I have created my Nebula CA server on a separate Micro SD card to use with a Raspberry Pi device, and this is used only to generate a new CA certificate each 6 months (in theory, I’ve not done this part yet!), and to sign keys for all the client devices as they come on board.

I copy the ca.crt file to my target machines, and then move on to creating my client certificates

Client Certificates

When you generate key materials for Public Key Cryptographic activities (like this one), you’re supposed to generate the private key on the source device, and the private key should never leave the device on which it’s generated. Nebula allows you to do this, using the nebula-cert command again. That command looks like this:

nebula-cert keygen -out-key host.key -out-pub host.pub

If you notice, there’s a key difference at this point between Nebula’s key signing routine, and an x509 TLS style certificate, you see, this stage would be called a “Certificate Signing Request” or CSR in TLS parlance, and it usually would specify the record details for the certificate (normally things like “region”, “organisational unit”, “subject name” and so on) before sending it to the CA for signing (marking it as trusted).

In the Nebula world, you create a key, and send the public part of that (in this case, “host.pub” but it can have any name you like) to the CA, at which point the CA defines what IP addresses it will have, what groups it is in, and so on, so let’s do that.

nebula-cert sign -ca-crt ca.crt -ca-key ca.key -in-pub host.pub -out-crt host.crt -groups Workstation -ip 192.0.2.5/24 -name host.nebula.example.org

Let’s pick apart these options, shall we? The first four flags “-ca-crt“, “-ca-key“, “-in-pub” and “-out-crt” all refer to the CSR process – it’s reading the CA certificate and key, as well as the public part of the keypair created for the process, and then defines what the output certificate will be called. The next switch, -groups, identifies the tags we’re assigning to this node, then (the mandatory flag) -ip sets the IP address allocated to the node. Note that the certificate is using one of the valid group names, and has been allocated a valid IP address address in the ranges defined above. If you provide a value for the certificate which isn’t valid, you’ll get a warning message.

nebula-cert issues a warning when signing a certificate that tries to specify a value outside the constraints of the CA

In the above screenshot, I’ve bypassed the key generation and asked for the CA to sign with values which don’t match the constraints.

The last part is the name of the certificate. This is relevant because Nebula has a DNS service which can resolve the Nebula IPs to the hostnames assigned on the Certificates.

Anyway… Now that we know how to generate certificates the “hard” way, let’s make life a bit easier for you. I wrote a little script – Nebula Cert Maker, also known as certmaker.sh.

certmaker.sh

So, what does certmaker.sh do that is special?

  1. It auto-assigns an IP address, based on the MD5SUM of the FQDN of the node. It uses (by default) the first CIDR mask (the IP range, written as something like 192.0.2.0/24) specified in the CA certificate. If multiple CIDR masks are specified in the certificate, there’s a flag you can use to select which one to use. You can override this to get a specific increment from the network address.
  2. It takes the provided name (perhaps webserver) and adds, as a suffix, the name of the CA Certificate (like nebula.example.org) to the short name, to make the FQDN. This means that you don’t need to run a DNS service for support staff to access machines (perhaps you’ll have webserver1.nebula.example.org and webserver2.nebula.example.org as well as database.nebula.example.org).
  3. Three “standard” roles have been defined for groups, these are “Server”, “Workstation” and “Lighthouse” [1] (the latter because you can configure Lighthouses to be the DNS servers mentioned in step 2.) Additional groups can also be specified on the command line.

[1] A lighthouse, in Nebula terms, is a publically accessible node, either with a static IP, or a DNS name which resolves to a known host, that can help other nodes find each other. Because all the nodes connect to it (or a couple of “it”s) this is a prime place to run the DNS server, as, well, it knows where all the nodes are!

So, given these three benefits, let’s see these in a script. This script is (at least currently) at the end of the README file in that repo.

# Create the CA
mkdir -p /tmp/nebula_ca
nebula-cert ca -out-crt /tmp/nebula_ca/ca.crt -out-key /tmp/nebula_ca/ca.key -ips 192.0.2.0/24,198.51.100.0/24 -name nebula.example.org

# First lighthouse, lighthouse1.nebula.example.org - 192.0.2.1, group "Lighthouse"
./certmaker.sh --cert_path /tmp/nebula_ca --name lighthouse1 --ip 1 --lighthouse

# Second lighthouse, lighthouse2.nebula.example.org - 192.0.2.2, group "Lighthouse"
./certmaker.sh -c /tmp/nebula_ca -n lighthouse2 -i 2 -l

# First webserver, webserver1.nebula.example.org - 192.0.2.168, groups "Server" and "web"
./certmaker.sh --cert_path /tmp/nebula_ca --name webserver1 --server --group web

# Second webserver, webserver2.nebula.example.org - 192.0.2.191, groups "Server" and "web"
./certmaker.sh -c /tmp/nebula_ca -n webserver2 -s -g web

# Database Server, db.nebula.example.org - 192.0.2.182, groups "Server" and "db"
./certmaker.sh --cert_path /tmp/nebula_ca --name db --server --group db

# First workstation, admin1.nebula.example.org - 198.51.100.205, group "Workstation"
./certmaker.sh --cert_path /tmp/nebula_ca --index 1 --name admin1 --workstation

# Second workstation, admin2.nebula.example.org - 198.51.100.77, group "Workstation"
./certmaker.sh -c /tmp/nebula_ca -d 1 -n admin2 -w

# First Mobile device - Create the private/public key pairing first
nebula-cert keygen -out-key mobile1.key -out-pub mobile1.pub
# Then sign it, mobile1.nebula.example.org - 198.51.100.217, group "mobile"
./certmaker.sh --cert_path /tmp/nebula_ca --index 1 --name mobile1 --group mobile --public mobile1.pub

# Second Mobile device - Create the private/public key pairing first
nebula-cert keygen -out-key mobile2.key -out-pub mobile2.pub
# Then sign it, mobile2.nebula.example.org - 198.51.100.22, group "mobile"
./certmaker.sh -c /tmp/nebula_ca -d 1 -n mobile2 -g mobile -p mobile2.pub

Technically, the mobile devices are simulating the local creation of the private key, and the sharing of the public part of that key. It also simulates what might happen in a more controlled environment – not where everything is run locally.

So, let’s pick out some spots where this content might be confusing. I’ve run each type of invocation twice, once with the short version of all the flags (e.g. -c instead of --cert_path, -n instead of --name) and so on, and one with the longer versions. Before each ./certmaker.sh command, I’ve added a comment, showing what the hostname would be, the IP address, and the Nebula Groups assigned to that node.

It is also possible to override the FQDN with your own FQDN, but this command option isn’t in here. Also, if the CA doesn’t provide a CIDR mask, one will be selected for you (10.44.88.0/24), or you can provide one with the -b/--subnet flag.

If the CA has multiple names (e.g. nebula.example.org and nebula.example.com), then the name for the host certificates will be host.nebula.example.org and also host.nebula.example.com.

Using Bash

So, if you’ve looked at, well, almost anything on my site, you’ll see that I like to use tools like Ansible and Terraform to deploy things, but for something which is going to be run on this machine, I’d like to keep things as simple as possible… and there’s not much in this script that needed more than what Bash offers us.

For those who don’t know, bash is the default shell for most modern Linux distributions and Docker containers. It can perform regular expression parsing (checking that strings, or specific collections of characters appear in a variable), mathematics, and perform extensive loop and checks on values.

I used a bash template found on a post at BetterDev.blog to give me a basic structure – usage, logging and parameter parsing. I needed two functions to parse and check whether IP addresses were valid, and what ranges of those IP addresses might be available. These were both found online. To get just enough of the MD5SUM to generate a random IPv4 address, I used a function to convert the hexedecimal number that the MDSUM produces, and then turned that into a decimal number, which I loop around the address space in the subnets. Lastly, I made extensive use of Bash Arrays in this. This was largely thanks to an article on OpenSource.com about bash arrays. It’s well worth a read!

So, take a look at the internals of the script, if you want to know some options on writing bash scripts that manipulate IP addresses and read the output of files!

If you’re looking for some simple tasks to start your portfolio of work, there are some “good first issue” tasks in the “issues” of the repo, and I’d be glad to help you work through them.

Wrap up

I hope you enjoy using this script, and I hope, if you’re planning on writing some bash scripts any time soon, that you take a look over the code and consider using some of the templates I reference.

Featured image is “Observatories Combine to Crack Open the Crab Nebula” by “NASA Goddard Space Flight Center” on Flickr and is released under a CC-BY license.

"Blueprints" by "Cameron Degelia" on Flickr

Using Architectural Decision Records (ADR) with adr-tools

Introducing Architectural Decision Records

Over the last week, I discovered a new tool for my arsenal called Architectural Decision Records (ADR). They were first written about in 2011, in a post called “Documenting Architecture Decisions“, where the author, Michael Nygard, advocates for short documents explaining each decision that influences the architecture of an environment.

I found this via a Github repository, created by the team at gov.uk, which includes their ADR library, and references the tool they use to manage these documents – adr-tools.

Late edit 2021-01-25: I also found a post which suggests that Spotify uses ADR.

Late edit 2021-08-11: I wrote a post about using other tooling.

Late edit 2021-12-14: I released (v0.0.1) my own rust-based application for making Decision Records. Yes, Decision Records – not Architecture Decision Records… because I think you should be able to apply the same logic to all decisions, not just architectural ones.

Installing adr-tools on Linux

Currently adr-tools are easier to install under OSX rather than Linux or Windows Subsystem for Linux (WSL) (I’m working on this – bear with me! 😃 ).

The current installation notes suggest for Linux (which would also work on WSL) is to download the latest release tar.gz or zip file and unpack it into your path somewhere. This isn’t exactly the best way to deploy anything on Linux, but… I guess it works right now?

For me, I downloaded the file, and unpacked the whole tar.gz file (as root) into /usr/local/bin/, giving me a directory of /usr/local/bin/adr-tools-3.0.0/. There’s a subdirectory in here, called src which contains a large number of files – mostly starting _adr or adr- and two additional files, init.md and template.md.

Rather than putting all of these files into /usr/local/bin directly, instead I leave them in the adr-tools-3.0.0 directory, and create a symbolic link (symlink) to the /usr/local/bin directory with this command:

cd /usr/local/bin
ln -s adr-tools-3.0.0/src/* .

This gives me all those files in one place, so I can refer to them later.

An aside – why link everything in that src directory? (Feel free to skip this block!)

Now, why, you might ask, do all of these unrelated files need to be in the same place? Well…. the author of the script has put this in at the top of almost all the files:

#!/bin/bash
set -e
eval "$($(dirname $0)/adr-config)"

And then in that script, it says:

#!/bin/bash
basedir=$(cd -L $(dirname $0) > /dev/null 2>&1 && pwd -L)
echo "adr_bin_dir=$basedir"
echo "adr_template_dir=$basedir"

There are, technically, good reasons for this! This is designed to be run in, what in the Windows world, you might call as a “Portable Script”. So, you bung adr-tools into some directory somewhere, and then just call adr somecommand and it knows that all the files are where they need to be. The (somewhat) down side to this is that if you just want to call adr somecommand rather than path/to/my/adr somecommand then all those files need to be there

I’m currently looking to see if I can improve this somewhat, so that it’s not quite so complex to install, but for now, that’s what you need.

Anyway…

Using adr-tools to document your decisions

I’ll start documenting a fictional hosted web service project, and note down some of the decisions which have been made.

Initializing your ADR directory

Start by running adr init. You may want to specify a directory where you want to put these records, so instead use: adr init path/to/adr, like this:

Initializing the ADR in “documentation/architecture-decisions” with adr init documentation/architecture-decisions

You’ll notice that when I run this command, it creates a new entry, called 0001-record-architecture-decisions.md. Let’s open this up, and see what’s in here.

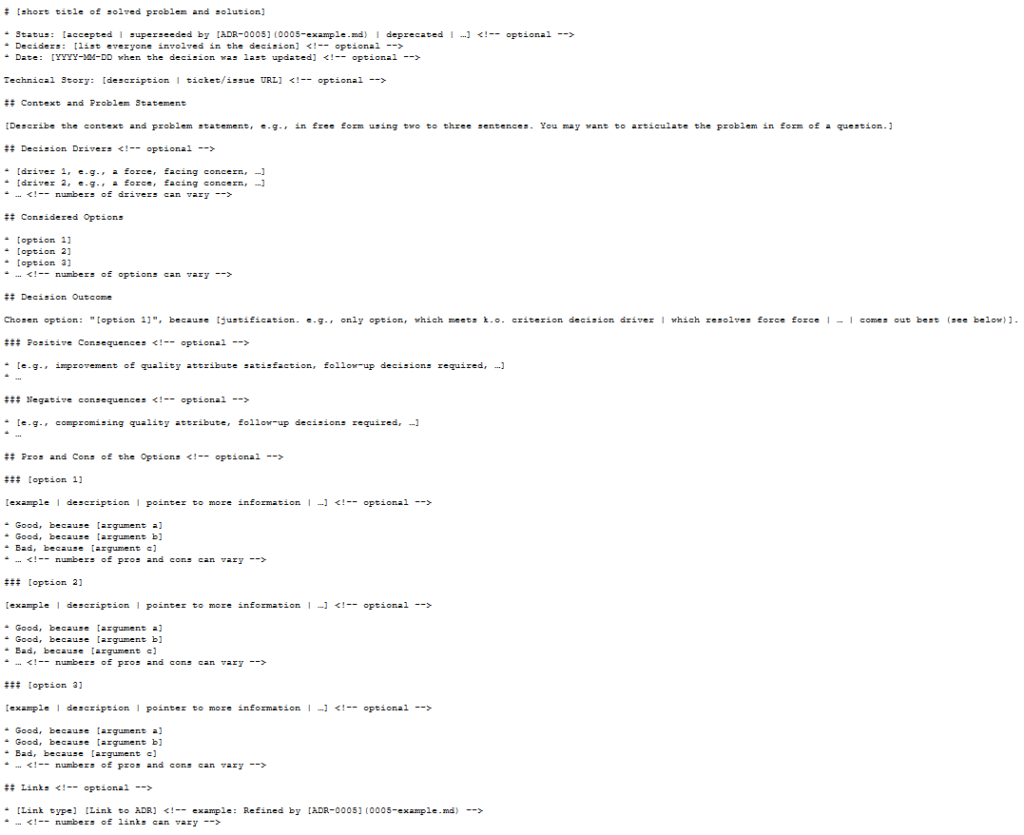
The VSCode record for the choice to use ADR. It is a markdown file, with the standard types of data recorded.

In here we have the record ID (1.), the title of the record Record architecture decisions, the date the choice was made Date: 2021-01-19, a status of Accepted, the context on why we made this choice, the decision, and the consequences of making this decision. Make changes, if needed, and save it. Let’s move on.

Creating our first own record

This all is quite straightforward thus far. Let’s create our next record.

Issuing the command adr new <sometitle> you create the next ADR record.

Let’s open up that record.

The template for the ADR record for “Use AWS”.

Like the first record, we have a title, a status, a context, decision and consequences. Let’s define these.

A “finished” brief ADR record.

This document shouldn’t be very long! It just describes why a choice was made and what that entails.

Changing decisions – completely replacing (superseding) a decision

Of course, over time, decisions will be replaced due to various decisions elsewhere.

You can ask adr to supersede a previous record, using the “-s” flag, and the record number.

Let’s look at how that works on the second ADR record.

After the command adr new -s 2 Use Azure, the ADR record number 2 has a new status, “Superceded by” and the superseded linked document. Yes, “Superceded” is a typo. There is an open PR for it

So, under the “Status”, where is previously said “Approved”, it now says “Superceded by [3. Use Azure](0003-use-azure.md)“. This is a markdown statement which indicates where the superseded document is located. As I mentioned in the comment below the above image, there is an open Pull Request to fix this on the adr-tools, so hopefully that typo won’t last long!

We’ve got our new ADR too – let’s take a look at that one?

Our new ADR shows that it “supercedes” the previous record. Which is good! Typo aside :)

Other references

Of course, you don’t always completely overrule a decision. Sometimes your decision is influenced by, or has a dependency on something else, like this one.

We know which provider we’re using at long last, now let’s pick a region. Use the -l flag to “link” between the referenced and new ADR. The context for the -l flag is “<number>:<text for link to number>:<text for link in targetted document>”.

The command here is:

adr new -l '3:Dependency:Influences' Use Region UK South and UK West

I’m just going to crop from the “Status” block on both the referenced ADR (3) and the ADR which references it (4):

Status block in ADR 0003 which is referenced by ADR 0004
Status block in the new ADR 0004 which references ADR 0003

And of course, you can also use the same switch to mark documents as partially obsoleted, like this:

adr new -l '4:Partially obsoletes:Partially obsoleted by' Use West Europe region instead of UK West region
Status block in ADR 0004 indicating it’s partially obsoleted. Probably worth updating the status properly to show it’s not just “Accepted”.

If you forget to add the referencing in, you can also use the adr link command, like this:

adr link 3 Influences 5 Dependency

To be clear, that command adds a (complete) line to ADR 0003 saying “Influences [5. ADR Title](link)” and a separate (complete) line to ADR 0005 saying “Dependency [3. ADR Title](link)“.

What else can we do?

There are four other “things” that it’s worth doing at this point.

  1. Note that you can change the template per-ADR directory.

Create a directory called “templates” in the ADR directory, and put a file in there called “template.md“. Tweak this as you need. Ensure you have AT LEAST the line ## Status and # NUMBER. TITLE as these are required by the script.

A much abbreviated template file, containing just “Number”, “Title”, “Date”, “Status”, and a new dummy heading called “Stuff”.
And the result of running adr new Some Text once you’ve created that template.

As you can see, it’s possible to add all sorts of content in this template as a result. Bear in mind, before your template turns into something like this, that it’s supposed to be a short document explaining why each decision was made, not a funding proposal, or a complex epic of your user stories!

Be careful not to let your template run away with you!
  1. Note that you can automatically open an editor, by setting the EDITOR (where the process is expected to finish before returning control, like using nano, emacs or vim, for example) or VISUAL (where the process is expected to “fork”, like for example, gedit or vscode) environment variable, and then running adr new A Title, like this:
  1. We can create “Table of Contents” files, using the adr generate toc command, like this:
Generating the table of contents, for injecting into other files.

This can be included into your various other markdown files. There are switches, so you can set the link path, but your best bet is to find that using adr help generate toc.

  1. We can also generate graphviz files of the link maps between elements of the various ADRs, like this: adr generate graph | dot -Tjpg > graph.jpg

If you omit the “| dot -Tjpg > graph.jpg” part, then you’ll see the graphviz output, which looks like this: (I’ve removed the documents 6 and 7).

digraph {
  node [shape=plaintext];
  subgraph {
    _1 [label="1. Record architecture decisions"; URL="0001-record-architecture-decisions.html"];
    _2 [label="2. Use AWS"; URL="0002-use-aws.html"];
    _1 -> _2 [style="dotted", weight=1];
    _3 [label="3. Use Azure"; URL="0003-use-azure.html"];
    _2 -> _3 [style="dotted", weight=1];
    _4 [label="4. Use Region UK South and UK West"; URL="0004-use-region-uk-south-and-uk-west.html"];
    _3 -> _4 [style="dotted", weight=1];
    _5 [label="5. Use West Europe region instead of UK West region"; URL="0005-use-west-europe-region-instead-of-uk-west-region.html"];
    _4 -> _5 [style="dotted", weight=1];
  }
  _3 -> _2 [label="Supercedes", weight=0]
  _3 -> _5 [label="Influences", weight=0]
  _4 -> _3 [label="Dependency", weight=0]
  _5 -> _4 [label="Partially obsoletes", weight=0]
  _5 -> _3 [label="Dependency", weight=0]
}

To make the graphviz part work, you’ll need to install graphviz, which is just an apt get away.

Any caveats?

adr-tools is not actively maintained. I’ve contacted the author, about seeing if I can help out with the maintenance, but… we’ll see, and given some fairly high profile malware takeovers of projects like this sort of thing on Github, Docker, NPM, and more… I can see why there might be some reluctance to consider it! Also, I’m an unknown entity, I’ve just dropped in on the project and offered to help, with no previous exposure to the lead dev or the project… so, we’ll see. Worst case, I’ll fork it!

Working with this also requires an understanding of markdown files, and why these might be a useful document format for records like this. There was a PR submitted to support multiple file formats (like asciidoc and rst) but these were not approved by the author.

There is no current intention to support languages other than English. The tool is hard-coded to look for strings like “status” and “superceded” which is hard. Part of the reason I raised the PRs I did was to let me fix some of these sorts of issues. Again, we’ll see what happens.

Lastly, it can be overwhelming to see a lot of documents in one place, particularly if they’re as granular as the documents I produced in this demo. If the project supported categories, or could be broken down into components (like doc/adr/networking and doc/adr/server_builds and doc/adr/applications) then this might help, but it’s not on the roadmap right now!

Late edit 2021-01-25: If you don’t think these templates have enough context or content, there are lots of others listed on Joel Parker Henderson’s repo of examples and templates. If you want a python based viewer of ADR records, take a look at adr-viewer.

Featured image is “Blueprints” by “Cameron Degelia” on Flickr and is released under a CC-BY license.

"Main console" by "Steve Parker" on Flickr

Running services (like SSH, nginx, etc) on Windows Subsystem for Linux (WSL1) on boot

I recently got a new laptop, and for various reasons, I’m going to be primarily running Windows on that laptop. However, I still like having a working SSH server, running in the context of my Windows Subsystem for Linux (WSL) environment.

Initially, trying to run service ssh start failed with an error, because you need to re-execute the ssh configuration steps which are missed in a WSL environment. To fix that, run sudo apt install --reinstall openssh-server.

Once you know your service runs OK, you start digging around to find out how to start it on boot, and you’ll see lots of people saying things like “Just run a shell script that starts your first service, and then another shell script for the next service.”

Well, the frustration for me is that Linux already has this capability – the current popular version is called SystemD, but a slightly older variant is still knocking around in modern linux distributions, and it’s called SystemV Init, often referred to as just “sysv” or “init.d”.

The way that those services work is that you have an “init” file in /etc/init.d and then those files have a symbolic link into a “runlevel” directory, for example /etc/rc3.d. Each symbolic link is named S##service or K##service, where the ## represents the order in which it’s to be launched. The SSH Daemon, for example, that I want to run is created in there as /etc/rc3.d/S01ssh.

So, how do I make this work in the grander scheme of WSL? I can’t use SystemD, where I could say systemctl enable --now ssh, instead I need to add a (yes, I know) shell script, which looks in my desired runlevel directory. Runlevel 3 is the level at which network services have started, hence using that one. If I was trying to set up a graphical desktop, I’d instead be looking to use Runlevel 5, but the X Windows system isn’t ported to Windows like that yet… Anyway.

Because the rc#.d directory already has this structure for ordering and naming services to load, I can just step over this directory looking for files which match or do not match the naming convention, and I do that with this script:

#! /bin/bash
function run_rc() {
  base="$(basename "$1")"
  if [[ ${base:0:1} == "S" ]]
  then
    "$1" start
  else
    "$1" stop
  fi
}

if [ "$1" != "" ] && [ -e "$1" ]
then
  run_rc "$1"
else
  rc=3
  if [ "$1" != "" ] && [ -e "/etc/rc${$1}.d/" ]
  then
    rc="$1"
  fi
  for digit1 in {0..9}
  do
    for digit2 in {0..9}
    do
      find "/etc/rc${rc}.d/" -name "[SK]${digit1}${digit2}*" -exec "$0" '{}' \; 2>/dev/null
    done
  done
fi

I’ve put this script in /opt/wsl_init.sh

This does a bit of trickery, but basically runs the bottom block first. It loops over the digits 0 to 9 twice (giving you 00, 01, 02 and so on up to 99) and looks in /etc/rc3.d for any file containing the filename starting S or K and then with the two digits you’ve looped to by that point. Finally, it runs itself again, passing the name of the file it just found, and this is where the top block comes in.

In the top block we look at the “basename” – the part of the path supplied, without any prefixed directories attached, and then extract just the first character (that’s the ${base:0:1} part) to see whether it’s an “S” or anything else. If it’s an S (which everything there is likely to be), it executes the task like this: /etc/rc3.d/S01ssh start and this works because it’s how that script is designed! You can run one of the following instances of this command: service ssh start, /etc/init.d/ssh start or /etc/rc3.d/S01ssh start. There are other options, notably “stop” or “status”, but these aren’t really useful here.

Now, how do we make Windows execute this on boot? I’m using NSSM, the “Non-sucking service manager” to add a line to the Windows System services. I placed the NSSM executable in C:\Program Files\nssm\nssm.exe, and then from a command line, ran C:\Program Files\nssm\nssm.exe install WSL_Init.

I configured it with the Application Path: C:\Windows\System32\wsl.exe and the Arguments: -d ubuntu -e sudo /opt/wsl_init.sh. Note that this only works because I’ve also got Sudo setup to execute this command without prompting for a password.

Here I invoke C:\Windows\System32\wsl.exe -d ubuntu -e sudo /opt/wsl_init.sh
I define the name of the service, as Services will see it, and also the description of the service.
I put in MY username and My Windows Password here, otherwise I’m not running WSL in my user context, but another one.

And then I rebooted. SSH was running as I needed it.

Featured image is “Main console” by “Steve Parker” on Flickr and is released under a CC-BY license.

"$bash" by "Andrew Mager" on Flickr

One to read: Put your bash code in functions

I’ve got a few mildly ropey bash scripts which I could do with making a bit more resilient, and perhaps even operating faster ;)

As such, I found this page really interesting: https://ricardoanderegg.com/posts/bash_wrap_functions/

In it, Ricardo introduces me to two things which are interesting.

  1. Using the wait command literally waits for all the backgrounded tasks to finish.
  2. Running bash commands like this: function1 & function2 & function3 should run all three processes in parallel. To be honest, I’d always usually do it like this:
    function1 &
    function2 &
    function3 &

The other thing which Ricardo links to is a page suggesting that if you’re downloading a bash script and executing it (which, you know, probably isn’t a good idea at the best of times), then wrapping it in a function, like this:

#!/bin/bash

function main() {
  echo "Some function"
}

main

This means that the bash scripting engine needs to download and parse all the functions before it can run the script. As a result, you’re less likely to get a broken run of your script, because imagine it only got as far as:

#!/bin/bash
echo "Some fun

Then it wouldn’t have terminated the echo command (as an example)…

Anyway, some great tricks here! Love it!

Featured image is “$bash” by “Andrew Mager” on Flickr and is released under a CC-BY-SA license.

"Fishing line and bobbin stuck on tree at Douthat State Park" by "Virginia State Parks" on Flickr

Note to self: Linux shell scripts don’t cope well with combined CRLF + LF files… Especially in User-Data / Custom Data / Cloud-Init scripts

This one is more a nudge to myself. On several occasions when building Infrastructure As Code (IAC), I split out a code sections into one or more files, for readability and reusability purposes. What I tended to do, and this was more apparent with the Linux builds than the Windows builds, was to forget to set the line terminator from CRLF to LF.

While this doesn’t really impact Windows builds too much (they’re kinda designed to support people being idiots with line endings now), Linux still really struggles with CRLF endings, and you’ll only see when you’ve broken this because you’ll completely fail to run any of the user-data script.

How do you determine this is your problem? Well, actually it’s a bit tricky, as neither cat, less, more or nano spot this issue. The only two things I found that identified it were file and vi.

The first part of the combined file with mixed line endings. This part has LF termination.
The second part of the combined file with mixed line endings. This part has CRLF termination.
What happens when we cat these two parts into one file? A file with CRLF, LF line terminators obviously!
What the combined file looks like in Vi. Note the blue ^M at the ends of the lines.

So, how to fix this? Assuming you’re using Visual Studio Code;

A failed line-ending clue in Visual Studio Code

You’ll notice this line showing “CRLF” in the status bar at the bottom of Code. Click on that, which brings up a discrete box near the top, as follows:

Oh no, it’s set to “CRLF”. That’s not what we want!

Selecting LF in that box changes the line feeds into LF for this file, but it’s not saved. Make sure you save this file before you re-run your terraform script!

Notice, we’re now using LF endings, but the file isn’t saved.

Fantastic! It’s all worked!

In Nano, I’ve opened the part with the invalid line endings.

Oh no! We have a “DOS Format” file. Quick, let’s fix it!

To fix this, we need to write the file out. Hit Ctrl+O. This tells us that we’re in DOS Format, and also gives us the keyboard combination to toggle “DOS Format” off – it’s Alt+D (In Unix/Linux world, the Alt key is referred to as the Meta key – hence M not A).

This is how we fix things

So, after hitting Alt+D, the “File Name to write” line changes, see below:

Yey, no pesky “DOS Format” warning here!

Using either editor (or any others, if you know how to solve line ending issues in other editors), you still need to combine your script back together before you can run it, so… do that, and your file will be fine to run! Good luck!

Featured image is “Fishing line and bobbin stuck on tree at Douthat State Park” by “Virginia State Parks” on Flickr and is released under a CC-BY license.