"Honey pots" by "Nicholas" on Flickr

Adding MITM (or “Trusted Certificate Authorities”) proxy certificates for Linux and Linux-like Environments

In some work environments, you may find that a “Man In The Middle” (also known as MITM) proxy may have been configured to inspect HTTPS traffic. If you work in a predominantly Windows based environment, you may have had some TLS certificates deployed to your computer when you logged in, or by group policy.

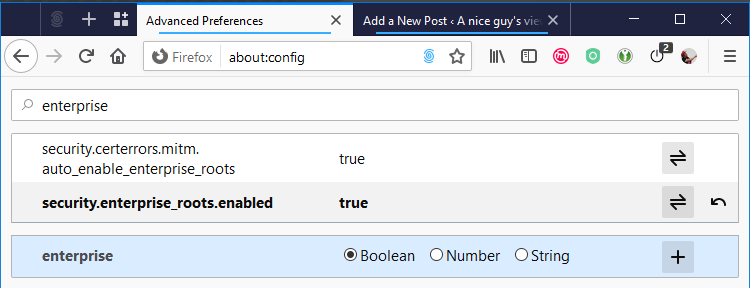
I’ve previously mentioned that if you’re using Firefox on your work machines where you’ve had these certificates pushed to your machine, then you’ll need to enable a configuration flag to make those work under Firefox (“security.enterprise_roots.enabled“), but this is talking about Linux (like Ubuntu, Fedora, CentOS, etc.) and Linux-like environments (like WSL, MSYS2)

Late edit 2021-05-06: Following a conversation with SiDoyle, I added some notes at the end of the post about using the System CA path with the Python Requests library. These notes were initially based on a post by Mohclips from several years ago!

Start with Windows

From your web browser of choice, visit any HTTPS web page that you know will be inspected by your proxy.

If you’re using Mozilla Firefox

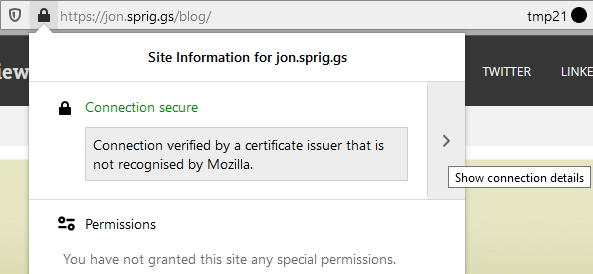
In Firefox, click on this part of the address bar and click on the right arrow next to “Connection secure”:

Clicking on the Padlock and then clicking on the Right arrow will take you to the “Connection Security” screen.
Certification Root obscured, but this where we prove we have a MITM certificate.

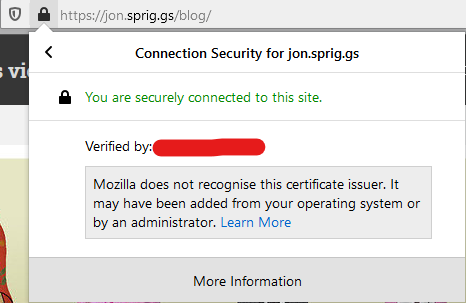
Click on “More Information” to take you to the “Page info” screen

More obscured details, but click on “View Certificate”

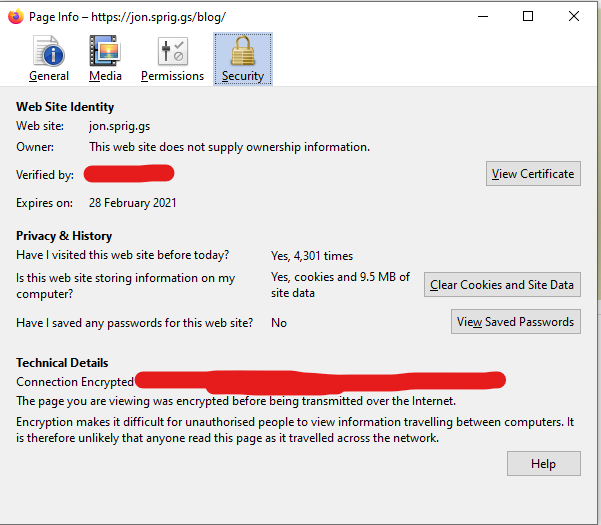
In recent versions of Firefox, clicking on “View Certificate” takes you to a new page which looks like this:

Mammoth amounts of obscuring here! The chain runs from left to right, with the right-most blob being the Root Certificate

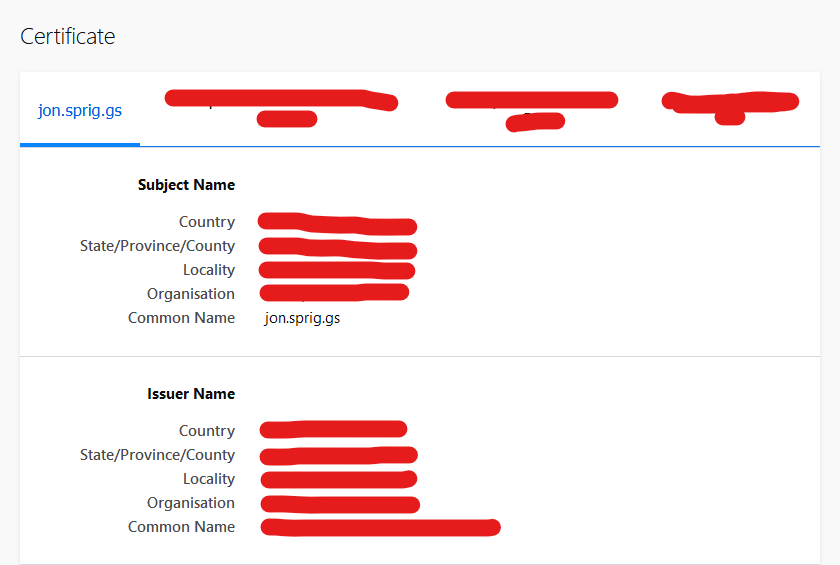
Click on the right-most tab of this screen, and navigate down to where it says “Miscellaneous”. Click on the link to download the “PEM (cert)”.

The details on the Certificate Authority (highly obscured!), but here is where we get our “Root” Certificate for this proxy.

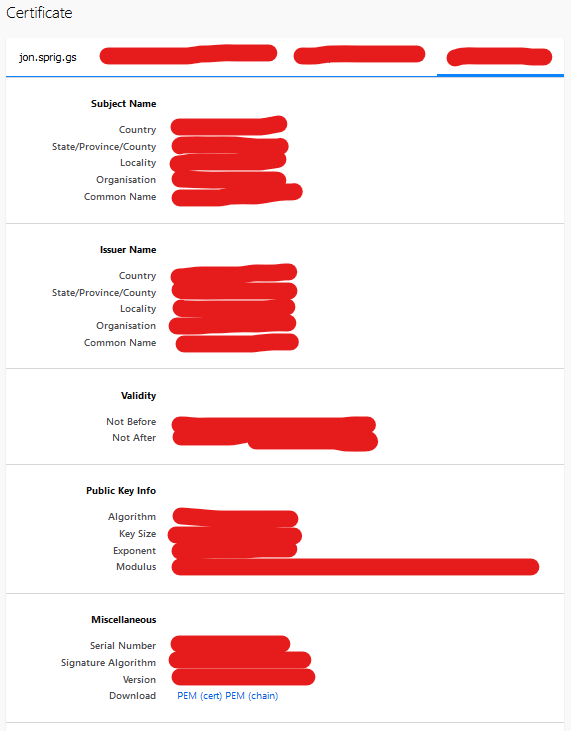
Save this certificate somewhere sensible, we’ll need it in a bit!

Note that if you’ve got multiple proxies (perhaps for different network paths, or perhaps for a cloud proxy and an on-premises proxy) you might need to force yourself in into several situations to get these.

If you’re using Google Chrome / Microsoft Edge

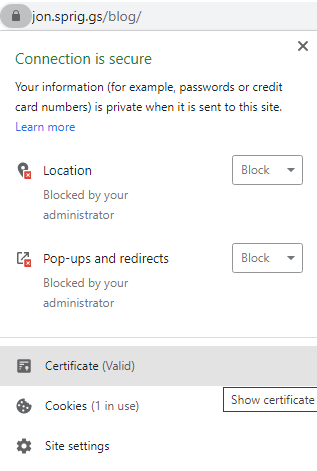
In Chrome or Edge, click on the same area, and select “Certificate”:

This will take you to a screen listing the “Certification Path”. This is the chain of trust between the “Root” certificate for the proxy to the certificate they issue so I can visit my website:

This screen shows the chain of trust from the top of the chain (the “Root” certificate) to the bottom (the certificate they issued so I could visit this website)

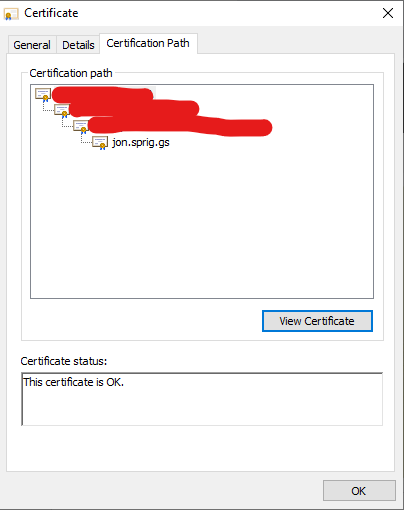
Click on the topmost line of the list, and then click “View Certificate” to see the root certificate. Click on “Details”:

The (obscured) details for the root CA.

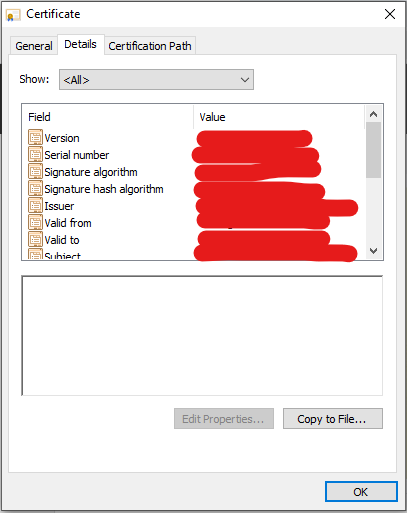
Click on “Copy to File” to open the “Certificate Export Wizard”:

In the Certificate Export Wizard, click “Next”
Select “Base-64 encoded X.509 (.CER)” and click “Next”
Click on the “Browse…” button to select a path.
Name the file something sensible, and put the file somewhere you’ll find it shortly. Click “Save”, then click “Next”.

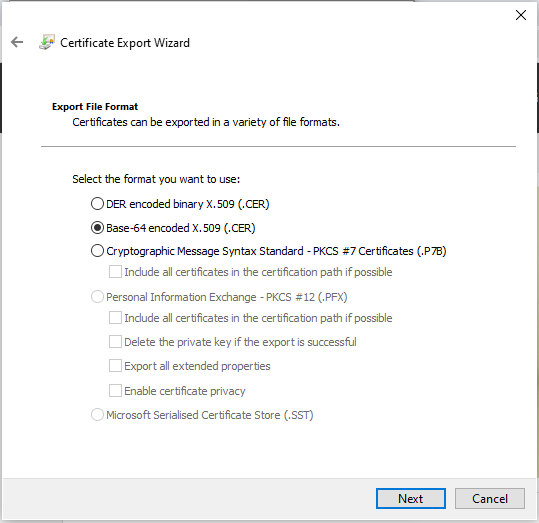
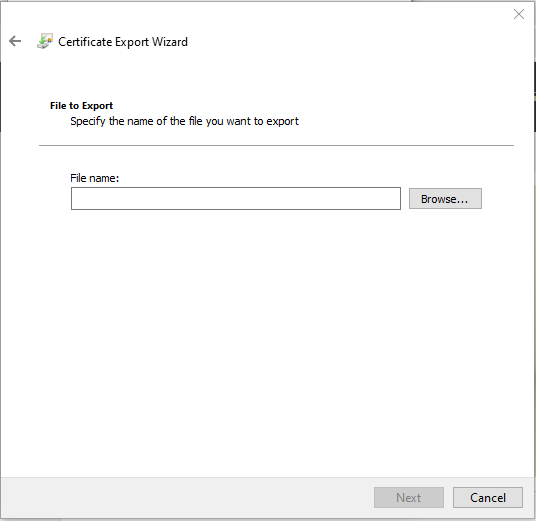
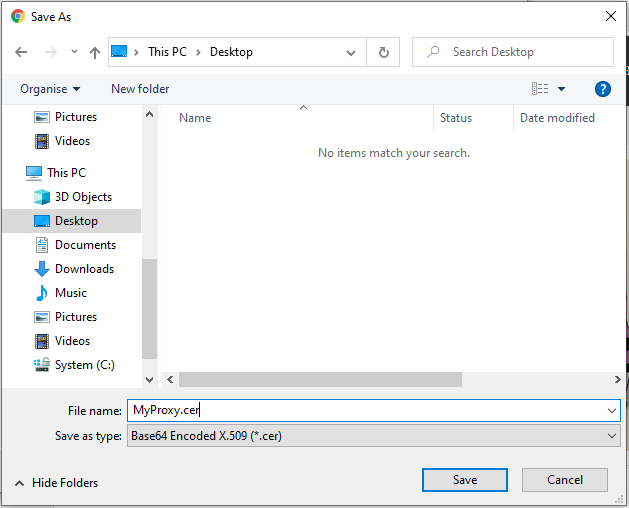
Once you’ve saved this file, rename it to have the extension .pem. You may need to do this from a command line!

Copy the certificate into the environment and add it to the system keychain

Ubuntu or Debian based systems as an OS, or as a WSL environment

As root, copy the proxy’s root key into /usr/local/share/ca-certificates/<your_proxy_name>.crt (for example, /usr/local/share/ca-certificates/proxy.my.corp.crt) and then run update-ca-certificates to update the system-wide certificate store.

RHEL/CentOS as an OS, or as a WSL environment

As root, copy the proxy’s root key into /etc/pki/ca-trust/source/anchors/<your_proxy_name>.pem (for example, /etc/pki/ca-trust/source/anchors/proxy.my.corp.pem) and then run update-ca-trust to update the system-wide certificate store.

MSYS2 or the Ruby Installer

Open the path to your MSYS2 environment (e.g. C:\Ruby30-x64\msys64) using your file manager (Explorer) and run msys2.exe. Then paste the proxy’s root key into the etc/pki/ca-trust/source/anchors subdirectory, naming it <your_proxy_name>.pem. In the MSYS2 window, run update-ca-trust to update the environment-wide certificate store.

If you’ve obtained the Ruby Installer from https://rubyinstaller.org/ and installed it from there, assuming you accepted the default path of C:\Ruby<VERSION>-x64 (e.g. C:\Ruby30-x64) you need to perform the above step (running update-ca-trust) and then copy the file from C:\Ruby30-x64\mysys64\etc\pki\ca-trust\extracted\pem\tls-ca-bundle.pem to C:\Ruby30-x64\ssl\cert.pem

Using the keychain

Most of your Linux and Linux-Like environments will operate fine with this keychain, but for some reason, Python needs an environment variable to be passed to it for this. As I encounter more environments, I’ll update this post!

The path to the system keychain varies between releases, but under Debian based systems, it is: /etc/ssl/certs/ca-certificates.crt while under RedHat based systems, it is: /etc/pki/tls/certs/ca-bundle.crt.

Python “Requests” library

If you’re getting TLS errors in your Python applications, you need the REQUESTS_CA_BUNDLE environment variable set to the path for the system-wide keychain. You may want to add this line to your /etc/profile to include this path.

Sources:

Featured image is “Honey pots” by “Nicholas” on Flickr and is released under a CC-BY license.

"Root" by "llee_wu" on Flickr

A quick note on using Firefox in Windows in a Corporate or Enterprise environment

I’ve been using Firefox as my “browser of choice” for around 15 years. I tend to prefer to use it for all sorts of reasons, but the main thing I expect is support for extensions. Not many of them, but … well, there’s a few!

There are two stumbling blocks for using Firefox in a corporate or enterprise setting. These are:

  1. NTLM or Kerberos Authentication for resources like Sharepoint and ADFS.
  2. Enterprise TLS certificates (usually deployed via GPO as part of the domain)

These are both trivially fixed in the about:config screen, but first you need to get past a scary looking warning page!

In the address bar, where it probably currently says jon.sprig.gs, click in there and type about:config.

Getting to about:config

This brings you to a scary page!

Proceed with caution! (of course!!)

Click the “Accept the Risk and Continue” (note, this is with Firefox 76. Wording with later or earlier versions may differ).

As if it wasn’t obvious enough from the previous screen, this “may impact performance and security”…

And then you get a search box.

In the “Search preference name” type in ntlm and find the line that says network.automatic-ntlm-auth.trusted-uris.

The “NTLM Options page”

Type in there the suffixes of any TRUSTED domains. For example, if your company uses the domain names of bigcompany.com, bigco.local and big.company then you’d type in:

bigcompany.com,bigco.local,big.company

Any pages that you browse to, where they request NTLM authentication, will receive an NTLM set of credentials if prompted (same as IE, Edge, and Chrome already do!) NTLM is effectively a way to pass a trusted Kerberos ticket (a bit like your domain credentials) into a web page.

Next up, let’s get those pesky certificate errors removed!

This assumes that you have a centrally managed TLS Root Certificate, and the admins in your network haven’t just been dumping self signed certificates everywhere (nothing gets around that… just sayin’).

Still in about:config, clear the search box and type enterprise, like this!

Enterprise Roots are here!

Find the line security.enterprise_roots.enabled and make sure it says true. If it doesn’t double click it, so it does.

Now you can close your preferences page, and you should be fine to visit your internal source code repository, time sheeting system or sharepoint site, with almost no interruptions!

If you’ve been tasked for turning this stuff on in your estate of managed desktop environment machines, then you might find this article (on Autoconfiguration of Firefox) of use (but I’ve not tried it!)

Featured image is “Root” by “llee_wu” on Flickr and is released under a CC-BY-ND license.

"pulpit and bible" by "Joel Kramer" on Flickr

Preaching about Firefox Containers (and how they can change your Internet life)

I want to preach for a few minutes about Containers in Firefox. This is not like Docker containers, a Snap Package (using cgroups), or Shipping Containers, but instead a way of describing how each tab protects you from tracking.

Here’s a quick lesson in how the web works. Each website you visit, when you get the HTML page, it might *also* ask you store a small text file, a “Cookie” that then gets handed *back* to that site the next time you visit. It’s an easy way of saying “I’ve been here before, you know me already”.

This doesn’t just happen when you visit a web page (unless the web page is really *really* simple), it also happens for each resource on that page. If the page also asks for an image (say, the logo of a social media network), a script (say, a banner bar from an advertising network) or a font (yep, web fonts are also a thing!), each one of those also gets to say “here’s a Cookie, keep it for the next time you come back”.

For a few years, there have been ad-blockers (my favourite two are “uBlock Origin” and “Privacy Badger“), which can stop the content from ever being loaded… but it’s an arms race. The ad-blockers stop content from being loaded (mostly it’s just to stop the adverts, but the other stuff is a benefit that they’ve kept on doing), then the tracking firms do something else to make it so their content is loaded, and so-on. Firefox also has “Private Browsing Mode”, which can stop “third party cookies” (the ones from each of the additional sources on the page) from being shared… but I always think that Private Browsing mode looks shady.

In the last couple of years, Firefox started an experiment called “Firefox Multi-Account Containers” (or just “Containers” for short). This is designed to create a whole new “state” for each browser tab, that’s shared between those containers.

You can mark particular websites as being part of a particular container, so Twitter, Facebook and GMail all end up in my “Personal” container, whereas the sites I need for work are in the “Work” container.

For a while I was using them to support family members (“I just need you to log into your GMail account for me to have a poke around… let me create a new container for your account”, or “Let’s have a look at why you’re getting those Facebook posts. Can you log in in this container here?”).

Then I needed it to separate out a couple of Twitter accounts I’m responsible for (when I use the “Switch Containers” extension to jump between them)… Then I found a new extension which upgraded how I use them “Temporary Containers“. With a couple of tweaks (see below), this makes every new tab into it’s own container… so it’s a bit like Private Browsing Mode, but one which dynamically turns itself into a “non-private mode” if you hit the right URL.

So, this is my work-flow – it might not work for you, but equally, it might! When I open a new tab, or visit a website that isn’t already categorised as a “Personal”, “Work” (or so-on) container, I get taken to a new “Temporary” container.

A Temporary Container window (note the “tmp2” in the address bar)

I then ask myself if this is something I need to log into with one of my existing containers (e.g. Google, Facebook, Twitter, Github, Azure, AWS etc), and if so, I’ll “Switch Containers” to that container (e.g. Personal).

Switching containers with the “Switch Containers” button

If I think that I always want to open it here then I’ll click on the “Containers” button in the bar, and select “Always open in ‘Personal'”.

Selecting “Always open in Personal”

If I’ve categorised something that I need to swap to something else (e.g. Twitter for another account, or a family member’s GMail account), then I explicitly “Switch Containers” or open a tab in that container first, and then go to the website.

If I need a new container for this window, I use the + symbol next to the “Edit Containers” button in the containers button in the window bar.

Adding a new container with the + button in the Open Container Tab dialogue

I also use the “Open Bookmark in Container” extension, for when I’m using bookmarks, as, by default, these can’t be opened in a container. I also use the “Containers Theme” extension, as can be seen by the colour changes in the above screenshots.

While this is fully available for Firefox on Desktop, it’s not yet available on Firefox for Android or Firefox for iOS, and there’s no word on whether it will come at all…

Featured image is “pulpit and bible” by “Joel Kramer” on Flickr and is released under a CC-BY license.