nobodys perfect nbc GIF by The Good Place from Giphy

Talk Summary – FDE Conference “Automation in an Infrastructure as Code World”

Format: Theatre Style room. ~70 attendees.

Slides: Available to view (Firefox/Chrome recommended – press “S” to see the required speaker notes), Code referenced in the slides also available to view.

Video: Not on the day, but I recorded a take of it at home after the event. The delivery on the day was better, but the content is there at least! :)

Slot: Slot 2 Wednesday 14:15-15:00

Notes: FDE is the abbreviation of “Fujitsu Distinguished Engineer”, an internal program at Fujitsu. Each year they hold a conference for all the FDEs to attend. This is my second year as an FDE, and the first where I’m presenting.

This slide deck was massively re-worked, following some excellent feedback at BCMcr9. I then, unusually for me, gave the deck two separate run through sessions with colleagues, and tweaked it following each run.

This deck includes Creative Commons licensed images (which is fairly common for my slide decks), but also, in a new and unusual step for me, includes meme gifs from Giphy. I’m not really sure about whether this is step forward or back for me, as I do prefer permissive licenses. That said, the memes seem to be more engaging – particularly as they’re animated. I’ve never had someone comment on the images in my slide deck until I did the first run through with the memes in with a colleague, and then again when I ran it a second time they particularly brought up the animated images… so the memes are staying for now.

I’m also slightly disappointed with myself that I couldn’t stick to the “One Bold Word” style of presentations (the format preferred by Jono Bacon), and found myself littering more and more content into the screen. I was, however, proud of myself for including the “Tweetable content” slide, as recommended, I think, by Lorna Mitchell (@LornaJane). I also included a “Your next steps” slide, as recommended by Andy Bounds (although I suspect he’d be disappointed with the “Questions?” slide at the end!)

This deck required quite a bit of research on my part. I’d never written CloudFormations (CF) before, and I’d only really copied-and-pasted Terraform (I refer to it as TF which probably isn’t right) before. I wrote a full stack of machines in CF, Azure Resource Manager (ARM) for the native technologies, as well as the same stacks in both TF and Ansible for both Azure and AWS. I also looked into how to deploy the CF and ARM templates with both Terraform and Ansible, and finally how to use TF from Ansible. I already knew how to run Ansible from within userdata/customdata arguments in AWS and Azure, but I included it and tested it as part of the deck too.

I had some amazing feedback from the audience and some great questions asked of me. I loved the response from the audience to some of my GIFs (although one comment that was made was that I need to stop the animations after the first run!)

Following the session, as I’d hoped, it brought a few of the fellow attendees to the forefront to ask if we can talk further about the subject and I would encourage you, if you are someone who uses these tools to give me a shout – I want to do more and find out about your projects, processes and tools!

My intention is to start using this slide deck at meet-ups in the Greater Manchester area, hopefully without having to re-write it that much!

BarCamp Manchester Logo, from barcampmanchester.co.uk

My talk summaries from BarCamp Manchester 9

BarCamp Manchester 9 (#BcMcr9) is a BarCamp style Unconference. It was held in the offices of Auto Trader in the centre of Manchester. It was a two day event, however, I was unable to attend the Saturday. Sundays are usually quieter days, and apparently the numbers were approximately half of the peak of Saturday on the Sunday.

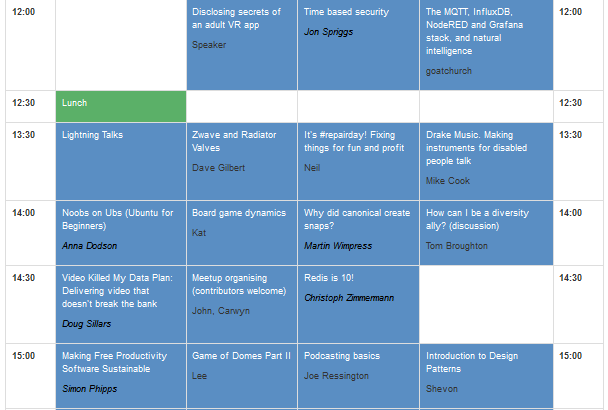
Lunch was provided by Auto Trader. The day was split into 7 slots, or sessions, running for 25 minutes each, with 5 minutes between slots to change rooms. There were three theatre layout rooms, each with a projector, and one room with soft chairs around the edges.

There and Back Again/How The Internet Works

Format: Presentation with slides. 30ish attendees.

Slot: Slot 1 Sunday 11:00-11:25

Notes: This slide deck was reused from when I delivered it in 2012. Some stuff had changed (the prevalence of WiFi being one, CAT5e being referenced raised some giggles), but most had not.

There were some comments raised during the talk about the slides, but nothing significant (mostly by network engineers, commenting on things like routing a local network. Ugh.)

Following the talk, someone came up to suggest some changes (primarily that the slides need to link back to the graphics created). Someone else noted that there were too many acronyms that should probably have been explained. As such, this deck is likely to change and be published here at some point soon.

I sent a tweet, following this talk:

At #BCMCR9? See my talk on “How The Internet Works” and looking for the slides? See here: https://www.slideshare.net/JonTheNiceGuy/there-and-back-again-15506394 And feel free to message me if you’ve got any questions!

Jon Spriggs (@jontheniceguy) @ Sep 22 12:03pm

Automation in an Infrastructure as Code World

Format: Presentation with slides. 8 attendees, reduced to 4 half way through.

Slot: Slots 5 and 6 Sunday 14:00-14:55

Notes: This was a trial run of my talk for the Fujitsu FDE Conference I’m attending in a couple of weeks. The audience were notified as such. I took two slots on the “grid”, and half way through my session, half the audience walked out.

Following the talk, someone came and suggested some changes, which I’ll be implementing.

The slides for this talk are still being developed and will be shared after the FDE conference on this site.

Decentralised Social Media? – Secure Scuttlebutt

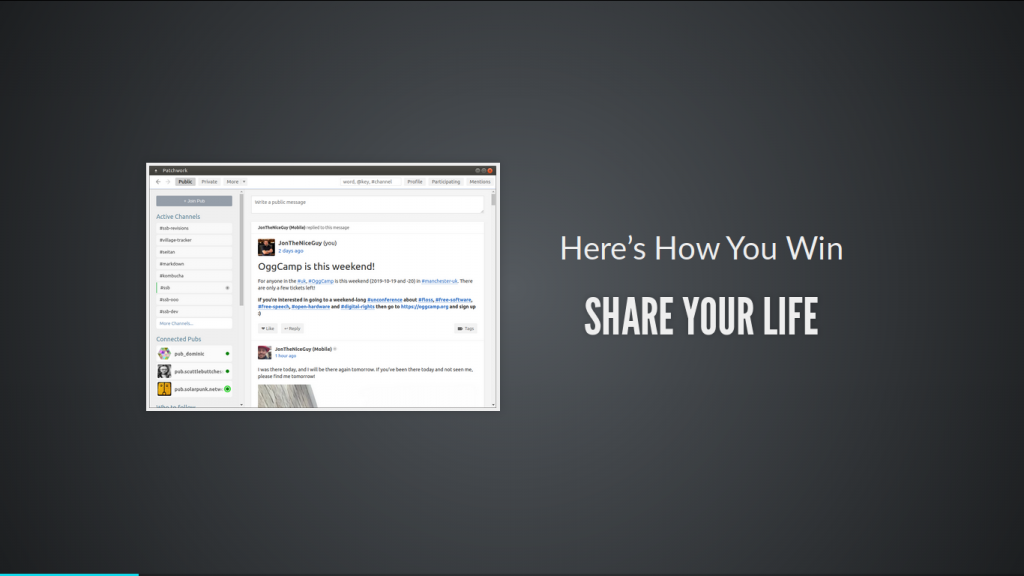
Format: Conversation with a desktop client application (Patchwork) loaded on the projector, and the Google Play entry for Manyverse on a browser tab. 3 attendees.

Slot: Slot 7 (last slot of the day) Sunday 15:00-15:25

Notes: This was an unplanned session, and probably should have been run earlier in the day. The audience members were very interactive, and asked lots of sensible questions.

I sent a tweet, following this talk:

Did you come to my talk at #BcMcr9 about #SecureScuttleButt? If you run a SSB client (patchwork, patchbay, patchfox or manyverse) and want to follow me, I’m @p3gu8eLHxXC0cuvZ0yXSC05ZROB4X7dpxGCEydIHZ0o=.ed25519 and @3SEA7qNZQPiYFCzY6K57f0LTc9l+Bk6cewQc6lbs/Ek=.ed25519

Jon Spriggs (@jontheniceguy) @ Sep 22 4:46pm

And if you want to know more about #SecureScuttlebutt, take a look at http://Scuttlebutt.nz! It’s fun!

Jon Spriggs (@jontheniceguy) @ Sep 22 4:49pm
Fujitsu AWS Game Day Attendees

AWS Game Day

I was invited, through work, to participate in an AWS tradition – the AWS Game Day. This event was organised by my employer for our internal staff to experience a day in the life of a fully deployed AWS environment… and have some fun with it too. The AWS Game Day is a common scenario, and if you’re lucky enough to join one, you’ll probably be doing this one… As such, there will be… #NoSpoilers.

A Game Day (sometimes disambiguated as an “Adversarial Game Day”, because of sporting events) is a day where you either have a dummy environment, or, if you have the scale, a portion of your live network is removed from live service and used as a training ground. In this case, AWS provided a specific dummy environment “Unicorn.Rentals”, and all the attendees are the new recruits to the DevOps Team… Oh, and all the previous DevOps team members had just left the company… all at once.

Attendees were split into teams of four, and each team had a disparate background.

We’re given access to;

  • Our login panel. This gives us our score, our trending increase or decrease in score over the last “period” (I think it was 5 minutes), our access to the AWS console, and a panel to update the CNAME for the DNS records.
  • AWS Console. This is a mostly unrestricted account in AWS. There are some things we don’t get access to – for example, we didn’t get the CloudFormation Template for setting up the game day, and we couldn’t make changes to the IAM environment at all. Oh, and what was particularly frustrating was not being able to … Oh yes, I forgot, #NoSpoilers ;)
  • A central scoreboard of all the teams
  • A running tally of how we were scored
    • Each web request served under X seconds received one score
    • Each request served between X and Y seconds received another score,
    • Each request served over Y seconds received a third score.
    • Failing to respond to a request received a negative score.
    • Infrastructure costs deducted points from the score (to stop you just putting stuff at ALL THE SERVERS, ALL THE TIME).
  • The outgoing DevOps team’s “runbook”. Not too dissimilar to the sort of documentation you write before you go on leave. “If this thing break, run this or just reboot the box”, “You might see this fail with something like this message if the server can’t keep up with the load”. Enough to give you a pointer on where to look, not quite enough to give you the answer :)

The environment we were working on was, well, relatively simple. An auto-scaling web service, running a simple binary on an EC2 instance behind a load balancer. We extended the reach of services we could use (#NoSpoilers!) to give us greater up-time, improved responsiveness and broader scope of access. We were also able to monitor … um, things :) and change the way we viewed the application.

I don’t want to give too many details, because it will spoil the surprises, but I will say that we learned a lot about the services in AWS we had access to, which wasn’t the full product set (just “basic” AWS IaaS tooling).

When the event finished, everyone I spoke to agreed that having a game day is a really good idea! One person said “You only really learn something when you fix it! This is like being called out, without the actual impact to a customer” and another said “I’ve done more with AWS in this day than I have the past couple of months since I’ve been looking at it.”

And, as you can probably tell, I agree! I’d love to see more games days like this! I can see how running something like this, on technology you use in your customer estate, can be unbelievably powerful – especially if you’ve got a mildly nefarious GM running some background processes to break things (#NoSpoilers). If you can make it time-sensitive too (“you’ve got one day to restore service”, or like in this case, “every minute we’re not selling product, we’re losing points”), then that makes it feel like you’ve been called out, but without the stress of feeling like you’re actually going to lose your job at the end of the day (not that I’ve ever actually felt like that when I’ve been called out!!)

Anyway, massive kudos to our AWS SE team for delivering the training, and a huge cheer of support to Sara for getting the event organised. I look forward to getting invited to a new scenario sometime soon! ;)

Here are some pictures from the event!

The teams get to know each other, and we find out about the day ahead! Picture by @Fujitsu_FDE.
Our team, becoming a team by changing the table layout! It made a difference, we went to the top of the leader board for at least 5 minutes! Picture by @Fujitsu_FDE.
The final scores. Picture by @Fujitsu_FDE
Our lucky attendees got to win some of these items! Picture by @Fujitsu_FDE
“Well Done” (ha, yehr, right!) to the winning team (“FIX!”) “UnicornsRUs”. Picture by @Fujitsu_FDE.

The featured image is “AWS Game Day Attendees” by @Fujitsu_FDE.

“Swatch Water Store, Grand Central Station, NYC, 9/2016, pics by Mike Mozart of TheToyChannel and JeepersMedia on YouTube #Swatch #Watch” by “Mike Mozart” on Flickr

Time Based Security

I came across the concept of “Time Based Security” (TBS) in the Sysadministrivia podcast, S4E13.

I’m still digging into the details of it, but in essence, the “Armadillo” (Crunchy on the outside, soft on the inside) protection model is broken (sometimes known as the “Fortress Model”). You assume that your impenetrable network boundary will prevent attackers from getting to your sensitive data. While this may stop them for a while, what you’re actually seeing here is one part of a complex protection system, however many organisations miss the fact that this is just one part.

The examples used in the only online content I’ve found about this refer to a burglary.

In this context, your “Protection” (P) is measured in time. Perhaps you have hardened glass that takes 20 seconds to break.

Next, we evaluate “Detection” (D) which is also, surprisingly enough, measured in time. As the glass is hit, it triggers an alarm to a security facility. That takes 20 seconds to respond and goes to a dispatch centre, another 20 seconds for that to be answered and a police officer dispatched.

The police officer being dispatched is the “Response” (R). The police take (optimistically) 2 minutes to arrive (it was written in the 90’s so the police forces weren’t decimated then).

So, in the TBS system, we say that Detection (D) of 40 seconds plus Response (R) of 120 seconds = 160 seconds. This is greater than Protection (P) of 20 seconds, so we have an Exposure (E) time of 140 seconds E = P – (D + R). The question that is posed is, how much damage can be done in E?

So, compare this to your average pre-automation SOC. Your firewall, SIEM (Security Incident Event Management system), IDS (Intrusion Detection System) or WAF (Web Application Firewall) triggers an alarm. Someone is trying to do something (e.g. Denial Of Service attack, password spraying or port scanning for vulnerable services) a system you’re responsible for. While D might be in the tiny fractions of a minute (perhaps let’s say 1 minute, for maths sake), R is likely to be minutes or even hours, depending on the refresh rate of the ticket management system or alarm system (again, for maths sake, let’s say 60 minutes). So, D+R is now 61 minutes. How long is P really going to hold? Could it be less than 30 minutes against a determined attacker? (Let’s assume P is 30 minutes for maths sake).

Let’s do the calculation for a pre-automation SOC (Security Operations Centre). P-(D+R)=E. E here is 31 minutes. How much damage can an attacker do in 31 minutes? Could they put a backdoor into your system? Can they download sensitive data to a remote system? Could they pivot to your monitoring system, and remove the logs that said they were in there?

If you consider how much smaller the D and R numbers become with an event driven SOAR (Security Orchestration and Automation Response) system – does that improve your P and E numbers? Consider that if you can get E to 0, this could be considered to be “A Secure Environment”.

Also, consider the fact that many of the tools we implement for security reduce D and R, but if you’re not monitoring the outputs of the Detection components, then your response time grows significantly. If your Detection component is misconfigured in that it’s producing too many False Positives (for example, “The Boy Who Cried Wolf“), so you don’t see the real incident, then your Response might only be when a security service notifies you that your data, your service or your money has been exposed and lost. And that wouldn’t be good now… Time to look into automation 😁

Featured image is “Swatch Water Store, Grand Central Station, NYC, 9/2016, pics by Mike Mozart of TheToyChannel and JeepersMedia on YouTube #Swatch #Watch” by “Mike Mozart” on Flickr and is released under a CC-BY license.

Building a simple CA for testing purposes

I recently needed to create a Certificate Authority with an Intermediate Certificate to test some TLS inspection stuff at work. This script (based on a document I found at jamielinux.com) builds a Certificate Authority and creates an Intermediate Certificate Authority using the root.

I’ve also done something similar with Ansible before, but I’ve not got that to hand :)

Late edit, 2019-08-21: Found it! Needs some tweaks to add the sub-CA or child certs, but so-far it would work :)

“code crunching” by “Ruben Molina” on Flickr

Getting Started with Terraform on AWS

I recently wrote a blog post about Getting Started with Terraform on Azure. You might have read it (I know I did!).

Having got a VM stood up in Azure, I wanted to build a VM in AWS, after all, it’s more-or-less the same steps. Note, this is a work-in-progress, and shouldn’t be considered “Final” – this is just something to use as *your* starting block.

What do you need?

You need an AWS account for this. If you’ve not got one, signing up for one is easy, but bear in mind that while there are free resource on AWS (only for the first year!), it’s also quite easy to suddenly enable a load of features that cost you money.

Best practice suggests (or rather, INSISTS) you shouldn’t use your “root” account for AWS. It’s literally just there to let you define the rest of your admin accounts. Turn on MFA (Multi-Factor Authentication) on that account, give it an exceedingly complex password, write that on a sheet of paper, and lock it in a box. You should NEVER use it!

Create your admin account, log in to that account. Turn on MFA on *that* account too. Then, create an “Access Token” for your account. This is in IAM (Identity and Access Management). These are what we’ll use to let Terraform perform actions in AWS, without you needing to actually “log in”.

On my machine, I’ve put the credentials for this in /home/<MYUSER>/.aws/credentials and it looks like this:

[default]
aws_access_key_id = ABC123DEF456
aws_secret_access_key = AaBbCcDd1234EeFf56

This file should be chmod 600 and make sure it’s only your account that can access this file. With this token, Terraform can perform *ANY ACTION* as you, including anything that charges you money, or creating servers that can mine a “cryptocurrency” for someone malicious.

I’m using Windows Subsystem for Linux (WSL). I’m using the Ubuntu 18.04 distribution obtained from the Store. This post won’t explain how to get *that*. Also, you might want to run Terraform on Mac, in Windows or on Linux natively… so, yehr.

Next, we need to actually install Terraform. Excuse the long, unwrapped code block, but it gets what you need quickly (assuming the terraform webpage doesn’t change any time soon!)

mkdir -p ~/bin
cd ~/bin
sudo apt update && sudo apt install unzip
curl -sLO $(curl https://www.terraform.io/downloads.html | grep "linux_amd64.zip" | cut -d\" -f 2) && unzip terraform*.zip && rm terraform*.zip && chmod 755 terraform

Starting coding your infrastructure

Before you can build your first virtual machine on AWS, you need to stand up the supporting infrastructure. These are:

  • An SSH Keypair (no password logins here!)
  • A VPC (“Virtual Private Cloud”, roughly the same as a VNet on Azure, or somewhat like a L3 switch in the Physical Realm).
  • An Internet Gateway (if your VPC isn’t classed as “the default one”)
  • A Subnet.
  • A Security Group.

Once we’ve got these, we can build our Virtual Machine on EC2 (“Elastic Cloud Compute”), and associate a “Public IP” to it.

To quote my previous post:

One quirk with Terraform, versus other tools like Ansible, is that when you run one of the terraform commands (like terraform init, terraform plan or terraform apply), it reads the entire content of any file suffixed “tf” in that directory, so if you don’t want a file to be loaded, you need to either move it out of the directory, comment it out, or rename it so it doesn’t end .tf. By convention, you normally have three “standard” files in a terraform directory – main.tf, variables.tf and output.tf, but logically speaking, you could have everything in a single file, or each instruction in it’s own file.

Getting Started with Terraform on Azure – Building the file structure

For the sake of editing and annotating the files for this post, these code blocks are all separated, but on my machine, they’re all currently one big file called “main.tf“.

In that file, I start by telling it that I’m working with the Terraform AWS provider, and that it should target my nearest region.

If you want to risk financial ruin, you can put things like your access tokens in here, but I really wouldn’t chance this!

Next, we create our network infrastructure – VPC, Internet Gateway and Subnet. We also change the routing table.

I suspect, if I’d created the VPC as “The Default” VPC, then I wouldn’t have needed to amend the routing table, nor added an Internet Gateway. To help us make the routing table change, there’s a “data” block in this section of code. A data block is an instruction to Terraform to go and ask a resource for *something*, in this case, we need AWS to tell Terraform what the routing table is that it created for the VPC. Once we have that we can ask for the routing table change.

AWS doesn’t actually give “proper” names to any of it’s assets. To provide something with a “real” name, you need to tag that thing with the “Name” tag. These can be practically anything, but I’ve given semi-sensible names to everything. You might want to name everything “main” (like I nearly did)!

We’re getting close to being able to create the VM now. First of all, we’ll create the Security Groups. I want to separate out my “Allow Egress Traffic” rule from my “Inbound SSH” rule. This means that I can clearly see what hosts allow inbound SSH access. Like with my Azure post, I’m using a “data provider” to get my public IP address, but in a normal “live” network, you’d specify a collection of valid source address ranges.

Last steps before we create the Virtual Machine. We need to upload our SSH key, and we need to find the “AMI” (AWS Machine ID) of the image we’ll be using. To create the key, in this directory, along side the .tf files, I’ve put my SSH public key (called id_rsa.pub), and we load that key when we create the “my_key” resource. To find the AMI, we need to make another data call, this time asking the AMI index to find the VM with the name containing ubuntu-bionic-18.04 and some other stuff. AMIs are region specific, so the image I’m using in eu-west-2 will not be the same AMI in eu-west-1 or us-east-1 and so on. This filtering means that, as long as the image exists in that region, we can use “the right one”. So let’s take a look at this file.

So, now we have everything we need to create our VM. Let’s do that!

In here, we specify a “user_data” file to upload, in this case, the contents of a file – CloudDev.sh, but you can load anything you want in here. My CloudDev.sh is shown below, so you can see what I’m doing with this file :)

So, having created all this lot, you need to execute the terraform workload. Initially you do terraform init. This downloads all the provisioners and puts them into the same tree as these .tf files are stored in. It also resets the state of the terraform discovered or created datastore.

Next, you do terraform plan -out tfout. Technically, the tfout part can be any filename, but having something like tfout marks it as clearly part of Terraform. This creates the tfout file with the current state, and whatever needs to change in the Terraform state file on it’s next run. Typically, if you don’t use a tfout file within about 20 minutes, it’s probably worth removing it.

Finally, once you’ve run your plan stage, now you need to apply it. In this case you execute terraform apply tfout. This tfout is the same filename you specified in terraform plan. If you don’t include -out tfout on your plan (or even run a plan!) and tfout in your apply, then you can skip the terraform plan stage entirely.

Once you’re done with your environment, use terraform destroy to shut it all down… and enjoy :)

Featured image is “code crunching” by “Ruben Molina” on Flickr and is released under a CC-ND license.

"Confused" by "CollegeDegrees360" on Flickr

Using AWSCLI on Ubuntu/Ubuntu-in-WSL

This is a brief note to myself (but might be useful to you)!

awscli (similar to the Azure az command) is packaged for Ubuntu, but the version which is in the Ubuntu 18.04 repositories is “out of date” and won’t work with AWS. You *actually* need to run the following:

sudo apt update && sudo apt install python3-pip -y && sudo -H pip3 install --upgrade awscli

If you’ve unfortunately already installed awscli from apt, do the following:

sudo apt remove awscli -y

Then, logout (for some reason, binary path caching is a thing now?) and log back in, and then run the above pip install line.

Solution found via this logged issue on the awscli git repo.

Featured image is “Confused” by “CollegeDegrees360” on Flickr and is released under a CC-BY-SA license.

"Hacker" by "The Preiser Project" on Flickr

What to do when a website you’ve trusted gets hacked?

Hello! Maybe you just got a sneeking suspicion that a website you trusted isn’t behaving right, perhaps someone told you that “unusual content” is being posted in your name somewhere, or, if you’re really lucky, you might have just had an email from a website like “HaveIBeenPwned.com” or “Firefox Monitor“. It might look something like this:

An example of an email from the service “Have I Been Pwned”

Of course, it doesn’t feel like you’re lucky! It’s OK. These things happen quite a lot of the time, and you’re not the only one in this boat!

How bad is it, Doc?

First of all, don’t panic! Get some idea of the scale of problem this is by looking at a few key things.

  1. How recent was the breach? Give this a score between 1 (right now) and 10 (more than 1 month ago).
  2. How many websites and services do you use this account on? Give this a score between 1 (right now) and 10 (OMG, this is *my* password, and I use it everywhere).
  3. How many other services would use this account to authenticate to, or get a password reset from? Give this a score between 1 (nope, it’s just this website. We’re good) and 10 (It’s my email account, and everything I’ve ever signed up to uses this account as the login address… or it’s Facebook/Google and I use their authentication to login to everything else).
  4. How much does your reputation hang on this website or any other websites that someone reusing the credentials of this account would get access to? Give this a score between 1 (meh, I post cat pictures from an anonymous username) and 10 (I’m an INFLUENCER HERE dagnamit! I get money because I said stuff here and/or my job is on that website, or I am publicly connected to my employer by virtue of that profile).
  5. (Optional) If this is from a breach notification, does it say that it’s just email addresses (score 1), or that it includes passwords (score 5), unencrypted or plaintext passwords (score 8) or full credit card details (score 10)?

Once you’ve got an idea of scale (4 to 40 or 5 to 50, depending on whether you used that last question), you’ve got an idea of how potentially bad it is.

Take action!

Make a list of the websites you think that you need to change this password on.

  1. Start with email accounts (GMail, Hotmail, Outlook, Yahoo, AOL and so on) – each email account that uses the same password needs to be changed, and this is because almost every website uses your email address to make a “password” change on it! (e.g. “Forgot your password, just type in your email address here, and we’ll send you a reset link“).
  2. Prominent social media profiles (e.g. Facebook, Twitter, Instagram) come next, even if they’re not linked to your persona. This is where your potential reputation damage comes from!
  3. Next up is *this* website, the one you got the breach notification for. After all, you know this password is “wild” now!

Change some passwords

This is a bit of a bind, but I’d REALLY recommend making a fresh password for each of those sites. There are several options for doing this, but my preferred option is to use a password manager. If you’re not very tech savvy, consider using the service Lastpass. If you’re tech savvy, and understand how to keep files in sync across multiple devices, you might be interested in using KeePassXC (my personal preference) or BitWarden instead.

No really. A fresh password. Per site. Honest. And not just “MyComplexPassw0rd-Hotmail” because there are ways of spotting you’ve done something like that, and when they come to your facebook account, they’ll try “MyComplexPassw0rd-Facebook” just to see if it gets them in.

ℹ️ Using a password manager gives you a unique, per-account password. I just generated a fresh one (for a dummy website), and it was 2-K$F+j7#Zz8b$A^]qj. But, fortunately, I don’t have to remember it. I can just copy and paste it in to the form when I need to change it, or perhaps, if you have a browser add-on, that’ll fill it in for you.

Making a list, and checking it twice!

Fab, so you’ve now got a lovely list of unique passwords. A bit like Santa, it’s time to check your list again. Assume that your list of sites you just changed passwords for were all compromised, because someone knew that password… I know, it’s a scary thought! So, have a look at all those websites you just changed the password on and figure out what they have links to, then you’ll probably make your list of things you need to change a bit bigger.

Not sure what they have links to?

Well, perhaps you’re looking at an email account… have a look through the emails you’ve received in the last month, three months or year and see how many of those come from “something” unique. Perhaps you signed up to a shopping site with that email address? It’s probably worth getting a password reset for that site done.

Perhaps you’re looking at a social media site that lets you login to other services? Check through those other services and make sure that “someone” hasn’t allowed access to a website they control. After all, you did lose access to that website, and so you don’t know what it’s connected to.

Also, check all of these sites, and make sure there aren’t any unexpected “active sessions” (where someone else is logged into your account still). If you have got any, kick them out :)

OK, so the horse bolted, now close the gate!

Once you’ve sorted out all of these passwords, it’s probably worth looking at improving your security in general. To do this, we need to think about how people get access to your account. As I wrote in my “What to do when your Facebook account gets hacked?” post:

What if you accidentally gave your password to someone? Or if you went to a website that wasn’t actually the right page and put your password in there by mistake? Falling prey to this when it’s done on purpose is known as social engineering or phishing, and means that someone else has your password to get into your account.

A quote from the “Second Factor” part of “What to do when your Facebook account gets hacked?

The easiest way of locking this down is to use a “Second Factor” (sometimes abbreviated to 2FA). You need to give your password (“something you know”) to log into the website. Now you also need something separate, that isn’t in the same store. If this were a physical token (like a SoloKey, Yubikey, or a RSA SecurID token), it’d be “something you have” (after all, you need to carry around that “token” with you), but normally these days it’s something on your phone.

Some places will send you a text message, others will pop up an “approve login” screen (and, I should note, if you get one and YOU AREN’T LOGGING IN, don’t press “approve”!), or you might have a separate app (perhaps called “Google Authenticator”, “Authy” or something like “Duo Security”) that has a number that keeps changing.

You should then finish your login with a code from that app, SMS or token or reacting to that screen or perhaps even pressing a button on a thing you plug into your computer. If you want to know how to set this up, take a look at “TwoFactorAuth.org“, a website providing access to the documentation on setting up 2FA on many of the websites you currently use… but especially do this with your email accounts.

Featured image is “Hacker” by “The Preiser Project” on Flickr and is released under a CC-BY license.

JonTheNiceGuy and "The Chief" Peter Bleksley at BSides Liverpool 2019

Review of BSIDES Liverpool 2019

I had the privilege today to attend BSIDES Liverpool 2019. BSIDES is a infosec community conference. The majority of the talks were recorded, and I can strongly recommend making your way through the content when it becomes available.

Full disclosure: While my employer is a sponsor, I was not there to represent the company, I was just enjoying the show. A former colleague (good friend and, while he was still employed by Fujitsu, an FDE – so I think he still is one) is one of the organisers team.

The first talk I saw (aside from the welcome speech) was the keynote by Omri Segev Moyal (@gelossnake) about how to use serverless technologies (like AWS Lambda) to build a malware research platform. The key takeaway I have from that talk was how easy it is to build a simple python lambda script using Chalice. That was fantastic, and I’m looking forward to trying some things with that service!

For various reasons (mostly because I got talking to people), I missed the rest of the morning tracks except for the last talk before lunch. I heard great things about the Career Advice talk by Martin King, and the Social Engineering talk by Tom H, but will need to catch up on those on the videos released after.

Just before lunch we received a talk from “The Chief” (from the Channel 4 TV Series “Hunted”), Peter Bleksley, about an investigation he’s currently involved in. This was quite an intense session, and his history (the first 1/4 of his talk) was very interesting. Just before he went in for his talk, I got a selfie with him (which is the “Featured Image” for this post :) )

After lunch, I sat on the Rookies Track, and saw three fantastic talks, from Chrissi Robertson (@frootware) on Imposter Syndrome, Matt (@reversetor) on “Privacy in the age of Convenience” (reminding me of one of my very early talks at OggCamp/BarCamp Manchester) and Jan (@janfajfer) about detecting data leaks on mobile devices with EVPN. All three speakers were fab and nailed their content.

Next up was an unrecorded talk by Jamie (@2sec4u) about WannaCry, as he was part of the company who discovered the “Kill-Switch” domain. He gave a very detailed overview of the timeline about WannaCry, the current situation of the kill-switch, and a view on some of the data from infected-but-dormant machines which are still trying to reach the kill-switch. A very scary but well explained talk. Also, memes and rude words, but it’s clearly a subject that needed some levity, being part of a frankly rubbish set of circumstances.

After that was a talk from (two-out-of-six of) The Beer Farmers. This was a talk (mostly) about privacy and the lack of it from the social media systems of Facebook, Twitter and Google. As I listen to The Many Hats Club podcast, on which the Beer Farmers occasionally appear, it was a great experience matching faces to voices.

We finished the day on a talk by Finux (@f1nux) about Machiavelli as his writings (in the form of “The Prince”) would apply to Infosec. I was tempted to take a whole slew of photos of the slide deck, but figured I’d just wait for the video to be released, as it would, I’m sure, make more sense in context.

There was a closing talk, and then everyone retired to the bar. All in all, a great day, and I’m really glad I got the opportunity to go (thanks for your ticket Paul (@s7v7ns) – you missed out mate!)

"Feb 11" by "Gordon" on Flickr

How to quickly get the next SemVer for your app

SemVer, short for Semantic Versioning is an easy way of numbering your software versions. They follow the model Major.Minor.Patch, like this 0.9.1 and has a very opinionated view on what is considered a Major “version bump” and what isn’t.

Sometimes, when writing a library, it’s easy to forget what version you’re on. Perhaps you have a feature change you’re working on, but also bug fixes to two or three previous versions you need to keep an eye on? How about an easy way of figuring out what that next bump should be?

In a recent conversation on the McrTech slack, Steven [0] mentioned he had a simple bash script for incrementing his SemVer numbers, and posted it over. Naturally, I tweaked it to work more easily for my usecases so, this is *mostly* Steven’s code, but with a bit of a wrapper before and after by me :)

Late Edit: 2022-11-19 ictus4u spotted that I wasn’t handling the reset of PATCH to 0 when MINOR gets a bump. I fixed this in the above gist.

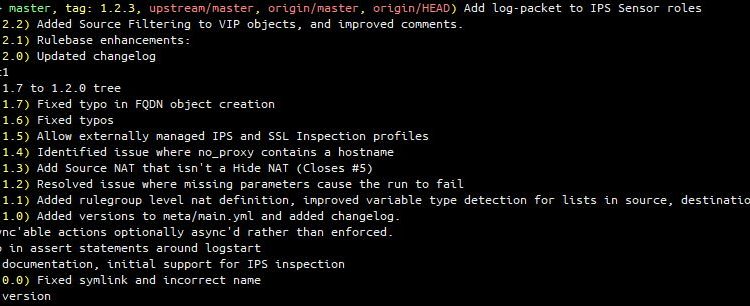
So how do you use this? Dead simple, use nextver in a tree that has an existing git tag SemVer to get the next patch number. If you want to bump it to the next minor or major version, try nextver minor or nextver major. If you don’t have a git tag, and don’t specify a SemVer number, then it’ll just assume you’re starting from fresh, and return 0.0.1 :)

Want to find more cool stuff from the original author of this work? Here is a video by the author :)

Featured image is “Feb 11” by “Gordon” on Flickr and is released under a CC-BY-SA license.