I’ve been looking at mapping out my network for a while, to try to understand where latency and instability was coming from. This post encourages me to take another look at the issue from, perhaps, another angle. Thanks for the info Stuart!
About a year ago, Bill (NE4RD) and Russ (K5TUX) were talking about Ansible, and I spotted a couple of… maybe misunderstandings, maybe mistakes, or perhaps just where they misspoke about it? Whatever it was at the time, I offered to talk about Ansible, and then scheduling became a major issue. We tried to meet up online a few times over the year and this was the first opportunity I had to actually talk to them.
In this conversation, I talk about what Ansible is and how it works. I go into quite a bit of depth on how you would install packages, make file changes, and then explain how to use, obtain and create Ansible Roles. I also go into Handlers, local and remote Inventories, Ansible Tower and AWX.
When I was talking about Ansible playbooks and tasks, particularly towards the beginning of the podcast, I was looking at the code samples I put together for the Admin Admin Podcast Deep Dive into Ansible. The custom OpenStack modules I referenced in the show were written by my friend and colleague, Nick Cross.
I get a bit of stick for my pronunciation of Inventories, which is … fun :) As usual, I “Um” and “Ah” quite a bit. It becomes exceptional apparent how much work Dave Lee does for me in my usual Admin Admin Podcast!
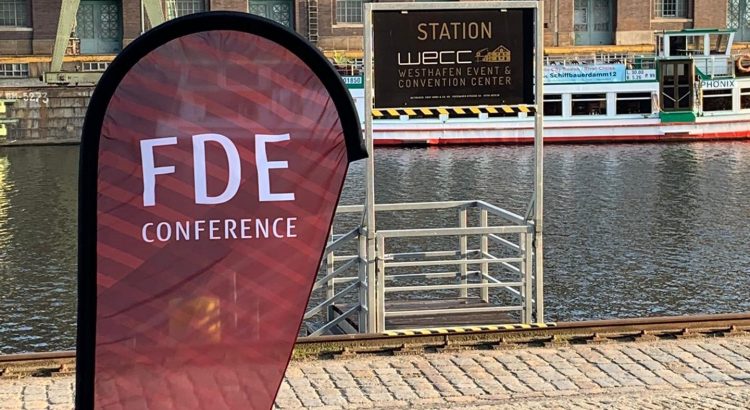
Last year, I was very fortunate be selected as a Fujitsu Distinguished Engineer (FDE), and earlier this year I was advised that my membership of that group was renewed (this is not a forgone conclusion – it’s something you need to achieve each year!)
Some FDEs have occasional local meet-ups, but our whole group’s “big do”, when we induct new members into the group, the “FDE Conference” was held this year (#FDEConf2019 on Social Media) at WECC, Berlin.
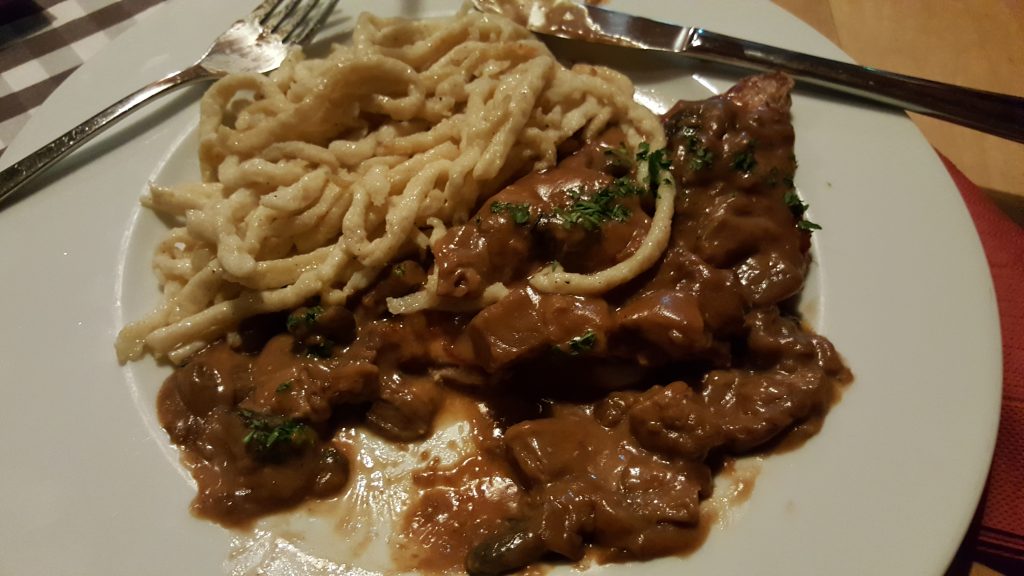
The FDE Conference spans two days (plus travelling) and this year was no exception. I travelled from Manchester with Associate FDE, Lucy McGrother, and stayed at the Ellington Hotel in Berlin. On arrival, several of the FDEs who were at the Ellington created a chat group on Linked In and organised going out for dinner at the Bavarian Berlin restaurant (which was really tasty!)
I’d already started eating before I remembered to take a photo! D’oh!I did better with Desert!
The following day, the first “real” day of the event, a few of us caught an Uber to the conference (I’ve never used Uber before, but was very impressed with the UX of it!) where we discovered that a “Uber X” (the bigger ones) for 6 people can’t fix 6 people into! I had my knees around my ears, which was fun!
Welcome speech delivered by the ever enthusiastic Joseph Reger, and then we were off to the “Breakout Sessions”!
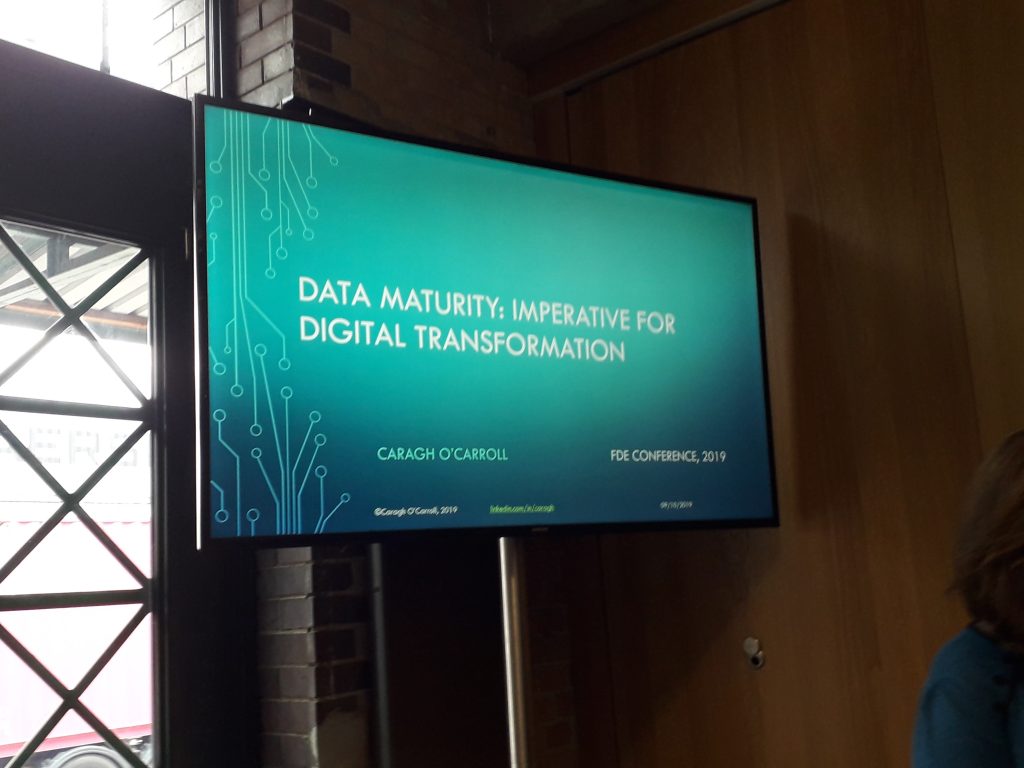
The first talk I attended was by Caragh O’Carroll, on Data Maturity. I’d had a bit of a preview of the talk a week or so before the talk was actually given (a dry-run, so to speak), and it was great to hear that I’d literally had 10% of what would actually be in the talk. Some of my suggestions had been incorporated, and the whole room was up and moving around for one piece of the story half way through. It was really energising!
After that, I was on stage. Because Joseph had run over slightly, the speaker in the slot before me had timed his talk to the minute and so overran into the “moving around” block. I was slightly nervous as this meant my timing could have gone out (but as it turned out, I nailed it to the minute!) I’ve written up some notes on my talk already elsewhere on this blog, so I won’t go into too much detail, aside from to add that after I wrote that post, I was told that people were being turned away from the door, so that’s a bit of an ego boost :)
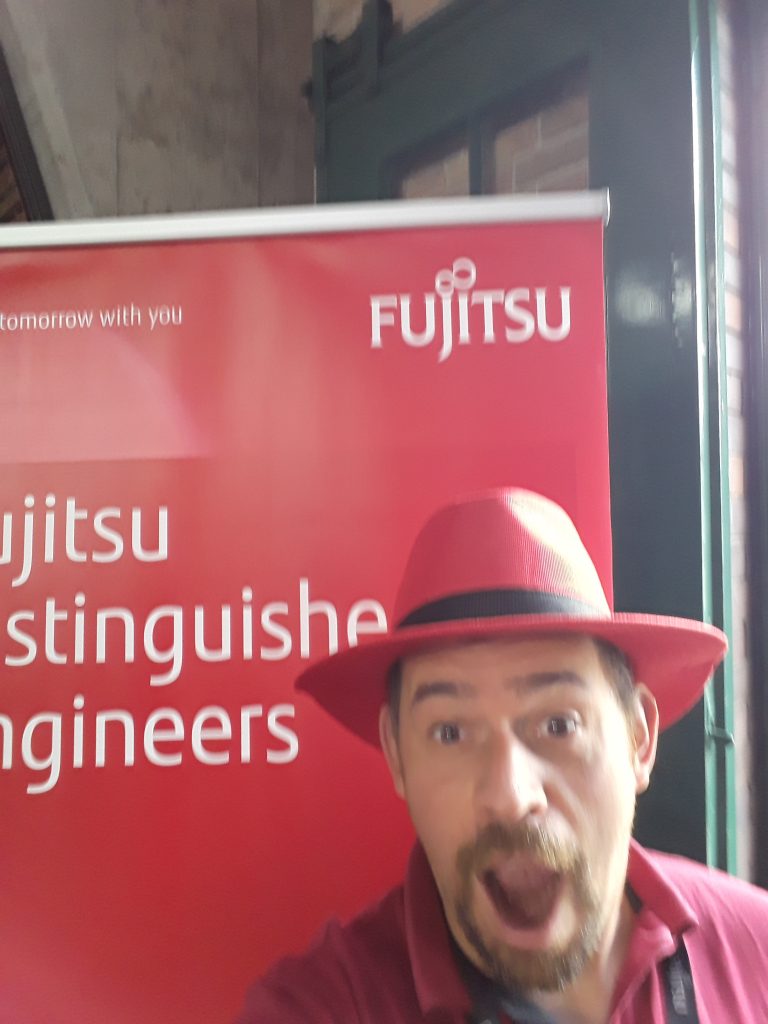
I’d intended next to attend a talk on Microservices Architectures, but unfortunately the room was rammed (it wasn’t even “standing room only” – they’d run out of room for people to stand!) Instead, I went away and spoke to some of the vendors. RedHat were there, dispensing Red Fedora hats to anyone who deposited a “contact card”. Yep, I went for it!
After I received the hat, it didn’t come off… until I got home and my wife’s raised eyebrow suggested it wouldn’t have a long life if it remained there…
I also spoke to Pluralsight, a training vendor I’d previously sidelined in favour of another platform, but who appeared to have a much broader scope of content… so they convinced me to give it another try.
I spoke briefly to SUSE, but more-so because I wanted to find out how people I knew working for SUSE were doing than to find out about what SUSE were offering. I’m reasonably well switched on with SUSE as a project and a company so I didn’t feel like I needed to get much from them. Also, sadly, none of the people who were there knew the people I was talking about, which wasn’t a good start! :)
I also spent a couple of minutes talking to a partner I’ve had reasonably close dealings with, Symantec, and agreed to a conversation in the next couple of months. Again, it wasn’t a long talk, as I knew the product set and context quite well.
The other sponsors had interesting content, but generally didn’t cover areas that overlap with my work or my personal interests, so, while I interacted with them, I don’t recall much of what was discussed.
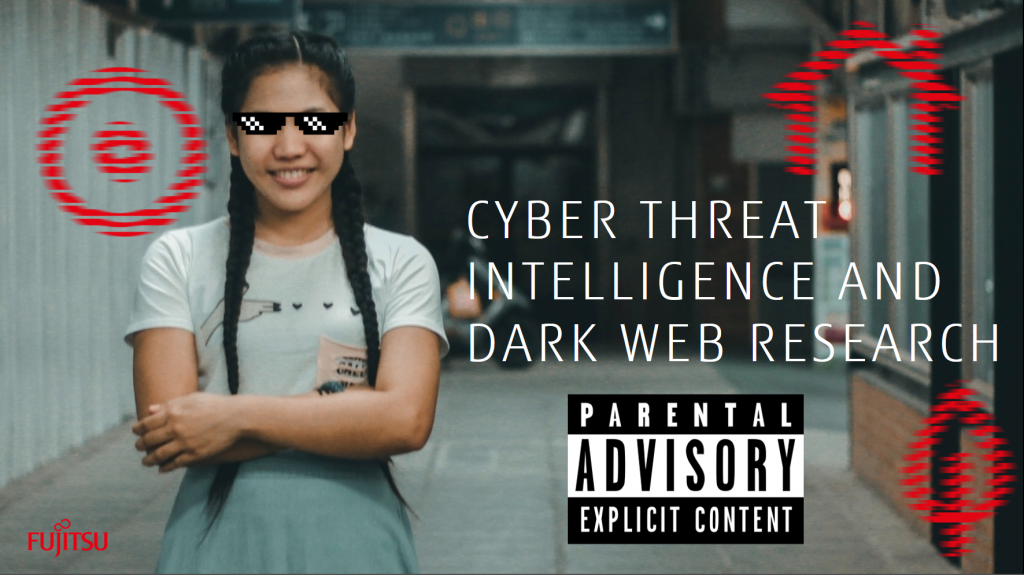
The last break-out session of the day was Scott Pendlebury and Dave Markham‘s session on “Cyber Threat Intelligence and Dark Web Research” – a cumulative talk on the research they’ve done into various aspects of their jobs in the Advanced Threat Centre. This was a very in-depth talk, covering a large number of subjects in a very short space of time. Several people I spoke to after their talk were very interested in lots of little aspects of their talk… because it touched so many areas!
All Meme’d up, Dave and Scott’s front slide was my favourite one!
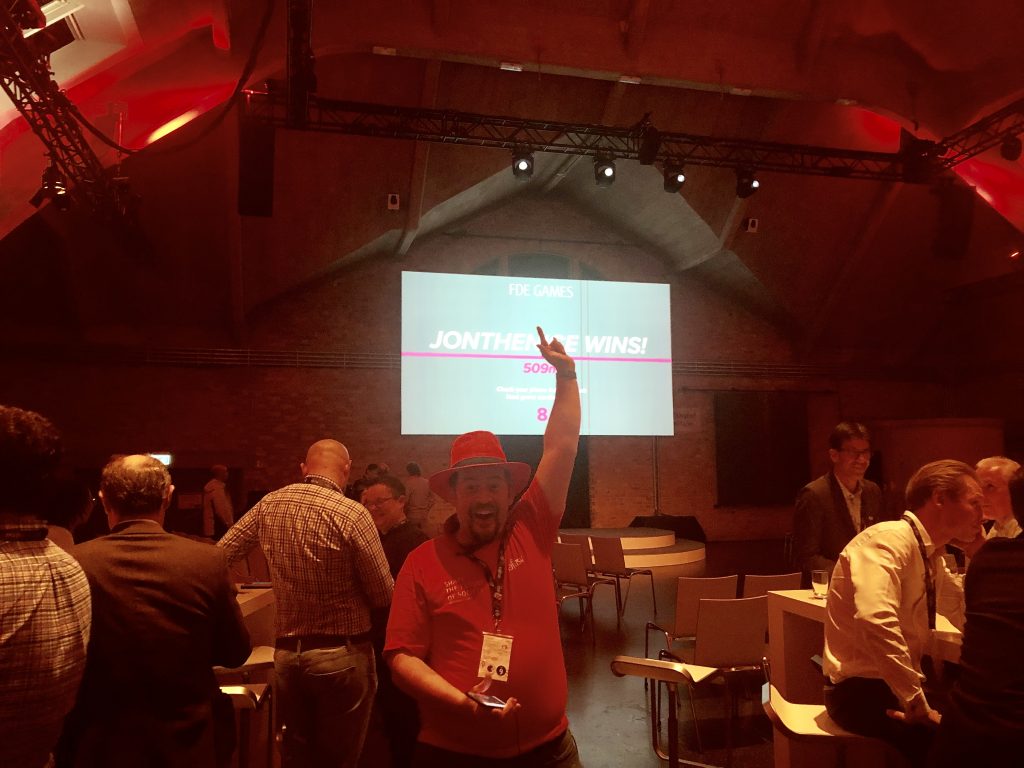
There was a closing speech for the day, and then the rooms were re-jigged for the evening games and food. In one room was a big-screen, phone controlled, multi-player “Pong” game (hosted by Piing) and a spin of “Cards Against Humanity” called “Cards Against Complexity” (hosted by Citrix). Both were fun, but what was much MORE fun was the game after Pong – a big-screen, phone controlled, multi-player buggy racing game. The first round, naturally, I won!
Me winning the first round of Buggy Racing. I didn’t manage to achieve *that* feat again! Photo courtesy of Caragh, who spotted me celebrating and snapped it!
Following the games, I went back to the hotel with a couple of the other FDEs (discovering how not-Uber, non-Uber services are), and had a couple of drinks in the bar. Bed and awake for breakfast the following morning.
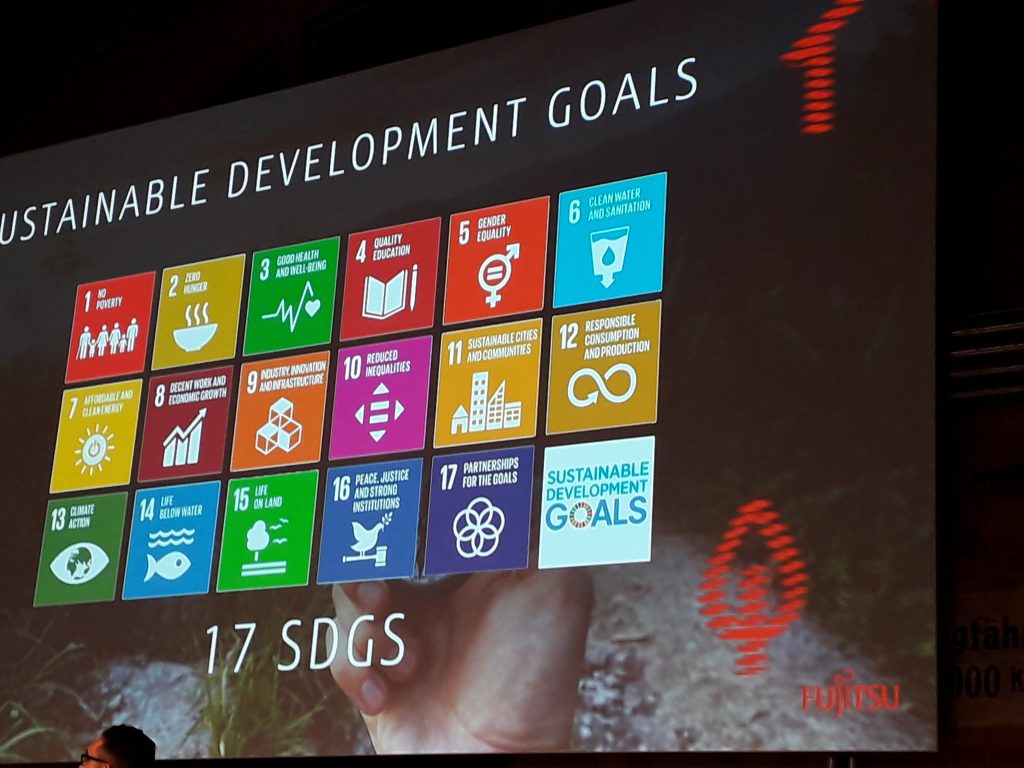
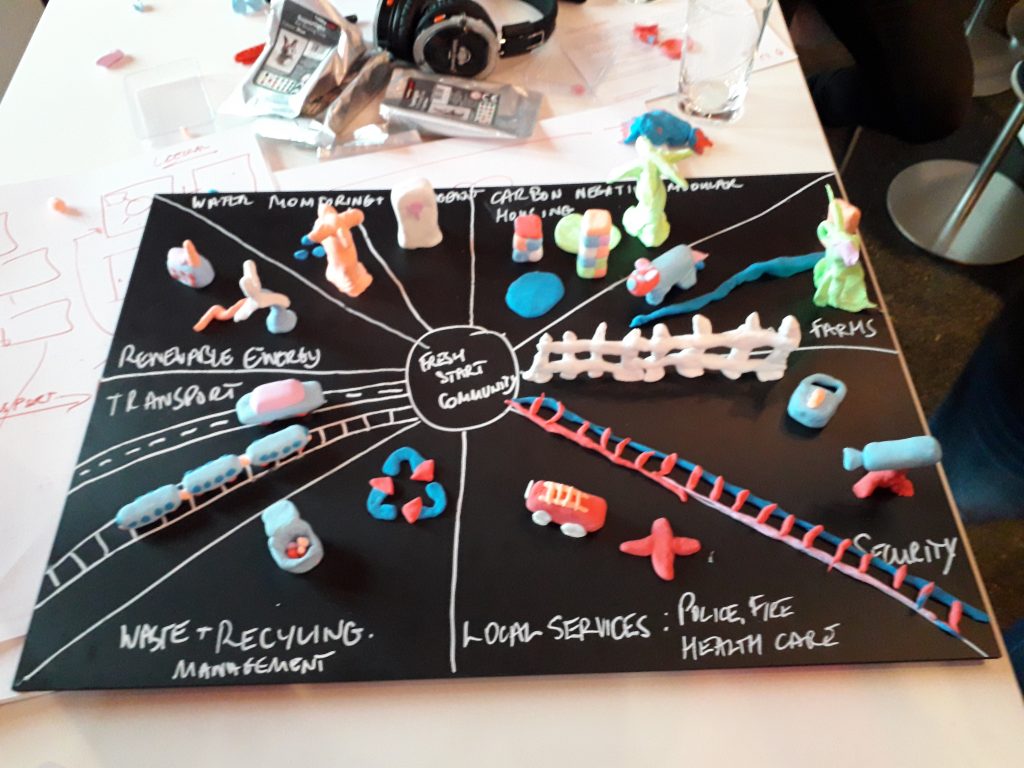
Day two was about the UN’s 17 Sustainable Development Goals, and what ideas we, as a company, could come up with to help progress those goals.
A slide from the morning, showing the Sustainable Development Goals
We had talks from three different individuals who are helping to steer the conversation. Neil Bennett, Dr. Leonardo Gheller Alves (link to his latest project) and Thomas Deloison. Our speakers, talking over individual radio channels to tuned headphones, told us about how we could impress them with our projects… and talking of the projects, there were three “target” cities – Berlin (naturally), Bangalore and Tokyo (also, naturally). Each city was prompted to look at three areas of interest – Homes & Communities, Transport and Environment. Each city/interest set was split into three groups (numbered 1-9), each of whom were to approach the subject and come up with a project to solve an issue in their chosen area.
The process, orchestrated by the co-creation conductor – Jo Box, took us on a journey, looking at the city and it’s issues, pushing us into looking at how those issues impact a single member of that city and, then pulling us into how we might help that person improve their lives.
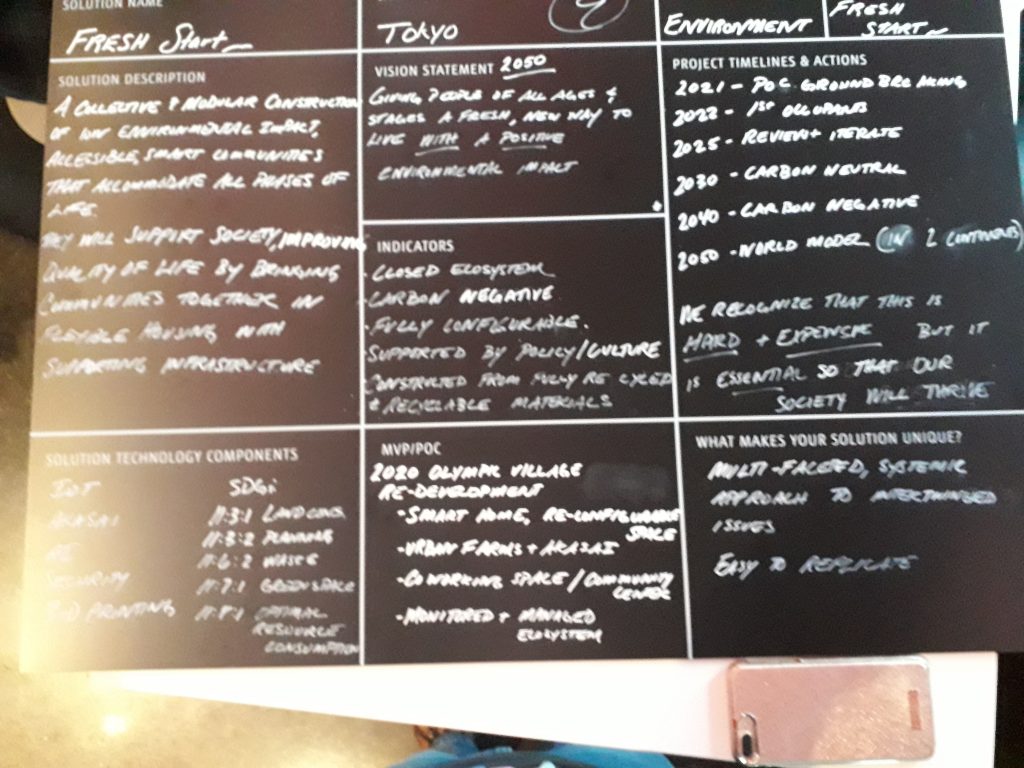
My team, Tokyo 9 (dealing with “Environment”) considered the path of an elderly Japanese lady “Mikika” and thought about what issues she had. We explored the fact that she lived in a “Walk-up” apartment, and probably was concerned with the fates of all of her family (including her own brother, as well as their children and grandchildren). We expanded on that to work out what things in Mikika’s environment would cause her issues, and how we might help to solve those issues… As it worked out, we ended up crossing from “Environment” into “Housing”, as we imagined building a new town on a brownfield environment inside Tokyo, and how that town might be better engineered to support family lives for all stages of life, from rearing children near home, to supporting young adults in their quest for a career, and later to the care and support of elderly family members who might be living nearby.
Our final presentation boardThe physical view of our final presentation – what makes up our project?
Sadly, we didn’t win, but I loved being a part of the team. I have to give lots of respect to all my team members, but particularly to Liz Parnell, a recent member of the FDE community and Sean Barker. These were both our voices for the pitches to our fellow Tokyo teams, and also in our final pitch to the judges.
Following the pitches, we went off-site for a walk around (I managed to do some tourist-y shopping for the family and then chatted with some other FDEs at the “Other” hotel) before heading back for drinks and dinner.
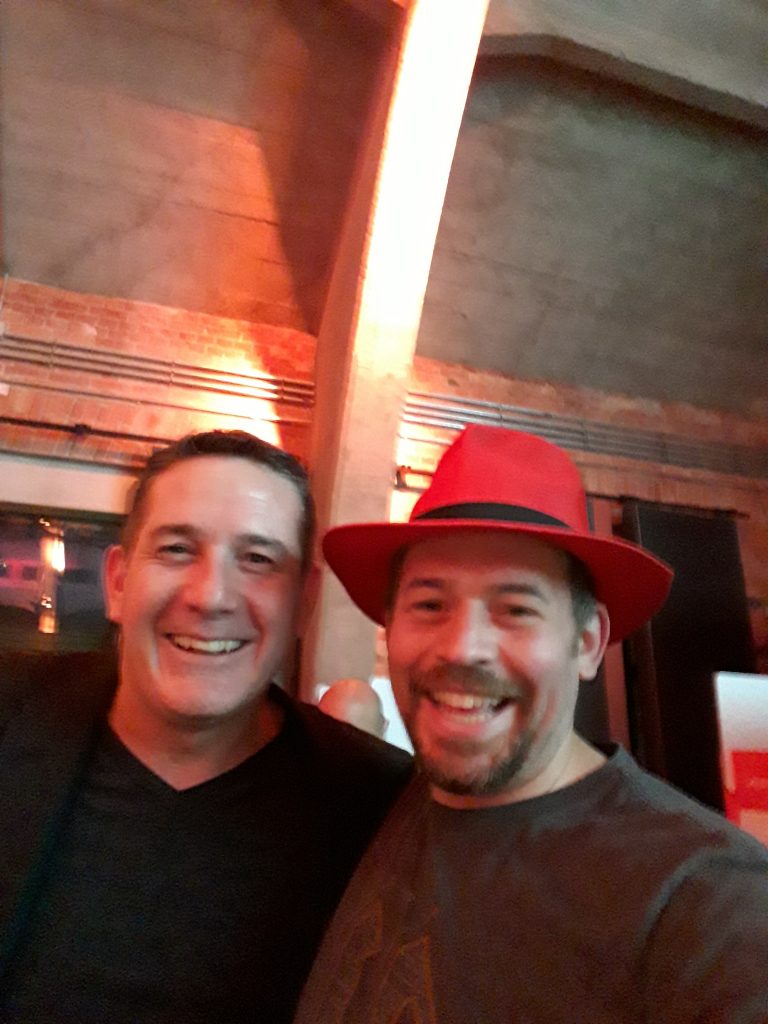
During the dinner, I was approached by someone from the RedHat stand, who asked if they could borrow my hat. I was, by this point, the only person at the event still wearing my coveted red fedora. I finally let him borrow my hat, only to find it on the head of Dr. Joseph!
In the latter part of the dinner were speeches from members of the Management Team, essentially reminding us that we’re amazing and need to keep being so great. I subsequently managed to talk to my local management representative – Tim White, with whom I got a great selfie!
Yes, I’ve got my red fedora back by now!
We also saw all the new FDEs and Associate FDEs being inducted in, and also those staff who were awarded for significant internal research papers.
And then, we all had a lot more drinks, and when the bar shut down, we returned to the bar at the hotel, and had some more.
A reasonable handful of us ended up on the same flight back to Manchester the following day, so it was nice to catch up with a few of the FDEs on the return.
I should say though, it took me a few days to recover! Hence, this post only arriving now… so, erm, perhaps that’ll teach me for taking my own vodka to a venue that’s only serving beer and wine? (#ThePerilsOfOnlyDrinkingSpirits)
Nah, didn’t think so! 😁
If you work for Fujitsu, and want to know more about the FDE program, want to become an FDE or just want to know more about what I do for Fujitsu, please get in touch. I’m in the Address Book and I am frequently on our IM system. I’d be more than happy to talk with you!
If you don’t work for Fujitsu, but would be interested, start by looking at the roles available in your region (e.g. via this page). Each region may have a different recruiting tool (that’s big business for you!) but if you spot something and want to know whether it might be the right sort of role for you, you can contact me via one of the options up the top of my blog and I’d be glad to try to help you, if it’s right for you!
Notes: FDE is the abbreviation of “Fujitsu Distinguished Engineer”, an internal program at Fujitsu. Each year they hold a conference for all the FDEs to attend. This is my second year as an FDE, and the first where I’m presenting.
This slide deck was massively re-worked, following some excellent feedback at BCMcr9. I then, unusually for me, gave the deck two separate run through sessions with colleagues, and tweaked it following each run.
This deck includes Creative Commons licensed images (which is fairly common for my slide decks), but also, in a new and unusual step for me, includes meme gifs from Giphy. I’m not really sure about whether this is step forward or back for me, as I do prefer permissive licenses. That said, the memes seem to be more engaging – particularly as they’re animated. I’ve never had someone comment on the images in my slide deck until I did the first run through with the memes in with a colleague, and then again when I ran it a second time they particularly brought up the animated images… so the memes are staying for now.
I’m also slightly disappointed with myself that I couldn’t stick to the “One Bold Word” style of presentations (the format preferred by Jono Bacon), and found myself littering more and more content into the screen. I was, however, proud of myself for including the “Tweetable content” slide, as recommended, I think, by Lorna Mitchell (@LornaJane). I also included a “Your next steps” slide, as recommended by Andy Bounds (although I suspect he’d be disappointed with the “Questions?” slide at the end!)
This deck required quite a bit of research on my part. I’d never written CloudFormations (CF) before, and I’d only really copied-and-pasted Terraform (I refer to it as TF which probably isn’t right) before. I wrote a full stack of machines in CF, Azure Resource Manager (ARM) for the native technologies, as well as the same stacks in both TF and Ansible for both Azure and AWS. I also looked into how to deploy the CF and ARM templates with both Terraform and Ansible, and finally how to use TF from Ansible. I already knew how to run Ansible from within userdata/customdata arguments in AWS and Azure, but I included it and tested it as part of the deck too.
I had some amazing feedback from the audience and some great questions asked of me. I loved the response from the audience to some of my GIFs (although one comment that was made was that I need to stop the animations after the first run!)
Following the session, as I’d hoped, it brought a few of the fellow attendees to the forefront to ask if we can talk further about the subject and I would encourage you, if you are someone who uses these tools to give me a shout – I want to do more and find out about your projects, processes and tools!
My intention is to start using this slide deck at meet-ups in the Greater Manchester area, hopefully without having to re-write it that much!
BarCamp Manchester 9 (#BcMcr9) is a BarCamp style Unconference. It was held in the offices of Auto Trader in the centre of Manchester. It was a two day event, however, I was unable to attend the Saturday. Sundays are usually quieter days, and apparently the numbers were approximately half of the peak of Saturday on the Sunday.
Lunch was provided by Auto Trader. The day was split into 7 slots, or sessions, running for 25 minutes each, with 5 minutes between slots to change rooms. There were three theatre layout rooms, each with a projector, and one room with soft chairs around the edges.
There and Back Again/How The Internet Works
Format: Presentation with slides. 30ish attendees.
Slot: Slot 1 Sunday 11:00-11:25
Notes: This slide deck was reused from when I delivered it in 2012. Some stuff had changed (the prevalence of WiFi being one, CAT5e being referenced raised some giggles), but most had not.
There were some comments raised during the talk about the slides, but nothing significant (mostly by network engineers, commenting on things like routing a local network. Ugh.)
Following the talk, someone came up to suggest some changes (primarily that the slides need to link back to the graphics created). Someone else noted that there were too many acronyms that should probably have been explained. As such, this deck is likely to change and be published here at some point soon.
Format: Presentation with slides. 8 attendees, reduced to 4 half way through.
Slot: Slots 5 and 6 Sunday 14:00-14:55
Notes: This was a trial run of my talk for the Fujitsu FDE Conference I’m attending in a couple of weeks. The audience were notified as such. I took two slots on the “grid”, and half way through my session, half the audience walked out.
Following the talk, someone came and suggested some changes, which I’ll be implementing.
The slides for this talk are still being developed and will be shared after the FDE conference on this site.
Decentralised Social Media? – Secure Scuttlebutt
Format: Conversation with a desktop client application (Patchwork) loaded on the projector, and the Google Play entry for Manyverse on a browser tab. 3 attendees.
Slot: Slot 7 (last slot of the day) Sunday 15:00-15:25
Notes: This was an unplanned session, and probably should have been run earlier in the day. The audience members were very interactive, and asked lots of sensible questions.
Did you come to my talk at #BcMcr9 about #SecureScuttleButt? If you run a SSB client (patchwork, patchbay, patchfox or manyverse) and want to follow me, I’m @p3gu8eLHxXC0cuvZ0yXSC05ZROB4X7dpxGCEydIHZ0o=.ed25519 and @3SEA7qNZQPiYFCzY6K57f0LTc9l+Bk6cewQc6lbs/Ek=.ed25519
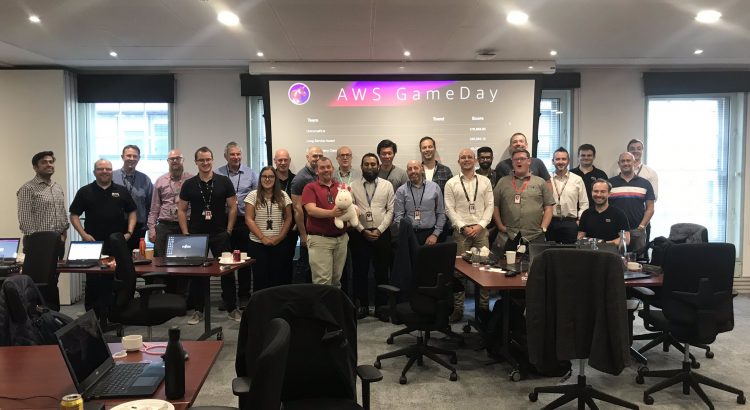
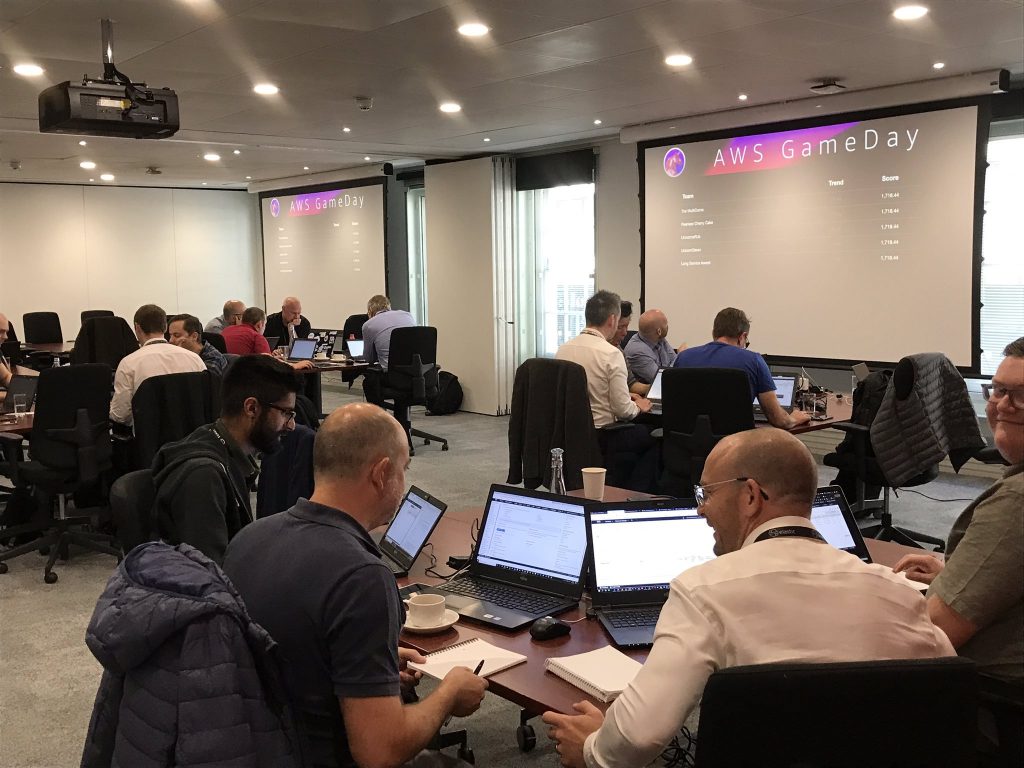
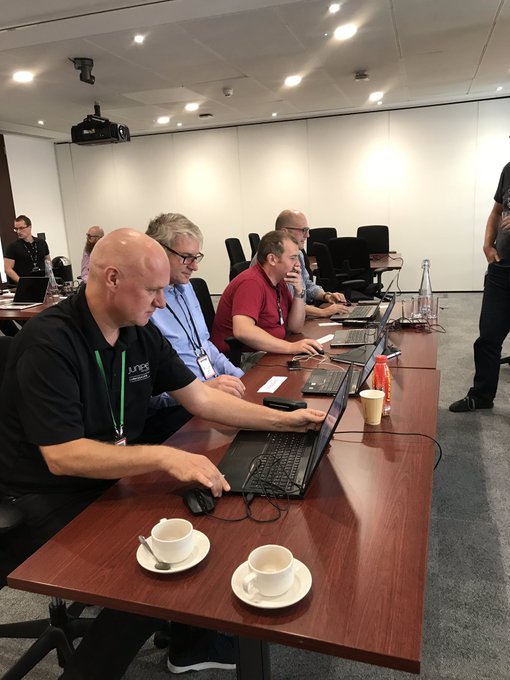
I was invited, through work, to participate in an AWS tradition – the AWS Game Day. This event was organised by my employer for our internal staff to experience a day in the life of a fully deployed AWS environment… and have some fun with it too. The AWS Game Day is a common scenario, and if you’re lucky enough to join one, you’ll probably be doing this one… As such, there will be… #NoSpoilers.
A Game Day (sometimes disambiguated as an “Adversarial Game Day”, because of sporting events) is a day where you either have a dummy environment, or, if you have the scale, a portion of your live network is removed from live service and used as a training ground. In this case, AWS provided a specific dummy environment “Unicorn.Rentals”, and all the attendees are the new recruits to the DevOps Team… Oh, and all the previous DevOps team members had just left the company… all at once.
Attendees were split into teams of four, and each team had a disparate background.
We’re given access to;
Our login panel. This gives us our score, our trending increase or decrease in score over the last “period” (I think it was 5 minutes), our access to the AWS console, and a panel to update the CNAME for the DNS records.
AWS Console. This is a mostly unrestricted account in AWS. There are some things we don’t get access to – for example, we didn’t get the CloudFormation Template for setting up the game day, and we couldn’t make changes to the IAM environment at all. Oh, and what was particularly frustrating was not being able to … Oh yes, I forgot, #NoSpoilers ;)
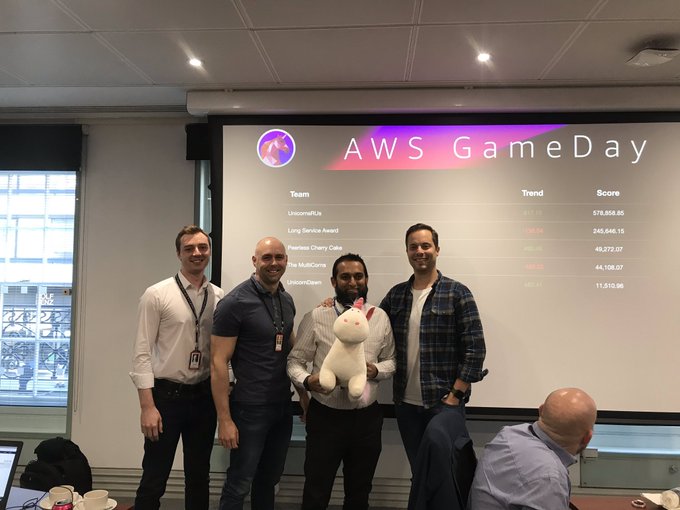
A central scoreboard of all the teams
A running tally of how we were scored
Each web request served under X seconds received one score
Each request served between X and Y seconds received another score,
Each request served over Y seconds received a third score.
Failing to respond to a request received a negative score.
Infrastructure costs deducted points from the score (to stop you just putting stuff at ALL THE SERVERS, ALL THE TIME).
The outgoing DevOps team’s “runbook”. Not too dissimilar to the sort of documentation you write before you go on leave. “If this thing break, run this or just reboot the box”, “You might see this fail with something like this message if the server can’t keep up with the load”. Enough to give you a pointer on where to look, not quite enough to give you the answer :)
The environment we were working on was, well, relatively simple. An auto-scaling web service, running a simple binary on an EC2 instance behind a load balancer. We extended the reach of services we could use (#NoSpoilers!) to give us greater up-time, improved responsiveness and broader scope of access. We were also able to monitor … um, things :) and change the way we viewed the application.
I don’t want to give too many details, because it will spoil the surprises, but I will say that we learned a lot about the services in AWS we had access to, which wasn’t the full product set (just “basic” AWS IaaS tooling).
When the event finished, everyone I spoke to agreed that having a game day is a really good idea! One person said “You only really learn something when you fix it! This is like being called out, without the actual impact to a customer” and another said “I’ve done more with AWS in this day than I have the past couple of months since I’ve been looking at it.”
And, as you can probably tell, I agree! I’d love to see more games days like this! I can see how running something like this, on technology you use in your customer estate, can be unbelievably powerful – especially if you’ve got a mildly nefarious GM running some background processes to break things (#NoSpoilers). If you can make it time-sensitive too (“you’ve got one day to restore service”, or like in this case, “every minute we’re not selling product, we’re losing points”), then that makes it feel like you’ve been called out, but without the stress of feeling like you’re actually going to lose your job at the end of the day (not that I’ve ever actually felt like that when I’ve been called out!!)
Anyway, massive kudos to our AWS SE team for delivering the training, and a huge cheer of support to Sara for getting the event organised. I look forward to getting invited to a new scenario sometime soon! ;)
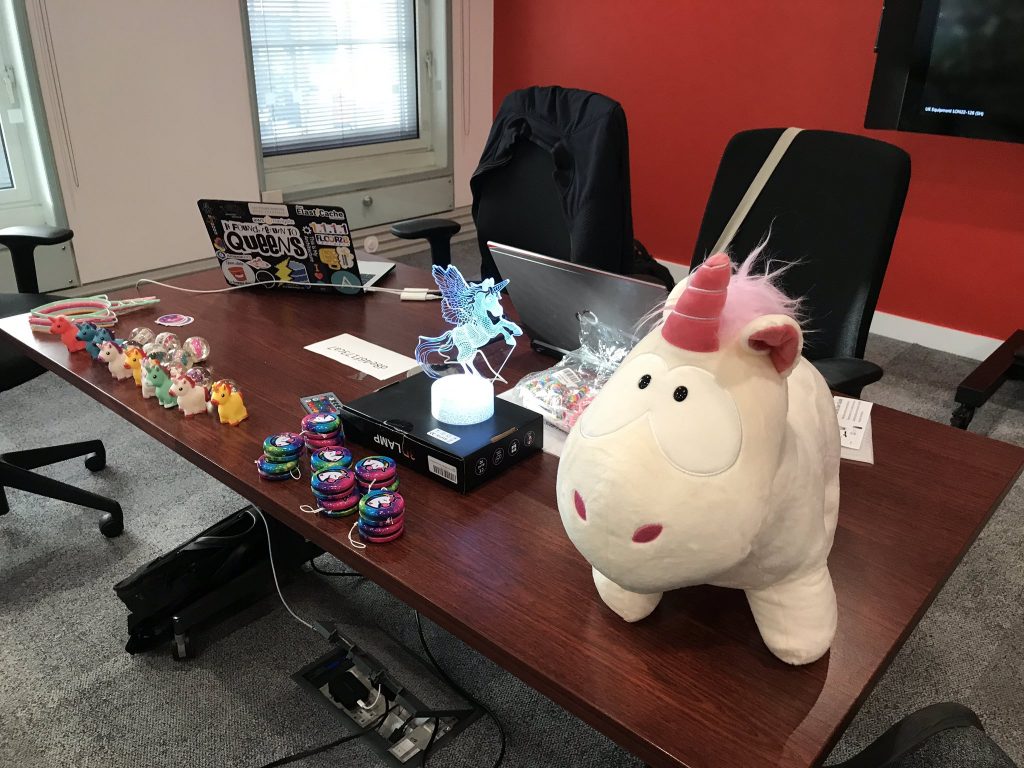
Here are some pictures from the event!
The teams get to know each other, and we find out about the day ahead! Picture by @Fujitsu_FDE.Our team, becoming a team by changing the table layout! It made a difference, we went to the top of the leader board for at least 5 minutes! Picture by @Fujitsu_FDE.The final scores. Picture by @Fujitsu_FDEOur lucky attendees got to win some of these items! Picture by @Fujitsu_FDE“Well Done” (ha, yehr, right!) to the winning team (“FIX!”) “UnicornsRUs”. Picture by @Fujitsu_FDE.
The featured image is “AWS Game Day Attendees” by @Fujitsu_FDE.
I’m still digging into the details of it, but in essence, the “Armadillo” (Crunchy on the outside, soft on the inside) protection model is broken (sometimes known as the “Fortress Model”). You assume that your impenetrable network boundary will prevent attackers from getting to your sensitive data. While this may stop them for a while, what you’re actually seeing here is one part of a complex protection system, however many organisations miss the fact that this is just one part.
The examples used in the onlyonline content I’ve found about this refer to a burglary.
In this context, your “Protection” (P) is measured in time. Perhaps you have hardened glass that takes 20 seconds to break.
Next, we evaluate “Detection” (D) which is also, surprisingly enough, measured in time. As the glass is hit, it triggers an alarm to a security facility. That takes 20 seconds to respond and goes to a dispatch centre, another 20 seconds for that to be answered and a police officer dispatched.
The police officer being dispatched is the “Response” (R). The police take (optimistically) 2 minutes to arrive (it was written in the 90’s so the police forces weren’t decimated then).
So, in the TBS system, we say that Detection (D) of 40 seconds plus Response (R) of 120 seconds = 160 seconds. This is greater than Protection (P) of 20 seconds, so we have an Exposure (E) time of 140 seconds E = P – (D + R). The question that is posed is, how much damage can be done in E?
So, compare this to your average pre-automation SOC. Your firewall, SIEM (Security Incident Event Management system), IDS (Intrusion Detection System) or WAF (Web Application Firewall) triggers an alarm. Someone is trying to do something (e.g. Denial Of Service attack, password spraying or port scanning for vulnerable services) a system you’re responsible for. While D might be in the tiny fractions of a minute (perhaps let’s say 1 minute, for maths sake), R is likely to be minutes or even hours, depending on the refresh rate of the ticket management system or alarm system (again, for maths sake, let’s say 60 minutes). So, D+R is now 61 minutes. How long is P really going to hold? Could it be less than 30 minutes against a determined attacker? (Let’s assume P is 30 minutes for maths sake).
Let’s do the calculation for a pre-automation SOC (Security Operations Centre). P-(D+R)=E. E here is 31 minutes. How much damage can an attacker do in 31 minutes? Could they put a backdoor into your system? Can they download sensitive data to a remote system? Could they pivot to your monitoring system, and remove the logs that said they were in there?
If you consider how much smaller the D and R numbers become with an event driven SOAR (Security Orchestration and Automation Response) system – does that improve your P and E numbers? Consider that if you can get E to 0, this could be considered to be “A Secure Environment”.
Also, consider the fact that many of the tools we implement for security reduce D and R, but if you’re not monitoring the outputs of the Detection components, then your response time grows significantly. If your Detection component is misconfigured in that it’s producing too many False Positives (for example, “The Boy Who Cried Wolf“), so you don’t see the real incident, then your Response might only be when a security service notifies you that your data, your service or your money has been exposed and lost. And that wouldn’t be good now… Time to look into automation 😁
I recently needed to create a Certificate Authority with an Intermediate Certificate to test some TLS inspection stuff at work. This script (based on a document I found at jamielinux.com) builds a Certificate Authority and creates an Intermediate Certificate Authority using the root.
I’ve also done something similar with Ansible before, but I’ve not got that to hand :)
Late edit, 2019-08-21: Found it! Needs some tweaks to add the sub-CA or child certs, but so-far it would work :)
Having got a VM stood up in Azure, I wanted to build a VM in AWS, after all, it’s more-or-less the same steps. Note, this is a work-in-progress, and shouldn’t be considered “Final” – this is just something to use as *your* starting block.
What do you need?
You need an AWS account for this. If you’ve not got one, signing up for one is easy, but bear in mind that while there are free resource on AWS (only for the first year!), it’s also quite easy to suddenly enable a load of features that cost you money.
Best practice suggests (or rather, INSISTS) you shouldn’t use your “root” account for AWS. It’s literally just there to let you define the rest of your admin accounts. Turn on MFA (Multi-Factor Authentication) on that account, give it an exceedingly complex password, write that on a sheet of paper, and lock it in a box. You should NEVER use it!
Create your admin account, log in to that account. Turn on MFA on *that* account too. Then, create an “Access Token” for your account. This is in IAM (Identity and Access Management). These are what we’ll use to let Terraform perform actions in AWS, without you needing to actually “log in”.
On my machine, I’ve put the credentials for this in /home/<MYUSER>/.aws/credentials and it looks like this:
This file should be chmod 600 and make sure it’s only your account that can access this file. With this token, Terraform can perform *ANY ACTION* as you, including anything that charges you money, or creating servers that can mine a “cryptocurrency” for someone malicious.
I’m using Windows Subsystem for Linux (WSL). I’m using the Ubuntu 18.04 distribution obtained from the Store. This post won’t explain how to get *that*. Also, you might want to run Terraform on Mac, in Windows or on Linux natively… so, yehr.
Next, we need to actually install Terraform. Excuse the long, unwrapped code block, but it gets what you need quickly (assuming the terraform webpage doesn’t change any time soon!)
Before you can build your first virtual machine on AWS, you need to stand up the supporting infrastructure. These are:
An SSH Keypair (no password logins here!)
A VPC (“Virtual Private Cloud”, roughly the same as a VNet on Azure, or somewhat like a L3 switch in the Physical Realm).
An Internet Gateway (if your VPC isn’t classed as “the default one”)
A Subnet.
A Security Group.
Once we’ve got these, we can build our Virtual Machine on EC2 (“Elastic Cloud Compute”), and associate a “Public IP” to it.
To quote my previous post:
One quirk with Terraform, versus other tools like Ansible, is that when you run one of the terraform commands (like terraform init, terraform plan or terraform apply), it reads the entire content of any file suffixed “tf” in that directory, so if you don’t want a file to be loaded, you need to either move it out of the directory, comment it out, or rename it so it doesn’t end .tf. By convention, you normally have three “standard” files in a terraform directory – main.tf, variables.tf and output.tf, but logically speaking, you could have everything in a single file, or each instruction in it’s own file.
For the sake of editing and annotating the files for this post, these code blocks are all separated, but on my machine, they’re all currently one big file called “main.tf“.
In that file, I start by telling it that I’m working with the Terraform AWS provider, and that it should target my nearest region.
If you want to risk financial ruin, you can put things like your access tokens in here, but I really wouldn’t chance this!
Next, we create our network infrastructure – VPC, Internet Gateway and Subnet. We also change the routing table.
I suspect, if I’d created the VPC as “The Default” VPC, then I wouldn’t have needed to amend the routing table, nor added an Internet Gateway. To help us make the routing table change, there’s a “data” block in this section of code. A data block is an instruction to Terraform to go and ask a resource for *something*, in this case, we need AWS to tell Terraform what the routing table is that it created for the VPC. Once we have that we can ask for the routing table change.
AWS doesn’t actually give “proper” names to any of it’s assets. To provide something with a “real” name, you need to tag that thing with the “Name” tag. These can be practically anything, but I’ve given semi-sensible names to everything. You might want to name everything “main” (like I nearly did)!
We’re getting close to being able to create the VM now. First of all, we’ll create the Security Groups. I want to separate out my “Allow Egress Traffic” rule from my “Inbound SSH” rule. This means that I can clearly see what hosts allow inbound SSH access. Like with my Azure post, I’m using a “data provider” to get my public IP address, but in a normal “live” network, you’d specify a collection of valid source address ranges.
Last steps before we create the Virtual Machine. We need to upload our SSH key, and we need to find the “AMI” (AWS Machine ID) of the image we’ll be using. To create the key, in this directory, along side the .tf files, I’ve put my SSH public key (called id_rsa.pub), and we load that key when we create the “my_key” resource. To find the AMI, we need to make another data call, this time asking the AMI index to find the VM with the name containing ubuntu-bionic-18.04 and some other stuff. AMIs are region specific, so the image I’m using in eu-west-2 will not be the same AMI in eu-west-1 or us-east-1 and so on. This filtering means that, as long as the image exists in that region, we can use “the right one”. So let’s take a look at this file.
So, now we have everything we need to create our VM. Let’s do that!
In here, we specify a “user_data” file to upload, in this case, the contents of a file – CloudDev.sh, but you can load anything you want in here. My CloudDev.sh is shown below, so you can see what I’m doing with this file :)
So, having created all this lot, you need to execute the terraform workload. Initially you do terraform init. This downloads all the provisioners and puts them into the same tree as these .tf files are stored in. It also resets the state of the terraform discovered or created datastore.
Next, you do terraform plan -out tfout. Technically, the tfout part can be any filename, but having something like tfout marks it as clearly part of Terraform. This creates the tfout
file with the current state, and whatever needs to change in the
Terraform state file on it’s next run. Typically, if you don’t use a
tfout file within about 20 minutes, it’s probably worth removing it.
Finally, once you’ve run your plan stage, now you need to apply it. In this case you execute terraform apply tfout. This tfout is the same filename you specified in terraform plan. If you don’t include -out tfout on your plan (or even run a plan!) and tfout in your apply, then you can skip the terraform plan stage entirely.
Once you’re done with your environment, use terraform destroy to shut it all down… and enjoy :)
This is a brief note to myself (but might be useful to you)!
awscli (similar to the Azure az command) is packaged for Ubuntu, but the version which is in the Ubuntu 18.04 repositories is “out of date” and won’t work with AWS. You *actually* need to run the following: