I’d seen quite a few comments from the community talking about using your own router, and yesterday I finally got around to sorting this out for myself!
I obtained a Turris Omnia CZ11NIC13 router last year to replace the Be-Fibre supplied Adtrans 854-v6. Both Adtrans and Omnia use an SFP to terminate the fibre connection on-box, but if you have an ONT then the Omnia will activate the WAN Ethernet socket if the SFP isn’t filled.
The version I was using was a little on the older side than the currently listed models, and the version of OpenWRT that was shipped on it kept breaking when trying to perform updates and upgrades. I followed the instructions on the OpenWRT Wiki to replace the custom firmware with the more generic OpenWRT for this model (upgrading U-Boot and then flashing the updated image using dd in the rescue environment).
Initial stumbles
I’d said I’d got this last year, and when I’d tried to migrate it over, it wasn’t clear that the SFP had been detected… On this router eth2 is either the WAN Ethernet interface or the SFP, and the only way you can tell is to run dmesg | grep ether which shows configuring for inband/1000base-x link mode (it’s on the SFP) or configuring for fixed/rgmii link mode (it’s on the ethernet port). Once you realise that, it all becomes a bit easier!
Getting ready
The main thing to realise about this process is that Be-Fibre only really care about two things; the MAC address of the router (the SFP doesn’t have a MAC address) and the VLAN it’s connected to – which is VLAN 10.
So, let’s set that up.
Using the Web interface
The first thing we need to do is to change the MAC address of “eth2” – the WAN/SFP port. Navigate to to “Network” then “Interfaces” and select the “Devices” tab.

Click “Configure…” next to eth2 to change the MAC address. Here I’ve changed it to “DE:CA:FB:AD:99:99” which is the value I got from my Be-Fibre router.
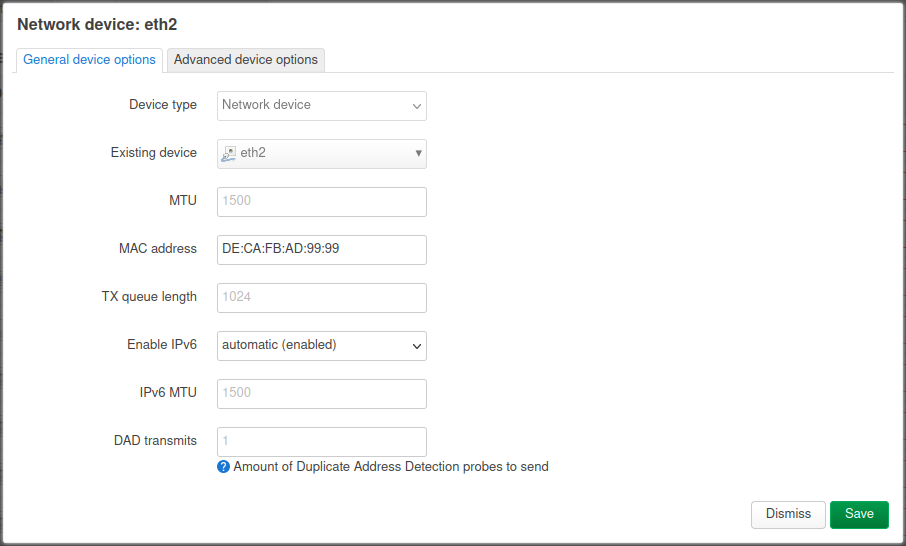
Once you click “Save” you go back to the devices page, and you can see here that the changed MAC address is now in bold.
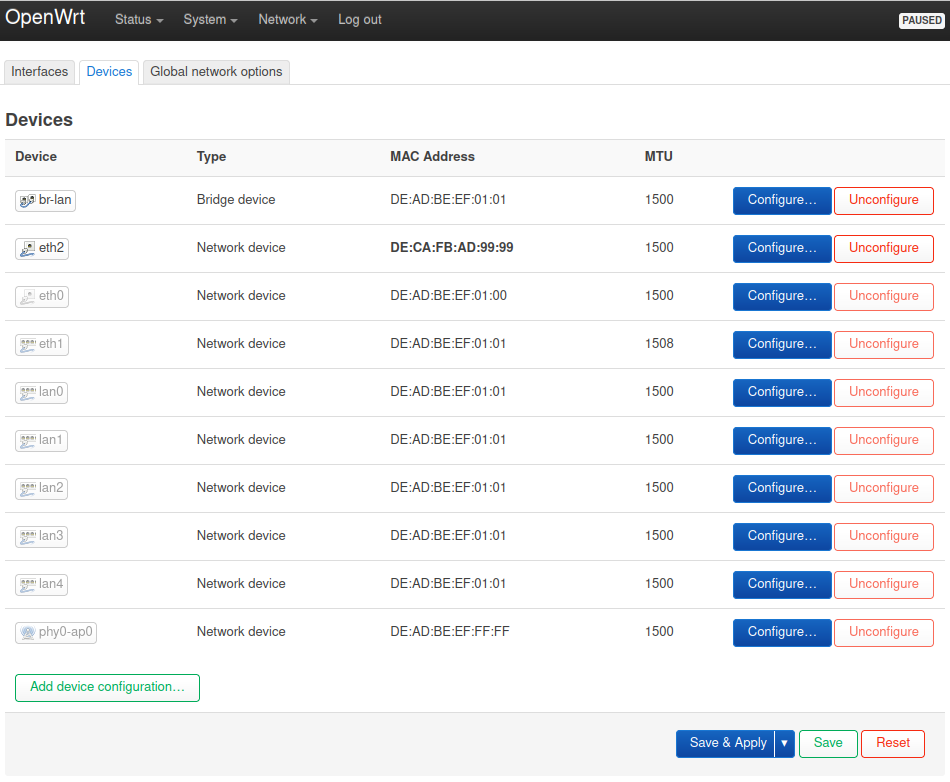
Next we need to setup the VLAN tag, so click on “Add device configuration…”
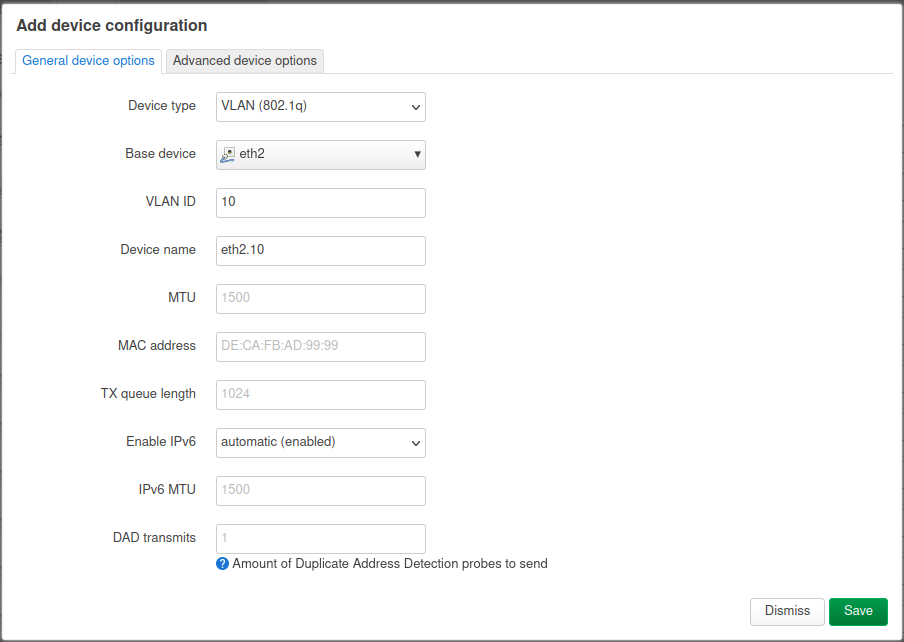
Once you click “Save”, you’ll be taken back to the devices page.

Click on “Save & Apply”, and then go into the “Interfaces” tab.
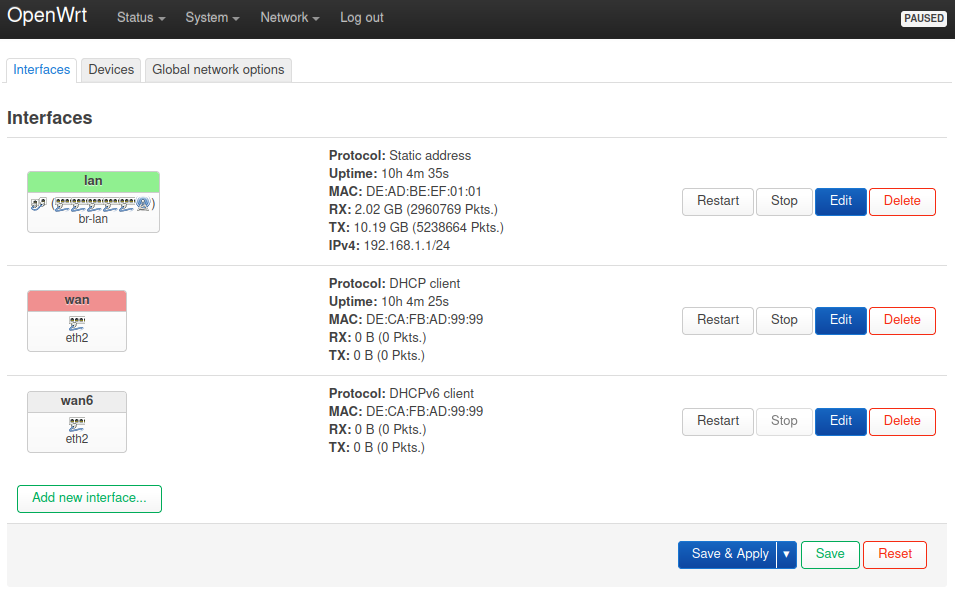
You may see that an IP address has been allocated to the wan interface… Don’t believe it! You still need to select the VLAN Tagged interface for it to work! Click “Edit” for the wan interface.
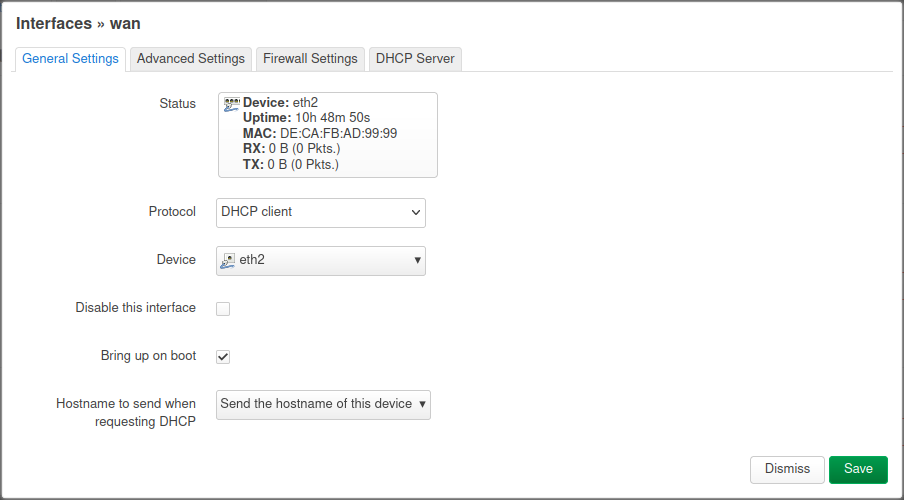
Change device to eth2.10 and click Save. Do the same for the wan6 interface.
Click Save & Apply and then navigate to the “System” -> “Reboot” screen and reboot the device to get the network changes recognised.
Using the command line
SSH to the OpenWRT device, and then run the following (replace MAC address as needed!)
eth2=$(uci show network.@device[1] | grep =device | cut -d= -f1 | cut -d. -f2)
uci set network.${eth2}.macaddr='DE:CA:FB:AD:99:99'
uci commit network

if ! ip link show dev eth2.20
then
  uci add network device
  uci set network.@device[-1].type='8021q'
  uci set network.@device[-1].ifname='eth2'
  uci set network.@device[-1].vid='10'
  uci set network.@device[-1].name='eth2.10'
  uci commit network
fi

uci set network.wan.device='eth2.10'
uci set network.wan6.device='eth2.10'
uci commit network
reload_config
Hi Jon,
Excellent article and has worked a treat configuring a brother’s linksys EA8300 router running Openwrt. However, in his infinite wisdom he has also opted to have his phoneline migrated from Plusnet to Befibre as part of the going FTTP. He has had the adapter delivered, which will plug in to an ethernet port and then on to his old landline. Is there any way of configuring the Openwrt router to work with the phone adapter/BeTalk or will he be stuck having to use their supplied router in order to maintain his phone line using Betalk (a £10 a month extra on the standard fibre only costs)
Regards
Andrew
Hey Andrew, I’ve not used one of those, so I can’t help here. I suspect it just gets a DHCP address and connects out, but if not, I don’t actually know. There is a Facebook community of BeFibre customers, so someone there might be able to help? If they can, please post back with details of how to do it, and I’ll add the notes to this post.
I replaced the router (Adtran) with a Sonicwall. I didn’t have to change anything with regard the vlan. I did have to spoof the mac address, but I will say I received an ONT and didn’t have an SFP connector so maybe that’s where Vlan 10 is needed My install was about 12 months ago.
Oh yes, that’s definitely a possibility!
Hi Jon. Do you know if this also works on a Unifi gateway?
Which part? I actually reverted back to the Be Fibre router, but yes, set the vlan to 10 and the Mac address to the same as the one they gave you, and you should be able to use any SFP or ONT connection to get onto their network. I’ve even heard some people saying you don’t need to use vlan 10, but I’ve not tried that… And like I said, I went back to the original router.
I have tried with the MAC address clone and vlan but had no luck in getting it working. Do you think its possible to connect by SFP without the ONT?
Oh interesting, I don’t actually know. I wonder if you need to clone the ONT Mac?
Do you know if you had a static IP from Be-Fibre when you used your own router? I wonder if this is why I am not getting an internet connection when I try.
I do still, and have always had a static IP from BeFibre. If it’s completely not working, it might be worth calling them and asking them to re-register your appliance (with the real MAC address of the router you have). In my interactions 2ish years ago, I didn’t feel like they’re *that* bothered. I also didn’t feel like they were that big that having a few “odd” devices were a problem to them.
Hi Jon. Do you know if this works on a Unifi security gateway?