A green notice board in a country setting. It has leaflets and cards on it, although they are not readable in this image.

Create yourself a “Work Profile” to let others know how (and when) to contact you!

I recently got talking to a colleague about how people prefer to work and how they prefer to be contacted. It’s obvious in an office – if Bob isn’t there, then he’s not around, but when some of the team is remote, some are hybrid working, then it’s a lot harder.

There are three things I’ve found are really useful to know when trying to reach someone, and I’ve written this up in a simple page stored on our internal wiki;

  1. What’s your baseline – where do you live and when are you usually in the office.
  2. What are your usual working hours – how accurate is your calendar for non-meetings? do you have fixed meetings that happen every week, or a school run that you typically do? Do you need to be away from your desk at certain times for religious reasons?
  3. What’s the best way to contact you – if you’ve got a choice of tools (like Slack Hangouts or Google Meet) which would you rather use, and why. Is it best to drop in a 15 minute appointment, or just call you?

Once you’ve got these three items, in something everyone can access, add it to your directory profile, bio on slack, your email signature (for internal emails) and so on.

From here to the end of the post is a mildly sanitised version of my internally posted profile. I hope it’s useful to you!


Baseline

I am based in the UK, using the Europe/London time zone. I am remote based with very infrequent visits to the London office.

Typical Working Hours Patterns

I work from Monday to Friday, normally starting at X and finishing at X. During school term times, I will be out of the office between 3:00PM and 3:45PM to do school drop-off and pick ups. On Monday to Thursday, I am in a stand-up from X until Y. I will typically take my lunch break between X and Y. On Friday I have a weekly one-to-one which starts at X and finishes at Y. I will then take lunch until 1:00PM.

During school holidays, the start and end times will need to be a bit more flexible, and drop-off and pick-up slots will vary based on day-to-day activities.

I will keep my calendar up-to-date accordingly.

Contact Preference

I prefer being contacted by Slack mention or DM, however, I will often follow-up with a request for a DM chat or call, especially if I have been typing a lot during the day, or am trying to resolve an issue which I expect will require a lot of interaction.

I am happy to use Google Meetings, Slack Huddles, Microsoft Teams or Amazon Chime, all of which I have tested and work on my computer. I personally prefer to use Microsoft Teams because the presenter can allow participants to interact with the presenter’s screen or Slack Huddles because that allows participants to draw on the presenters screen, and because I can see more of your screen by default.


Featured image is “Notice board / Bulletin Board” by “Matthew Paul Argall” on Flickr and is released under a CC-BY license.

"Exam" by "Alberto G." on Flickr

My no-spoilers thoughts on the GitLab Certified Associate certification course and exam

On Wednesday, 21st April, I saw a link to a blog post in a chat group for the Linux Lads podcast. This blog post included a discount code to make the GitLab Certified Associate course and exam free. I signed up, and then shared the post to colleagues.

Free GitLab certification course and exam – until 30th April 2021.

GitLab has created a “Certified Associate” certification course which normally costs $650, but is available for free until 30th April using the discount code listed on this blog post and is available for one year after purchase (or free purchase).

I’ve signed up for the course today, and will be taking the 6 hour course, which covers:

Section 1: Self-Study – Introduction to GitLab

* GitLab Overview
* GitLab Comparison
* GitLab Components and Navigation
* Demos and Hands On Exercises

Section 2: Self-Study – Using Git and GitLab

* Git Basics
* Basic Code Creation in GitLab
* GitLab’s CI/CD Functions
* GitLab’s Package and Release Functions
* GitLab Security Scanning

Section 3: Certification Assessments

* GitLab Certified Associate Exam Instructions
* GitLab Certified Associate Knowledge Exam
* GitLab Certified Associate Hands On Exam
* Final Steps

You don’t need your own GitLab environment – you get one provided to you as part of the course.

Another benefit to this course is that you’ll learn about Git as part of the course, so if you’re looking to do any code development, infrastructure as code, documentation as code, or just learning how to store any content in a version control system – this will teach you how 😀

Good luck to everyone participating in the course!

After sharing this post, the GitLab team amended the post to remove the discount code as they were significantly oversubscribed! I’ve heard rumours that it’s possible to find the code, either on Gitlab’s own source code repository, or perhaps using Archive.org’s wayback machine, but I’ve not tried!

On Friday I started the course and completed it yesterday. The rest of this post will be my thoughts on the course itself, and the exam.

Signing up for the course and getting started

Signing up was pretty straightforward. It wasn’t clear that you had a year between when you enrolled for the course and until you first opened the content, but that once you’d opened the link to use the Gitlab demo environment, you had 21 days to use it. You’re encouraged to sign up for the demo environment on the first stage, thereby limiting you to the 21 days from that point. I suspect that if you re-visit that link on a second or third time, you’d get fresh credentials, so no real disaster there, but it does make you feel a bit under pressure to use the environment.

First impressions

The training environment is pretty standard, as far as corporate training goes. You have a side-bar showing the modules you need to complete before the end of the course, and as you scroll down through each module, you get various different media-types arriving, including youtube videos, fade-in text, flashcards which require clicking on and side-scrolling presentation cards. (Honestly, I do wonder whether this is particularly accessible to those with visual or motor impairments… I hope so, but I don’t know how I’d check!)

As you progress through each module, in the sidebar to the left, a circle outline is slowly turned from grey to purple, and when you finish a module the outline is replaced by a filled circle with a white tick in it. At the bottom of each module is a link to the next module.

The content

You have a series of 3 sections:

  • “Introduction to Gitlab” (aka, “Corporate Propaganda” 😉) which includes the history of the GitLab project and product, how many contributors it has, what it’s primary objective is, and so on. There’s even an “Infotainment” QVC-like advert about how amazing GitLab is in this section, which is quite cute. At the end of this first section, you get a “Hands On” section, where you’re encouraged to use GitLab to create a new Project. I’ll come back to the Hands on sections after this.
  • “Using Git and Gitlab”, which you’d expect to be more hands-on but is largely more flashcards and presentation cards, each with a hands on section at the end.
  • “Certification Assessments” has two modules to explain what needs to happen (one before, one after) and then two parts to the “assessment” – a multiple-choice section which has to be answered 100% correctly to proceed, and a “hands on” exam, which is basically a collection of “perform this task” questions, which you are expected to perform in the demo environment.

Hands-on sections focus on a specific task – “create a project”, “commit code”, “create an issue”, “create a merge request” and so-on. There are no tasks which will stretch even the freshest Git user, and seeing the sorts of things that the “Auto DevOps” function can enable might interest someone who wants to use GitLab. I was somewhat disappointed that there was barely any focus on the fact that GitLab can be self-hosted, and what it takes to set something like that up.

We also get to witness the entire power (apparently) of upgrading to the “Premium” and “Ultimate” packages of GitLab’s proprietary add-ons… Epics. I jest of course, I’ve looked and there’s loads more to that upgrade!

The final exams (No Spoilers)

This is in two parts, a multiple-choice selection on a fixed set of 14 questions, with 100% accuracy required to move on to the next stage that can be retaken indefinitely, and a hands-on set of… from memory… 14ish tasks which must be completed on a project you create.

The exam is generally things about GitLab which you’ve covered in the course, but included two questions about using Git that were not covered in any of the modules. For this reason, I’d suggest when you get to those questions, open a git environment, and try each of the commands offered given the specific scenario.

Once you’ve finished the hands-on section, using the credentials you were given, you’re asked to complete a Google Forms page which includes the URL of the GitLab Project you’ve performed your work in, and the username for your GitLab Demo Environment. You submit this form, and in 7 days (apparently, although, given the take-up of the course, I’m not convinced this is an accurate number) you’ll get your result. If you fail, apparently, you’ll be invited to re-try your hands-on exam again.

At least some of the hands-on section tasks are a bit ambiguous, suggesting you should make this change on the first question, and then “merge that change into this branch” (again, from memory) in the next task.

My final thoughts

So, was it worth $650 to take this course? No, absolutely not. I realise that people have put time and effort into the content and there will be people within GitLab Inc checking the results at the end… but at most it’s worth maybe $200, and even that is probably a stretch.

If this course was listed at any price (other than free) would I have taken it? …. Probably not. It’s useful to show you can drive a GitLab environment, but if I were going for a job that needed to use Git, I’d probably point them at a project I’ve created on GitHub or GitLab, as the basics of Git are more likely to be what I’d need to show capabilities in.

Does this course teach you anything new about Git or GitLab that just using the products wouldn’t have done? Tentatively, yes. I didn’t know anything about the “Auto DevOps” feature of GitLab, I’d never used the “Quick Actions” in either issues or merge requests, and there were a couple of git command lines that were new to me… but on the whole, the course is about using a web based version control system, which I’ve been doing for >10 years.

Would this course have taught you anything about Git and GitLab if you were new to both? Yes! But I wouldn’t have considered paying $650… or even $65 for this, when YouTube has this sort of content for free!

What changes would you make to this course? For me, I’d probably introduce more content about the CI/CD elements of GitLab, I might introduce a couple of questions or a module about self-hosting and differences about the tiers (to explain why it would be worth paying $99/user/month for the additional features in the software). I’d probably also split the course up into several pieces, where each of those pieces goes towards a larger target… so perhaps there might be a “basic user” track, which is just “GitLab inc history”, “using git” and “using Gitlab for issues and changes”, then an advanced user, covering “GitLab tiers”, “GitLab CI/CD”, “Auto DevOps”, running “Git Runners”, and perhaps a Self Hosting course which adds running the service yourself, integrating GitLab with other services, and so on. You might also (as GitLab are a very open company) have a “marketing GitLab” course (for TAMs, Pre-Sales and Sales) which could also be consumed externally.

Have you passed? Yep

Read More
"Blueprints" by "Cameron Degelia" on Flickr

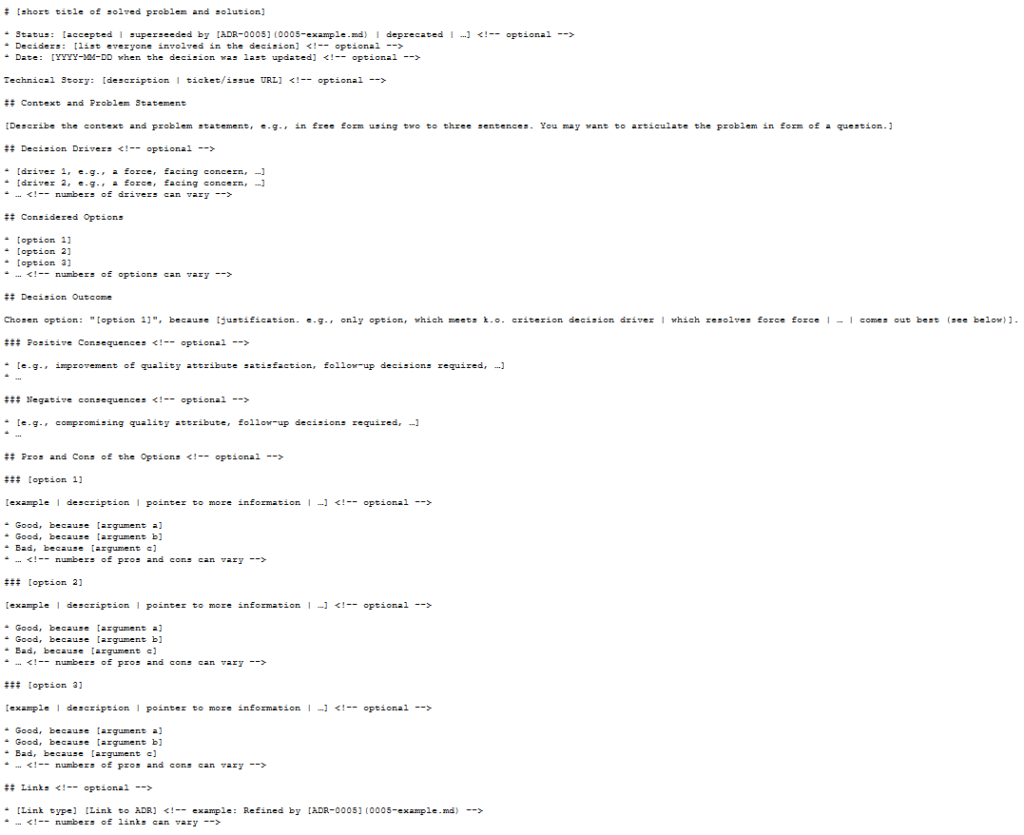
Using Architectural Decision Records (ADR) with adr-tools

Introducing Architectural Decision Records

Over the last week, I discovered a new tool for my arsenal called Architectural Decision Records (ADR). They were first written about in 2011, in a post called “Documenting Architecture Decisions“, where the author, Michael Nygard, advocates for short documents explaining each decision that influences the architecture of an environment.

I found this via a Github repository, created by the team at gov.uk, which includes their ADR library, and references the tool they use to manage these documents – adr-tools.

Late edit 2021-01-25: I also found a post which suggests that Spotify uses ADR.

Late edit 2021-08-11: I wrote a post about using other tooling.

Late edit 2021-12-14: I released (v0.0.1) my own rust-based application for making Decision Records. Yes, Decision Records – not Architecture Decision Records… because I think you should be able to apply the same logic to all decisions, not just architectural ones.

Installing adr-tools on Linux

Currently adr-tools are easier to install under OSX rather than Linux or Windows Subsystem for Linux (WSL) (I’m working on this – bear with me! 😃 ).

The current installation notes suggest for Linux (which would also work on WSL) is to download the latest release tar.gz or zip file and unpack it into your path somewhere. This isn’t exactly the best way to deploy anything on Linux, but… I guess it works right now?

For me, I downloaded the file, and unpacked the whole tar.gz file (as root) into /usr/local/bin/, giving me a directory of /usr/local/bin/adr-tools-3.0.0/. There’s a subdirectory in here, called src which contains a large number of files – mostly starting _adr or adr- and two additional files, init.md and template.md.

Rather than putting all of these files into /usr/local/bin directly, instead I leave them in the adr-tools-3.0.0 directory, and create a symbolic link (symlink) to the /usr/local/bin directory with this command:

cd /usr/local/bin
ln -s adr-tools-3.0.0/src/* .

This gives me all those files in one place, so I can refer to them later.

An aside – why link everything in that src directory? (Feel free to skip this block!)

Now, why, you might ask, do all of these unrelated files need to be in the same place? Well…. the author of the script has put this in at the top of almost all the files:

#!/bin/bash
set -e
eval "$($(dirname $0)/adr-config)"

And then in that script, it says:

#!/bin/bash
basedir=$(cd -L $(dirname $0) > /dev/null 2>&1 && pwd -L)
echo "adr_bin_dir=$basedir"
echo "adr_template_dir=$basedir"

There are, technically, good reasons for this! This is designed to be run in, what in the Windows world, you might call as a “Portable Script”. So, you bung adr-tools into some directory somewhere, and then just call adr somecommand and it knows that all the files are where they need to be. The (somewhat) down side to this is that if you just want to call adr somecommand rather than path/to/my/adr somecommand then all those files need to be there

I’m currently looking to see if I can improve this somewhat, so that it’s not quite so complex to install, but for now, that’s what you need.

Anyway…

Using adr-tools to document your decisions

I’ll start documenting a fictional hosted web service project, and note down some of the decisions which have been made.

Initializing your ADR directory

Start by running adr init. You may want to specify a directory where you want to put these records, so instead use: adr init path/to/adr, like this:

Initializing the ADR in “documentation/architecture-decisions” with adr init documentation/architecture-decisions

You’ll notice that when I run this command, it creates a new entry, called 0001-record-architecture-decisions.md. Let’s open this up, and see what’s in here.

The VSCode record for the choice to use ADR. It is a markdown file, with the standard types of data recorded.

In here we have the record ID (1.), the title of the record Record architecture decisions, the date the choice was made Date: 2021-01-19, a status of Accepted, the context on why we made this choice, the decision, and the consequences of making this decision. Make changes, if needed, and save it. Let’s move on.

Creating our first own record

This all is quite straightforward thus far. Let’s create our next record.

Issuing the command adr new <sometitle> you create the next ADR record.

Let’s open up that record.

The template for the ADR record for “Use AWS”.

Like the first record, we have a title, a status, a context, decision and consequences. Let’s define these.

A “finished” brief ADR record.

This document shouldn’t be very long! It just describes why a choice was made and what that entails.

Changing decisions – completely replacing (superseding) a decision

Of course, over time, decisions will be replaced due to various decisions elsewhere.

You can ask adr to supersede a previous record, using the “-s” flag, and the record number.

Let’s look at how that works on the second ADR record.

After the command adr new -s 2 Use Azure, the ADR record number 2 has a new status, “Superceded by” and the superseded linked document. Yes, “Superceded” is a typo. There is an open PR for it

So, under the “Status”, where is previously said “Approved”, it now says “Superceded by [3. Use Azure](0003-use-azure.md)“. This is a markdown statement which indicates where the superseded document is located. As I mentioned in the comment below the above image, there is an open Pull Request to fix this on the adr-tools, so hopefully that typo won’t last long!

We’ve got our new ADR too – let’s take a look at that one?

Our new ADR shows that it “supercedes” the previous record. Which is good! Typo aside :)

Other references

Of course, you don’t always completely overrule a decision. Sometimes your decision is influenced by, or has a dependency on something else, like this one.

We know which provider we’re using at long last, now let’s pick a region. Use the -l flag to “link” between the referenced and new ADR. The context for the -l flag is “<number>:<text for link to number>:<text for link in targetted document>”.

The command here is:

adr new -l '3:Dependency:Influences' Use Region UK South and UK West

I’m just going to crop from the “Status” block on both the referenced ADR (3) and the ADR which references it (4):

Status block in ADR 0003 which is referenced by ADR 0004
Status block in the new ADR 0004 which references ADR 0003

And of course, you can also use the same switch to mark documents as partially obsoleted, like this:

adr new -l '4:Partially obsoletes:Partially obsoleted by' Use West Europe region instead of UK West region
Status block in ADR 0004 indicating it’s partially obsoleted. Probably worth updating the status properly to show it’s not just “Accepted”.

If you forget to add the referencing in, you can also use the adr link command, like this:

adr link 3 Influences 5 Dependency

To be clear, that command adds a (complete) line to ADR 0003 saying “Influences [5. ADR Title](link)” and a separate (complete) line to ADR 0005 saying “Dependency [3. ADR Title](link)“.

What else can we do?

There are four other “things” that it’s worth doing at this point.

  1. Note that you can change the template per-ADR directory.

Create a directory called “templates” in the ADR directory, and put a file in there called “template.md“. Tweak this as you need. Ensure you have AT LEAST the line ## Status and # NUMBER. TITLE as these are required by the script.

A much abbreviated template file, containing just “Number”, “Title”, “Date”, “Status”, and a new dummy heading called “Stuff”.
And the result of running adr new Some Text once you’ve created that template.

As you can see, it’s possible to add all sorts of content in this template as a result. Bear in mind, before your template turns into something like this, that it’s supposed to be a short document explaining why each decision was made, not a funding proposal, or a complex epic of your user stories!

Be careful not to let your template run away with you!
  1. Note that you can automatically open an editor, by setting the EDITOR (where the process is expected to finish before returning control, like using nano, emacs or vim, for example) or VISUAL (where the process is expected to “fork”, like for example, gedit or vscode) environment variable, and then running adr new A Title, like this:
  1. We can create “Table of Contents” files, using the adr generate toc command, like this:
Generating the table of contents, for injecting into other files.

This can be included into your various other markdown files. There are switches, so you can set the link path, but your best bet is to find that using adr help generate toc.

  1. We can also generate graphviz files of the link maps between elements of the various ADRs, like this: adr generate graph | dot -Tjpg > graph.jpg

If you omit the “| dot -Tjpg > graph.jpg” part, then you’ll see the graphviz output, which looks like this: (I’ve removed the documents 6 and 7).

digraph {
  node [shape=plaintext];
  subgraph {
    _1 [label="1. Record architecture decisions"; URL="0001-record-architecture-decisions.html"];
    _2 [label="2. Use AWS"; URL="0002-use-aws.html"];
    _1 -> _2 [style="dotted", weight=1];
    _3 [label="3. Use Azure"; URL="0003-use-azure.html"];
    _2 -> _3 [style="dotted", weight=1];
    _4 [label="4. Use Region UK South and UK West"; URL="0004-use-region-uk-south-and-uk-west.html"];
    _3 -> _4 [style="dotted", weight=1];
    _5 [label="5. Use West Europe region instead of UK West region"; URL="0005-use-west-europe-region-instead-of-uk-west-region.html"];
    _4 -> _5 [style="dotted", weight=1];
  }
  _3 -> _2 [label="Supercedes", weight=0]
  _3 -> _5 [label="Influences", weight=0]
  _4 -> _3 [label="Dependency", weight=0]
  _5 -> _4 [label="Partially obsoletes", weight=0]
  _5 -> _3 [label="Dependency", weight=0]
}

To make the graphviz part work, you’ll need to install graphviz, which is just an apt get away.

Any caveats?

adr-tools is not actively maintained. I’ve contacted the author, about seeing if I can help out with the maintenance, but… we’ll see, and given some fairly high profile malware takeovers of projects like this sort of thing on Github, Docker, NPM, and more… I can see why there might be some reluctance to consider it! Also, I’m an unknown entity, I’ve just dropped in on the project and offered to help, with no previous exposure to the lead dev or the project… so, we’ll see. Worst case, I’ll fork it!

Working with this also requires an understanding of markdown files, and why these might be a useful document format for records like this. There was a PR submitted to support multiple file formats (like asciidoc and rst) but these were not approved by the author.

There is no current intention to support languages other than English. The tool is hard-coded to look for strings like “status” and “superceded” which is hard. Part of the reason I raised the PRs I did was to let me fix some of these sorts of issues. Again, we’ll see what happens.

Lastly, it can be overwhelming to see a lot of documents in one place, particularly if they’re as granular as the documents I produced in this demo. If the project supported categories, or could be broken down into components (like doc/adr/networking and doc/adr/server_builds and doc/adr/applications) then this might help, but it’s not on the roadmap right now!

Late edit 2021-01-25: If you don’t think these templates have enough context or content, there are lots of others listed on Joel Parker Henderson’s repo of examples and templates. If you want a python based viewer of ADR records, take a look at adr-viewer.

Featured image is “Blueprints” by “Cameron Degelia” on Flickr and is released under a CC-BY license.

"map" by "Jason Grote" on Flickr

Documenting my Career Path

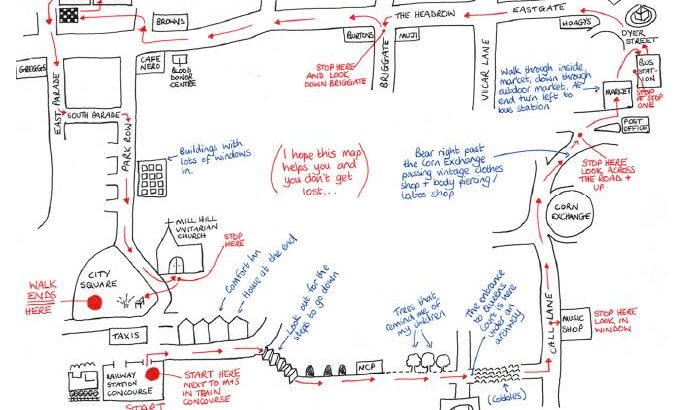
For something internal at work, I decided to sketch out how I got to doing the job I do today. And, because there’s nothing hugely secretive in that document (or, at least, nothing you wouldn’t already find out on something like Linked In), I figured I’d also put this on my blog… and I think it might be interesting if you’ve written something similar, if you’d share your document too.

I intend to make that a “Living Document” (like I do with my “What am I doing now” and my “What do I use” pages) that I update every time I think about it, and think they need a tweak. So, as a result, I’ve put them over on my “Career Path” page, which is not a traditional “blog post” and is in my sidebar.

Featured image is “map” by “Jason Grote” on Flickr and is released under a CC-BY-SA license.

"Status" by "Doug Letterman" on Flickr

Adding your Git Status to your Bash prompt

I was watching Lorna Mitchell‘s Open Source Hour twitch stream this morning, and noticed that she had a line in her prompt showing what her git status was.

A snip from Lorna’s screen during the Open Source Hour stream.

Git, for those of you who aren’t aware, is the version control software which has dominated software development and documentation for over 10 years now. It’s used for almost everything now, supplanting it’s competitors like Subversion, Visual Source Safe, Mercurial and Bazaar. While many people are only aware of Git using GitHub, before there was GitHub, there was the Git command line. I’m using the git command in a Bash shell all the time because I find it easier to use that for the sorts of things I do, than it is to use the GUI tools.

However, the thing that often stumbles me is what state I’m in with the project, and this line showed me just how potentially powerful this command can be.

During the video, I started researching how I could get this prompt set up on my machine, and finally realised that actually, git prompt was installed as part of the git package on my Ubuntu 20.04 install. To use it, I just had to add this string $(__git_ps1) into my prompt. This showed me which branch I was on, but I wanted more detail than that!

So, then I started looking into how to configure this prompt. I found this article from 2014, called “Git Prompt Variables” which showed me how to configure which features I wanted to enable:

GIT_PS1_DESCRIBE_STYLE='contains'
GIT_PS1_SHOWCOLORHINTS='y'
GIT_PS1_SHOWDIRTYSTATE='y'
GIT_PS1_SHOWSTASHSTATE='y'
GIT_PS1_SHOWUNTRACKEDFILES='y'
GIT_PS1_SHOWUPSTREAM='auto'

To turn this on, I edited ~/.bashrc (again, this is Ubuntu 20.04, I’ve not tested this on CentOS, Fedora, Slackware or any other distro). Here’s the lines I’m looking for:

The lines in the middle, between the two red lines are the lines in question – the lines above and below are for context in the standard .bashrc file shipped with Ubuntu 20.04

I edited each line starting PS1=, to add this: $(__git_ps1), so this now looks like this:

The content of those two highlighted lines in .bashrc

I’m aware that line is pretty hard to read in many cases, so here’s just the text for each PS1 line:

PS1='${debian_chroot:+($debian_chroot)}\[\033[01;32m\]\u@\h\[\033[00m\]:\[\033[01;34m\]\w$(__git_ps1)\[\033[00m\]\$ '
PS1='${debian_chroot:+($debian_chroot)}\u@\h:\w$(__git_ps1)\$ '

The first of those is the version that is triggered when if [ "$color_prompt" = yes ] is true, the second is when it isn’t.

What does this look like?

Let’s run through a “standard” work-flow of “conditions”. Yes, this is a really trivial example, and quite (I would imagine) different from how most people approach things like this… but it gives you a series of conditions so you can see what it looks like.

Note, as I’m still running a slightly older version of git, and I’ve not adjusted my defaults, the “initial” branch created is still called “master”, not “main”. For the purposes of this demonstration, it’s fine, but I should really have fixed this from the outset. My apologies.

First, we create and git init a directory, called git_test in /tmp.

Following a git init, the prompt ends (master #). Following the git init of the master branch, we are in a state where there is “No HEAD to compare against”, so the git prompt fragment ends #.

Next, we create a file in here. It’s unstaged.

Following the creation of an empty file, using the touch command, the prompt ends (master #%). We’re on the master branch, with no HEAD to compare against (#), and we have an untracked file (%).

And then we add that to the staging area.

Following a git add, the prompt ends (master +). We’re on the master branch, with a staged change (+).

Next we commit the file to the repository.

Following a git commit, the prompt ends (master). We’re on the master branch with a clean staging and unstaged area.

We add some content to the README file.

Following the change of a tracked file, by echoing content into the file, the prompt ends (master *). We’re on the master branch with an unstaged change (*).

We realise that we can’t use this change right now, let’s stash it for later.

Following the git stash of a tracked file, the prompt ends (master $). We’re on the master branch with stashed files ($).

We check out a new branch, so we can use that stash in there.

Following the creation of a new branch with git checkout -b, the prompt ends (My-New-Feature $). We’re on the My-New-Feature branch with stashed files ($).

And then pop the stashed file out.

Following the restoration of a stashed file, using git stash pop, the prompt ends (My-New-Feature *). We’re on the My-New-Feature branch with stashed files (*).

We then add the file and commit it.

Following a git add and git commit of the previously stashed file, the prompt ends (My-New-Feature). We’re on the My-New-Feature branch with a clean staged and unstaged area.

How about working with remote sources? Let’s change to back to the /tmp directory and fork git_test to git_local_fork.

Following the clone of the repository in a new path using git clone, and then changing into that directory with the cd command, the prompt ends (My-New-Feature=). We’re on the My-New-Feature branch, which is in an identical state to it’s default remote tracked branch (=).

We’ve checked it out at the feature branch instead of master, let’s check out master instead.

Subsequent to checking out the master branch in the repository using git checkout master, the prompt ends (master=). We’re on the master branch, which is in an identical state to it’s default remote tracked branch (=).

In the meantime, upstream, someone merged “My-New-Feature” into “master” on our original git_test repo.

Following the merge of a feature branch, using git merge, the prompt ends (master). We’re on the master branch with a clean staged and unstaged area.

On our local branch again, let’s fetch the state of our “upstream” into git_local_fork.

After we fetch the state of our default upstream repository, the prompt ends (master<). We’re on the master branch with a clean staged and unstaged area, but we’re behind the default remote tracked branch (<).

And then pull, to make sure we’re in-line with upstream’s master branch.

Once we perform a git pull to bring this branch up-to-date with the upstream repository, the prompt ends (master=). We’re on the master branch, which is back in an identical state to it’s default remote tracked branch (=).

We should probably make some local changes to this repository.

The prompt changes from (master=) to (master *=) to (master +=) and then (master>) as we create an unstaged change (*), stage it (+) and then bring the branch ahead of the default remote tracked branch (>).

Meanwhile, someone made some changes to the upstream repository.

The prompt changes from (master) to (master *) to (master +) and then (master) as we create an unstaged change (*) with echo, stage it (+) with git add and then end up with a clear staged and unstaged area following a git commit.

So, before we try and push, let’s quickly fetch their tree to see what’s going on.

After a git fetch to pull the latest state from the remote repository, the prompt ends (master <>). We’re on the master branch, but our branch has diverged from the default remote and won’t merge cleanly (<>).

Oh no, we’ve got a divergence. We need to fix this! Let’s pull the upstream master branch.

We do git pull and end up with the prompt ending (master *+|MERGING<>). We have unstaged (*) and staged (+) changes, and we’re in a “merging” state (MERGING) to try to resolve our diverged branches (<>).

Let’s fix the failed merge.

We resolve the merge conflict with nano, and confirm it has worked with cat, and then stage the merge resolution change using git add. The prompt ends (master +|MERGING<>). We have staged (+) changes, and we’re in a “merging” state (MERGING) to try to resolve our diverged branches (<>).

I think we’re ready to go with the merge.

We perform a git commit and the prompt ends as (master>). We have resolved our diverged master branches, have exited the “merging” state and are simply ahead of the default remote branch (>).

If the remote were a system like github, at this point we’d just do a git push. But… it’s not, so we’d need to do a git pull /tmp/git_local_fork in /tmp/git_test and then a git fetch in /tmp/git_local_fork… but that’s an implementation detail 😉

Featured image is “Status” by “Doug Letterman” on Flickr and is released under a CC-BY license.

"inventory" by "Lee" on Flickr

Using a AWS Dynamic Inventory with Ansible 2.10

In Ansible 2.10, Ansible started bundling modules and plugins as “Collections”, basically meaning that Ansible didn’t need to make a release every time a vendor wanted to update the libraries it required, or API changes required new fields to be supplied to modules. As part of this split between “Collections” and “Core”, the AWS modules and plugins got moved into a collection.

Now, if you’re using Ansible 2.9 or earlier, this probably doesn’t impact you, but there are some nice features in Ansible 2.10 that I wanted to use, so… buckle up :)

Getting started with Ansible 2.10, using a virtual environment

If you currently are using Ansible 2.9, it’s probably worth creating a “python virtual environment”, or “virtualenv” to try out Ansible 2.10. I did this on my Ubuntu 20.04 machine by typing:

sudo apt install -y virtualenv
mkdir -p ~/bin
cd ~/bin
virtualenv -p python3 ansible_2.10

The above ensures that you have virtualenv installed, creates a directory called “bin” in your home directory, if it doesn’t already exist, and then places the virtual environment, using Python3, into a directory there called “ansible_2.10“.

Whenever we want to use this new environment you must activate it, using this command:

source ~/bin/ansible_2.10/bin/activate

Once you’ve executed this, any binary packages created in that virtual environment will be executed from there, in preference to the file system packages.

You can tell that you’ve “activated” this virtual environment, because your prompt changes from user@HOST:~$ to (ansible_2.10) user@HOST:~$ which helps 😀

Next, let’s create a requirements.txt file. This will let us install the environment in a repeatable manner (which is useful with Ansible). Here’s the content of this file.

ansible>=2.10
boto3
botocore

So, this isn’t just Ansible, it’s also the supporting libraries we’ll need to talk to AWS from Ansible.

We execute the following command:

pip install -r requirements.txt

Note, on Windows Subsystem for Linux version 1 (which I’m using) this will take a reasonable while, particularly if it’s crossing from the WSL environment into the Windows environment, depending on where you have specified the virtual environment to be placed.

If you get an error message about something to do with being unable to install ffi, then you’ll need to install the package libffi-dev with sudo apt install -y libffi-dev and then re-run the pip install command above.

Once the installation has completed, you can run ansible --version to see something like the following:

ansible 2.10.2
  config file = None
  configured module search path = ['/home/user/.ansible/plugins/modules', '/usr/share/ansible/plugins/modules']
  ansible python module location = /home/user/ansible_2.10/lib/python3.8/site-packages/ansible
  executable location = /home/user/ansible_2.10/bin/ansible
  python version = 3.8.2 (default, Jul 16 2020, 14:00:26) [GCC 9.3.0]

Configuring Ansible for local collections

Ansible relies on certain paths in the filesystem to store things like collections, roles and modules, but I like to circumvent these things – particularly if I’m developing something, or moving from one release to the next. Fortunately, Ansible makes this very easy, using a single file, ansible.cfg to tell the code that’s running in this path where to find things.

A quick note on File permissions with ansible.cfg

Note that the POSIX file permissions for the directory you’re in really matter! It must be set to 775 (-rwxrwxr-x) as a maximum – if it’s “world writable” (the last number) it won’t use this file! Other options include 770, 755. If you accidentally set this as world writable, or are using a directory from the “Windows” side of WSL, then you’ll get an error message like this:

[WARNING]: Ansible is being run in a world writable directory (/home/user/ansible_2.10_aws), ignoring it as an ansible.cfg source. For more information see
https://docs.ansible.com/ansible/devel/reference_appendices/config.html#cfg-in-world-writable-dir

That link is this one: https://docs.ansible.com/ansible/devel/reference_appendices/config.html#cfg-in-world-writable-dir and has some useful advice.

Back to configuring Ansible

In ansible.cfg, I have the following configured:

[defaults]
collections_paths = ./collections:~/.ansible/collections:/usr/share/ansible/collections

This file didn’t previously exist in this directory, so I created that file.

This block asks Ansible to check the following paths in order:

  • collections in this path (e.g. /home/user/ansible_2.10_aws/collections)
  • collections in the .ansible directory under the user’s home directory (e.g. /home/user/.ansible/collections)
  • and finally /usr/share/ansible/collections for system-wide collections.

If you don’t configure Ansible with the ansible.cfg file, the default is to store the collections in ~/.ansible/collections, but you can “only have one version of the collection”, so this means that if you’re relying on things not to change when testing, or if you’re running multiple versions of Ansible on your system, then it’s safest to store the collections in the same file tree as you’re working in!

Installing Collections

Now we have Ansible 2.10 installed, and our Ansible configuration file set up, let’s get our collection ready to install. We do this with a requirements.yml file, like this:

---
collections:
- name: amazon.aws
  version: ">=1.2.1"

What does this tell us? Firstly, that we want to install the Amazon AWS collection from Ansible Galaxy. Secondly that we want at least the most current version (which is currently version 1.2.1). If you leave the version line out, it’ll get “the latest” version. If you replace ">=1.2.1" with 1.2.1 it’ll install exactly that version from Galaxy.

If you want any other collections, you add them as subsequent lines (more details here), like this:

collections:
- name: amazon.aws
  version: ">=1.2.1"
- name: some.other
- name: git+https://example.com/someorg/somerepo.git
  version: 1.0.0
- name: git@example.com:someorg/someotherrepo.git

Once we’ve got this file, we run this command to install the content of the requirements.yml: ansible-galaxy collection install -r requirements.yml

In our case, this installs just the amazon.aws collection, which is what we want. Fab!

Getting our dynamic inventory

Right, so we’ve got all the pieces now that we need! Let’s tell Ansible that we want it to ask AWS for an inventory. There are three sections to this.

Configuring Ansible, again!

We need to open up our ansible.cfg file. Because we’re using the collection to get our Dynamic Inventory plugin, we need to tell Ansible to use that plugin. Edit ./ansible.cfg in your favourite editor, and add this block to the end:

[inventory]
enable_plugins = aws_ec2

If you previously created the ansible.cfg file when you were setting up to get the collection installed alongside, then your ansible.cfg file will look (something) like this:

[defaults]
collections_paths     = ./collections:~/.ansible/collections:/usr/share/ansible/collections

[inventory]
enable_plugins = amazon.aws.aws_ec2

Configure AWS

Your machine needs to have access tokens to interact with the AWS API. These are stored in ~/.aws/credentials (e.g. /home/user/.aws/credentials) and look a bit like this:

[default]
aws_access_key_id = A1B2C3D4E5F6G7H8I9J0
aws_secret_access_key = A1B2C3D4E5F6G7H8I9J0a1b2c3d4e5f6g7h8i9j0

Set up your inventory

In a bit of a change to how Ansible usually does the inventory, to have a plugin based dynamic inventory, you can’t specify a file any more, you have to specify a directory. So, create the file ./inventory/aws_ec2.yaml (having created the directory inventory first). The file contains the following:

---
plugin: amazon.aws.aws_ec2

Late edit 2020-12-01: Further to the comment by Giovanni, I’ve amended this file snippet from plugin: aws_ec2 to plugin: amazon.aws.aws_ec2.

By default, this just retrieves the hostnames of any running EC2 instance, as you can see by running ansible-inventory -i inventory --graph

@all:
  |--@aws_ec2:
  |  |--ec2-176-34-76-187.eu-west-1.compute.amazonaws.com
  |  |--ec2-54-170-131-24.eu-west-1.compute.amazonaws.com
  |  |--ec2-54-216-87-131.eu-west-1.compute.amazonaws.com
  |--@ungrouped:

I need a bit more detail than this – I like to use the tags I assign to AWS assets to decide what I’m going to target the machines with. I also know exactly which regions I’ve got my assets in, and what I want to use to get the names of the devices, so this is what I’ve put in my aws_ec2.yaml file:

---
plugin: amazon.aws.aws_ec2
keyed_groups:
- key: tags
  prefix: tag
- key: 'security_groups|json_query("[].group_name")'
  prefix: security_group
- key: placement.region
  prefix: aws_region
- key: tags.Role
  prefix: role
regions:
- eu-west-1
hostnames:
- tag:Name
- dns-name
- public-ip-address
- private-ip-address

Late edit 2020-12-01: Again, I’ve amended this file snippet from plugin: aws_ec2 to plugin: amazon.aws.aws_ec2.

Now, when I run ansible-inventory -i inventory --graph, I get this output:

@all:
  |--@aws_ec2:
  |  |--euwest1-firewall
  |  |--euwest1-demo
  |  |--euwest1-manager
  |--@aws_region_eu_west_1:
  |  |--euwest1-firewall
  |  |--euwest1-demo
  |  |--euwest1-manager
  |--@role_Firewall:
  |  |--euwest1-firewall
  |--@role_Firewall_Manager:
  |  |--euwest1-manager
  |--@role_VM:
  |  |--euwest1-demo
  |--@security_group_euwest1_allow_all:
  |  |--euwest1-firewall
  |  |--euwest1-demo
  |  |--euwest1-manager
  |--@tag_Name_euwest1_firewall:
  |  |--euwest1-firewall
  |--@tag_Name_euwest1_demo:
  |  |--euwest1-demo
  |--@tag_Name_euwest1_manager:
  |  |--euwest1-manager
  |--@tag_Role_Firewall:
  |  |--euwest1-firewall
  |--@tag_Role_Firewall_Manager:
  |  |--euwest1-manager
  |--@tag_Role_VM:
  |  |--euwest1-demo
  |--@ungrouped:

To finish

Now you have your dynamic inventory, you can target your playbook at any of the groups listed above (like role_Firewall, aws_ec2, aws_region_eu_west_1 or some other tag) like you would any other inventory assignment, like this:

---
- hosts: role_Firewall
  gather_facts: false
  tasks:
  - name: Show the name of this device
    debug:
      msg: "{{ inventory_hostname }}"

And there you have it. Hope this is useful!

Late edit: 2020-11-23: Following a conversation with Andy from Work, we’ve noticed that if you’re trying to do SSM connections, rather than username/password based ones, you might want to put this in your aws_ec2.yml file:

---
plugin: amazon.aws.aws_ec2
hostnames:
  - tag:Name
compose:
  ansible_host: instance_id
  ansible_connection: 'community.aws.aws_ssm'

Late edit 2020-12-01: One final instance, I’ve changed plugin: aws_ec2 to plugin: amazon.aws.aws_ec2.

This will keep your hostnames “pretty” (with whatever you’ve tagged it as), but will let you connect over SSM to the Instance ID. Good fun :)

Featured image is “inventory” by “Lee” on Flickr and is released under a CC-BY-SA license.

"Submarine" by "NH53" on Flickr

Recursive Git Submodules

One of my colleagues asked today about using recursive git submodules. First, let’s quickly drill into what a Submodule is.

Git Submodules

A submodule is a separate git repository, attached to the git repository you’re working on via two “touch points” – a file in the root directory called .gitmodules, and, when checked out, the HEAD file in the .git directory.

When you clone a repository with a submodule attached, it creates the directory the submodule will be cloned into, but leave it empty, unless you either do git submodule update --init --recursive or, when you clone the repository initially, you can ask it to pull any recursive submodules, like this git clone https://your.vcs.example.org/someorg/somerepo.git --recursive.

Git stores the commit reference of the submodule (via a file in .git/modules/$SUBMODULE_NAME/HEAD which contains the commit reference). If you change a file in that submodule, it marks the path of the submodule as “dirty” (because you have an uncommitted change), and if you either commit that change, or pull an updated commit from the source repository, then it will mark the path of the submodule as having changed.

In other words, you can track two separate but linked parts of your code in the same tree, working on each in turn, and without impacting each other code base.

I’ve used this, mostly with Ansible playbooks, where I’ve consumed someone else’s role, like this:

My_Project
|
+- Roles
|  |
|  +- <SUBMODULE> someorg.some_role
|  +- <SUBMODULE> anotherorg.another_role
+- inventory
+- playbook.yml
+- .git
|  |
|  +- HEAD
|  +- modules
|  +- etc
+- .gitmodules

In .gitmodules the file looks like this:

[submodule "module1"]
 path = module1
 url = https://your.vcs.example.org/someorg/module1.git

Once you’ve checked out this submodule, you can do any normal operations in this submodule, like pulls, pushes, commits, tags, etc.

So, what happens when you want to nest this stuff?

Nesting Submodule Recursion

So, my colleague wanted to have files in three layers of directories. In this instance, I’ve simulated this by creating three directories, root, module1 and module2. Typically these would be pulled from their respective Git Service paths, like GitHub or GitLab, but here I’m just using everything on my local file system. Where, in the following screen shot, you see /tmp/ you could easily replace that with https://your.vcs.example.org/someorg/.

The output of running mkdir {root,module1,module2} ; cd root ; git init ; cd ../module1 ; git init ; cd ../module2 ; git init ; touch README.md ; git add README.md ; git commit -m 'Added README.md' ; cd ../module1 ; git submodule add /tmp/module2 module2 ; git commit -m 'Added module2' ; cd ../root ; git submodule add /tmp/module1 module1 ; git submodule update --init --recursive ; tree showing the resulting tree of submodules under the root directory.
The output of running mkdir {root,module1,module2} ; cd root ; git init ; cd ../module1 ; git init ; cd ../module2 ; git init ; touch README.md ; git add README.md ; git commit -m ‘Added README.md’ ; cd ../module1 ; git submodule add /tmp/module2 module2 ; git commit -m ‘Added module2’ ; cd ../root ; git submodule add /tmp/module1 module1 ; git submodule update –init –recursive ; tree showing the resulting tree of submodules under the root directory.

So, here, we’ve created these three paths (basically to initiate the repositories), added a basic commit to the furthest submodule (module2), then done a submodule add into the next furthest submodule (module1) and finally added that into the root tree.

Note, however, when you perform the submodule add it doesn’t automatically clone any submodules, and if you were to, from another machine, perform git clone https://your.vcs.example.org/someorg/root.git you wouldn’t get any of the submodules (neither module1 nor module2) without adding either --recursive to the clone command (like this: git clone --recursive https://your.vcs.example.org/someorg/root.git), or by running the follow-up command git submodule update --init --recursive.

Oh, and if any of these submodules are updated? You need to go in and pull those updates, and then commit that change, like this!

The workflow of pulling updates for each of the submodules, with git add, git commit, and git pull, also noting that when a module has been changed, it shows as having “new commits”.
And here we have the finish of the workflow, updating the other submodules. Note that some of these steps (probably the ones in the earlier image) are likely to have been performed by some other developer on another system, so having all the updates on one machine is pretty rare!

The only thing which isn’t in these submodules is if you’ve done a git clone of the root repo (using the terms from the above screen images), the submodules won’t be using the “master” branch (or a particular “tag” or “branch hame”, for that matter), but will instead be using the commit reference. If you wanted to switch to a specific branch or tag, then you’d need to issue the command git checkout some_remote/some_branch or git checkout master instead of (in the above screen captures) git pull.

If you have any questions or issues with this post, please either add a comment, or contact me via one of the methods at the top or side of this page!

Featured image is “Submarine” by “NH53” on Flickr and is released under a CC-BY license.

“New shoes” by “Morgaine” from Flickr

Making Windows Cloud-Init Scripts run after a reboot (Using Terraform)

I’m currently building a Proof Of Value (POV) environment for a product, and one of the things I needed in my environment was an Active Directory domain.

To do this in AWS, I had to do the following steps:

  1. Build my Domain Controller
    1. Install Windows
    2. Set the hostname (Reboot)
    3. Promote the machine to being a Domain Controller (Reboot)
    4. Create a domain user
  2. Build my Member Server
    1. Install Windows
    2. Set the hostname (Reboot)
    3. Set the DNS client to point to the Domain Controller
    4. Join the server to the domain (Reboot)

To make this work, I had to find a way to trigger build steps after each reboot. I was working with Windows 2012R2, Windows 2016 and Windows 2019, so the solution had to be cross-version. Fortunately I found this script online! That version was great for Windows 2012R2, but didn’t cover Windows 2016 or later… So let’s break down what I’ve done!

In your userdata field, you need to have two sets of XML strings, as follows:

<persist>true</persist>
<powershell>
$some = "powershell code"
</powershell>

The first block says to Windows 2016+ “keep trying to run this script on each boot” (note that you need to stop it from doing non-relevant stuff on each boot – we’ll get to that in a second!), and the second bit is the PowerShell commands you want it to run. The rest of this now will focus just on the PowerShell block.

  $path= 'HKLM:\Software\UserData'
  
  if(!(Get-Item $Path -ErrorAction SilentlyContinue)) {
    New-Item $Path
    New-ItemProperty -Path $Path -Name RunCount -Value 0 -PropertyType dword
  }
  
  $runCount = Get-ItemProperty -Path $path -Name Runcount -ErrorAction SilentlyContinue | Select-Object -ExpandProperty RunCount
  
  if($runCount -ge 0) {
    switch($runCount) {
      0 {
        $runCount = 1 + [int]$runCount
        Set-ItemProperty -Path $Path -Name RunCount -Value $runCount
        if ($ver -match 2012) {
          #Enable user data
          $EC2SettingsFile = "$env:ProgramFiles\Amazon\Ec2ConfigService\Settings\Config.xml"
          $xml = [xml](Get-Content $EC2SettingsFile)
          $xmlElement = $xml.get_DocumentElement()
          $xmlElementToModify = $xmlElement.Plugins
          
          foreach ($element in $xmlElementToModify.Plugin)
          {
            if ($element.name -eq "Ec2HandleUserData") {
              $element.State="Enabled"
            }
          }
          $xml.Save($EC2SettingsFile)
        }
        $some = "PowerShell Script"
      }
    }
  }

Whew, what a block! Well, again, we can split this up into a couple of bits.

In the first few lines, we build a pointer, a note which says “We got up to here on our previous boots”. We then read that into a variable and find that number and execute any steps in the block with that number. That’s this block:

  $path= 'HKLM:\Software\UserData'
  
  if(!(Get-Item $Path -ErrorAction SilentlyContinue)) {
    New-Item $Path
    New-ItemProperty -Path $Path -Name RunCount -Value 0 -PropertyType dword
  }
  
  $runCount = Get-ItemProperty -Path $path -Name Runcount -ErrorAction SilentlyContinue | Select-Object -ExpandProperty RunCount
  
  if($runCount -ge 0) {
    switch($runCount) {

    }
  }

The next part (and you’ll repeat it for each “number” of reboot steps you need to perform) says “increment the number” then “If this is Windows 2012, remind the userdata handler that the script needs to be run again next boot”. That’s this block:

      0 {
        $runCount = 1 + [int]$runCount
        Set-ItemProperty -Path $Path -Name RunCount -Value $runCount
        if ($ver -match 2012) {
          #Enable user data
          $EC2SettingsFile = "$env:ProgramFiles\Amazon\Ec2ConfigService\Settings\Config.xml"
          $xml = [xml](Get-Content $EC2SettingsFile)
          $xmlElement = $xml.get_DocumentElement()
          $xmlElementToModify = $xmlElement.Plugins
          
          foreach ($element in $xmlElementToModify.Plugin)
          {
            if ($element.name -eq "Ec2HandleUserData") {
              $element.State="Enabled"
            }
          }
          $xml.Save($EC2SettingsFile)
        }
        
      }

In fact, it’s fair to say that in my userdata script, this looks like this:

  $path= 'HKLM:\Software\UserData'
  
  if(!(Get-Item $Path -ErrorAction SilentlyContinue)) {
    New-Item $Path
    New-ItemProperty -Path $Path -Name RunCount -Value 0 -PropertyType dword
  }
  
  $runCount = Get-ItemProperty -Path $path -Name Runcount -ErrorAction SilentlyContinue | Select-Object -ExpandProperty RunCount
  
  if($runCount -ge 0) {
    switch($runCount) {
      0 {
        ${file("templates/step.tmpl")}

        ${templatefile(
          "templates/rename_windows.tmpl",
          {
            hostname = "SomeMachine"
          }
        )}
      }
      1 {
        ${file("templates/step.tmpl")}

        ${templatefile(
          "templates/join_ad.tmpl",
          {
            dns_ipv4 = "192.0.2.1",
            domain_suffix = "ad.mycorp",
            join_account = "ad\someuser",
            join_password = "SomePassw0rd!"
          }
        )}
      }
    }
  }

Then, after each reboot, you need a new block. I have a block to change the computer name, a block to join the machine to the domain, and a block to install an software that I need.

Featured image is “New shoes” by “Morgaine” on Flickr and is released under a CC-BY-SA license.
FDE Flag by the dock side in Berlin, with a WECC sign in the background.

#FDEConf2019 – My Impressions

Last year, I was very fortunate be selected as a Fujitsu Distinguished Engineer (FDE), and earlier this year I was advised that my membership of that group was renewed (this is not a forgone conclusion – it’s something you need to achieve each year!)

Some FDEs have occasional local meet-ups, but our whole group’s “big do”, when we induct new members into the group, the “FDE Conference” was held this year (#FDEConf2019 on Social Media) at WECC, Berlin.

The FDE Conference spans two days (plus travelling) and this year was no exception. I travelled from Manchester with Associate FDE, Lucy McGrother, and stayed at the Ellington Hotel in Berlin. On arrival, several of the FDEs who were at the Ellington created a chat group on Linked In and organised going out for dinner at the Bavarian Berlin restaurant (which was really tasty!)

I’d already started eating before I remembered to take a photo! D’oh!
I did better with Desert!

The following day, the first “real” day of the event, a few of us caught an Uber to the conference (I’ve never used Uber before, but was very impressed with the UX of it!) where we discovered that a “Uber X” (the bigger ones) for 6 people can’t fix 6 people into! I had my knees around my ears, which was fun!

I was speaking at the event on the first day, so I made my way to my room, only to discover that not only was the venue “HDMI only” (damn you DisplayPort-only laptop!) but also that an update overnight on my blog (to update syntax highlighting I don’t use any more) had taken out the presentation software I was using. Cue running around looking for an DisplayPort/HDMI Adaptor, and then trying to figure out what had actually broken on the site! Oh well – soon sorted!

Welcome speech delivered by the ever enthusiastic Joseph Reger, and then we were off to the “Breakout Sessions”!

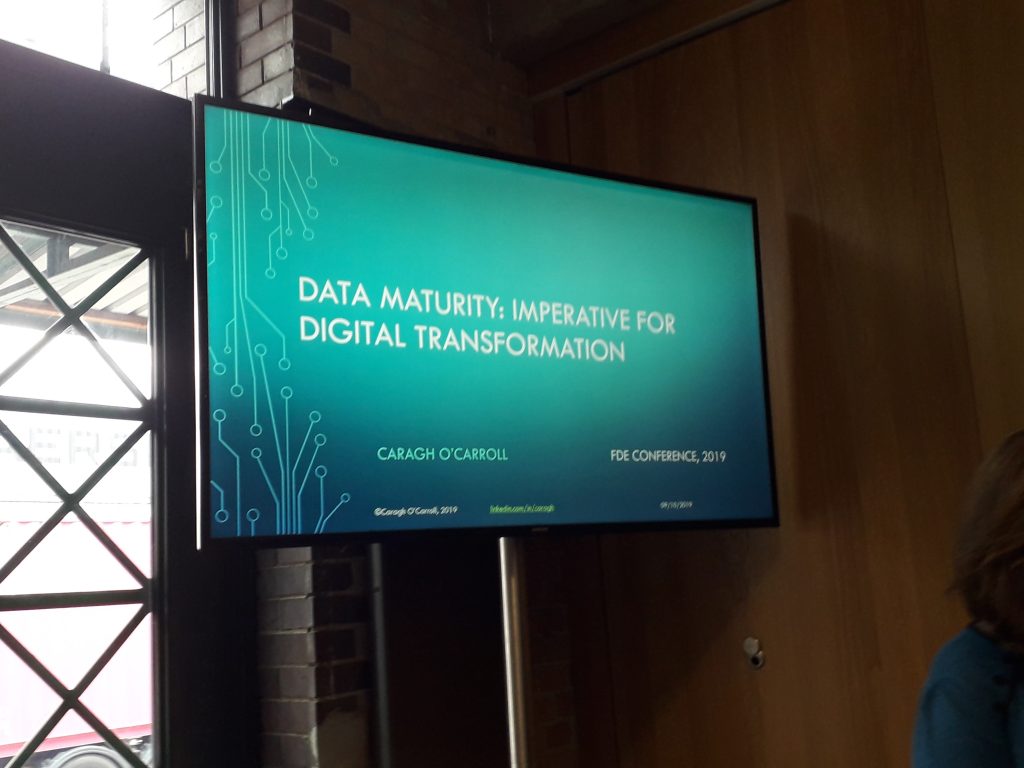
The first talk I attended was by Caragh O’Carroll, on Data Maturity. I’d had a bit of a preview of the talk a week or so before the talk was actually given (a dry-run, so to speak), and it was great to hear that I’d literally had 10% of what would actually be in the talk. Some of my suggestions had been incorporated, and the whole room was up and moving around for one piece of the story half way through. It was really energising!

After that, I was on stage. Because Joseph had run over slightly, the speaker in the slot before me had timed his talk to the minute and so overran into the “moving around” block. I was slightly nervous as this meant my timing could have gone out (but as it turned out, I nailed it to the minute!) I’ve written up some notes on my talk already elsewhere on this blog, so I won’t go into too much detail, aside from to add that after I wrote that post, I was told that people were being turned away from the door, so that’s a bit of an ego boost :)

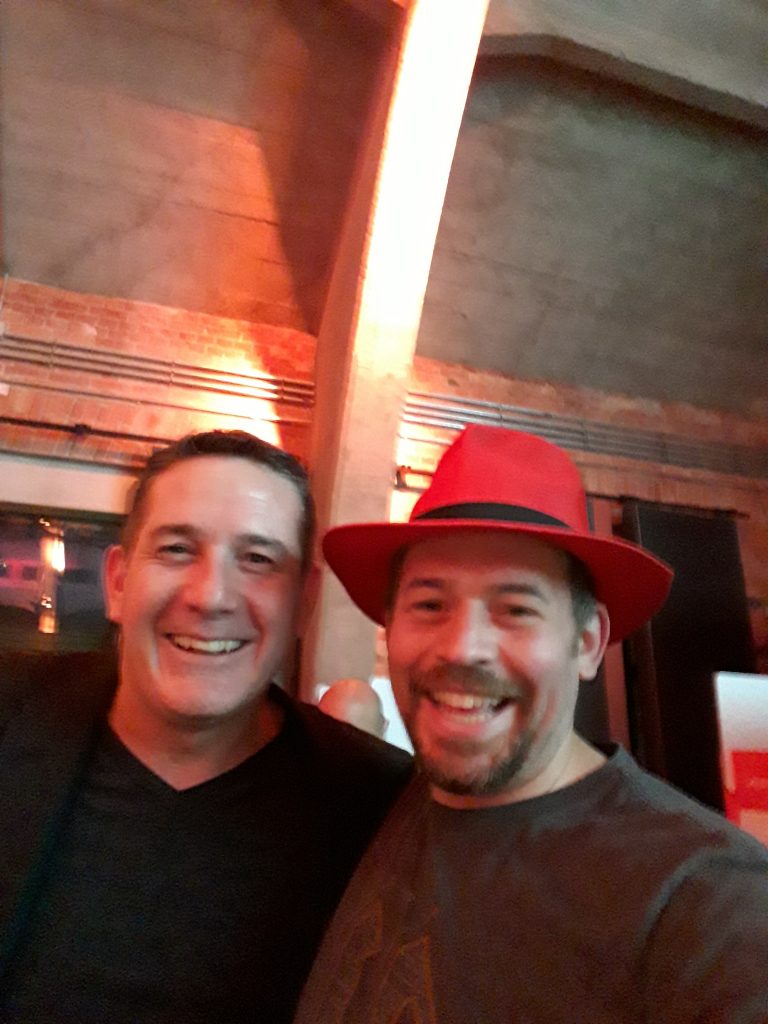
I’d intended next to attend a talk on Microservices Architectures, but unfortunately the room was rammed (it wasn’t even “standing room only” – they’d run out of room for people to stand!) Instead, I went away and spoke to some of the vendors. RedHat were there, dispensing Red Fedora hats to anyone who deposited a “contact card”. Yep, I went for it!

Jon in a Red Hat from RedHat standing in front of the Fujitsu Distinguished Engineers banner
After I received the hat, it didn’t come off… until I got home and my wife’s raised eyebrow suggested it wouldn’t have a long life if it remained there…

I also spoke to Pluralsight, a training vendor I’d previously sidelined in favour of another platform, but who appeared to have a much broader scope of content… so they convinced me to give it another try.

I spoke briefly to SUSE, but more-so because I wanted to find out how people I knew working for SUSE were doing than to find out about what SUSE were offering. I’m reasonably well switched on with SUSE as a project and a company so I didn’t feel like I needed to get much from them. Also, sadly, none of the people who were there knew the people I was talking about, which wasn’t a good start! :)

I also spent a couple of minutes talking to a partner I’ve had reasonably close dealings with, Symantec, and agreed to a conversation in the next couple of months. Again, it wasn’t a long talk, as I knew the product set and context quite well.

The other sponsors had interesting content, but generally didn’t cover areas that overlap with my work or my personal interests, so, while I interacted with them, I don’t recall much of what was discussed.

The last break-out session of the day was Scott Pendlebury and Dave Markham‘s session on “Cyber Threat Intelligence and Dark Web Research” – a cumulative talk on the research they’ve done into various aspects of their jobs in the Advanced Threat Centre. This was a very in-depth talk, covering a large number of subjects in a very short space of time. Several people I spoke to after their talk were very interested in lots of little aspects of their talk… because it touched so many areas!

All Meme’d up, Dave and Scott’s front slide was my favourite one!

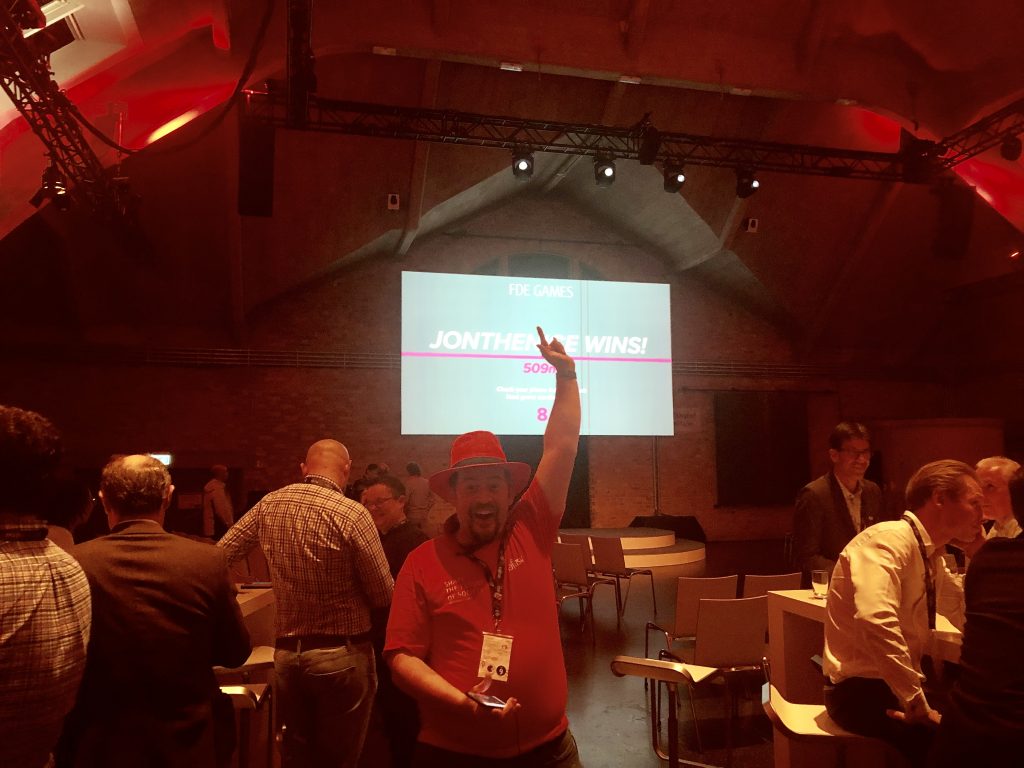
There was a closing speech for the day, and then the rooms were re-jigged for the evening games and food. In one room was a big-screen, phone controlled, multi-player “Pong” game (hosted by Piing) and a spin of “Cards Against Humanity” called “Cards Against Complexity” (hosted by Citrix). Both were fun, but what was much MORE fun was the game after Pong – a big-screen, phone controlled, multi-player buggy racing game. The first round, naturally, I won!

Me winning the first round of Buggy Racing. I didn’t manage to achieve *that* feat again! Photo courtesy of Caragh, who spotted me celebrating and snapped it!

Following the games, I went back to the hotel with a couple of the other FDEs (discovering how not-Uber, non-Uber services are), and had a couple of drinks in the bar. Bed and awake for breakfast the following morning.

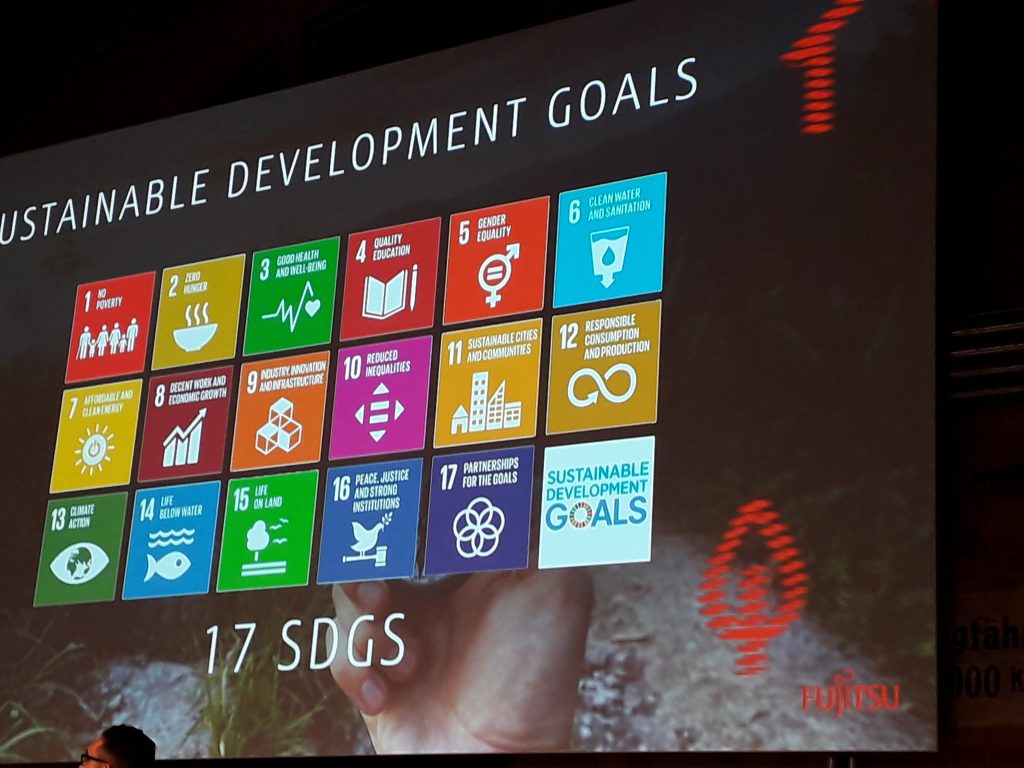
Day two was about the UN’s 17 Sustainable Development Goals, and what ideas we, as a company, could come up with to help progress those goals.

A slide from the morning, showing the Sustainable Development Goals

We had talks from three different individuals who are helping to steer the conversation. Neil Bennett, Dr. Leonardo Gheller Alves (link to his latest project) and Thomas Deloison. Our speakers, talking over individual radio channels to tuned headphones, told us about how we could impress them with our projects… and talking of the projects, there were three “target” cities – Berlin (naturally), Bangalore and Tokyo (also, naturally). Each city was prompted to look at three areas of interest – Homes & Communities, Transport and Environment. Each city/interest set was split into three groups (numbered 1-9), each of whom were to approach the subject and come up with a project to solve an issue in their chosen area.

The process, orchestrated by the co-creation conductor – Jo Box, took us on a journey, looking at the city and it’s issues, pushing us into looking at how those issues impact a single member of that city and, then pulling us into how we might help that person improve their lives.

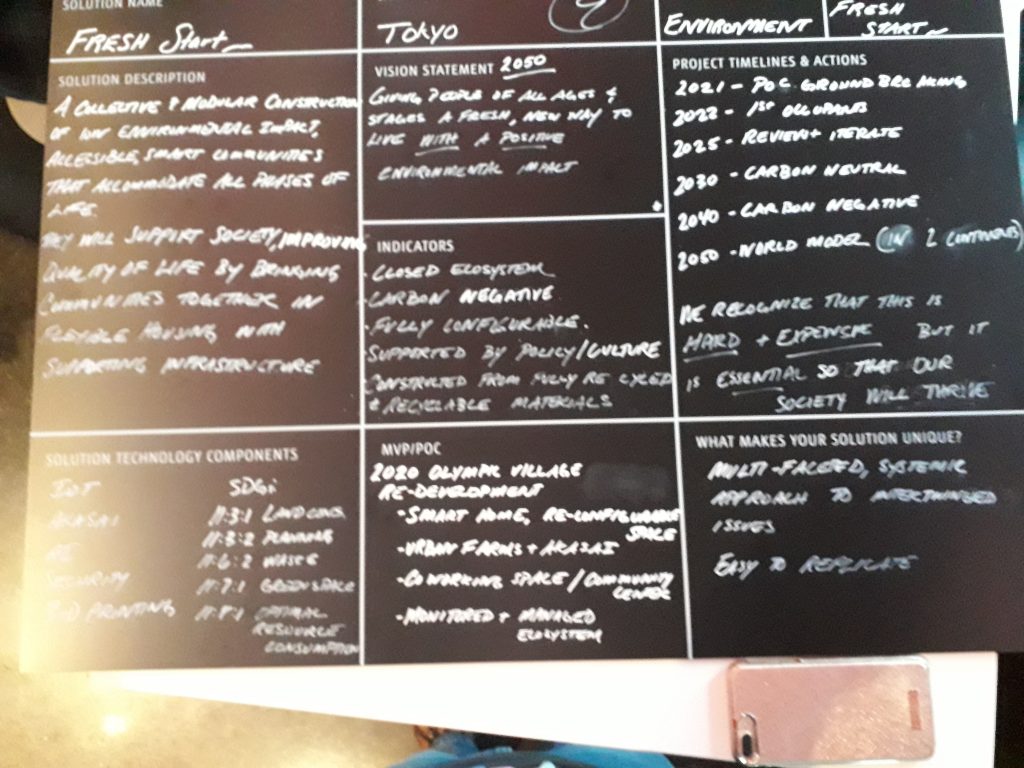
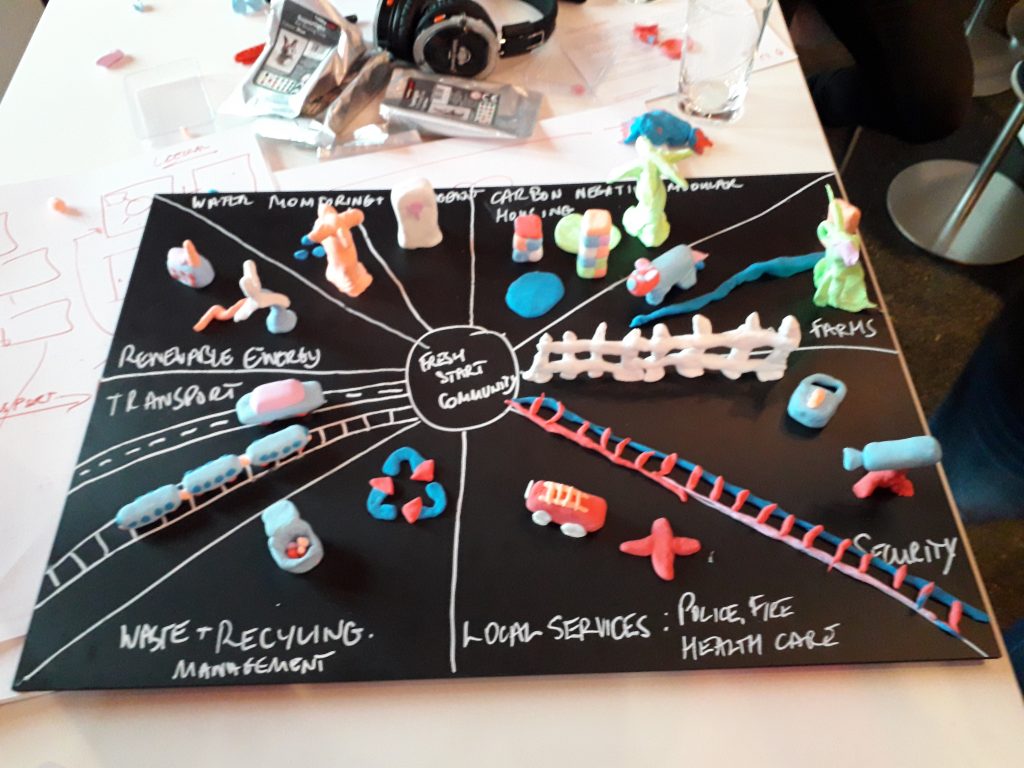
My team, Tokyo 9 (dealing with “Environment”) considered the path of an elderly Japanese lady “Mikika” and thought about what issues she had. We explored the fact that she lived in a “Walk-up” apartment, and probably was concerned with the fates of all of her family (including her own brother, as well as their children and grandchildren). We expanded on that to work out what things in Mikika’s environment would cause her issues, and how we might help to solve those issues… As it worked out, we ended up crossing from “Environment” into “Housing”, as we imagined building a new town on a brownfield environment inside Tokyo, and how that town might be better engineered to support family lives for all stages of life, from rearing children near home, to supporting young adults in their quest for a career, and later to the care and support of elderly family members who might be living nearby.

Our final presentation board
The physical view of our final presentation – what makes up our project?

Sadly, we didn’t win, but I loved being a part of the team. I have to give lots of respect to all my team members, but particularly to Liz Parnell, a recent member of the FDE community and Sean Barker. These were both our voices for the pitches to our fellow Tokyo teams, and also in our final pitch to the judges.

Following the pitches, we went off-site for a walk around (I managed to do some tourist-y shopping for the family and then chatted with some other FDEs at the “Other” hotel) before heading back for drinks and dinner.

During the dinner, I was approached by someone from the RedHat stand, who asked if they could borrow my hat. I was, by this point, the only person at the event still wearing my coveted red fedora. I finally let him borrow my hat, only to find it on the head of Dr. Joseph!

In the latter part of the dinner were speeches from members of the Management Team, essentially reminding us that we’re amazing and need to keep being so great. I subsequently managed to talk to my local management representative – Tim White, with whom I got a great selfie!

Jon Spriggs and Tim White. Jon wears a Red Hat.
Yes, I’ve got my red fedora back by now!

We also saw all the new FDEs and Associate FDEs being inducted in, and also those staff who were awarded for significant internal research papers.

And then, we all had a lot more drinks, and when the bar shut down, we returned to the bar at the hotel, and had some more.

A reasonable handful of us ended up on the same flight back to Manchester the following day, so it was nice to catch up with a few of the FDEs on the return.

I should say though, it took me a few days to recover! Hence, this post only arriving now… so, erm, perhaps that’ll teach me for taking my own vodka to a venue that’s only serving beer and wine? (#ThePerilsOfOnlyDrinkingSpirits)

Nah, didn’t think so! 😁

If you work for Fujitsu, and want to know more about the FDE program, want to become an FDE or just want to know more about what I do for Fujitsu, please get in touch. I’m in the Address Book and I am frequently on our IM system. I’d be more than happy to talk with you!

If you don’t work for Fujitsu, but would be interested, start by looking at the roles available in your region (e.g. via this page). Each region may have a different recruiting tool (that’s big business for you!) but if you spot something and want to know whether it might be the right sort of role for you, you can contact me via one of the options up the top of my blog and I’d be glad to try to help you, if it’s right for you!

Featured image is “Inspiring couple of days in Berlin attending #FDEConf2019” by Paul Clarke.

Stripping a UK O2 Samsung Galaxy SIII Mini down to the bare essentials

The company I work for have recently issued all On Call engineers in my team a Samsung Galaxy SIII Mini to give us access to company e-mail and resources out of hours. Rather than shipping a customized image, we have received a stock O2 imaged mobile, and so this is my limited guide to bringing this to as close to “Stock” Android as I can manage (or want).

Most of what we need is provided to us using a commercial solution called Touchdown, so I won’t be covering that here, as whatever you get shipped to you will not include that. I’ve elected not to use the device for my personal systems, barring my Google calendar, which means I’ll stand a fighting chance of not booking overtime and other work things for personal appointments.

So, on power-on, I completed the post-install steps, including setting up my Google account. I decided not to keep the device in sync with my Google account, as I already have a few other Android devices, and I don’t want to get my work infrastructure mixed up with my home kit.

Next, I went into Settings, and from there into the Google Account. I clicked on my e-mail address and unselected the following options:

  • Sync App Data
  • Sync Contacts
  • Sync Gmail
  • Sync Internet
  • Sync People details

After that, I went into Application Manager (again, in Settings), and swapped to the “All” tab. Firstly, I needed to clear out the downloaded contacts, which I did by selecting Contacts Storage, and then pressing the “Clear Data” button.

Next, I disabled all the applications that I either don’t need, or don’t want on my work phone. I did this by selecting each in turn, and then selecting the option to disable them. Here’s the list:

  • Amazon MP3
  • eBay
  • Flipboard
  • Gallery
  • Game Hub
  • Gmail
  • Google Play Books
  • Google Play Magazines
  • Google Play Music
  • Google+
  • Music
  • O2 Space
  • S Planner
  • S Planner Widget
  • S Suggest
  • S Voice
  • Samsung Account
  • Samsung Apps
  • Samsung Backup Provider
  • Samsung Browser SyncAdapter
  • Samsung Calendar SyncAdapter
  • Samsung Cloud Data Relay
  • Samsung Contact SyncAdapter
  • Samsung Push Service
  • Samsung Syncadapters
  • Tags
  • Talk
  • Talkback
  • Video Hub
  • Yahoo! Finance
  • Yahoo! News
  • YouTube

Wow, isn’t that a list!

My next step was to hide some of the applications I don’t need. To do this, I went into the applications page, pressed the menu button, and selected “Hide applications”. This puts selection boxes next to all the applications on the page, and once you’ve done selecting options, press “Done” in the top right corner to hide them. Here’s my list:

  • Contacts
  • Downloads
  • E-Mail
  • FM Radio
  • Google Settings
  • Help
  • Memo
  • Music Player
  • My Files
  • Video Player
  • Voice Recorder
  • Voice Search

Lastly, installed a couple of applications from the Play Store:

Once I’d got Agenda Widget Plus, and Google Keyboard configured, I hid those applications in the applications pane too.

After all of that, I set up Touchdown… which you’ll need to follow up though your own instructions!

One final thing before I wrap this all up… even though I’m on-call, this doesn’t include being engaged via e-mail. As such, my e-mail doesn’t need to disturb me, and so I’ve disabled the touchdown application’s notifications for e-mail. To do this, go into Touchdown, make sure you’re at the “main” screen (not the default e-mail screen, but the one which also includes all your tasks and calendar options), and then press the menu button, press “Settings”, and select the “Advanced” tab. Scroll right to the bottom of the list, and press the “Email Alerts” button. Select “Customize settings” and then select appropriate options. If you leave nothing ticked, all you’ll get is a flag in the notifications tray showing an e-mail has appeared. Personally, I’ve turned on “Enable lights” and picked a colour, so I can quickly see whether I’ve had a mail just by checking the screen.