"jogger" by "Acid Pix" on Flickr

My journey with Couch To 5k

Couch to 5k is a training plan for jogging or running, where you start from doing very little jogging and move up to doing longer and longer extended runs. In the UK the BBC have an app which helps you follow the plan, but outside the UK there are other apps you can try.

Why did I start?

With the exception of the beginning of lockdown (where we were doing “big walks” to “keep our fitness up”), I found myself becoming progressively more and more sedentary. Yes, I’d still take the kids out each day, but I was finding myself more and more stuck in doing the same short walks that they were happy to do. I needed to push myself a bit. I’ve never been a runner, in fact many of my worst memories of secondary school involved being sent out for a run, or doing laps around the field… but Jules suggested I try Couch to 5k.

What am I using?

I’ve been using the BBC One You Couch to 5k app.

Screenshot Image
Screen shot from the Android App listing. While you might see this a few times on your early runs, chances are you’ll not really look at this again.

Following the plan

The first week, I was out, three times, shuffling along for 19 minutes, doing cycles of “jogging” for 60 seconds and then walking for 90 seconds. I felt like I couldn’t possibly jog for 60 seconds, but just keep going as best as I could. More often than not in the first couple of sessions I’d only be able to jog the full 60 seconds, but instead I’d do 30 to 45 seconds. And then session three came along, and I managed the full 60 seconds of the jog, each time! Wow!

The next week was a little bit harder, it’s still three sessions a week, but now it’s 5 cycles of jogging 90 seconds and walking for 2 minutes. Again I had the same pattern, the first session I couldn’t jog the full 90 seconds, but I could usually do 60 seconds, and sometimes I’d make it up to 75… and again, by the third session, I was managing the full 90 seconds for each of the cycles. I still wasn’t feeling like I could do any serious distance or speed, but at least I was going out consistently.

Week three got a bit harder. The three sessions this week all followed this cycle – 90 seconds jogging, 90 seconds walking, 3 minutes jogging, 3 minutes walking, 90 seconds jogging, 90 seconds walking, then 3 minutes jogging. Oof. The first time I did this I don’t think I even made the 90 seconds out of the 3 minutes jogging, but again, by the third session, I had this one sorted!

Week four changed the dynamic a bit. In this week you jog more than you walk. Yes, it sounds hard, but… well, as the app’s voice in my ear, Jo Whiley, says “You’ve done all the preparation for this, you can do it”. I’ll talk about the “Coaches” and the app itself in a bit. This week you do 3 minutes jogging, 90 seconds walking, 5 minutes jogging, 2.5 minutes walking, 3 minutes jogging, 90 seconds walking and then 5 minutes jogging. I followed a fairly standard (for me) pattern in this – I ended up not being able to do all of the running on each jog for the first two sessions, but on the third, I could manage it.

Week five was where I struggled the most. A combination of bad weather and, well, a global pandemic meant that I ended up doing this week twice. I quite like the fact that you can re-do individual sessions, or whole weeks of the Couch to 5k app. Anyway, the actual cycles this week are different from each session. It seems a bit hard but on the second time around I managed OK.

So, week 5 session one is 5 minutes jogging, 3 minutes walking, 5 minutes jogging, 3 minutes walking and then a final 5 minutes jogging. First time around I did OK with this – I think I managed 5 minutes jogging, then 3 minutes jogging and then 3 minutes jogging. Second time around I did 5 minutes, 4.5 minutes and 5 minutes.

Week 5 session two is 8 minutes jogging, 5 minutes walking and 8 minutes jogging. Oof. I think on my first pass at this I managed 5 minutes and then 2 minutes on the first block and then 6 minutes and walked the rest of the second block. On my second pass of this week I got both sets of 8 minutes, but I was exhausted. It was all good stuff.

And then the real killer. Week 5 session three is 20 minutes “non-stop” jogging. So, I’m going to remind you. It took me two goes at this week to manage this. The first time around I essentially managed 5 minute blocks, did what I could for each of those and then walked for anywhere from 30 seconds to 1 minute between each of them. Not great. Not what the plan said, but… I could re-do it. On the second run through I think I managed 12 minutes and then walked for 30 seconds, and then jogged for the rest of it. Whoop whoop.

Week 6 also had different timings for each of the sessions. This and Week 7 were also a bit of a muddle for me. I was away from my house from the end of week 6, all of week 7 and I was on my main summer holiday break. My children were both interested in coming out for a run with me, so I ended up doing the following sessions over the 9 days we were away (and the couple of days each side of it)!

  • Week 6 session 1 (just me) 5 minutes jogging, 3 minutes walking, 8 minutes jogging, 3 minutes walking and 5 minutes jogging. At home. All generally OK. I don’t recall any issues with this one, but I clearly did have an issue, as I repeated it later in the week
  • Week 6 session 2 (just me) 10 minutes jogging, 3 minutes walking then 10 minutes jogging. At home. Again, generally fine.
  • Week 6 session 1 (just me) repeated for some reason! At home.
  • Week 6 session 3 (just me) 25 minutes along the Abergele sea wall. All OK.
  • Week 7 session 1 (me and Daniel) 25 minutes along the Abergele sea wall. Daniel struggles a bit with pace, so he’d rush off, then stop, then rush off, then stop. We did it OK though.
  • Week 1 session 1 (me and Emily) (60 seconds jogging, 90 seconds walking, cycled 7 times) Good, and better paced too. Emily said she didn’t want to do it again 😁
  • Week 2 session 1 (me and Daniel) (90 seconds jogging, 90 seconds walking, cycled 5 times) OK. Still no better paced, but Daniel also said he didn’t want to do it again.
  • Week 7 session 2 (just me) 25 minutes at home. Felt amazing.
  • Week 7 session 3 (just me) 25 minutes at home. Felt like I’d nailed this distance.

Back home from that break, I got back into it! I did week 8 session 1 last night, it’s now up to 28 minutes and I feel like I managed it with no worries at all.

Apps and accessories

That first week, I hadn’t known what to do with my phone – the first session I was wearing jogging bottoms and had the phone in my pocket – ugh, that was uncomfortable. The next time I had a small bag that went over my shoulder, but it kept rising up and catching me on the throat – that also didn’t work. I tried a small backpack and the phone just kept bouncing around in there and felt really uncomfortable and painful.

In the end I bought a “VGuard Running Phone Armband” from Amazon.

Image from the Amazon listing

I measured my upper arm, and thought it would be tight, but would fit. In the end, I’ve actually started wearing it on my forearm, as I can actually see the display there, and because it’s not quite so tight. I wear wired headphones from my Nokia 6.2 phone which pass under a flap on the side of the case and then goes up my sleeve. I’m thinking of getting some bond conducting bluetooth headphones, as none of the over-the-ear or in-the-ear ones I’ve worn are really suitable for how I jog. Aside from anything I cross a couple of roads when I’m jogging, and while I can do this by vision alone, having an audio cue too would be helpful.

On my other wrist, I wear a Fossil Gen 4 Android Wear based watch.

https://images-na.ssl-images-amazon.com/images/I/71LTnGrXpML._AC_UX522_.jpg
Image from the Amazon listing

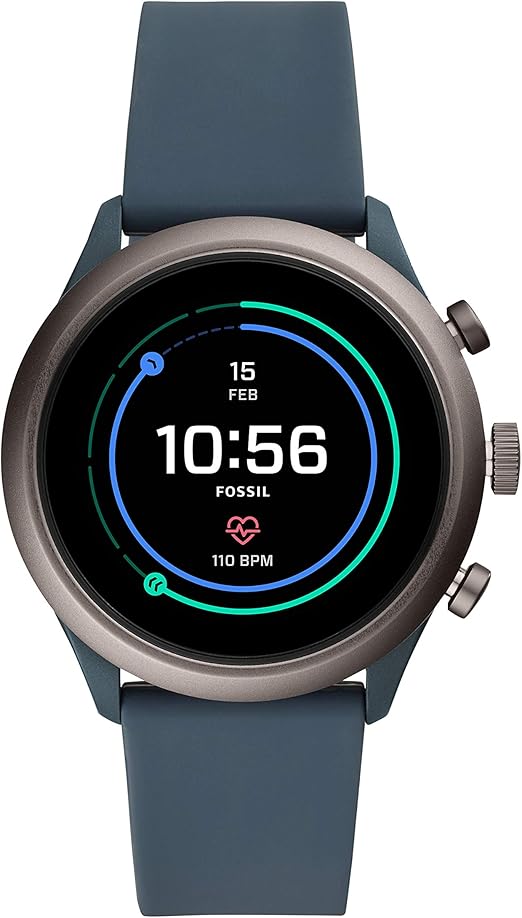
I use this to signal to Google Fit when I start and stop the couch to 5k session, so I can get more accurate tracking of my activities. I upgraded to this during week 6 from my LG Urbane watch, and the new model has in-built heart rate tracking. As such, I get an idea of my heart rate during my jogs now too.

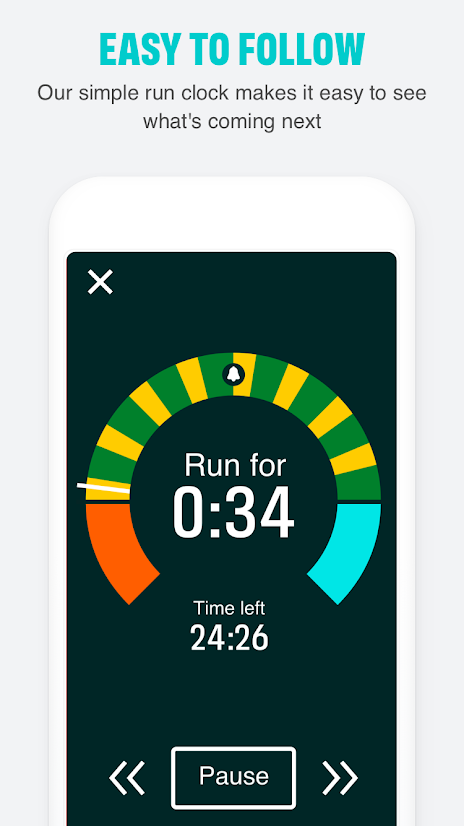
How about the app itself? On the whole, it’s OK. You do a 5 minute “brisk walk” to warm up and another to warm down at the end. Half way around the course, there’s a bell sound, so you know when you’re half way. You get a set of yellow circles showing what stages you’ve completed, and you’re reminded not to do the later stages without having done the earlier ones. Apparently, in the App there are also

There’s a few different coach voices to select from – I chose Jo Whiley, but there are also a few others, most of which I didn’t recognise, except for the comedienne Sarah Millican.

I had some niggles, but they’re not disastrous, for example, around week 2 I had a few sessions where the app would restart itself during the final block of speech, and so it didn’t record that run as having been completed (to resolve this, once I got home, I just put the phone on the side, set it to “running” and then pressed “end” once the timed session was done). On another occasion, the bell sounded, and it re-started the podcast which had been paused for my coach to talk to me about how far I’d gone. Not a disaster, again, as I just paused the podcast again, but a little frustrating!

Talking of the coaches and niggles, one of the later weeks, perhaps 5 or 6, the app indicated that it had failed to download my preferred voice for that week, and asked me to change coach. I picked Sarah Millican, and it was clear that Jo Whiley is much more my style of coach. Jo spends much of her time with you on the course telling you how she found getting started with running, or making suggestions about things to distract you while you’re running. Sarah was very matter-of-fact “You’ve done 5 minutes, well done”, and so on. A few people have remarked that some of the coaches are “too chatty” – Jo probably falls into that category, but I found it just enough distraction to keep me going. Sarah did not work for me! I swapped back to Jo when I got back to reliable Wifi and it downloaded fine! Whew.

I don’t think the app stores any data “in the cloud”, so I don’t think it’s possible to swap over to another phone – I think you’d just need to jump ahead to where you got to, and maybe afterwards go back and let it play through the track for each session to catch up.

In summary

If I was starting again, would I do “Couch to 5k”? Yes, absolutely. Have I encouraged others? Yep. Oh, and am I anywhere near 5k? No, not a shot! I’m currently doing about 2.3miles, which is a little over 3.5k. At 30 minutes, I’ll probably be doing about 2.5miles, which is about 4k, so to get to 3.1miles (which is around 5k), I’ll probably need to be running for maybe 40 minutes? Something like that. Anyway, I’m looking forward to getting close to that! And then, maybe, just maybe, I’ll start looking at doing 10k? Who knows!

Featured image is “jogger” by “Acid Pix” on Flickr and is released under a CC-BY license.

"Stockholms Stadsbibliotek" by "dilettantiquity" on Flickr

Terraform templates with Maps

For a project I’m working on, I needed to define a list of ports, and set some properties on some of them. In the Ansible world, you’d use statements like:

{% if data.somekey is defined %}something {{ data.somekey }}{% endif %}

or

{{ data.somekey | default('') }}

In a pinch, you can also do this:

{{ (data | default({}) ).somekey | default('') }}

With Terraform, I was finding it much harder to work out how to find whether a value as part of a map (the Terraform term for a Dictionary in Ansible terms, or an Associative Array in PHP terms), until I stumbled over the Lookup function. Here’s how that looks for just a simple Terraform file:

output "test" {
    value = templatefile(
        "template.tmpl",
        {
            ports = {
                "eth0": {"ip": "192.168.1.1/24", "name": "public"}, 
                "eth1": {"ip": "172.16.1.1/24", "name": "protected"}, 
                "eth2": {"ip": "10.1.1.1/24", "name": "management", "management": true}, 
                "eth3": {}
            },
            management = "1"
        }
    )
}

And the template that goes with that?

%{ for port, data in ports ~}
Interface: ${port}%{ if lookup(data, "name", "") != ""}
Alias: ${ lookup(data, "name", "") }%{ endif }
Services: ping%{ if lookup(data, "management", false) == true } ssh https%{ endif }
IP: ${ lookup(data, "ip", "Not Defined") }

%{ endfor }

This results in the following output:

C:\tf>terraform.exe apply -auto-approve

Apply complete! Resources: 0 added, 0 changed, 0 destroyed.

Outputs:

test = Interface: eth0
Alias: public
Services: ping
IP: 192.168.1.1/24

Interface: eth1
Alias: protected
Services: ping
IP: 172.16.1.1/24

Interface: eth2
Alias: management
Services: ping ssh https
IP: 10.1.1.1/24

Interface: eth3
Services: ping
IP: Not Defined

Naturally, using this in your own user-data or Custom Data field will probably make more sense than just writing it to “output” 😁

Featured image is “Stockholms Stadsbibliotek” by “dilettantiquity” on Flickr and is released under a CC-BY-SA license.

"Sydney Observatory I" by "Newtown grafitti" on Flickr

Using Feature Flags in Terraform with Count Statements

In a project I’m working on in Terraform, I’ve got several feature flags in a module. These flags relate to whether this module should turn on a system in a cloud provider, or not, and looks like this:

variable "turn_on_feature_x" {
  description = "Setting this to 'yes' will enable Feature X. Any other value will disable it. (Default 'yes')"
  value = "yes"
}

variable "turn_on_feature_y" {
  description = "Setting this to 'yes' will enable Feature Y. Any other value will disable it. (Default 'no')"
  value = "no"
}

When I call the module, I then can either leave the feature with the default values, or selectively enable or disable them, like this:

module "region1" {
  source = "./my_module"
}

module "region2" {
  source = "./my_module"
  turn_on_feature_x = "no"
  turn_on_feature_y = "yes"
}

module "region3" {
  source = "./my_module"
  turn_on_feature_y = "yes"
}

module "region4" {
  source = "./my_module"
  turn_on_feature_x = "no"
}

# Result:
# region1 has X=yes, Y=no
# region2 has X=no, Y=yes
# region3 has X=yes, Y=yes
# region4 has X=no, Y=no

When I then want to use the feature, I have to remember a couple of key parts.

  1. Normally this feature check is done with a “count” statement, and the easiest way to use this is to use the ternary operator to check values and return a “1” or a “0” for if you want the value used.

    Ternary operators look like this: var.turn_on_feature_x == "yes" ? 1 : 0 which basically means, if the value of the variable turn_on_feature_x is set to “yes”, then return 1 otherwise return 0.

    This can get a bit complex, particularly if you want to check several flags a few times, like this: var.turn_on_feature_x == "yes" ? var.turn_on_feature_y == "yes" ? 1 : 0 : 0. I’ve found that wrapping them in brackets helps to understand what you’re getting, like this:

    (
      var.turn_on_feature_x == "yes" ?
      (
        var.turn_on_feature_y == "yes" ?
        1 :
        0
      ) :
      0
    )
  2. If you end up using a count statement, the resulting value must be treated as an 0-indexed array, like this: some_provider_service.my_name[0].result

    This is because, using the count value says “I want X number of resources”, so Terraform has to treat it as an array, in case you actually wanted 10 instead of 1 or 0.

Here’s an example of that in use:

resource "aws_guardduty_detector" "Region" {
  count = var.enable_guardduty == "yes" ? 1 : 0
  enable = true
}

resource "aws_cloudwatch_event_rule" "guardduty_finding" {
  count = (var.enable_guardduty == "yes" ? (var.send_guardduty_findings_to_sns == "yes" ? 1 : (var.send_guardduty_findings_to_sqs == "yes" ? 1 : 0)) : 0)
  name = "${data.aws_caller_identity.current.account_id}-${data.aws_region.current.name}-${var.sns_guardduty_finding_suffix}"
  event_pattern = <<PATTERN
{
  "source": [
    "aws.guardduty"
  ],
  "detail-type": [
    "GuardDuty Finding"
  ]
}
PATTERN
}

resource "aws_cloudwatch_event_target" "sns_guardduty_finding" {
  count = (var.enable_guardduty == "yes" ? (var.send_guardduty_findings_to_sns == "yes" ? 1 : 0) : 0)
  rule = aws_cloudwatch_event_rule.guardduty_finding[0].name
  target_id = aws_sns_topic.guardduty_finding[0].name
  arn = aws_sns_topic.guardduty_finding[0].arn
}

resource "aws_cloudwatch_event_target" "sqs_guardduty_finding" {
  count = (var.enable_guardduty == "yes" ? (var.send_guardduty_findings_to_sqs == "yes" ? 1 : 0) : 0)
  rule = aws_cloudwatch_event_rule.guardduty_finding[0].name
  target_id = "SQS"
  arn = aws_sqs_queue.guardduty_finding[0].arn
}

One thing that bit me rather painfully around this was that if you change from an uncounted resource, like this:

resource "some_tool" "this" {
  some_setting = 1
}

To a counted resource, like this:

resource "some_tool" "this" {
  count = var.some_tool == "yes" ? 1 : 0
  some_setting = 1
}

Then, Terraform will promptly destroy some_tool.this to replace it with some_tool.this[0], because they’re not the same referenced thing!

Fun, huh? 😊

Featured image is “Sydney Observatory I” by “Newtown grafitti” on Flickr and is released under a CC-BY license.

"Tracking Methane Sources and Movement Around the Globe" by "NASA/Scientific Visualization Studio" on Nasa.gov

Flexibly loading files in Terraform to license a FortiGate firewall on AWS, Azure and other Cloud platforms

One of the things I’m currently playing with is a project to deploy some FortiGate Firewalls into cloud platforms. I have a couple of Evaluation Licenses I can use (as we’re a partner), but when it comes to automatically scaling, you need to use the PAYG license.

To try to keep my terraform files as reusable as possible, I came up with this work around. It’s likely to be useful in other places too. Enjoy!

This next block is stored in license.tf and basically says “by default, you have no license.”

variable "license_file" {
  default = ""
  description = "Path to the license file to load, or leave blank to use a PAYG license."
}

We can either override this with a command line switch terraform apply -var 'license_file=mylicense.lic', or (more likely) the above override file named license_override.tf (ignored in Git) which has this next block in it:

variable "license_file" {
  default = "mylicense.lic"
}

This next block is also stored in license.tf and says “If var.license is not empty, load that license file [var.license != "" ? var.license] but if it is empty, check whether /dev/null exists (*nix platforms) [fileexists("/dev/null")] in which case, use /dev/null, otherwise use the NUL: device (Windows platforms).”

data "local_file" "license" {
  filename = var.license_file != "" ? var.license_file : fileexists("/dev/null") ? "/dev/null" : "NUL:"
}

👉 Just as an aside, I’ve seen this “ternary” construct in a few languages. It basically looks like this: boolean_operation ? true_value : false_value

That check, logically, could have been written like this instead: "%{if boolean_operation}${true_value}%{else}${false_value}%{endif}"

By combining two of these together, while initially it looks far more messy and hard to parse, I’ve found that, especially in single-line statements, it’s much more compact and eventually easier to read than the alternative if/else/endif structure.

So, this means that we can now refer to data.local_file.license as our data source.

Next, I want to select either the PAYG (Pay As You Go) or BYOL (Bring Your Own License) licensed AMI in AWS (the same principle applies in Azure, GCP, etc), so in this block we provide a different value to the filter in the AMI Data Source, suggesting the string “FortiGate-VM64-AWS *x.y.z*” if we have a value provided license, or “FortiGate-VM64-AWSONDEMAND *x.y.z*” if we don’t.

data "aws_ami" "FortiGate" {
  most_recent = true

  filter {
    name   = "name"
    values = ["FortiGate-VM64-AWS%{if data.local_file.license.content == ""}ONDEMAND%{endif} *${var.release}*"]
  }

  filter {
    name   = "virtualization-type"
    values = ["hvm"]
  }

  owners = ["679593333241"] # AWS
}

And the very last thing is to create the user-data template (known as customdata in Azure), using this block:

data "template_cloudinit_config" "config" {
  gzip          = false
  base64_encode = false

  part {
    filename     = "config"
    content_type = "multipart/mixed"
    content      = templatefile(
      "${path.module}/user_data.txt.tmpl",
      {
        hostname = "firewall"
      }
    )
  }

  part {
    filename     = "license"
    content_type = "text/plain"
    content      = data.local_file.license.content
  }
}

And so that is how I can elect to provide a license, or use a pre-licensed image from AWS, and these lessons can also be applied in an Azure or GCP environment too.

Featured image is “Tracking Methane Sources and Movement Around the Globe” by “NASA/Scientific Visualization Studio

"Kelvin Test" by "Eelke" on Flickr

In Ansible, determine the type of a value, and casting those values to other types

TL;DR? It’s possible to work out what type of variable you’re working with in Ansible. The in-built filters don’t always do quite what you’re expecting. Jump to the “In Summary” heading for my suggestions.

LATE EDIT: 2021-05-23 After raising a question in #ansible on Freenode, flowerysong noticed that my truth table around mappings, iterables and strings was wrong. I’ve amended the table accordingly, and have added a further note below the table.

One of the things I end up doing quite a bit with Ansible is value manipulation. I know it’s not really normal, but… well, I like rewriting values from one type of a thing to the next type of a thing.

For example, I like taking a value that I don’t know if it’s a list or a string, and passing that to an argument that expects a list.

Doing it wrong, getting it better

Until recently, I’d do that like this:

- debug:
    msg: |-
      {
        {%- if value | type_debug == "string" or value | type_debug == "AnsibleUnicode" -%}
           "string": "{{ value }}"
        {%- elif value | type_debug == "dict" or value | type_debug == "ansible_mapping" -%}
          "dict": {{ value }}
        {%- elif value | type_debug == "list" -%}
          "list": {{ value }}
        {%- else -%}
          "other": "{{ value }}"
        {%- endif -%}
      }

But, following finding this gist, I now know I can do this:

- debug:
    msg: |-
      {
        {%- if value is string -%}
           "string": "{{ value }}"
        {%- elif value is mapping -%}
          "dict": {{ value }}
        {%- elif value is iterable -%}
          "list": {{ value }}
        {%- else -%}
          "other": "{{ value }}"
        {%- endif -%}
      }

So, how would I use this, given the context of what I was saying before?

- assert:
    that:
    - value is string
    - value is not mapping
    - value is iterable
- some_module:
    some_arg: |-
      {%- if value is string -%}
        ["{{ value }}"]
      {%- else -%}
        {{ value }}
      {%- endif -%}

More details on finding a type

Why in this order? Well, because of how values are stored in Ansible, the following states are true:

⬇️Type \ ➡️Checkis iterableis mappingis sequenceis string
a_dict (e.g. {})✔️✔️✔️
a_list (e.g. [])✔️✔️
a_string (e.g. “”)✔️✔️✔️
A comparison between value types

So, if you were to check for is iterable first, you might match on a_list or a_dict instead of a_string, but string can only match on a_string. Once you know it can’t be a string, you can check whether something is mapping – again, because a mapping can only match a_dict, but it can’t match a_list or a_string. Once you know it’s not that, you can check for either is iterable or is sequence because both of these match a_string, a_dict and a_list.

LATE EDIT: 2021-05-23 Note that a prior revision of this table and it’s following paragraph showed “is_mapping” as true for a_string. This is not correct, and has been fixed, both in the table and the paragraph.

Likewise, if you wanted to check whether a_float and an_integer is number and not is string, you can check these:

⬇️Type \ ➡️Checkis floatis integeris iterableis mappingis numberis sequenceis string
a_float✔️✔️
an_integer✔️✔️
A comparison between types of numbers

So again, a_float and an_integer don’t match is string, is mapping or is iterable, but they both match is number and they each match their respective is float and is integer checks.

How about each of those (a_float and an_integer) wrapped in quotes, making them a string? What happens then?

⬇️Type \ ➡️Checkis floatis integeris iterableis mappingis numberis sequenceis string
a_float_as_string✔️✔️✔️
an_integer_as_string✔️✔️✔️
A comparison between types of numbers when held as a string

This is somewhat interesting, because they look like a number, but they’re actually “just” a string. So, now you need to do some comparisons to make them look like numbers again to check if they’re numbers.

Changing the type of a string

What happens if you cast the values? Casting means to convert from one type of value (e.g. string) into another (e.g. float) and to do that, Ansible has three filters we can use, float, int and string. You can’t cast to a dict or a list, but you can use dict2items and items2dict (more on those later). So let’s start with casting our group of a_ and an_ items from above. Here’s a list of values I want to use:

---
- hosts: localhost
  gather_facts: no
  vars:
    an_int: 1
    a_float: 1.1
    a_string: "string"
    an_int_as_string: "1"
    a_float_as_string: "1.1"
    a_list:
      - item1
    a_dict:
      key1: value1

With each of these values, I returned the value as Ansible knows it, what happens when you do {{ value | float }} to cast it as a float, as an integer by doing {{ value | int }} and as a string {{ value | string }}. Some of these results are interesting. Note that where you see u'some value' means that Python converted that string to a Unicode string.

⬇️Value \ ➡️Castvaluevalue when cast as floatvalue when cast as integervalue when cast as string
a_dict{“key1”: “value1”}0.00“{u’key1′: u’value1′}”
a_float1.11.11“1.1”
a_float_as_string“1.1”1.11“1.1”
a_list[“item1”]0.00“[u’item1′]”
a_string“string”0.00“string”
an_int111“1”
an_int_as_string“1”11“1”
Casting between value types

So, what does this mean for us? Well, not a great deal, aside from to note that you can “force” a number to be a string, or a string which is “just” a number wrapped in quotes can be forced into being a number again.

Oh, and casting dicts to lists and back again? This one is actually pretty clearly documented in the current set of documentation (as at 2.9 at least!)

Checking for miscast values

How about if I want to know whether a value I think might be a float stored as a string, how can I check that?

{{ vars[var] | float | string == vars[var] | string }}

What is this? If I cast a value that I think might be a float, to a float, and then turn both the cast value and the original into a string, do they match? If I’ve got a string or an integer, then I’ll get a false, but if I have actually got a float, then I’ll get true. Likewise for casting an integer. Let’s see what that table looks like:

⬇️Type \ ➡️Checkvalue when cast as floatvalue when cast as integervalue when cast as string
a_float✔️✔️
a_float_as_string✔️✔️
an_integer✔️✔️
an_integer_as_string✔️✔️
A comparison between types of numbers when cast to a string

So this shows us the values we were after – even if you’ve got a float (or an integer) stored as a string, by doing some careful casting, you can confirm they’re of the type you wanted… and then you can pass them through the right filter to use them in your playbooks!

Booleans

Last thing to check – boolean values – “True” or “False“. There’s a bit of confusion here, as a “boolean” can be: true or false, yes or no, 1 or 0, however, is true and True and TRUE the same? How about false, False and FALSE? Let’s take a look!

⬇️Value \ ➡️Checktype_debug is booleanis numberis iterableis mappingis stringvalue when cast as boolvalue when cast as stringvalue when cast as integer
yesbool✔️✔️TrueTrue1
YesAnsibleUnicode✔️✔️FalseYes0
YESAnsibleUnicode✔️✔️FalseYES0
“yes”AnsibleUnicode✔️✔️Trueyes0
“Yes”AnsibleUnicode✔️✔️TrueYes0
“YES”AnsibleUnicode✔️✔️TrueYES0
truebool✔️✔️TrueTrue1
Truebool✔️✔️TrueTrue1
TRUEbool✔️✔️TrueTrue1
“true”AnsibleUnicode✔️✔️Truetrue0
“True”AnsibleUnicode✔️✔️TrueTrue0
“TRUE”AnsibleUnicode✔️✔️TrueTRUE0
1int✔️True11
“1”AnsibleUnicode✔️✔️True11
nobool✔️✔️FalseFalse0
Nobool✔️✔️FalseFalse0
NObool✔️✔️FalseFalse0
“no”AnsibleUnicode✔️✔️Falseno0
“No”AnsibleUnicode✔️✔️FalseNo0
“NO”AnsibleUnicode✔️✔️FalseNO0
falsebool✔️✔️FalseFalse0
Falsebool✔️✔️FalseFalse0
FALSEbool✔️✔️FalseFalse0
“false”AnsibleUnicode✔️✔️Falsefalse0
“False”AnsibleUnicode✔️✔️FalseFalse0
“FALSE”AnsibleUnicode✔️✔️FalseFALSE0
0int✔️False00
“0”AnsibleUnicode✔️✔️False00
Comparisons between various stylings of boolean representations

So, the stand out thing for me here is that while all the permutations of string values of the boolean representations (those wrapped in quotes, like this: "yes") are treated as strings, and shouldn’t be considered as “boolean” (unless you cast for it explicitly!), and all non-string versions of true, false, and no are considered to be boolean, yes, Yes and YES are treated differently, depending on case. So, what would I do?

In summary

  • Consistently use no or yes, true or false in lower case to indicate a boolean value. Don’t use 1 or 0 unless you have to.
  • If you’re checking that you’re working with a string, a list or a dict, check in the order string (using is string), dict (using is mapping) and then list (using is sequence or is iterable)
  • Checking for numbers that are stored as strings? Cast your string through the type check for that number, like this: {% if value | float | string == value | string %}{{ value | float }}{% elif value | int | string == value | string %}{{ value | int }}{% else %}{{ value }}{% endif %}
  • Try not to use type_debug unless you really can’t find any other way. These values will change between versions, and this caused me a lot of issues with a large codebase I was working on a while ago!

Run these tests yourself!

Want to run these tests yourself? Here’s the code I ran (also available in a Gist on GitHub), using Ansible 2.9.10.

---
- hosts: localhost
  gather_facts: no
  vars:
    an_int: 1
    a_float: 1.1
    a_string: "string"
    an_int_as_string: "1"
    a_float_as_string: "1.1"
    a_list:
      - item1
    a_dict:
      key1: value1
  tasks:
    - debug:
        msg: |
          {
          {% for var in ["an_int", "an_int_as_string","a_float", "a_float_as_string","a_string","a_list","a_dict"] %}
            "{{ var }}": {
              "type_debug": "{{ vars[var] | type_debug }}",
              "value": "{{ vars[var] }}",
              "is float": "{{ vars[var] is float }}",
              "is integer": "{{ vars[var] is integer }}",
              "is iterable": "{{ vars[var] is iterable }}",
              "is mapping": "{{ vars[var] is mapping }}",
              "is number": "{{ vars[var] is number }}",
              "is sequence": "{{ vars[var] is sequence }}",
              "is string": "{{ vars[var] is string }}",
              "value cast as float": "{{ vars[var] | float }}",
              "value cast as integer": "{{ vars[var] | int }}",
              "value cast as string": "{{ vars[var] | string }}",
              "is same when cast to float": "{{ vars[var] | float | string == vars[var] | string }}",
              "is same when cast to integer": "{{ vars[var] | int | string == vars[var] | string }}",
              "is same when cast to string": "{{ vars[var] | string == vars[var] | string }}",
            },
          {% endfor %}
          }
---
- hosts: localhost
  gather_facts: false
  vars:
    # true, True, TRUE, "true", "True", "TRUE"
    a_true: true
    a_true_initial_caps: True
    a_true_caps: TRUE
    a_string_true: "true"
    a_string_true_initial_caps: "True"
    a_string_true_caps: "TRUE"
    # yes, Yes, YES, "yes", "Yes", "YES"
    a_yes: yes
    a_yes_initial_caps: Tes
    a_yes_caps: TES
    a_string_yes: "yes"
    a_string_yes_initial_caps: "Yes"
    a_string_yes_caps: "Yes"
    # 1, "1"
    a_1: 1
    a_string_1: "1"
    # false, False, FALSE, "false", "False", "FALSE"
    a_false: false
    a_false_initial_caps: False
    a_false_caps: FALSE
    a_string_false: "false"
    a_string_false_initial_caps: "False"
    a_string_false_caps: "FALSE"
    # no, No, NO, "no", "No", "NO"
    a_no: no
    a_no_initial_caps: No
    a_no_caps: NO
    a_string_no: "no"
    a_string_no_initial_caps: "No"
    a_string_no_caps: "NO"
    # 0, "0"
    a_0: 0
    a_string_0: "0"
  tasks:
    - debug:
        msg: |
          {
          {% for var in ["a_true","a_true_initial_caps","a_true_caps","a_string_true","a_string_true_initial_caps","a_string_true_caps","a_yes","a_yes_initial_caps","a_yes_caps","a_string_yes","a_string_yes_initial_caps","a_string_yes_caps","a_1","a_string_1","a_false","a_false_initial_caps","a_false_caps","a_string_false","a_string_false_initial_caps","a_string_false_caps","a_no","a_no_initial_caps","a_no_caps","a_string_no","a_string_no_initial_caps","a_string_no_caps","a_0","a_string_0"] %}
            "{{ var }}": {
              "type_debug": "{{ vars[var] | type_debug }}",
              "value": "{{ vars[var] }}",
              "is float": "{{ vars[var] is float }}",
              "is integer": "{{ vars[var] is integer }}",
              "is iterable": "{{ vars[var] is iterable }}",
              "is mapping": "{{ vars[var] is mapping }}",
              "is number": "{{ vars[var] is number }}",
              "is sequence": "{{ vars[var] is sequence }}",
              "is string": "{{ vars[var] is string }}",
              "is bool": "{{ vars[var] is boolean }}",
              "value cast as float": "{{ vars[var] | float }}",
              "value cast as integer": "{{ vars[var] | int }}",
              "value cast as string": "{{ vars[var] | string }}",
              "value cast as bool": "{{ vars[var] | bool }}",
              "is same when cast to float": "{{ vars[var] | float | string == vars[var] | string }}",
              "is same when cast to integer": "{{ vars[var] | int | string == vars[var] | string }}",
              "is same when cast to string": "{{ vars[var] | string == vars[var] | string }}",
              "is same when cast to bool": "{{ vars[var] | bool | string == vars[var] | string }}",
            },
          {% endfor %}
          }

Featured image is “Kelvin Test” by “Eelke” on Flickr and is released under a CC-BY license.

"$bash" by "Andrew Mager" on Flickr

One to read: Put your bash code in functions

I’ve got a few mildly ropey bash scripts which I could do with making a bit more resilient, and perhaps even operating faster ;)

As such, I found this page really interesting: https://ricardoanderegg.com/posts/bash_wrap_functions/

In it, Ricardo introduces me to two things which are interesting.

  1. Using the wait command literally waits for all the backgrounded tasks to finish.
  2. Running bash commands like this: function1 & function2 & function3 should run all three processes in parallel. To be honest, I’d always usually do it like this:
    function1 &
    function2 &
    function3 &

The other thing which Ricardo links to is a page suggesting that if you’re downloading a bash script and executing it (which, you know, probably isn’t a good idea at the best of times), then wrapping it in a function, like this:

#!/bin/bash

function main() {
  echo "Some function"
}

main

This means that the bash scripting engine needs to download and parse all the functions before it can run the script. As a result, you’re less likely to get a broken run of your script, because imagine it only got as far as:

#!/bin/bash
echo "Some fun

Then it wouldn’t have terminated the echo command (as an example)…

Anyway, some great tricks here! Love it!

Featured image is “$bash” by “Andrew Mager” on Flickr and is released under a CC-BY-SA license.

"html tattoo" by "webmove" on Flickr

Writing with Commonmark/Markdown formatting

I’m starting to write some documentation, and I realised that I’ve not documented how I write with Markdown. So, let’s make some notes here :) This is largely drawn from the CommonMark Markdown Cheat Sheet, as well as my own experiences.

I’ll use the terms “Markdown” and “Commonmark” interchangeably, but really I’m talking about the “Commonmark” implementation of Markdown, as Markdown is just a “way of doing things”, whereas Commonmark is a specification to standardise how Markdown is done.

Late edit, 2020-06-24: My colleague, Simon Partridge, who writes the “Tech Snippets” round up of interesting content, pointed me to a Markdown Tutorial that he recommends. I’ve added two “Late Edit” comments below, in the Lists section and a new section called “Soft Breaks”, featuring stuff I’d not come across before that was on the Markdown Tutorial. It’s well worth a look! Dave Lee, the producer on the podcast I co-host, podcaster in his own right, and all-round-lovely-guy, also noted that the Walt Disney quote I included below wasn’t quite formatted right. I’ve fixed this, and added another example for clarity.

Normal text

This is normal text, you might know it in HTML as “paragraph” mode, or <p>some text</p>.

In your word processor, this is the default styled text that you start with.

In Markdown and Commonmark, line lengths don’t matter, you can just keep writing and writing and writing, or you can type 40 characters, and put a single new line in, and it’ll keep the text on the same line, like this:

In your word processor, this is the default styled
text that you start with.

In Markdown and Commonmark, line lengths don't matter, you can just keep writing and writing and writing or you can type 40 characters and put a single new line in, and it'll keep the text on the same line, like this:

Links

While a single page of text is often useful, some people find it easier to connect to other documents. In HTML, you would do this by writing something like this: <a hrеf="http://example.com">Link</a>. In Markdown, you use this format:

You might want to put your [link](http://example.com) in here for later.

This link is in-line for ease of understanding.

This makes it very easy to read in-line where a link is pointing to. It’s also possible to make those links listed elsewhere in the document, by writing something like this:

You might want to put your [link][1] in here for later.

Some documents include links elsewhere in their structure, which is easier
for moving links around your document, while keeping the formatting
structure.

[1]: (http://example.com)

Links can be to absolute URLs (http://example.com/some/page.html), or relative URLs (some/page.html) and can include anchor points (http://example.com/some/page.html#heading-1). They can also link to other protocols, like email (mailto:person@example.org) or ftp (ftp://user:password@192.0.2.1/some/directory/).

Images

Much like the link layout, in HTML an image is inserted with a special tag, in that case, <img src="http://example.com/some/image.png" alt="Some Image">. An image can have an “Alt Tag”, which is text that a screen reader (for people with partial or complete vision loss) can read out. To put an image into a Markdown document, you use the link-style formatting, but add an exclamation mark before it, like this:

![Some Image](http://example.com/some/image.png)
![Some other image][1]

[1]: (relative/paths/work/too.png)

If you want to mix Images and Links, you do that like this:

[![This is an arrow, pointing you to your link](arrow.png)](my_link.html)

Note that here it looks a little complicated, as you’ve got the image identifier (![]()) inside the link identifier ([]()). Again, you could also use some non-inline URLs to clarify that a little, like this:

[![Click here to send an email][email]](mailto:someone@example.net?subject=Enquiry)

[email]: http://example.org/assets/email.png

Headings

You can prefix text with the # symbol and a space to make it a “top level heading”, like my heading for this blog post “Writing with Commonmark/Markdown formatting”, like this:

# Writing with Commonmark/Markdown formatting

Subsequent level headings, from 2 (e.g. “Headings” above) to 6 are written like this:

## Headings

### Now also at level 3

#### And level 4

##### And so on

###### Until level 6

### You can also jump back up levels, if you need to

Typically, you include a line space before and after the heading, just to make it clearer that this is a heading. It’s also possible to use the equals underlining and hyphen underlining to turn a single top level and second level heading, like this:

# Heading 1

is the same as

Heading 1
=========
## Heading 2

is the same as

Heading 2
---------

I’ve not really seen that structure before, but it seems less clear than the symbol-prefix method… I guess it’s just codifying some early practices.

Another benefit to the headings is that they automatically get turned into “anchor tags”, so you can refer to those points elsewhere in your document, like this:

Refer to [our sales literature for more details](#sales-literature).

## Sales Literature

![Our Brochure](brochure.jpg)

Note that the anchor tag in this case is any heading tag (level 1 to 6), turned into lower case, and replacing any spaces with hyphens and removing any other characters.

Emphasis

Aside from the above, you can also use some punctuation to indicate emphasis, like this:

This is *bold* text. As is _this_.

This text is **italicised** instead. This is __too__.

This text is ***both*** bold and italicised. ___Also___ here.
So is __*this*__ and **_this_** and _**this**_ and *__this__*.

Lists (ordered and unordered)

An ordered list looks like this:

1. Go to the shops
  1. Open the door
  2. Walk in
  3. Select products
  4. Pay for products
    1. Use debit or credit card
    2. Enter PIN
  5. Open the door
  6. Exit
2. Go home

and so on. An unordered list looks like this:

* Eggs
* Dairy
  * Milk
  * Cheese
* Meat
  * Pork
    * Ham
    * Bacon
  * Beef

Both of these can be rendered in Markdown using this format:

1. Go to the shops
    1. Open the door
    2. Walk in
    3. Select products
        * Eggs
        * Dairy
            * Milk
2. Go home

Notice that you can nest ordered and unordered lists. You need to provide four spaces when indenting from one level to the next.

If you’re not sure what the numbering will be, you can replace each of the numbers (1., 2., 3. and so on) with a single number, 1. Also, * for the unordered list can be replaced with -. So, the above example could look like this:

1. Go to the shops
    1. Open the door
    1. Walk in
    1. Select products
        - Eggs
        - Dairy
            * Milk
1. Go home

This all depends on what writing style you prefer.

Late Edit: 2020-06-24 If you want to include a more content under the same list item, you can add a new line and indent it by at least one space (and usually to the same indenting level as the bullet point), like this:

1. Go to the shops

   I've found going to Smiths, on the high street best.

   1. Open the door

      Use the handle on the edge of the door.

   1. Walk in
   1. Select products

      Look for items with the best dates. The items you need are as follows:

      - Eggs
      - Dairy
          * Milk

Soft Breaks (Late edit, 2020-06-24)

A soft break, written in HTML as <br>, is signalled in Markdown with two spaces, like this (spaces replaced with . characters):

It.was.a.dark.day..
Bob.had.died.a.sad.death..
All.alone.in.his.fish.tank

This would be rendered like this (italicised to differentiate from the rest of this post):

It was a dark day
Bob had died a sad death
All alone in his fish tank

Quoting text

The way to get started is to quit talking and begin doing.

Walt Disney

People sometimes like to quote other people. In Markdown, we do this by following a long email convention, proceeding the quote with a “chevron” symbol – >, like this:

> The way to get started is to quit talking and begin doing.
> 
> [*Walt Disney*](https://blog.hubspot.com/sales/famous-quotes)

Note that this could also have been written like this:

As Walt Disney once said:

The way to get started is to quit talking and begin doing.

As [Walt Disney](https://blog.hubspot.com/sales/famous-quotes) once said:

> The way to get started is to quit talking and begin doing.

Embedding code

This one I use all the time. Backticks (`) help you embed code, while three backticks (```) start a block of code, like this:

Also, `*` for the unordered list can be replaced with `-`.

```
> The way to get started is to quit talking and begin doing.

[Walt Disney](https://blog.hubspot.com/sales/famous-quotes)
```

Some interpretations of Markdown (notably “Github Flavoured Markdown”) let you signal what type of code you’ve written by adding the language after the first set of three backticks, like this:

```bash
#!/bin/bash
echo "$1"
exit
```

If three backticks don’t work for you, you can instead add four spaces before each line of your code, like this:

    #!/bin/bash
    echo "$1"
    exit

Raw HTML

Sometimes you just can’t do with Markdown what you want to achieve. I’ve notably found this with trying to incorporate several images and figure references in an ordered list, but in those cases, you can always use “raw HTML”. Here’s a list (from the Commonmark Spec as of version 0.29, dated 2019-04-06) of what tags are available to you:

address, article, aside, base, basefont, blockquote, body, caption, center, col, colgroup, dd, details, dialog, dir, div, dl, dt, fieldset, figcaption, figure, footer, form, frame, frameset, h1, h2, h3, h4, h5, h6, head, header, hr, html, iframe, legend, li, link, main, menu, menuitem, nav, noframes, ol, optgroup, option, p, param, section, source, summary, table, tbody, td, tfoot, th, thead, title, tr, track, ul

Given this, here’s what I tend to do:

1. Here's something to do with the following image<br>
![alt text](figure1.png)<br>
*Figure 1 - Some image that is relevant*<br>

Since looking into this further, this is now what I intend to do:

1. Here's something to do with the following image
<figure>![alt text](figure1.png)
<figcaption>*Figure 1 - Some image that is relevant*</figcaption>
</figure>

Tables

Not all Markdown flavours incorporate these, but some do. Trial-and-error is your friend here!

Github Flavoured Markdown supports tables, as do several other Markdown interpreters, but it’s explicitly not in Commonmark.

These are very basic tables, but will work for several cases. In this case, you MUST have a heading row (in my case, the first column has no name, but the second, third and fourth have the text “column” and then the alignment the subsequent rows follow), then a line which indicates the alignment of the row, either left (|---|), right (|--:|) or centre (|:-:|). All subsequent lines must contain all the columns specified. You can’t merge columns or rows, without resorting to HTML table definitions.

|      | Column Left | Column Right | Column Centre |
|------|-------------|-------------:|:-------------:|
| row1 | 1           |            1 |       1       |
| row2 | 2           |            2 |       2       |
| row3 | 3           |            3 |       3       |

In this case, you’ll get the following:

Note that different flavours disagree on whether the alignment of the text inside the rows matters, so while the above text works out OK, the following would also produce exactly the same result:

|      | Column Left | Column Right | Column Centre |
|------|-------------|-------------:|:-------------:|
| row1 | 1           | 1            | 1             |
| row2 | 2           | 2            | 2             |
| row3 | 3           | 3            | 3             |

As would this:

|  | Column Left | Column Right | Column Centre |
|-|-|-:|:-:|
| row1 | 1 | 1 | 1 |
| row2 | 2 | 2 | 2 |
| row3 | 3 | 3 | 3 |

Personally, I’d probably use the longer format divider line to match up to the column heads, but use the shorter format for the rows.

Using Markdown

  • In projects on Github and Gitlab, any file suffixed .md will usually be rendered as a Markdown file. Editing a Markdown file in Github at least will allow you to use the “preview” tab to see the changes. You can also include some Markdown in issues and pull/merge requests. It is not recommended for git logs, and IIRC won’t render it there either.
  • Visual Studio Code will preview Markdown, and has a “linting” extension, called “markdownlint“, that will help identify common issues with Markdown.
  • WordPress’ “Gutenberg” block editor supports using markdown, both for importing content, and for using it to shortcut things like bold, italics, headings and links (in fact, I wrote rather a lot of this using it!).
  • Popular blogging platform Ghost and static site creation tool Jekyll both use Markdown extensively.

Alternatives

  • Naturally, Plain Text is an option :)
  • You might also consider “Restructured Text” (RST) which are popular with open source projects for their documentation.

Featured image is “html tattoo” by “webmove” on Flickr and is released under a CC-BY license.

A screenshot of the Wordpress site, showing updates available

wp-upgrade.sh – A simple tool to update and upgrade WordPress components via cron

A simple tool to update and upgrade WordPress components

A few years ago, I hosted my blog on Dreamhost. They’ve customized something inside the blog which means it doesn’t automatically update itself. I’ve long since moved this blog off to my own hosting, but I can’t figure out which thing it was they changed, and I’ve got so much content and stuff in here, I don’t really want to mess with it.

Anyway, I like keeping my systems up to date, and I hate logging into a blog and finding updates are pending, so I wrote this script. It uses wp-cli which I have installed to /usr/local/bin/wp as per the install guide. This is also useful if you’re hosting your site in such a way that you can’t make changes to core or plugins from the web interface.

This script updates:

  1. All core files (lines core update-db, core update and language core update)
  2. All plugins (lines plugin update --all and language plugin update --all)
  3. All themes (lines theme update --all and language theme update --all)

To remove any part of this script, just delete those lines, including the /usr/local/bin/wp and --quiet && \ fragments!

I then run sudo -u www-data crontab -e (replacing www-data with the real account name of the user who controls the blog, which can be found by doing an ls -l /var/www/html/ replacing the path to where your blog is located) and I add the bottom line to that crontab file (the rest is just comments to remind you what the fields are!)

#                                         day of month [1-31]
#                                             month [1-12]
#                                                 day of week [1-6 Mon-Sat, 0/7 Sun]
# minute   hour                                         command
1          1,3,5,7,9,11,13,15,17,19,21,23 *   *   *     /usr/local/bin/wp-upgrade.sh /var/www/jon.sprig.gs/blog

This means that every other hour, at 1 minute past the hour, every day, every month, I run the update :)

If you’ve got email setup for this host and user, you’ll get an email whenever it upgrades a component too.

"Monitors" by "Jaysin Trevino" on Flickr

Using monit to monitor Docker Containers

As I only run a few machines with services that matter on them (notably, my home server and my web server), I don’t need a full-on monitoring service, so instead rely on a system called monit.

Monit is an open source piece of software, used to monitor (see, it’s easily named 😄) and, if possible remediate issues with things it sees wrong.

I use this for watching whether particular services are running (and if not, restart them), for whether the ink in my printer is empty, and to monitor the free space and SMART status on my disks.

Today I noticed that a Docker container had stopped, and I’d not noticed. It wasn’t a big thing, but it gnawed at me, so I had a bit of a look around to see what I can find about this.

I found this blog post, titled “Monitoring Docker Containers with Monit”, from 2014, which suggested monitoring the result from docker top… and would you believe it, that’s a valid trick 🙂

So, here’s what I’m doing! Each container has it’s own file called/etc/monit/scripts/check_container_<container-name>.sh which has just this command in it:

#! /bin/bash
docker top "<container-name>"
exit $?

Note that you replace <container-name> in both the filename and the script itself with the name of the container – for example, the container hello-world would be monitored with the file check_container_hello-world.sh, and the line in that file would say docker top "hello-world".

I then have a file in /etc/monit/conf.d/ called check_container_<container-name> which has this content

CHECK PROGRAM <container-name> WITH PATH /etc/monit/scripts/check_container_<container-name>.sh
  START PROGRAM = "/usr/bin/docker start <container-name>"
  STOP PROGRAM = "/usr/bin/docker stop <container-name>"
  IF status != 0 FOR 3 CYCLES THEN RESTART
  IF 2 RESTARTS WITHIN 5 CYCLES THEN UNMONITOR

I then ensure that in /etc/monit/monitrc the line “include /etc/monit/conf.d/*” is included and not commented out, and then restart monit with systemctl restart monit.

Featured image is “Monitors” by “Jaysin Trevino” on Flickr and is released under a CC-BY license.

"Field Notes - Sweet Tooth" by "The Marmot" on Flickr

Multi-OS builds in AWS with Terraform – some notes from the field!

Late edit: 2020-05-22 – Updated with better search criteria from colleague conversations

I’m building a proof of concept for … well, a product that needs testing on several different Linux and Windows variants on AWS and Azure. I’m building this environment with Terraform, and it’s thrown me a few curve balls, so I thought I’d document the issues I’ve had!

The versions of distributions I have tested are the latest releases of each of these images at-or-near the time of writing. The major version listed is the earliest I have tested, so no assumption is made about previous versions, and later versions, after the time of this post should not assume any of this data is also accurate!

(Fujitsu Staff – please contact me on my work email address for details on how to get the internal AMIs of our builds of these images 😄)

Linux Distributions

On the whole, I tend to be much more confident and knowledgable about Linux distributions. I’ve also done far more installs of each of these!

Almost all of these installs are Free of Charge, with the exception of Red Hat Enterprise Linux, which requires a subscription fee, and this can be “Pay As You Go” or “Bring Your Own License”. These sorts of things are arranged for me, so I don’t know how easy or hard it is to organise these licenses!

These builds all use cloud-init, via either a cloud-init yaml script, or some shell scripting language (usually accepted to be bash). If this script fails to execute, you will find your user-data file in /var/lib/cloud/instance/scripts/part-001. If this is a shell script then you will be able to execute it by running that script as your root user.

Amazon Linux 2 or Amzn2

Amazon Linux2 is the “preferred” distribution for Amazon Web Services (AWS) (surprisingly enough). It is based on Red Hat Enterprise Linux (RHEL), and many of the instructions you’ll want to run to install software will use RHEL based instructions. This platform is not available outside the AWS ecosystem, as far as I can tell, although you might be able to run it on-prem.

Software packages are limited in this distribution, so any “extra” features require the installation of the “EPEL” repository, by executing the command sudo amazon-linux-extras install epel and then using the yum command to install further packages. I needed nginx for part of my build, and this was only in EPEL.

Amzn2 AMI Lookup

data "aws_ami" "amzn2" {
  most_recent = true

  filter {
    name   = "name"
    values = ["amzn2-ami-hvm-2.0.*-gp2"]
  }

  filter {
    name   = "architecture"
    values = ["x86_64"]
  }

  filter {
    name   = "state"
    values = ["available"]
  }

  owners = ["amazon"] # Canonical
}

Amzn2 User Account

Amazon Linux 2 images under AWS have a default “ec2-user” user account. sudo will allow escalation to Root with no password prompt.

Amzn2 AWS Interface Configuration

The primary interface is called eth0. Network Manager is not installed. To manage the interface, you need to edit /etc/sysconfig/network-scripts/ifcfg-eth0 and apply changes with ifdown eth0 ; ifup eth0.

Amzn2 user-data / Cloud-Init Troubleshooting

I’ve found the output from user-data scripts appearing in /var/log/cloud-init-output.log.

CentOS 7

For starters, AWS doesn’t have an official CentOS8 image, so I’m a bit stymied there! In fact, as far as I can make out, CentOS is only releasing ISOs for builds now, and not any cloud images. There’s an open issue on their bug tracker which seems to suggest that it’s not going to get any priority any time soon! Blimey.

This image may require you to “subscribe” to the image (particularly if you have a “private marketplace”), but this will be requested of you (via a URL provided on screen) when you provision your first machine with this AMI.

Like with Amzn2, CentOS7 does not have nginx installed, and like Amzn2, installation of the EPEL library is not a difficult task. CentOS7 bundles a file to install the EPEL, installed by running yum install epel-release. After this is installed, you have the “full” range of software in EPEL available to you.

CentOS AMI Lookup

data "aws_ami" "centos7" {
  most_recent = true

  filter {
    name   = "name"
    values = ["CentOS Linux 7*"]
  }

  filter {
    name   = "architecture"
    values = ["x86_64"]
  }

  filter {
    name   = "state"
    values = ["available"]
  }

  owners = ["aws-marketplace"]
}

CentOS User Account

CentOS7 images under AWS have a default “centos” user account. sudo will allow escalation to Root with no password prompt.

CentOS AWS Interface Configuration

The primary interface is called eth0. Network Manager is not installed. To manage the interface, you need to edit /etc/sysconfig/network-scripts/ifcfg-eth0 and apply changes with ifdown eth0 ; ifup eth0.

CentOS Cloud-Init Troubleshooting

I’ve run several different user-data located bash scripts against this system, and the logs from these scripts are appearing in the default syslog file (/var/log/syslog) or by running journalctl -xefu cloud-init. They do not appear in /var/log/cloud-init-output.log.

Red Hat Enterprise Linux (RHEL) 7 and 8

Red Hat has both RHEL7 and RHEL8 images in the AWS market place. The Proof Of Value (POV) I was building was only looking at RHEL7, so I didn’t extensively test RHEL8.

Like Amzn2 and CentOS7, RHEL7 needs EPEL installing to have additional packages installed. Unlike Amzn2 and CentOS7, you need to obtain the EPEL package from the Fedora Project. Do this by executing these two commands:

wget https://dl.fedoraproject.org/pub/epel/epel-release-latest-7.noarch.rpm
yum install epel-release-latest-7.noarch.rpm

After this is installed, you’ll have access to the broader range of software that you’re likely to require. Again, I needed nginx, and this was not available to me with the stock install.

RHEL7 AMI Lookup

data "aws_ami" "rhel7" {
  most_recent = true

  filter {
    name   = "name"
    values = ["RHEL-7*GA*Hourly*"]
  }

  filter {
    name   = "architecture"
    values = ["x86_64"]
  }

  filter {
    name   = "state"
    values = ["available"]
  }

  owners = ["309956199498"] # Red Hat
}

RHEL8 AMI Lookup

data "aws_ami" "rhel8" {
  most_recent = true

  filter {
    name   = "name"
    values = ["RHEL-8*HVM-*Hourly*"]
  }

  filter {
    name   = "architecture"
    values = ["x86_64"]
  }

  filter {
    name   = "state"
    values = ["available"]
  }

  owners = ["309956199498"] # Red Hat
}

RHEL User Accounts

RHEL7 and RHEL8 images under AWS have a default “ec2-user” user account. sudo will allow escalation to Root with no password prompt.

RHEL AWS Interface Configuration

The primary interface is called eth0. Network Manager is installed, and the eth0 interface has a profile called “System eth0” associated to it.

RHEL Cloud-Init Troubleshooting

In RHEL7, as per CentOS7, logs from user-data scripts are appear in the general syslog file (in this case, /var/log/messages) or by running journalctl -xefu cloud-init. They do not appear in /var/log/cloud-init-output.log.

In RHEL8, logs from user-data scrips now appear in /var/log/cloud-init-output.log.

Ubuntu 18.04

At the time of writing this, the vendor, who’s product I was testing, categorically stated that the newest Ubuntu LTS, Ubuntu 20.04 (Focal Fossa) would not be supported until some time after our testing was complete. As such, I spent no time at all researching or planning to use this image.

Ubuntu is the only non-RPM based distribution in this test, instead being based on the Debian project’s DEB packages. As such, it’s range of packages is much wider. That said, for the project I was working on, I required a later version of nginx than was available in the Ubuntu Repositories, so I had to use the nginx Personal Package Archive (PPA). To do this, I found the official PPA for the nginx project, and followed the instructions there. Generally speaking, this would potentially risk any support from the distribution vendor, as it’s not certified or supported by the project… but I needed that version, so I had to do it!

Ubuntu 18.04 AMI Lookup

data "aws_ami" "ubuntu1804" {
  most_recent = true

  filter {
    name   = "name"
    values = ["*ubuntu*18.04*"]
  }

  filter {
    name   = "architecture"
    values = ["x86_64"]
  }

  filter {
    name   = "state"
    values = ["available"]
  }

  owners = ["099720109477"] # Canonical
}

Ubuntu 18.04 User Accounts

Ubuntu 18.04 images under AWS have a default “ubuntu” user account. sudo will allow escalation to Root with no password prompt.

Ubuntu 18.04 AWS Interface Configuration

The primary interface is called eth0. Network Manager is not installed, and instead Ubuntu uses Netplan to manage interfaces. The file to manage the interface defaults is /etc/netplan/50-cloud-init.yaml. If you struggle with this method, you may wish to install ifupdown and define your configuration in /etc/network/interfaces.

Ubuntu 18.04 Cloud-Init Troubleshooting

In Ubuntu 18.04, logs from user-data scrips appear in /var/log/cloud-init-output.log.

Windows

This section is far more likely to have it’s data consolidated here!

Windows has a common “standard” username – Administrator, and a common way of creating a password (this is generated on-boot, and the password is transferred to the AWS Metadata Service, which it is retrieved and decrypted with the SSH key you’ve used to build the “authentication” to the box) which Terraform handles quite nicely.

The network device is referred to as “AWS PV Network Device #0”. It can be managed with powershell, netsh (although apparently Microsoft are rumbling about demising this script), or from the GUI.

Windows 2012R2

This version is very old now, and should be compared to Windows 7 in terms of age. It is only supported by Microsoft with an extended maintenance package!

Windows 2012R2 AMI Lookup

data "aws_ami" "w2012r2" {
  most_recent = true

  filter {
    name = "name"
    values = ["Windows_Server-2012-R2_RTM-English-64Bit-Base*"]
  }

  filter {
    name   = "architecture"
    values = ["x86_64"]
  }

  filter {
    name   = "state"
    values = ["available"]
  }

  owners = ["801119661308"] # AWS
}

Windows 2012R2 Cloud-Init Troubleshooting

Logs from the Metadata Service can be found in C:\Program Files\Amazon\Ec2ConfigService\Logs\Ec2ConfigLog.txt. You can also find the userdata script in C:\Program Files\Amazon\Ec2ConfigService\Scripts\UserScript.ps1. This can be launched and debugged using PowerShell ISE, which is in the “Start” menu.

Windows 2016

This version is reasonably old now, and should be compared to Windows 8 in terms of age. It is supported until 2022 in “mainline” support.

Windows 2016 AMI Lookup

data "aws_ami" "w2016" {
  most_recent = true

  filter {
    name = "name"
    values = ["Windows_Server-2016-English-Full-Base*"]
  }

  filter {
    name   = "architecture"
    values = ["x86_64"]
  }

  filter {
    name   = "state"
    values = ["available"]
  }

  owners = ["801119661308"] # AWS
}

Windows 2016 Cloud-Init Troubleshooting

The metadata service has moved from Windows 2016 and onwards. Logs are stored in a partially hidden directory tree, so you may need to click in the “Address” bar of the Explorer window and type in part of this path. The path to these files is: C:\ProgramData\Amazon\EC2-Windows\Launch\Log. I say “files” as there are two parts to this file – an “Ec2Launch.log” file which reports on the boot process, and “UserdataExecution.log” which shows the output from the userdata script.

Unlike with the Windows 2012R2 version, you can’t get hold of the actual userdata script on the filesystem, you need to browse to a special path in the metadata service (actually, technically, you can do this with any of the metadata services – OpenStack, Azure, and so on) which is: http://169.254.169.254/latest/user-data/

This will contain userdata between a <powershell> and </powershell> pair of tags. This would need to be copied out of this URL and pasted into a new file on your local machine to determine why issues are occurring. Again, I would recommend using PowerShell ISE from the Start Menu to debug your code.

Windows 2019

This version is the most recent released version of Windows Server, and should be compared to Windows 10 in terms of age.

Windows 2019 AMI Lookup

data "aws_ami" "w2019" {
  most_recent = true

  filter {
    name = "name"
    values = ["Windows_Server-2019-English-Full-Base*"]
  }

  filter {
    name   = "architecture"
    values = ["x86_64"]
  }

  filter {
    name   = "state"
    values = ["available"]
  }

  owners = ["801119661308"] # AWS
}

Windows 2019 Cloud-Init Troubleshooting

Functionally, the same as Windows 2016, but to recap, the metadata service has moved from Windows 2016 and onwards. Logs are stored in a partially hidden directory tree, so you may need to click in the “Address” bar of the Explorer window and type in part of this path. The path to these files is: C:\ProgramData\Amazon\EC2-Windows\Launch\Log. I say “files” as there are two parts to this file – an “Ec2Launch.log” file which reports on the boot process, and “UserdataExecution.log” which shows the output from the userdata script.

Unlike with the Windows 2012R2 version, you can’t get hold of the actual userdata script on the filesystem, you need to browse to a special path in the metadata service (actually, technically, you can do this with any of the metadata services – OpenStack, Azure, and so on) which is: http://169.254.169.254/latest/user-data/

This will contain userdata between a <powershell> and </powershell> pair of tags. This would need to be copied out of this URL and pasted into a new file on your local machine to determine why issues are occurring. Again, I would recommend using PowerShell ISE from the Start Menu to debug your code.

Featured image is “Field Notes – Sweet Tooth” by “The Marmot” on Flickr and is released under a CC-BY license.