Unicorn Rentals and the Red Hat

A No-Spoilers AWS Micro services GameDay review (Go team RedHat)

It’s only been a few months since I last attended an AWS Game Day, but the Microservices Game Day came up in the internal calendar, and I jumped at the chance.

To quote from my last post:

A Game Day (sometimes disambiguated as an “Adversarial Game Day”, because of sporting events) is a day where you either have a dummy environment, or, if you have the scale, a portion of your live network is removed from live service and used as a training ground. In this case, AWS provided a specific dummy environment “Unicorn.Rentals”, and all the attendees are the new recruits to the DevOps Team… Oh, and all the previous DevOps team members had just left the company… all at once.

My AWS Game Day blog post from 2019-0918

Guess what? We were recruited BACK by Unicorn.Rentals! Again, the Ops Team have all “quit” (someone needs to talk to their HR team, for crying out loud), and we’re left with their migration from a legacy system to a new microservices based system. Teams are groups of 4 people.

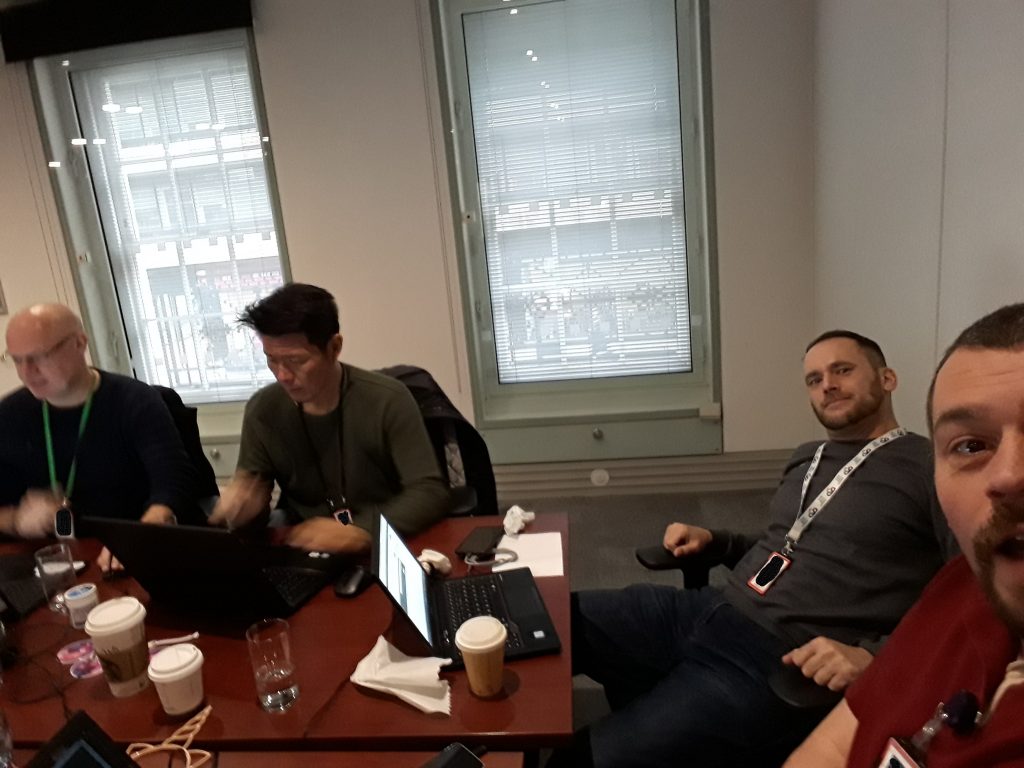
Team Red Hats - left to right: Paul Clarke, Ho Kingsley, Jason Daniels and Me (the owner of the mentioned Red Hat)
Team Red Hats – left to right: Paul Clarke, Ho Kingsley, Jason Daniels and Me (the owner of the mentioned Red Hat)

The task was to maintain a “service router”, and three micro services. Like the last session, there were moments where the stability of the network was challenged, with issues in code, environment and even external actors (no spoilers, remember).

The main take-away I had was that even though I’ve been cramming Docker and Kubernetes knowledge like crazy (more blog posts to come, folks), it doesn’t mean anything if you can’t actually put it into practice.

The pressure is on you right from the start – when you’re trying to get your head around the service you’re running, and working out how to make your microservices work right. There’s also an element of negotiation (admirably performed in our team by Jason) to get people to work together, and keep your eye on the “troubles” in your environment.

My role was mostly around getting on top of improving the condition of the Service Router, and about half way through the session, I decided to try and apply my newfound Docker knowledge to the problem. Naturally, as I’ve not done this under live fire before, I completely mangled the attempt, even managing to knock one of the working microservices off in the process. I was working with a great team as there were no recriminations or criticism for doing that, just an understanding that we needed to roll-back and fix things.

Trying to work out what needed to be done with that broken Docker container took a lot of effort and even right to the last minute, I still hadn’t managed to get my head around it enough to trust it at the end. I think it’s fair to say, though, that it gave me a lot of impetus to try to understand how a docker container should work and has made me want to try and build something less purposefully complex to see how it would work “in the real world”…

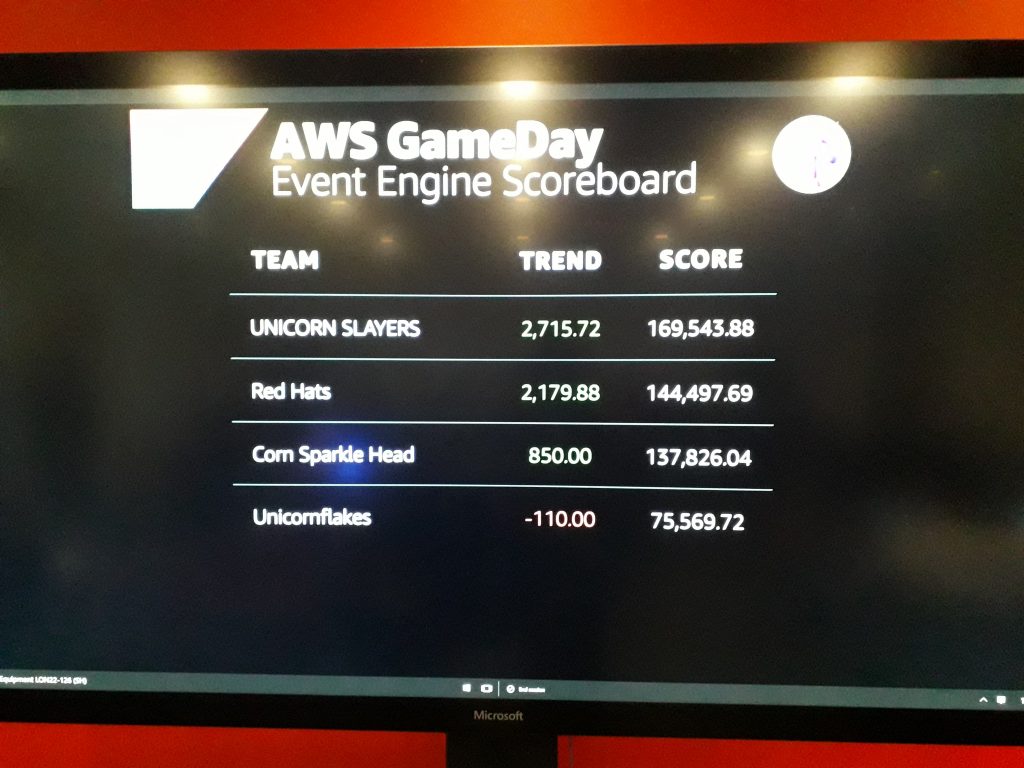
The AWS Microservices Game Day Scoreboard at the end

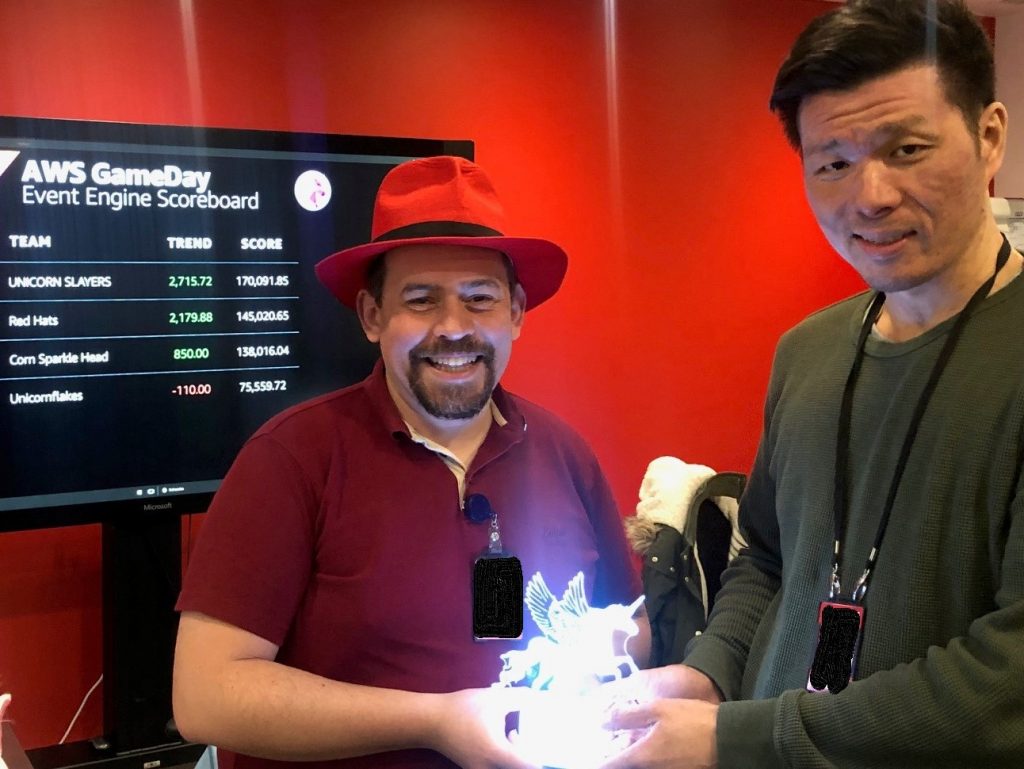
Even without doing something crazy with all the components, Team Red Hats came in second, so I came home with my second LED unicorn, currently sitting on my desk, waiting for a child to be good enough to award them A Unicorn from Unicorn Rentals!

Me and Ho accepting our prize for second place

If you’re offered the opportunity to do one of these, take it!!

“code crunching” by “Ruben Molina” on Flickr

Getting Started with Terraform on AWS

I recently wrote a blog post about Getting Started with Terraform on Azure. You might have read it (I know I did!).

Having got a VM stood up in Azure, I wanted to build a VM in AWS, after all, it’s more-or-less the same steps. Note, this is a work-in-progress, and shouldn’t be considered “Final” – this is just something to use as *your* starting block.

What do you need?

You need an AWS account for this. If you’ve not got one, signing up for one is easy, but bear in mind that while there are free resource on AWS (only for the first year!), it’s also quite easy to suddenly enable a load of features that cost you money.

Best practice suggests (or rather, INSISTS) you shouldn’t use your “root” account for AWS. It’s literally just there to let you define the rest of your admin accounts. Turn on MFA (Multi-Factor Authentication) on that account, give it an exceedingly complex password, write that on a sheet of paper, and lock it in a box. You should NEVER use it!

Create your admin account, log in to that account. Turn on MFA on *that* account too. Then, create an “Access Token” for your account. This is in IAM (Identity and Access Management). These are what we’ll use to let Terraform perform actions in AWS, without you needing to actually “log in”.

On my machine, I’ve put the credentials for this in /home/<MYUSER>/.aws/credentials and it looks like this:

[default]
aws_access_key_id = ABC123DEF456
aws_secret_access_key = AaBbCcDd1234EeFf56

This file should be chmod 600 and make sure it’s only your account that can access this file. With this token, Terraform can perform *ANY ACTION* as you, including anything that charges you money, or creating servers that can mine a “cryptocurrency” for someone malicious.

I’m using Windows Subsystem for Linux (WSL). I’m using the Ubuntu 18.04 distribution obtained from the Store. This post won’t explain how to get *that*. Also, you might want to run Terraform on Mac, in Windows or on Linux natively… so, yehr.

Next, we need to actually install Terraform. Excuse the long, unwrapped code block, but it gets what you need quickly (assuming the terraform webpage doesn’t change any time soon!)

mkdir -p ~/bin
cd ~/bin
sudo apt update && sudo apt install unzip
curl -sLO $(curl https://www.terraform.io/downloads.html | grep "linux_amd64.zip" | cut -d\" -f 2) && unzip terraform*.zip && rm terraform*.zip && chmod 755 terraform

Starting coding your infrastructure

Before you can build your first virtual machine on AWS, you need to stand up the supporting infrastructure. These are:

  • An SSH Keypair (no password logins here!)
  • A VPC (“Virtual Private Cloud”, roughly the same as a VNet on Azure, or somewhat like a L3 switch in the Physical Realm).
  • An Internet Gateway (if your VPC isn’t classed as “the default one”)
  • A Subnet.
  • A Security Group.

Once we’ve got these, we can build our Virtual Machine on EC2 (“Elastic Cloud Compute”), and associate a “Public IP” to it.

To quote my previous post:

One quirk with Terraform, versus other tools like Ansible, is that when you run one of the terraform commands (like terraform init, terraform plan or terraform apply), it reads the entire content of any file suffixed “tf” in that directory, so if you don’t want a file to be loaded, you need to either move it out of the directory, comment it out, or rename it so it doesn’t end .tf. By convention, you normally have three “standard” files in a terraform directory – main.tf, variables.tf and output.tf, but logically speaking, you could have everything in a single file, or each instruction in it’s own file.

Getting Started with Terraform on Azure – Building the file structure

For the sake of editing and annotating the files for this post, these code blocks are all separated, but on my machine, they’re all currently one big file called “main.tf“.

In that file, I start by telling it that I’m working with the Terraform AWS provider, and that it should target my nearest region.

If you want to risk financial ruin, you can put things like your access tokens in here, but I really wouldn’t chance this!

Next, we create our network infrastructure – VPC, Internet Gateway and Subnet. We also change the routing table.

I suspect, if I’d created the VPC as “The Default” VPC, then I wouldn’t have needed to amend the routing table, nor added an Internet Gateway. To help us make the routing table change, there’s a “data” block in this section of code. A data block is an instruction to Terraform to go and ask a resource for *something*, in this case, we need AWS to tell Terraform what the routing table is that it created for the VPC. Once we have that we can ask for the routing table change.

AWS doesn’t actually give “proper” names to any of it’s assets. To provide something with a “real” name, you need to tag that thing with the “Name” tag. These can be practically anything, but I’ve given semi-sensible names to everything. You might want to name everything “main” (like I nearly did)!

We’re getting close to being able to create the VM now. First of all, we’ll create the Security Groups. I want to separate out my “Allow Egress Traffic” rule from my “Inbound SSH” rule. This means that I can clearly see what hosts allow inbound SSH access. Like with my Azure post, I’m using a “data provider” to get my public IP address, but in a normal “live” network, you’d specify a collection of valid source address ranges.

Last steps before we create the Virtual Machine. We need to upload our SSH key, and we need to find the “AMI” (AWS Machine ID) of the image we’ll be using. To create the key, in this directory, along side the .tf files, I’ve put my SSH public key (called id_rsa.pub), and we load that key when we create the “my_key” resource. To find the AMI, we need to make another data call, this time asking the AMI index to find the VM with the name containing ubuntu-bionic-18.04 and some other stuff. AMIs are region specific, so the image I’m using in eu-west-2 will not be the same AMI in eu-west-1 or us-east-1 and so on. This filtering means that, as long as the image exists in that region, we can use “the right one”. So let’s take a look at this file.

So, now we have everything we need to create our VM. Let’s do that!

In here, we specify a “user_data” file to upload, in this case, the contents of a file – CloudDev.sh, but you can load anything you want in here. My CloudDev.sh is shown below, so you can see what I’m doing with this file :)

So, having created all this lot, you need to execute the terraform workload. Initially you do terraform init. This downloads all the provisioners and puts them into the same tree as these .tf files are stored in. It also resets the state of the terraform discovered or created datastore.

Next, you do terraform plan -out tfout. Technically, the tfout part can be any filename, but having something like tfout marks it as clearly part of Terraform. This creates the tfout file with the current state, and whatever needs to change in the Terraform state file on it’s next run. Typically, if you don’t use a tfout file within about 20 minutes, it’s probably worth removing it.

Finally, once you’ve run your plan stage, now you need to apply it. In this case you execute terraform apply tfout. This tfout is the same filename you specified in terraform plan. If you don’t include -out tfout on your plan (or even run a plan!) and tfout in your apply, then you can skip the terraform plan stage entirely.

Once you’re done with your environment, use terraform destroy to shut it all down… and enjoy :)

Featured image is “code crunching” by “Ruben Molina” on Flickr and is released under a CC-ND license.

"Confused" by "CollegeDegrees360" on Flickr

Using AWSCLI on Ubuntu/Ubuntu-in-WSL

This is a brief note to myself (but might be useful to you)!

awscli (similar to the Azure az command) is packaged for Ubuntu, but the version which is in the Ubuntu 18.04 repositories is “out of date” and won’t work with AWS. You *actually* need to run the following:

sudo apt update && sudo apt install python3-pip -y && sudo -H pip3 install --upgrade awscli

If you’ve unfortunately already installed awscli from apt, do the following:

sudo apt remove awscli -y

Then, logout (for some reason, binary path caching is a thing now?) and log back in, and then run the above pip install line.

Solution found via this logged issue on the awscli git repo.

Featured image is “Confused” by “CollegeDegrees360” on Flickr and is released under a CC-BY-SA license.