"html tattoo" by "webmove" on Flickr

Writing with Commonmark/Markdown formatting

I’m starting to write some documentation, and I realised that I’ve not documented how I write with Markdown. So, let’s make some notes here :) This is largely drawn from the CommonMark Markdown Cheat Sheet, as well as my own experiences.

I’ll use the terms “Markdown” and “Commonmark” interchangeably, but really I’m talking about the “Commonmark” implementation of Markdown, as Markdown is just a “way of doing things”, whereas Commonmark is a specification to standardise how Markdown is done.

Late edit, 2020-06-24: My colleague, Simon Partridge, who writes the “Tech Snippets” round up of interesting content, pointed me to a Markdown Tutorial that he recommends. I’ve added two “Late Edit” comments below, in the Lists section and a new section called “Soft Breaks”, featuring stuff I’d not come across before that was on the Markdown Tutorial. It’s well worth a look! Dave Lee, the producer on the podcast I co-host, podcaster in his own right, and all-round-lovely-guy, also noted that the Walt Disney quote I included below wasn’t quite formatted right. I’ve fixed this, and added another example for clarity.

Normal text

This is normal text, you might know it in HTML as “paragraph” mode, or <p>some text</p>.

In your word processor, this is the default styled text that you start with.

In Markdown and Commonmark, line lengths don’t matter, you can just keep writing and writing and writing, or you can type 40 characters, and put a single new line in, and it’ll keep the text on the same line, like this:

In your word processor, this is the default styled
text that you start with.

In Markdown and Commonmark, line lengths don't matter, you can just keep writing and writing and writing or you can type 40 characters and put a single new line in, and it'll keep the text on the same line, like this:

Links

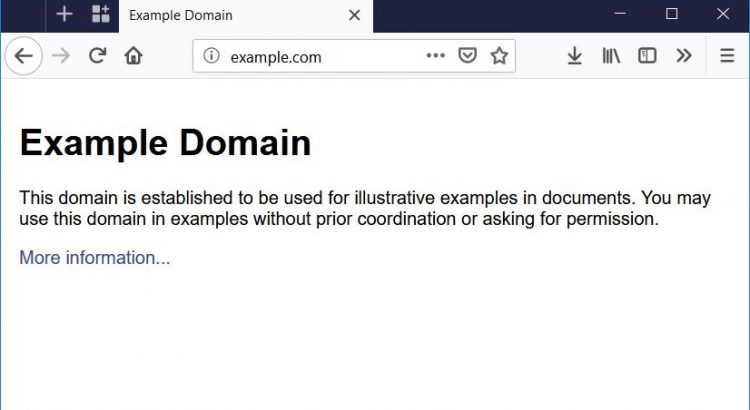
While a single page of text is often useful, some people find it easier to connect to other documents. In HTML, you would do this by writing something like this: <a hrеf="http://example.com">Link</a>. In Markdown, you use this format:

You might want to put your [link](http://example.com) in here for later.

This link is in-line for ease of understanding.

This makes it very easy to read in-line where a link is pointing to. It’s also possible to make those links listed elsewhere in the document, by writing something like this:

You might want to put your [link][1] in here for later.

Some documents include links elsewhere in their structure, which is easier
for moving links around your document, while keeping the formatting
structure.

[1]: (http://example.com)

Links can be to absolute URLs (http://example.com/some/page.html), or relative URLs (some/page.html) and can include anchor points (http://example.com/some/page.html#heading-1). They can also link to other protocols, like email (mailto:person@example.org) or ftp (ftp://user:password@192.0.2.1/some/directory/).

Images

Much like the link layout, in HTML an image is inserted with a special tag, in that case, <img src="http://example.com/some/image.png" alt="Some Image">. An image can have an “Alt Tag”, which is text that a screen reader (for people with partial or complete vision loss) can read out. To put an image into a Markdown document, you use the link-style formatting, but add an exclamation mark before it, like this:

![Some Image](http://example.com/some/image.png)
![Some other image][1]

[1]: (relative/paths/work/too.png)

If you want to mix Images and Links, you do that like this:

[![This is an arrow, pointing you to your link](arrow.png)](my_link.html)

Note that here it looks a little complicated, as you’ve got the image identifier (![]()) inside the link identifier ([]()). Again, you could also use some non-inline URLs to clarify that a little, like this:

[![Click here to send an email][email]](mailto:someone@example.net?subject=Enquiry)

[email]: http://example.org/assets/email.png

Headings

You can prefix text with the # symbol and a space to make it a “top level heading”, like my heading for this blog post “Writing with Commonmark/Markdown formatting”, like this:

# Writing with Commonmark/Markdown formatting

Subsequent level headings, from 2 (e.g. “Headings” above) to 6 are written like this:

## Headings

### Now also at level 3

#### And level 4

##### And so on

###### Until level 6

### You can also jump back up levels, if you need to

Typically, you include a line space before and after the heading, just to make it clearer that this is a heading. It’s also possible to use the equals underlining and hyphen underlining to turn a single top level and second level heading, like this:

# Heading 1

is the same as

Heading 1
=========
## Heading 2

is the same as

Heading 2
---------

I’ve not really seen that structure before, but it seems less clear than the symbol-prefix method… I guess it’s just codifying some early practices.

Another benefit to the headings is that they automatically get turned into “anchor tags”, so you can refer to those points elsewhere in your document, like this:

Refer to [our sales literature for more details](#sales-literature).

## Sales Literature

![Our Brochure](brochure.jpg)

Note that the anchor tag in this case is any heading tag (level 1 to 6), turned into lower case, and replacing any spaces with hyphens and removing any other characters.

Emphasis

Aside from the above, you can also use some punctuation to indicate emphasis, like this:

This is *bold* text. As is _this_.

This text is **italicised** instead. This is __too__.

This text is ***both*** bold and italicised. ___Also___ here.
So is __*this*__ and **_this_** and _**this**_ and *__this__*.

Lists (ordered and unordered)

An ordered list looks like this:

1. Go to the shops
  1. Open the door
  2. Walk in
  3. Select products
  4. Pay for products
    1. Use debit or credit card
    2. Enter PIN
  5. Open the door
  6. Exit
2. Go home

and so on. An unordered list looks like this:

* Eggs
* Dairy
  * Milk
  * Cheese
* Meat
  * Pork
    * Ham
    * Bacon
  * Beef

Both of these can be rendered in Markdown using this format:

1. Go to the shops
    1. Open the door
    2. Walk in
    3. Select products
        * Eggs
        * Dairy
            * Milk
2. Go home

Notice that you can nest ordered and unordered lists. You need to provide four spaces when indenting from one level to the next.

If you’re not sure what the numbering will be, you can replace each of the numbers (1., 2., 3. and so on) with a single number, 1. Also, * for the unordered list can be replaced with -. So, the above example could look like this:

1. Go to the shops
    1. Open the door
    1. Walk in
    1. Select products
        - Eggs
        - Dairy
            * Milk
1. Go home

This all depends on what writing style you prefer.

Late Edit: 2020-06-24 If you want to include a more content under the same list item, you can add a new line and indent it by at least one space (and usually to the same indenting level as the bullet point), like this:

1. Go to the shops

   I've found going to Smiths, on the high street best.

   1. Open the door

      Use the handle on the edge of the door.

   1. Walk in
   1. Select products

      Look for items with the best dates. The items you need are as follows:

      - Eggs
      - Dairy
          * Milk

Soft Breaks (Late edit, 2020-06-24)

A soft break, written in HTML as <br>, is signalled in Markdown with two spaces, like this (spaces replaced with . characters):

It.was.a.dark.day..
Bob.had.died.a.sad.death..
All.alone.in.his.fish.tank

This would be rendered like this (italicised to differentiate from the rest of this post):

It was a dark day
Bob had died a sad death
All alone in his fish tank

Quoting text

The way to get started is to quit talking and begin doing.

Walt Disney

People sometimes like to quote other people. In Markdown, we do this by following a long email convention, proceeding the quote with a “chevron” symbol – >, like this:

> The way to get started is to quit talking and begin doing.
> 
> [*Walt Disney*](https://blog.hubspot.com/sales/famous-quotes)

Note that this could also have been written like this:

As Walt Disney once said:

The way to get started is to quit talking and begin doing.

As [Walt Disney](https://blog.hubspot.com/sales/famous-quotes) once said:

> The way to get started is to quit talking and begin doing.

Embedding code

This one I use all the time. Backticks (`) help you embed code, while three backticks (```) start a block of code, like this:

Also, `*` for the unordered list can be replaced with `-`.

```
> The way to get started is to quit talking and begin doing.

[Walt Disney](https://blog.hubspot.com/sales/famous-quotes)
```

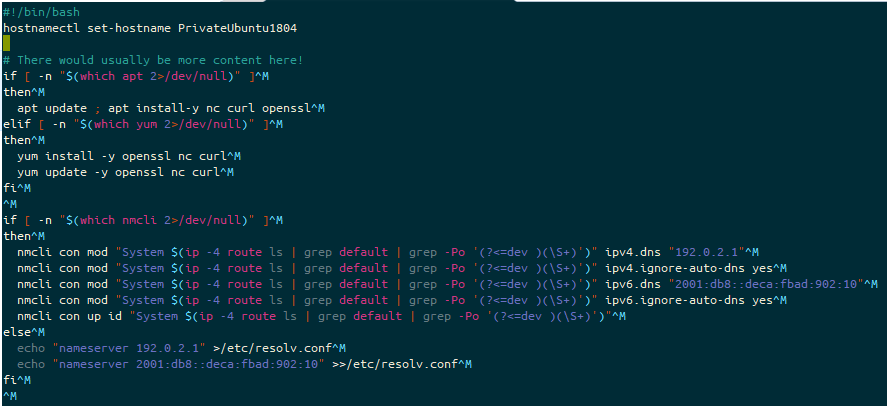
Some interpretations of Markdown (notably “Github Flavoured Markdown”) let you signal what type of code you’ve written by adding the language after the first set of three backticks, like this:

```bash
#!/bin/bash
echo "$1"
exit
```

If three backticks don’t work for you, you can instead add four spaces before each line of your code, like this:

    #!/bin/bash
    echo "$1"
    exit

Raw HTML

Sometimes you just can’t do with Markdown what you want to achieve. I’ve notably found this with trying to incorporate several images and figure references in an ordered list, but in those cases, you can always use “raw HTML”. Here’s a list (from the Commonmark Spec as of version 0.29, dated 2019-04-06) of what tags are available to you:

address, article, aside, base, basefont, blockquote, body, caption, center, col, colgroup, dd, details, dialog, dir, div, dl, dt, fieldset, figcaption, figure, footer, form, frame, frameset, h1, h2, h3, h4, h5, h6, head, header, hr, html, iframe, legend, li, link, main, menu, menuitem, nav, noframes, ol, optgroup, option, p, param, section, source, summary, table, tbody, td, tfoot, th, thead, title, tr, track, ul

Given this, here’s what I tend to do:

1. Here's something to do with the following image<br>
![alt text](figure1.png)<br>
*Figure 1 - Some image that is relevant*<br>

Since looking into this further, this is now what I intend to do:

1. Here's something to do with the following image
<figure>![alt text](figure1.png)
<figcaption>*Figure 1 - Some image that is relevant*</figcaption>
</figure>

Tables

Not all Markdown flavours incorporate these, but some do. Trial-and-error is your friend here!

Github Flavoured Markdown supports tables, as do several other Markdown interpreters, but it’s explicitly not in Commonmark.

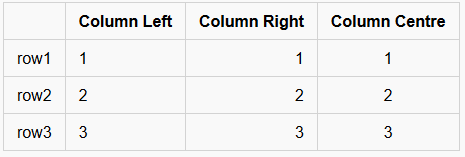
These are very basic tables, but will work for several cases. In this case, you MUST have a heading row (in my case, the first column has no name, but the second, third and fourth have the text “column” and then the alignment the subsequent rows follow), then a line which indicates the alignment of the row, either left (|---|), right (|--:|) or centre (|:-:|). All subsequent lines must contain all the columns specified. You can’t merge columns or rows, without resorting to HTML table definitions.

|      | Column Left | Column Right | Column Centre |
|------|-------------|-------------:|:-------------:|
| row1 | 1           |            1 |       1       |
| row2 | 2           |            2 |       2       |
| row3 | 3           |            3 |       3       |

In this case, you’ll get the following:

Note that different flavours disagree on whether the alignment of the text inside the rows matters, so while the above text works out OK, the following would also produce exactly the same result:

|      | Column Left | Column Right | Column Centre |
|------|-------------|-------------:|:-------------:|
| row1 | 1           | 1            | 1             |
| row2 | 2           | 2            | 2             |
| row3 | 3           | 3            | 3             |

As would this:

|  | Column Left | Column Right | Column Centre |
|-|-|-:|:-:|
| row1 | 1 | 1 | 1 |
| row2 | 2 | 2 | 2 |
| row3 | 3 | 3 | 3 |

Personally, I’d probably use the longer format divider line to match up to the column heads, but use the shorter format for the rows.
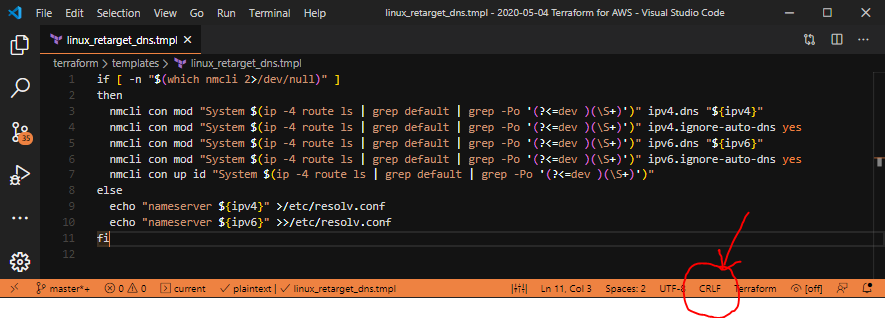
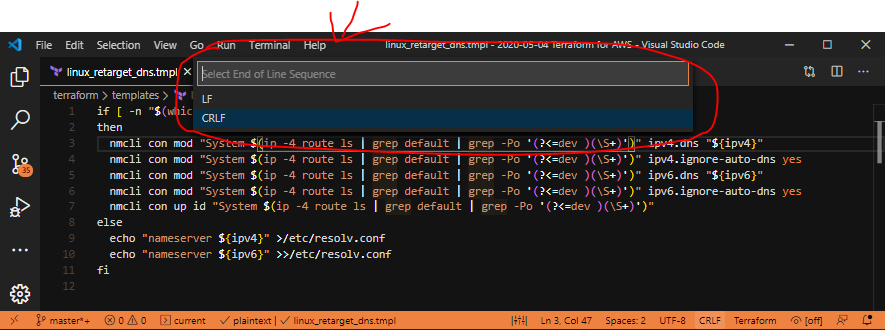
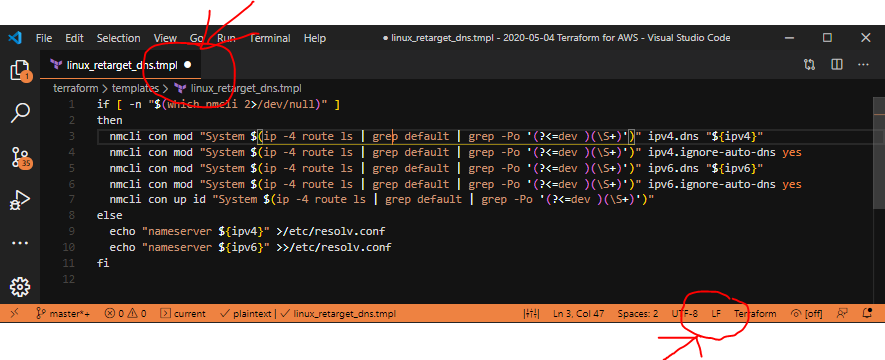
Using Markdown

  • In projects on Github and Gitlab, any file suffixed .md will usually be rendered as a Markdown file. Editing a Markdown file in Github at least will allow you to use the “preview” tab to see the changes. You can also include some Markdown in issues and pull/merge requests. It is not recommended for git logs, and IIRC won’t render it there either.
  • Visual Studio Code will preview Markdown, and has a “linting” extension, called “markdownlint“, that will help identify common issues with Markdown.
  • WordPress’ “Gutenberg” block editor supports using markdown, both for importing content, and for using it to shortcut things like bold, italics, headings and links (in fact, I wrote rather a lot of this using it!).
  • Popular blogging platform Ghost and static site creation tool Jekyll both use Markdown extensively.

Alternatives

  • Naturally, Plain Text is an option :)
  • You might also consider “Restructured Text” (RST) which are popular with open source projects for their documentation.

Featured image is “html tattoo” by “webmove” on Flickr and is released under a CC-BY license.

“New shoes” by “Morgaine” from Flickr

Making Windows Cloud-Init Scripts run after a reboot (Using Terraform)

I’m currently building a Proof Of Value (POV) environment for a product, and one of the things I needed in my environment was an Active Directory domain.

To do this in AWS, I had to do the following steps:

  1. Build my Domain Controller
    1. Install Windows
    2. Set the hostname (Reboot)
    3. Promote the machine to being a Domain Controller (Reboot)
    4. Create a domain user
  2. Build my Member Server
    1. Install Windows
    2. Set the hostname (Reboot)
    3. Set the DNS client to point to the Domain Controller
    4. Join the server to the domain (Reboot)

To make this work, I had to find a way to trigger build steps after each reboot. I was working with Windows 2012R2, Windows 2016 and Windows 2019, so the solution had to be cross-version. Fortunately I found this script online! That version was great for Windows 2012R2, but didn’t cover Windows 2016 or later… So let’s break down what I’ve done!

In your userdata field, you need to have two sets of XML strings, as follows:

<persist>true</persist>
<powershell>
$some = "powershell code"
</powershell>

The first block says to Windows 2016+ “keep trying to run this script on each boot” (note that you need to stop it from doing non-relevant stuff on each boot – we’ll get to that in a second!), and the second bit is the PowerShell commands you want it to run. The rest of this now will focus just on the PowerShell block.

  $path= 'HKLM:\Software\UserData'
  
  if(!(Get-Item $Path -ErrorAction SilentlyContinue)) {
    New-Item $Path
    New-ItemProperty -Path $Path -Name RunCount -Value 0 -PropertyType dword
  }
  
  $runCount = Get-ItemProperty -Path $path -Name Runcount -ErrorAction SilentlyContinue | Select-Object -ExpandProperty RunCount
  
  if($runCount -ge 0) {
    switch($runCount) {
      0 {
        $runCount = 1 + [int]$runCount
        Set-ItemProperty -Path $Path -Name RunCount -Value $runCount
        if ($ver -match 2012) {
          #Enable user data
          $EC2SettingsFile = "$env:ProgramFiles\Amazon\Ec2ConfigService\Settings\Config.xml"
          $xml = [xml](Get-Content $EC2SettingsFile)
          $xmlElement = $xml.get_DocumentElement()
          $xmlElementToModify = $xmlElement.Plugins
          
          foreach ($element in $xmlElementToModify.Plugin)
          {
            if ($element.name -eq "Ec2HandleUserData") {
              $element.State="Enabled"
            }
          }
          $xml.Save($EC2SettingsFile)
        }
        $some = "PowerShell Script"
      }
    }
  }

Whew, what a block! Well, again, we can split this up into a couple of bits.

In the first few lines, we build a pointer, a note which says “We got up to here on our previous boots”. We then read that into a variable and find that number and execute any steps in the block with that number. That’s this block:

  $path= 'HKLM:\Software\UserData'
  
  if(!(Get-Item $Path -ErrorAction SilentlyContinue)) {
    New-Item $Path
    New-ItemProperty -Path $Path -Name RunCount -Value 0 -PropertyType dword
  }
  
  $runCount = Get-ItemProperty -Path $path -Name Runcount -ErrorAction SilentlyContinue | Select-Object -ExpandProperty RunCount
  
  if($runCount -ge 0) {
    switch($runCount) {

    }
  }

The next part (and you’ll repeat it for each “number” of reboot steps you need to perform) says “increment the number” then “If this is Windows 2012, remind the userdata handler that the script needs to be run again next boot”. That’s this block:

      0 {
        $runCount = 1 + [int]$runCount
        Set-ItemProperty -Path $Path -Name RunCount -Value $runCount
        if ($ver -match 2012) {
          #Enable user data
          $EC2SettingsFile = "$env:ProgramFiles\Amazon\Ec2ConfigService\Settings\Config.xml"
          $xml = [xml](Get-Content $EC2SettingsFile)
          $xmlElement = $xml.get_DocumentElement()
          $xmlElementToModify = $xmlElement.Plugins
          
          foreach ($element in $xmlElementToModify.Plugin)
          {
            if ($element.name -eq "Ec2HandleUserData") {
              $element.State="Enabled"
            }
          }
          $xml.Save($EC2SettingsFile)
        }
        
      }

In fact, it’s fair to say that in my userdata script, this looks like this:

  $path= 'HKLM:\Software\UserData'
  
  if(!(Get-Item $Path -ErrorAction SilentlyContinue)) {
    New-Item $Path
    New-ItemProperty -Path $Path -Name RunCount -Value 0 -PropertyType dword
  }
  
  $runCount = Get-ItemProperty -Path $path -Name Runcount -ErrorAction SilentlyContinue | Select-Object -ExpandProperty RunCount
  
  if($runCount -ge 0) {
    switch($runCount) {
      0 {
        ${file("templates/step.tmpl")}

        ${templatefile(
          "templates/rename_windows.tmpl",
          {
            hostname = "SomeMachine"
          }
        )}
      }
      1 {
        ${file("templates/step.tmpl")}

        ${templatefile(
          "templates/join_ad.tmpl",
          {
            dns_ipv4 = "192.0.2.1",
            domain_suffix = "ad.mycorp",
            join_account = "ad\someuser",
            join_password = "SomePassw0rd!"
          }
        )}
      }
    }
  }

Then, after each reboot, you need a new block. I have a block to change the computer name, a block to join the machine to the domain, and a block to install an software that I need.

Featured image is “New shoes” by “Morgaine” on Flickr and is released under a CC-BY-SA license.

"Fishing line and bobbin stuck on tree at Douthat State Park" by "Virginia State Parks" on Flickr

Note to self: Linux shell scripts don’t cope well with combined CRLF + LF files… Especially in User-Data / Custom Data / Cloud-Init scripts

This one is more a nudge to myself. On several occasions when building Infrastructure As Code (IAC), I split out a code sections into one or more files, for readability and reusability purposes. What I tended to do, and this was more apparent with the Linux builds than the Windows builds, was to forget to set the line terminator from CRLF to LF.

While this doesn’t really impact Windows builds too much (they’re kinda designed to support people being idiots with line endings now), Linux still really struggles with CRLF endings, and you’ll only see when you’ve broken this because you’ll completely fail to run any of the user-data script.

How do you determine this is your problem? Well, actually it’s a bit tricky, as neither cat, less, more or nano spot this issue. The only two things I found that identified it were file and vi.

The first part of the combined file with mixed line endings. This part has LF termination.
The second part of the combined file with mixed line endings. This part has CRLF termination.
What happens when we cat these two parts into one file? A file with CRLF, LF line terminators obviously!
What the combined file looks like in Vi. Note the blue ^M at the ends of the lines.

So, how to fix this? Assuming you’re using Visual Studio Code;

A failed line-ending clue in Visual Studio Code

You’ll notice this line showing “CRLF” in the status bar at the bottom of Code. Click on that, which brings up a discrete box near the top, as follows:

Oh no, it’s set to “CRLF”. That’s not what we want!

Selecting LF in that box changes the line feeds into LF for this file, but it’s not saved. Make sure you save this file before you re-run your terraform script!

Notice, we’re now using LF endings, but the file isn’t saved.

Fantastic! It’s all worked!

In Nano, I’ve opened the part with the invalid line endings.

Oh no! We have a “DOS Format” file. Quick, let’s fix it!

To fix this, we need to write the file out. Hit Ctrl+O. This tells us that we’re in DOS Format, and also gives us the keyboard combination to toggle “DOS Format” off – it’s Alt+D (In Unix/Linux world, the Alt key is referred to as the Meta key – hence M not A).

This is how we fix things

So, after hitting Alt+D, the “File Name to write” line changes, see below:

Yey, no pesky “DOS Format” warning here!

Using either editor (or any others, if you know how to solve line ending issues in other editors), you still need to combine your script back together before you can run it, so… do that, and your file will be fine to run! Good luck!

Featured image is “Fishing line and bobbin stuck on tree at Douthat State Park” by “Virginia State Parks” on Flickr and is released under a CC-BY license.

"Root" by "llee_wu" on Flickr

A quick note on using Firefox in Windows in a Corporate or Enterprise environment

I’ve been using Firefox as my “browser of choice” for around 15 years. I tend to prefer to use it for all sorts of reasons, but the main thing I expect is support for extensions. Not many of them, but … well, there’s a few!

There are two stumbling blocks for using Firefox in a corporate or enterprise setting. These are:

  1. NTLM or Kerberos Authentication for resources like Sharepoint and ADFS.
  2. Enterprise TLS certificates (usually deployed via GPO as part of the domain)

These are both trivially fixed in the about:config screen, but first you need to get past a scary looking warning page!

In the address bar, where it probably currently says jon.sprig.gs, click in there and type about:config.

Getting to about:config

This brings you to a scary page!

Proceed with caution! (of course!!)

Click the “Accept the Risk and Continue” (note, this is with Firefox 76. Wording with later or earlier versions may differ).

As if it wasn’t obvious enough from the previous screen, this “may impact performance and security”…

And then you get a search box.

In the “Search preference name” type in ntlm and find the line that says network.automatic-ntlm-auth.trusted-uris.

The “NTLM Options page”

Type in there the suffixes of any TRUSTED domains. For example, if your company uses the domain names of bigcompany.com, bigco.local and big.company then you’d type in:

bigcompany.com,bigco.local,big.company

Any pages that you browse to, where they request NTLM authentication, will receive an NTLM set of credentials if prompted (same as IE, Edge, and Chrome already do!) NTLM is effectively a way to pass a trusted Kerberos ticket (a bit like your domain credentials) into a web page.

Next up, let’s get those pesky certificate errors removed!

This assumes that you have a centrally managed TLS Root Certificate, and the admins in your network haven’t just been dumping self signed certificates everywhere (nothing gets around that… just sayin’).

Still in about:config, clear the search box and type enterprise, like this!

Enterprise Roots are here!

Find the line security.enterprise_roots.enabled and make sure it says true. If it doesn’t double click it, so it does.

Now you can close your preferences page, and you should be fine to visit your internal source code repository, time sheeting system or sharepoint site, with almost no interruptions!

If you’ve been tasked for turning this stuff on in your estate of managed desktop environment machines, then you might find this article (on Autoconfiguration of Firefox) of use (but I’ve not tried it!)

Featured image is “Root” by “llee_wu” on Flickr and is released under a CC-BY-ND license.

Publishing a “Bio” in Secure Scuttlebutt, using ssb-server

This is one of those “oh, there it is” posts, more for myself than anyone else. Anyway, if you use SSB from a shell (perhaps you run your own SSB Pub, for example), you might want to run this style of command:

ssb-server publish --type about --about "$(ssb-server whoami | jq .id -r)" --name "Some Server" --description "I'm just some server, you know"

As long as you have --name or --description in there, you should be good to go!

"vieux port Marseille" by "Jeanne Menjoulet" on Flickr

Networking tricks with Multipass in Virtualbox on Windows (Bridged interfaces and Port Forwards)

TL;DR? Want to “just” bridge one or more interfaces to a Multipass instance when you’re using Virtualbox? See the Bridging Summary below. Want to do a port forward? See the Port Forward section below. You will need the psexec command and to execute this as an administrator. The use of these two may be considered a security incident on your computing environment, depending on how your security processes and infrastructure are defined and configured.

Ah Multipass. This is a tool created by Canonical to create a “A mini-cloud on your Mac or Windows workstation.” (from their website)…

I’ve often seen this endorsed as the tool of choice from Canonical employees to do “stuff” like run Kubernetes, develop tools for UBPorts (previously Ubuntu Touch) devices, and so on.

So far, it seems interesting. It’s a little bit like Vagrant with an in-built cloud-init Provisioner, and as I want to test out the cloud-init files I’m creating for AWS and Azure, that’d be so much easier than actually building the AWS or Azure machines, or finding a viable cloud-init plugin for Vagrant to test it out.

BUT… Multipass is really designed for Linux systems (running LibVirt), OS X (running HyperKit) and Windows (running Hyper-V). Even if I were using Windows 10 Pro on this machine, I use Virtualbox for “things” on my Windows Machine, and Hyper-V steals the VT-X bit, which means that VirtualBox can’t run x64 code…. Soooo I can’t use the Hyper-V mode.

Now, there is a “fix” for this. You can put Multipass into Virtualbox mode, which lets you run Multipass on Windows or OS X without using their designed-for hypervisor, but this has a downside, you see, VirtualBox doesn’t give MultiPass the same interface to route networking connections to the VM, and there’s currently no CLI or GUI options to say “bridge my network” or “forward a port” (in part because it needs to be portable to the native hypervisor options, apparently). So, I needed to fudge some things so I can get my beloved bridged connections.

I got to the point where I could do this, thanks to the responses to a few issues I raised on the Multipass Github issues, mostly #1333.

The first thing you need to install in Windows is PsExec, because Multipass runs it’s Virtual Machines as the SYSTEM account, and talking to SYSTEM account processes is nominally hard. Get PsExec from the SysInternals website. Some IT Security professionals will note the addition of PsExec as a potential security incident, but then again, they might also see the running of a virtual machine as a security incident too, as these aren’t controlled with a central image. Anyway… Just bear it in mind, and don’t shout at me if you get frogmarched in front of your CISO.

I’m guessing if you’re here, you’ve already installed Multipass, (but if not, and it seems interesting – it’s over at https://multipass.run. Get it and install it, then carry on…) and you’ve probably enabled the VirtualBox mode (if not – open a command prompt as administrator, and run “multipass set local.driver=virtualbox“). Now, you can start sorting out your bridges.

Sorting out bridges

First things first, you need to launch a virtual machine. I did, and it generated a name for my image.

C:\Users\JON>multipass launch
Launched: witty-kelpie

Fab! We have a running virtual machine, and you should be able to get a shell in there by running multipass shell "witty-kelpie" (the name of the machine it launched before). But, uh-oh. We have the “default” NAT interface of this device mapped, not a bridged interface.

C:\Users\JON>multipass shell "witty-kelpie"
Welcome to Ubuntu 18.04.3 LTS (GNU/Linux 4.15.0-76-generic x86_64)

 * Documentation:  https://help.ubuntu.com
 * Management:     https://landscape.canonical.com
 * Support:        https://ubuntu.com/advantage

  System information as of Thu Feb  6 10:56:38 GMT 2020

  System load:  0.3               Processes:             82
  Usage of /:   20.9% of 4.67GB   Users logged in:       0
  Memory usage: 11%               IP address for enp0s3: 10.0.2.15
  Swap usage:   0%


0 packages can be updated.
0 updates are security updates.


To run a command as administrator (user "root"), use "sudo <command>".
See "man sudo_root" for details.

ubuntu@witty-kelpie:~$

So, exit the machine, and issue a multipass stop "witty-kelpie" command to ask Virtualbox to shut it down.

So, this is where the fun[1] part begins.
[1] The “Fun” part here depends on how you view this specific set of circumstances 😉

We need to get the descriptions of all the interfaces we might want to bridge to this device. I have three interfaces on my machine – a WiFi interface, a Ethernet interface on my laptop, and an Ethernet interface on my USB3 dock. At some point in the past, I renamed these interfaces, so I’d recognise them in the list of interfaces, so they’re not just called “Connection #1”, “Connection #2” and so on… but you should recognise your interfaces.

To get this list of interfaces, open PowerShell (as a “user”), and run this command:

PS C:\Users\JON> Get-NetAdapter -Physical | format-list -property "Name","DriverDescription"

Name              : On-Board Network Connection
DriverDescription : Intel(R) Ethernet Connection I219-LM

Name              : Wi-Fi
DriverDescription : Intel(R) Dual Band Wireless-AC 8260

Name              : Dock Network Connection
DriverDescription : DisplayLink Network Adapter NCM

For reasons best known to the Oracle team, they use the “Driver Description” to identify the interfaces, not the name assigned to the device by the user, so, before we get started, find your interface, and note down the description for later. If you want to bridge “all” of them, make a note of all the interfaces in question, and in the order you want to attach them. Note that Virtualbox doesn’t really like exposing more than 8 NICs without changing the Chipset to ICH9 (but really… 9+ NICs? really??) and the first one is already consumed with the NAT interface you’re using to connect to it… so that gives you 7 bridgeable interfaces. Whee!

So, now you know what interfaces you want to bridge, let’s configure the Virtualbox side. Like I said before you need psexec. I’ve got psexec stored in my Downloads folder. You can only run psexec as administrator, so open up an Administrator command prompt or powershell session, and run your command.

Just for clarity, your commands are likely to have some different paths, so remember that wherever “your” PsExec64.exe command is located, mine is in C:\Users\JON\Downloads\sysinternals\PsExec64.exe, and wherever your vboxmanage.exe is located, mine is in C:\Program Files\Oracle\VirtualBox\vboxmanage.exe.

Here, I’m going to attach my dock port (“DisplayLink Network Adapter NCM”) to the second VirtualBox interface, the Wifi adaptor to the third interface and my locally connected interface to the fourth interface. Your interfaces WILL have different descriptions, and you’re likely not to need quite so many of them!

C:\WINDOWS\system32>C:\Users\JON\Downloads\sysinternals\PsExec64.exe -s "c:\program files\oracle\virtualbox\vboxmanage" modifyvm "witty-kelpie" --nic2 bridged --bridgeadapter2 "DisplayLink Network Adapter NCM" --nic3 bridged --bridgeadapter3 "Intel(R) Dual Band Wireless-AC 8260" --nic4 bridged --bridgeadapter4 "Intel(R) Ethernet Connection I219-LM"

PsExec v2.2 - Execute processes remotely
Copyright (C) 2001-2016 Mark Russinovich
Sysinternals - www.sysinternals.com

c:\program files\oracle\virtualbox\vboxmanage exited on MINILITH with error code 0.

An error code of 0 means that it completed successfuly and with no issues.

If you wanted to use a “Host Only” network (if you’re used to using Vagrant, you might know it as “Private” Networking), then change the NIC you’re interested in from --nicX bridged --bridgeadapterX "Some Description" to --nicX hostonly --hostonlyadapterX "VirtualBox Host-Only Ethernet Adapter" (where X is replaced with the NIC number you want to swap, ranged between 2 and 8, as 1 is the NAT interface you use to SSH into the virtual machine.)

Now we need to check to make sure the machine has it’s requisite number of interfaces. We use the showvminfo flag to the vboxmanage command. It produces a LOT of content, so I’ve manually filtered the lines I want, but you should spot it reasonably quickly.

C:\WINDOWS\system32>C:\Users\JON\Downloads\sysinternals\PsExec64.exe -s "c:\program files\oracle\virtualbox\vboxmanage" showvminfo "witty-kelpie"

PsExec v2.2 - Execute processes remotely
Copyright (C) 2001-2016 Mark Russinovich
Sysinternals - www.sysinternals.com


Name:                        witty-kelpie
Groups:                      /Multipass
Guest OS:                    Ubuntu (64-bit)
<SNIP SOME CONTENT>
NIC 1:                       MAC: 0800273CCED0, Attachment: NAT, Cable connected: on, Trace: off (file: none), Type: 82540EM, Reported speed: 0 Mbps, Boot priority: 0, Promisc Policy: deny, Bandwidth group: none
NIC 1 Settings:  MTU: 0, Socket (send: 64, receive: 64), TCP Window (send:64, receive: 64)
NIC 1 Rule(0):   name = ssh, protocol = tcp, host ip = , host port = 53507, guest ip = , guest port = 22
NIC 2:                       MAC: 080027303758, Attachment: Bridged Interface 'DisplayLink Network Adapter NCM', Cable connected: on, Trace: off (file: none), Type: 82540EM, Reported speed: 0 Mbps, Boot priority: 0, Promisc Policy: deny, Bandwidth group: none
NIC 3:                       MAC: 0800276EA174, Attachment: Bridged Interface 'Intel(R) Dual Band Wireless-AC 8260', Cable connected: on, Trace: off (file: none), Type: 82540EM, Reported speed: 0 Mbps, Boot priority: 0, Promisc Policy: deny, Bandwidth group: none
NIC 4:                       MAC: 080027042135, Attachment: Bridged Interface 'Intel(R) Ethernet Connection I219-LM', Cable connected: on, Trace: off (file: none), Type: 82540EM, Reported speed: 0 Mbps, Boot priority: 0, Promisc Policy: deny, Bandwidth group: none
NIC 5:                       disabled
NIC 6:                       disabled
NIC 7:                       disabled
NIC 8:                       disabled
<SNIP SOME CONTENT>

Configured memory balloon size: 0MB

c:\program files\oracle\virtualbox\vboxmanage exited on MINILITH with error code 0.

Fab! We now have working interfaces… But wait, let’s start that VM back up and see what happens.

C:\Users\JON>multipass shell "witty-kelpie"
Welcome to Ubuntu 18.04.3 LTS (GNU/Linux 4.15.0-76-generic x86_64)

 * Documentation:  https://help.ubuntu.com
 * Management:     https://landscape.canonical.com
 * Support:        https://ubuntu.com/advantage

  System information as of Thu Feb  6 11:31:08 GMT 2020

  System load:  0.1               Processes:             84
  Usage of /:   21.1% of 4.67GB   Users logged in:       0
  Memory usage: 11%               IP address for enp0s3: 10.0.2.15
  Swap usage:   0%


0 packages can be updated.
0 updates are security updates.


Last login: Thu Feb  6 10:56:45 2020 from 10.0.2.2
To run a command as administrator (user "root"), use "sudo <command>".
See "man sudo_root" for details.

ubuntu@witty-kelpie:~$

Wait, what….. We’ve still only got the one interface up with an IP address… OK, let’s fix this!

As of Ubuntu 18.04, interfaces are managed using Netplan, and, well, when the VM was built, it didn’t know about any interface past the first one, so we need to get Netplan to get them enabled. Let’s check they’re detected by the VM, and see what they’re all called:

ubuntu@witty-kelpie:~$ ip link
1: lo: <LOOPBACK,UP,LOWER_UP> mtu 65536 qdisc noqueue state UNKNOWN mode DEFAULT group default qlen 1000
    link/loopback 00:00:00:00:00:00 brd 00:00:00:00:00:00
2: enp0s3: <BROADCAST,MULTICAST,UP,LOWER_UP> mtu 1500 qdisc fq_codel state UP mode DEFAULT group default qlen 1000
    link/ether 08:00:27:3c:ce:d0 brd ff:ff:ff:ff:ff:ff
3: enp0s8: <BROADCAST,MULTICAST> mtu 1500 qdisc noop state DOWN mode DEFAULT group default qlen 1000
    link/ether 08:00:27:30:37:58 brd ff:ff:ff:ff:ff:ff
4: enp0s9: <BROADCAST,MULTICAST> mtu 1500 qdisc noop state DOWN mode DEFAULT group default qlen 1000
    link/ether 08:00:27:6e:a1:74 brd ff:ff:ff:ff:ff:ff
5: enp0s10: <BROADCAST,MULTICAST> mtu 1500 qdisc noop state DOWN mode DEFAULT group default qlen 1000
    link/ether 08:00:27:04:21:35 brd ff:ff:ff:ff:ff:ff
ubuntu@witty-kelpie:~$ 

If you compare the link/ether lines to the output from showvminfo we executed before, you’ll see that the MAC address against enp0s3 matches the NAT interface, while enp0s8 matches the DisplayLink adapter, and so on… So we basically want to ask NetPlan to do a DHCP lookup for all the new interfaces we’ve added to it. If you’ve got 1 NAT and 7 physical interfaces (why oh why…) then you’d have enp0s8, 9, 10, 16, 17, 18 and 19 (I’ll come back to the random numbering in a tic)… so we now need to ask Netplan to do DHCP on all of those interfaces (assuming we’ll be asking for them all to come up!)

If we want to push that in, then we need to add a new file in /etc/netplan called something like 60-extra-interfaces.yaml, that should contain:

network:
  ethernets:
    enp0s8:
      optional: yes
      dhcp4: yes
      dhcp4-overrides:
        route-metric: 10
    enp0s9:
      optional: yes
      dhcp4: yes
      dhcp4-overrides:
        route-metric: 11
    enp0s10:
      optional: yes
      dhcp4: yes
      dhcp4-overrides:
        route-metric: 12
    enp0s16:
      optional: yes
      dhcp4: yes
      dhcp4-overrides:
        route-metric: 13
    enp0s17:
      optional: yes
      dhcp4: yes
      dhcp4-overrides:
        route-metric: 14
    enp0s18:
      optional: yes
      dhcp4: yes
      dhcp4-overrides:
        route-metric: 15
    enp0s19:
      optional: yes
      dhcp4: yes
      dhcp4-overrides:
        route-metric: 16

Going through this, we basically ask netplan not to assume the interfaces are attached. This stops the boot process for waiting for a timeout to configure each of the interfaces before proceeding, so it means your boot should be reasonably fast, particularly if you don’t always attach a network cable or join a Wifi network on all your interfaces!

We also say to assume we want IPv4 DHCP on each of those interfaces. I’ve done IPv4 only, as most people don’t use IPv6 at home, but if you are doing IPv6 as well, then you’d also need the same lines that start dhcp4 copied to show dhcp6 (like dhcp6: yes and dhcp6-overrides: route-metric: 10)

The eagle eyed of you might notice that the route metric increases for each extra interface. This is because realistically, if you have two interfaces connected (perhaps if you’ve got wifi enabled, and plug a network cable in), then you’re more likely to want to prioritize traffic going over the lower numbered interfaces than the higher number interfaces.

Once you’ve created this file, you need to run netplan apply or reboot your machine.

So, yehr, that gets you sorted on the interface front.

Bridging Summary

To review, you launch your machine with multipass launch, and immediately stop it with multipass stop "vm-name", then, as an admin, run psexec vboxmanage modifyvm "vm-name" --nic2 bridged --bridgedadapter2 "NIC description", and then start the machine with multipass start "vm-name". Lastly, ask the interface to do DHCP by manipulating your Netplan configuration.

Interface Names in VirtualBox

Just a quick note on the fact that the interface names aren’t called things like eth0 any more. A few years back, Ubuntu (amongst pretty much all of the Linux distribution vendors) changed from using eth0 style naming to what they call “Predictable Network Interface Names”. This derives the names from things like, what the BIOS provides for on-board interfaces, slot index numbers for PCI Express ports, and for this case, the “geographic location of the connector”. In Virtualbox, these interfaces are provided as the “Geographically” attached to “port 0” (so enp0 are all on port 0), but for some reason, they broadcast themselves as being attached to the port 0 at “slots” 3, 8, 9, 10, 16, 17, 18 and 19… hence enp0s3 and so on. shrug It just means that if you don’t have the interfaces coming up on the interfaces you’re expecting, you need to run ip link to confirm the MAC addresses match.

Port Forwarding

Unlike with the Bridging, we don’t need to power down the VM to add the extra interfaces, we just need to use psexec (as an admin again) to execute a vboxmanage command – in this case, it’s:

C:\WINDOWS\system32>C:\Users\JON\Downloads\sysinternals\PsExec64.exe -s "c:\program files\oracle\virtualbox\vboxmanage" controlvm "witty-kelpie" --natpf1 "myport,tcp,,1234,,2345"

OK, that’s a bit more obscure. Basically it says “Create a NAT rule on NIC 1 called ‘myport’ to forward TCP connections from port 1234 attached to any IP associated to the host OS to port 2345 attached to the DHCP supplied IP on the guest OS”.

If we wanted to run a DNS server in our VM, we could run multiple NAT rules in the same command, like this:

C:\WINDOWS\system32>C:\Users\JON\Downloads\sysinternals\PsExec64.exe -s "c:\program files\oracle\virtualbox\vboxmanage" controlvm "witty-kelpie" --natpf1 "TCP DNS,tcp,127.0.0.1,53,,53" --natpf1 "UDP DNS,udp,127.0.0.1,53,,53"

If we then decide we don’t need those NAT rules any more, we just (with psexec and appropriate paths) issue: vboxmanage controlvm "vm-name" --natpf1 delete "TCP DNS"

Using ifupdown instead of netplan

Late Edit 2020-04-01: On Github, someone asked me how they could use the same type of config with netplan, but instead on a 16.04 system. Ubuntu 16.04 doesn’t use netplan, but instead uses ifupdown instead. Here’s how to configure the file for ifupdown:

You can either add the following stanzas to /etc/network/interfaces, or create a separate file for each interface in /etc/network/interfaces.d/<number>-<interface>.cfg (e.g. /etc/network/interfaces.d/10-enp0s8.cfg)

allow-hotplug enp0s8
iface enp0s8 inet dhcp
  metric 10

To re-iterate, in the above netplan file, the interfaces we identified were: enp0s8, enp0s9, enp0s10, enp0s16, enp0s17, enp0s18 and enp0s19. Each interface was incrementally assigned a route metric, starting at 10 and ending at 16, so enp0s8 has a metric of 10, while enp0s16 has a metric of 13, and so on. To build these files, I’ve created this brief shell script you could use:

export metric=10
for int in 8 9 10 16 17 18 19
do
  echo -e "allow-hotplug enp0s${int}\niface enp0s${int} inet dhcp\n  metric $metric" > /etc/network/interfaces.d/enp0s${int}.cfg
  ((metric++))
done

As before, you could reboot to make the changes to the interfaces. Bear in mind, however, that unlike Netplan, these interfaces will try and DHCP on boot with this configuration, so boot time will take longer if every interface attached isn’t connected to a network.

Using NAT Network instead of NAT Interface

Late update 2020-05-26: Ruzsinsky contacted me by email to ask how I’d use a “NAT Network” instead of a “NAT interface”. Essentially, it’s the same as the Bridged interface above, with one other tweak first, we need to create the Net Network, with this command (as an Admin)

C:\WINDOWS\system32>C:\Users\JON\Downloads\sysinternals\PsExec64.exe -s "c:\program files\oracle\virtualbox\vboxmanage" natnetwork add --netname MyNet --network 192.0.2.0/24

Next, stop your multipass virtual machine with multipass stop "witty-kelpie", and configure your second interface, like this:

C:\WINDOWS\system32>C:\Users\JON\Downloads\sysinternals\PsExec64.exe -s "c:\program files\oracle\virtualbox\vboxmanage" modifyvm "witty-kelpie" --nic2 natnetwork --nat-network2 "MyNet"

PsExec v2.2 - Execute processes remotely
Copyright (C) 2001-2016 Mark Russinovich
Sysinternals - www.sysinternals.com

c:\program files\oracle\virtualbox\vboxmanage exited on MINILITH with error code 0.

Start the vm with multipass start "witty-kelpie", open a shell with it multipass shell "witty-kelpie", become root sudo -i and then configure the interface in /etc/netplan/60-extra-interfaces.yaml like we did before:

network:
  ethernets:
    enp0s8:
      optional: yes
      dhcp4: yes
      dhcp4-overrides:
        route-metric: 10

And then run netplan apply or reboot.

What I would say, however, is that the first interface seems to be expected to be a NAT interface, at which point, having a NAT network as well seems a bit pointless. You might be better off using a “Host Only” (or “Private”) network for any inter-host communications between nodes at a network level… But you know your environments and requirements better than I do :)

Featured image is “vieux port Marseille” by “Jeanne Menjoulet” on Flickr and is released under a CC-BY-ND license.

"So many coats..." by "Scott Griggs" on Flickr

Migrating from docker-compose to Kubernetes Files

Just so you know. This is a long article to explain my wandering path through understanding Kubernetes (K8S). It’s not an article to explain to you how to use K8S with your project. I hit a lot of blockers, due to the stack I’m using and I document them all. This means there’s a lot of noise and not a whole lot of Signal.

In a previous blog post I created a docker-compose.yml file for a PHP based web application. Now that I have a working Kubernetes environment, I wanted to port the configuration files into Kubernetes.

Initially, I was pointed at Kompose, a tool for converting docker-compose files to Kubernetes YAML formatted files, and, in fact, this gives me 99% of what I need… except, the current version uses beta API version flags for some of it’s outputted files, and this isn’t valid for the version of Kubernetes I’m running. So, let’s wind things back a bit, and find out what you need to do to use kompose first and then we can tweak the output file next.

Note: I’m running all these commands as root. There’s a bit of weirdness going on because I’m using the snap of Docker and I had a few issues with running these commands as a user… While I could have tried to get to the bottom of this with sudo and watching logs, I just wanted to push on… Anyway.

Here’s our “simple” docker-compose file.

version: '3'
services:
  db:
    build:
      context: .
      dockerfile: mariadb/Dockerfile
    image: localhost:32000/db
    restart: always
    environment:
      MYSQL_ROOT_PASSWORD: a_root_pw
      MYSQL_USER: a_user
      MYSQL_PASSWORD: a_password
      MYSQL_DATABASE: a_db
    expose:
      - 3306
  nginx:
    build:
      context: .
      dockerfile: nginx/Dockerfile
    image: localhost:32000/nginx
    ports:
      - 1980:80
  phpfpm:
    build:
      context: .
      dockerfile: phpfpm/Dockerfile
    image: localhost:32000/phpfpm

This has three components – the MariaDB database, the nginx web server and the PHP-FPM CGI service that nginx consumes. The database service exposes a port (3306) to other containers, with a set of hard-coded credentials (yep, that’s not great… working on that one!), while the nginx service opens port 1980 to port 80 in the container. So far, so … well, kinda sensible :)

If we run kompose convert against this docker-compose file, we get five files created; db-deployment.yaml, nginx-deployment.yaml, phpfpm-deployment.yaml, db-service.yaml and nginx-service.yaml. If we were to run kompose up on these, we get an error message…

Well, actually, first, we get a whole load of “INFO” and “WARN” lines up while kompose builds and pushes the containers into the MicroK8S local registry (a registry is a like a package repository, for containers), which is served by localhost:32000 (hence all the image: localhost:3200/someimage lines in the docker-compose.yml file), but at the end, we get (today) this error:

INFO We are going to create Kubernetes Deployments, Services and PersistentVolumeClaims for your Dockerized application. If you need different kind of resources, use the 'kompose convert' and 'kubectl create -f' commands instead.

FATA Error while deploying application: Get http://localhost:8080/api: dial tcp 127.0.0.1:8080: connect: connection refused

Uh oh! Well, this is a known issue at least! Kubernetes used to use, by default, http on port 8080 for it’s service, but now it uses https on port 6443. Well, that’s what I thought! In this issue on the MicroK8S repo, it says that it uses a different port, and you should use microk8s.kubectl cluster-info to find the port… and yep… Kubernetes master is running at https://127.0.0.1:16443. Bah.

root@microk8s-a:~/glowing-adventure# microk8s.kubectl cluster-info
Kubernetes master is running at https://127.0.0.1:16443
Heapster is running at https://127.0.0.1:16443/api/v1/namespaces/kube-system/services/heapster/proxy
CoreDNS is running at https://127.0.0.1:16443/api/v1/namespaces/kube-system/services/kube-dns:dns/proxy
Grafana is running at https://127.0.0.1:16443/api/v1/namespaces/kube-system/services/monitoring-grafana/proxy
InfluxDB is running at https://127.0.0.1:16443/api/v1/namespaces/kube-system/services/monitoring-influxdb:http/proxy

So, we export the KUBERNETES_MASTER environment variable, which was explained in that known issue I mentioned before, and now we get a credential prompt:

Please enter Username:

Oh no, again! I don’t have credentials!! Fortunately the MicroK8S issue also tells us how to find those! You run microk8s.config and it tells you the username!

roo@microk8s-a:~/glowing-adventure# microk8s.config
apiVersion: v1
clusters:
- cluster:
    certificate-authority-data: <base64-data>
    server: https://10.0.2.15:16443
  name: microk8s-cluster
contexts:
- context:
    cluster: microk8s-cluster
    user: admin
  name: microk8s
current-context: microk8s
kind: Config
preferences: {}
users:
- name: admin
  user:
    username: admin
    password: QXdUVmN3c3AvWlJ3bnRmZVJmdFhpNkJ3cDdkR3dGaVdxREhuWWo0MmUvTT0K

So, our username is “admin” and our password is … well, in this case a string starting QX and ending 0K but yours will be different!

We run kompose up again, and put in the credentials… ARGH!

FATA Error while deploying application: Get https://127.0.0.1:16443/api: x509: certificate signed by unknown authority

Well, now, that’s no good! Fortunately, a quick Google later, and up pops this Stack Overflow suggestion (mildly amended for my circumstances):

openssl s_client -showcerts -connect 127.0.0.1:16443 < /dev/null | sed -ne '/-BEGIN CERTIFICATE-/,/-END CERTIFICATE-/p' | sudo tee /usr/local/share/ca-certificates/k8s.crt
update-ca-certificates
systemctl restart snap.docker.dockerd

Right then. Let’s run that kompose up statement again…

INFO We are going to create Kubernetes Deployments, Services and PersistentVolumeClaims for your Dockerized application. If you need different kind of resources, use the 'kompose convert' and 'kubectl create -f' commands instead.

Please enter Username: 
Please enter Password: 
INFO Deploying application in "default" namespace
INFO Successfully created Service: nginx
FATA Error while deploying application: the server could not find the requested resource

Bah! What resource do I need? Well, actually, there’s a bug in 1.20.0 of Kompose, and it should be fixed in 1.21.0. The “resource” it’s talking about is, I think, that one of the APIs refuses to process the converted YAML files. As a result, the “resource” is the service that won’t start. So, instead, let’s convert the file into the output YAML files, and then take a peak at what’s going wrong.

root@microk8s-a:~/glowing-adventure# kompose convert
INFO Kubernetes file "nginx-service.yaml" created
INFO Kubernetes file "db-deployment.yaml" created
INFO Kubernetes file "nginx-deployment.yaml" created
INFO Kubernetes file "phpfpm-deployment.yaml" created

So far, so good! Now let’s run kubectl apply with each of these files.

root@microk8s-a:~/glowing-adventure# kubectl apply -f nginx-service.yaml
Warning: kubectl apply should be used on resource created by either kubectl create --save-config or kubectl apply
service/nginx configured
root@microk8s-a:~# kubectl apply -f nginx-deployment.yaml
error: unable to recognize "nginx-deployment.yaml": no matches for kind "Deployment" in version "extensions/v1beta1"

Apparently the service files are all OK, the problem is in the deployment files. Hmm OK, let’s have a look at what could be wrong. Here’s the output file:

root@microk8s-a:~/glowing-adventure# cat nginx-deployment.yaml
apiVersion: extensions/v1beta1
kind: Deployment
metadata:
  annotations:
    kompose.cmd: kompose convert
    kompose.version: 1.20.0 (f3d54d784)
  creationTimestamp: null
  labels:
    io.kompose.service: nginx
  name: nginx
spec:
  replicas: 1
  strategy: {}
  template:
    metadata:
      annotations:
        kompose.cmd: kompose convert
        kompose.version: 1.20.0 (f3d54d784)
      creationTimestamp: null
      labels:
        io.kompose.service: nginx
    spec:
      containers:
      - image: localhost:32000/nginx
        name: nginx
        ports:
        - containerPort: 80
        resources: {}
      restartPolicy: Always
status: {}

Well, the extensions/v1beta1 API version doesn’t seem to support “Deployment” options any more, so let’s edit it to change that to what the official documentation example shows today. We need to switch to using the apiVersion: apps/v1 value. Let’s see what happens when we make that change!

root@microk8s-a:~/glowing-adventure# kubectl apply -f nginx-deployment.yaml
error: error validating "nginx-deployment.yaml": error validating data: ValidationError(Deployment.spec): missing required field "selector" in io.k8s.api.apps.v1.DeploymentSpec; if you choose to ignore these errors, turn validation off with --validate=false

Hmm this seems to be a fairly critical issue. A selector basically tells the orchestration engine which images we want to be deployed. Let’s go back to the official example. So, we need to add the “selector” value in the “spec” block, at the same level as “template”, and it needs to match the labels we’ve specified. It also looks like we don’t need most of the metadata that kompose has given us. So, let’s adjust the deployment to look a bit more like that example.

root@microk8s-a:~/glowing-adventure# cat nginx-deployment.yaml
apiVersion: apps/v1
kind: Deployment
metadata:
  labels:
    app: nginx
  name: nginx
spec:
  replicas: 1
  selector:
    matchLabels:
      app: nginx
  template:
    metadata:
      labels:
        app: nginx
    spec:
      containers:
      - image: localhost:32000/nginx
        name: nginx
        ports:
        - containerPort: 80
        resources: {}
      restartPolicy: Always

Fab. And what happens when we run it?

root@microk8s-a:~/glowing-adventure# kubectl apply -f nginx-deployment.yaml
deployment.apps/nginx created

Woohoo! Let’s apply all of these now.

root@microk8s-a:~/glowing-adventure# for i in db-deployment.yaml nginx-deployment.yaml nginx-service.yaml phpfpm-deployment.yaml; do kubectl apply -f $i ; done
deployment.apps/db created
deployment.apps/nginx unchanged
service/nginx unchanged
deployment.apps/phpfpm created

Oh, hang on a second, that service (service/nginx) is unchanged, but we changed the label from io.kompose.service: nginx to app: nginx, so we need to fix that. Let’s open it up and edit it!

apiVersion: v1
kind: Service
metadata:
  annotations:
    kompose.cmd: kompose convert
    kompose.version: 1.20.0 (f3d54d784)
  creationTimestamp: null
  labels:
    io.kompose.service: nginx
  name: nginx
spec:
  ports:
  - name: "1980"
    port: 1980
    targetPort: 80
  selector:
    io.kompose.service: nginx
status:
  loadBalancer: {}

Ah, so this has the “annotations” field too, in the metadata, and, as suspected, it’s got the io.kompose.service label as the selector. Hmm OK, let’s fix that.

root@microk8s-a:~/glowing-adventure# cat nginx-service.yaml
apiVersion: v1
kind: Service
metadata:
  labels:
    app: nginx
  name: nginx
spec:
  ports:
  - name: "1980"
    port: 1980
    targetPort: 80
  selector:
    app: nginx
status:
  loadBalancer: {}

Much better. And let’s apply it…

root@microk8s-a:~/glowing-adventure# kubectl apply -f nginx-service.yaml
service/nginx configured

Fab! So, let’s review the state of the deployments, the services, the pods and the replication sets.

root@microk8s-a:~/glowing-adventure# kubectl get deploy
NAME     READY   UP-TO-DATE   AVAILABLE   AGE
db       1/1     1            1           8m54s
nginx    0/1     1            0           8m53s
phpfpm   1/1     1            1           8m48s

Hmm. That doesn’t look right.

root@microk8s-a:~/glowing-adventure# kubectl get pod
NAME                      READY   STATUS             RESTARTS   AGE
db-f78f9f69b-grqfz        1/1     Running            0          9m9s
nginx-7774fcb84c-cxk4v    0/1     CrashLoopBackOff   6          9m8s
phpfpm-66945b7767-vb8km   1/1     Running            0          9m3s
root@microk8s-a:~# kubectl get rs
NAME                DESIRED   CURRENT   READY   AGE
db-f78f9f69b        1         1         1       9m18s
nginx-7774fcb84c    1         1         0       9m17s
phpfpm-66945b7767   1         1         1       9m12s

Yep. What does “CrashLoopBackOff” even mean?! Let’s check the logs. We need to ask the pod itself, not the deployment, so let’s use the kubectl logs command to ask.

root@microk8s-a:~/glowing-adventure# kubectl logs nginx-7774fcb84c-cxk4v
2020/01/17 08:08:50 [emerg] 1#1: host not found in upstream "phpfpm" in /etc/nginx/conf.d/default.conf:10
nginx: [emerg] host not found in upstream "phpfpm" in /etc/nginx/conf.d/default.conf:10

Hmm. That’s not good. We were using the fact that Docker just named everything for us in the docker-compose file, but now in Kubernetes, we need to do something different. At this point I ran out of ideas. I asked on the McrTech slack for advice. I was asked to run this command, and would you look at that, there’s nothing for nginx to connect to.

root@microk8s-a:~/glowing-adventure# kubectl get service
NAME         TYPE        CLUSTER-IP      EXTERNAL-IP   PORT(S)    AGE
kubernetes   ClusterIP   10.152.183.1    <none>        443/TCP    24h
nginx        ClusterIP   10.152.183.62   <none>        1980/TCP   9m1s

It turns out that I need to create a service for each of the deployments. So, now I have a separate service for each one. I copied the nginx-service.yaml file into db-service.yaml and phpfpm-service.yaml, edited the files and now… tada!

root@microk8s-a:~/glowing-adventure# kubectl get service
NAME         TYPE        CLUSTER-IP      EXTERNAL-IP   PORT(S)    AGE
db           ClusterIP   10.152.183.61   <none>        3306/TCP   5m37s
kubernetes   ClusterIP   10.152.183.1    <none>        443/TCP    30h
nginx        ClusterIP   10.152.183.62   <none>        1980/TCP   5h54m
phpfpm       ClusterIP   10.152.183.69   <none>        9000/TCP   5m41s

But wait… How do I actually address nginx now? Huh. No external-ip (not even “pending”, which is what I ended up with), no ports to talk to. Uh oh. Now I need to understand how to hook this service up to the public IP of this node. Ahh, see up there it says “ClusterIP”? That means “this service is only available INSIDE the cluster”. If I change this to “NodePort” or “LoadBalancer”, it’ll attach that port to the external interface.

What’s the difference between “NodePort” and “LoadBalancer”? Well, according to this page, if you are using a managed Public Cloud service that supports an external load balancer, then putting this to “LoadBalancer” should attach your “NodePort” to the provider’s Load Balancer automatically. Otherwise, you need to define the “NodePort” value in your config (which must be a value between 30000 and 32767, although that is configurable for the node). Once you’ve done that, you can hook your load balancer up to that port, for example Client -> Load Balancer IP (TCP/80) -> K8S Cluster IP (e.g. TCP/31234)

So, how does this actually look. I’m going to use the “LoadBalancer” option, because if I ever deploy this to “live”, I want it to integrate with the load balancer, but for now, I can cope with addressing a “high port”. Right, well, let me open back up that nginx-service.yaml, and make the changes.

root@microk8s-a:~/glowing-adventure# cat nginx-service.yaml
apiVersion: v1
kind: Service
metadata:
  labels:
    app: nginx
  name: nginx
spec:
  type: LoadBalancer
  ports:
  - name: nginx
    nodePort: 30000
    port: 1980
    targetPort: 80
  selector:
    app: nginx
status:
  loadBalancer: {}

The key parts here are the lines type: LoadBalancer and nodePort: 30000 under spec: and ports: respectively. Note that I can use, at this point type: LoadBalancer and type: NodePort interchangably, but, as I said, if you were using this in something like AWS or Azure, you might want to do it differently!

So, now I can curl http://192.0.2.100:30000 (where 192.0.2.100 is the address of my “bridged interface” of K8S environment) and get a response from my PHP application, behind nginx, and I know (from poking at it a bit) that it works with my Database.

OK, one last thing. I don’t really want lots of little files which have got config items in. I quite liked the docker-compose file as it was, because it had all the services in as one block, and I could run “docker-compose up”, but the kompose script split it out into lots of pieces. In Kubernetes, if the YAML file it loads has got a divider in it (a line like this: ---) then it stops parsing it at that point, and starts reading the file after that as a new file. Like this I could have the following layout:

apiVersion: apps/v1
kind: Deployment
more: stuff
---
apiVersion: v1
kind: Service
more: stuff
---
apiVersion: apps/v1
kind: Deployment
more: stuff
---
apiVersion: v1
kind: Service
more: stuff

But, thinking about it, I quite like having each piece logically together, so I really want db.yaml, nginx.yaml and phpfpm.yaml, where each of those files contains both the deployment and the service. So, let’s do that. I’ll do one file, so it makes more sense, and then show you the output.

root@microk8s-a:~/glowing-adventure# mkdir -p k8s
root@microk8s-a:~/glowing-adventure# mv db-deployment.yaml k8s/db.yaml
root@microk8s-a:~/glowing-adventure# echo "---" >> k8s/db.yaml
root@microk8s-a:~/glowing-adventure# cat db-service.yaml >> k8s/db.yaml
root@microk8s-a:~/glowing-adventure# rm db-service.yaml
root@microk8s-a:~/glowing-adventure# cat k8s/db.yaml
apiVersion: apps/v1
kind: Deployment
metadata:
  labels:
    app: db
  name: db
spec:
  replicas: 1
  selector:
    matchLabels:
      app: db
  template:
    metadata:
      labels:
        app: db
    spec:
      containers:
      - env:
        - name: MYSQL_DATABASE
          value: a_db
        - name: MYSQL_PASSWORD
          value: a_password
        - name: MYSQL_ROOT_PASSWORD
          value: a_root_pw
        - name: MYSQL_USER
          value: a_user
        image: localhost:32000/db
        name: db
        resources: {}
      restartPolicy: Always
---
apiVersion: v1
kind: Service
metadata:
  labels:
    app: db
  name: db
spec:
  ports:
  - name: mariadb
    port: 3306
    targetPort: 3306
  selector:
    app: db
status:
  loadBalancer: {}

So, now, if I do kubectl apply -f k8s/db.yaml I’ll get this output:

root@microk8s-a:~/glowing-adventure# kubectl apply -f k8s/db.yaml
deployment.apps/db unchanged
service/db unchanged

You can see the final files in the git repo for this set of tests.

Next episode, I’ll start looking at making my application scale (as that’s the thing that Kubernetes is known for) and having more than one K8S node to house my K8S pods!

Featured image is “So many coats…” by “Scott Griggs” on Flickr and is released under a CC-BY-ND license.

apt update && apt full-upgrade -y && apt autoremove -y && apt autoclean -y

Apt Updates with Ansible

I’ve got a small Ansible script that I bundle up on Ubuntu boxes to do apt updates. This was originally a one-statement job, but I’ve added a few lines to it, so I thought I’d explain what I’m doing (more for myself, for later!)

Initally, I just had a task to do apt: upgrade=full update_cache=yes autoremove=yes autoclean-yes but if you’re running the script over and over again, well, this gets slow… So I added a tweak!

Here it is folks, in all it’s glory!

- hosts: all
  tasks:
  - name: Get stat of last run apt
    stat:
      path: /var/cache/apt/pkgcache.bin
    register: apt_run

  - name: "Apt update, Full-upgrade, autoremove, autoclean check"
    debug:
      msg: "Skipping apt-update, etc. actions as apt update was run today"
    when: "'%Y-%m-%d' | strftime(apt_run.stat.mtime) in ansible_date_time.date"

  - name: "Apt update, Full-upgrade, autoremove, autoclean"
    apt:
      upgrade: full
      update_cache: yes
      autoremove: yes
      autoclean: yes
    when: "'%Y-%m-%d' | strftime(apt_run.stat.mtime) not in ansible_date_time.date"

What does this do? Well, according to this AskUbuntu post, the best file to check if an update has been performed is /var/cache/apt/pkgcache.bin, so we check the status of that file. Most file systems available to Linux distributions provide the mtime – or “last modified time”. This is returned in the number of seconds since UTC 00:00:00 on the Unix Epoch (1970-01-01), so we need to convert that to a date., which we return as YYYY-MM-DD (e.g. today is 2020-01-06) and then compare that to what the system thinks today is. If the dates don’t equate (so one string doesn’t match the other – in other words, apt update wasn’t run today), it runs the update. If the dates do match up, we get a statement saying that apt update was already run.

Fun times!

"Confused" by "CollegeDegrees360" on Flickr

Using AWSCLI on Ubuntu/Ubuntu-in-WSL

This is a brief note to myself (but might be useful to you)!

awscli (similar to the Azure az command) is packaged for Ubuntu, but the version which is in the Ubuntu 18.04 repositories is “out of date” and won’t work with AWS. You *actually* need to run the following:

sudo apt update && sudo apt install python3-pip -y && sudo -H pip3 install --upgrade awscli

If you’ve unfortunately already installed awscli from apt, do the following:

sudo apt remove awscli -y

Then, logout (for some reason, binary path caching is a thing now?) and log back in, and then run the above pip install line.

Solution found via this logged issue on the awscli git repo.

Featured image is “Confused” by “CollegeDegrees360” on Flickr and is released under a CC-BY-SA license.

A web browser with the example.com web page loaded

Working around the fact that Ansible’s URI module doesn’t honour the no_proxy variable…

An Ansible project I’ve been working on has tripped me up this week. I’m working with some HTTP APIs and I need to check early whether I can reach the host. To do this, I used a simple Ansible Core Module which lets you call an HTTP URI.

- uri:
    follow_redirects: none
    validate_certs: False
    timeout: 5
    url: "http{% if ansible_https | default(True) %}s{% endif %}://{{ ansible_host }}/login"
  register: uri_data
  failed_when: False
  changed_when: False

This all seems pretty simple. One of the environments I’m working in uses the following values in their environment:

http_proxy="http://192.0.2.1:8080"
https_proxy="http://192.0.2.1:8080"
no_proxy="10.0.0.0/8, 172.16.0.0/12, 192.168.0.0/16, 192.0.2.0/24, 198.51.100.0/24, 203.0.113.0/24"

And this breaks the uri module, because it tries to punt everything through the proxy if the “no_proxy” contains CIDR values (like 192.0.2.0/24) (there’s a bug raised for this)… So here’s my fix!

- set_fact:
    no_proxy_match: |
      {
        {% for no_proxy in (lookup('env', 'no_proxy') | replace(',', '') ).split() %}
          {% if no_proxy| ipaddr | type_debug != 'NoneType' %}
            {% if ansible_host | ipaddr(no_proxy) | type_debug != 'NoneType' %}
              "match": "True"
            {% endif %}
          {% endif %}
        {% endfor %}
      }

- uri:
    follow_redirects: none
    validate_certs: False
    timeout: 5
    url: "http{% if ansible_https | default(True) %}s{% endif %}://{{ ansible_host }}/login"
  register: uri_data
  failed_when: False
  changed_when: False
  environment: "{ {% if no_proxy_match.match | default(False) %}'no_proxy': '{{ ansible_host }}'{% endif %} }"

So, let’s break this down.

The key part to this script is that we need to override the no_proxy environment variable with the IP address that we’re trying to address (so that we’re not putting 16M addresses for 10.0.0.0/8 into no_proxy, for example). To do that, we use the exact same URI block, except for the environment line at the end.

In turn, the set_fact block steps through the no_proxy values, looking for IP Addresses to check ({% if no_proxy | ipaddr ... %}‌ says “if the no_proxy value is an IP Address, return it, but if it isn’t, return a ‘None’ value”) and if it’s an IP address or subnet mask, it checks to see whether the IP address of the host you’re trying to reach falls inside that IP Address or Subnet Mask ({% if ansible_host | ipaddr(no_proxy) ... %} says “if the ansible_host address falls inside the no_proxy range, then return it, otherwise return a ‘None’ value”). Both of these checks say “If this previous check returns anything other than a ‘None’ value, do the next thing”, and on the last check, the “next” thing is to set the flag ‘match’ to ‘true’. When we get to the environment variable, we say “if match is not true, it’s false, so don’t put a value in there”.

So that’s that! Yes, I could merge the set_fact block into the environment variable, but I do end up using that a fair amount. And really, if it was merged, that would be even MORE complicated to pick through.

I have raised a pull request on the Ansible project to update the documentation, so we’ll see whether we end up with people over here looking for ways around this issue. If so, let me know in the comments below! Thanks!!