Warning, this is a long and dense document!
That said, If you’re thinking of getting started with Proxmox though it’s well worth a read. If you’ve *used* Proxmox, and think I’m doing something wrong here, let me know in the comments!
Context
In the various podcasts I listen to, I’ve been hearing over and over again about Proxmox, and how it’s a great system for building and running virtual machines. In a former life, I’d use a combination of VMWare ESXi servers or desktop machines running Vagrant and Virtualbox to build out small labs and build environments, and at home I’d previously used a i3 ex-demo machine that was resold to staff at a reduced price. Unfortunately, the power supply went pop one evening on that, and all my home-lab experiments died.
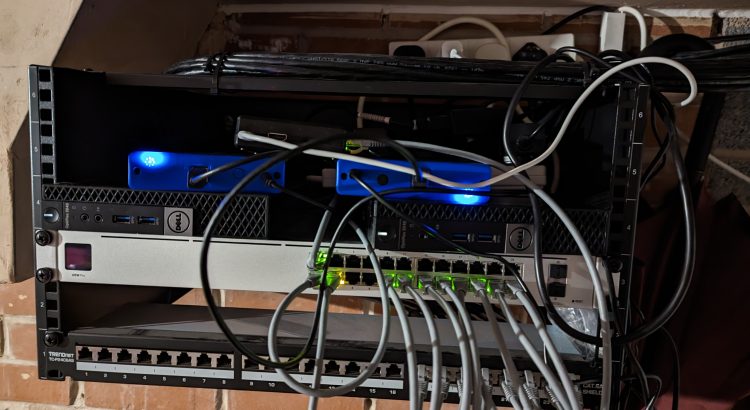
When I changed to my most recent job, I had a small cash windfall at the same time, and decided to rebuild my home lab. I bought two Dell Optiplex 3040M i5 with 16GB RAM and two 3TB external USB3 hard drives to provide storage. These were selected because of the small size which meant they would fit in the small comms rack I had fitted when I got my house wired with CAT6 networking cables last year. These were patched into the UniFi USW-Pro-24 which was fitted as part of the networking build.

(Yes, it’s a bit of a mess, but it’s also not been in there very long, so needs a bit of a clean-up!)
The Install
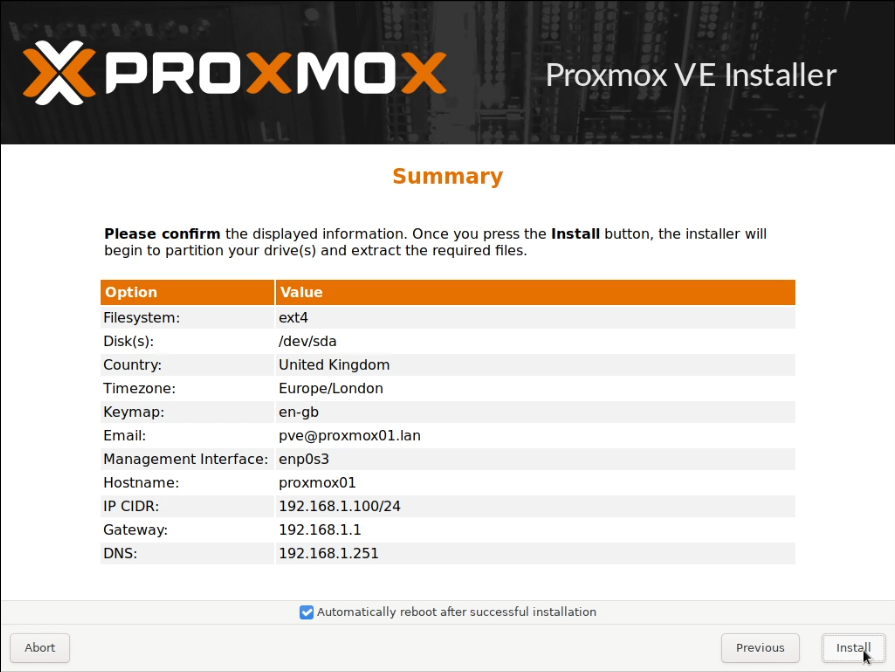
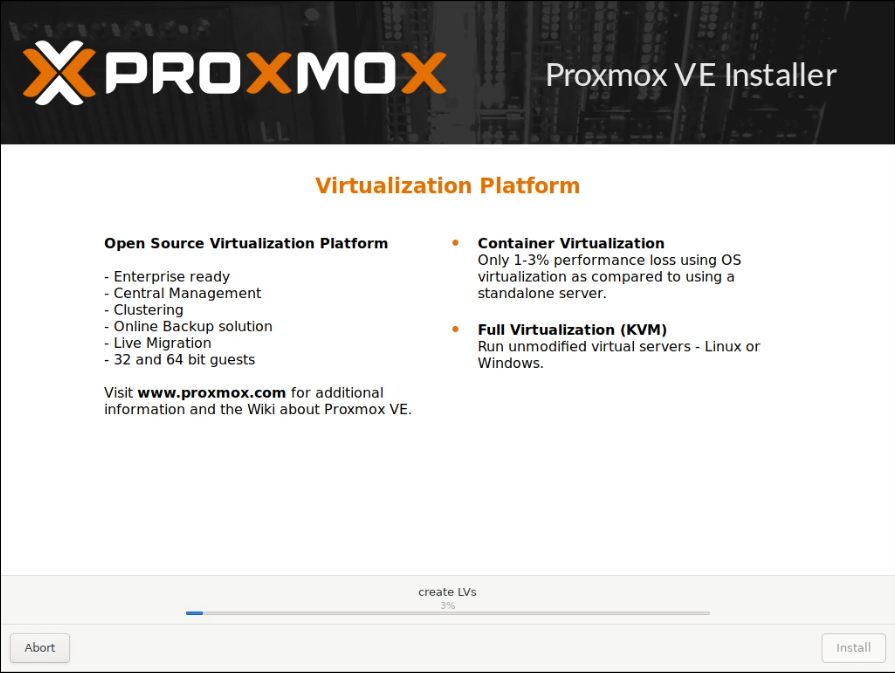
I allocated two static IP addresses for these hosts, and performed a standard installation of Proxmox using a USB stick with the multi-image-installer Ventoy on it.
Some screenshots follow:
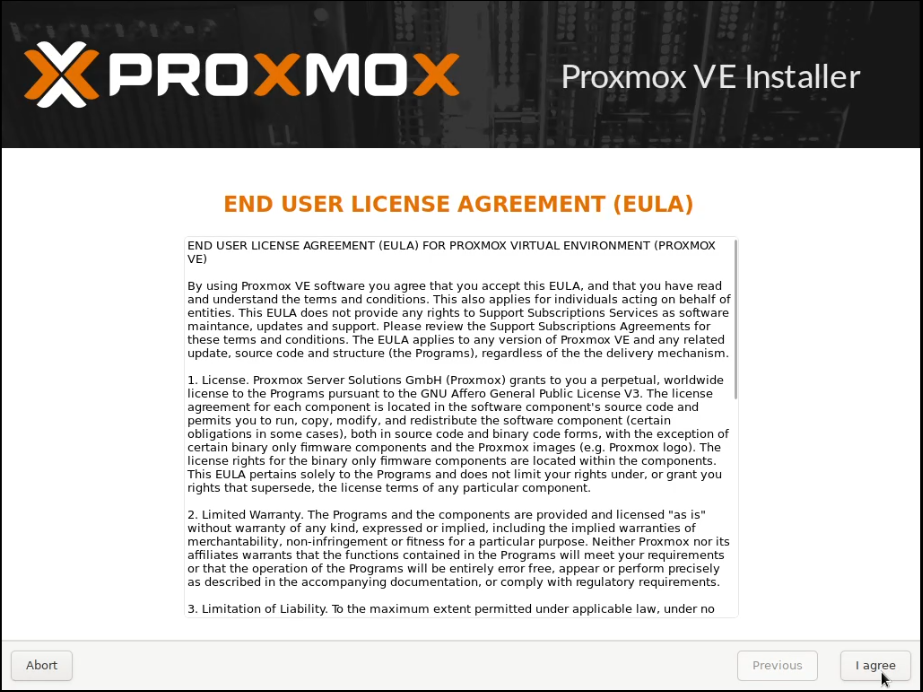
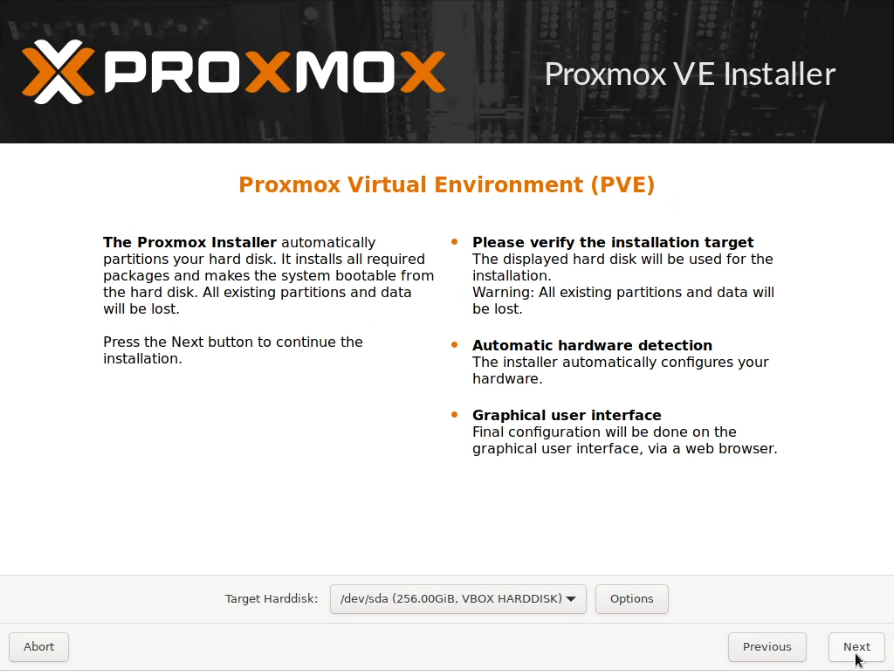

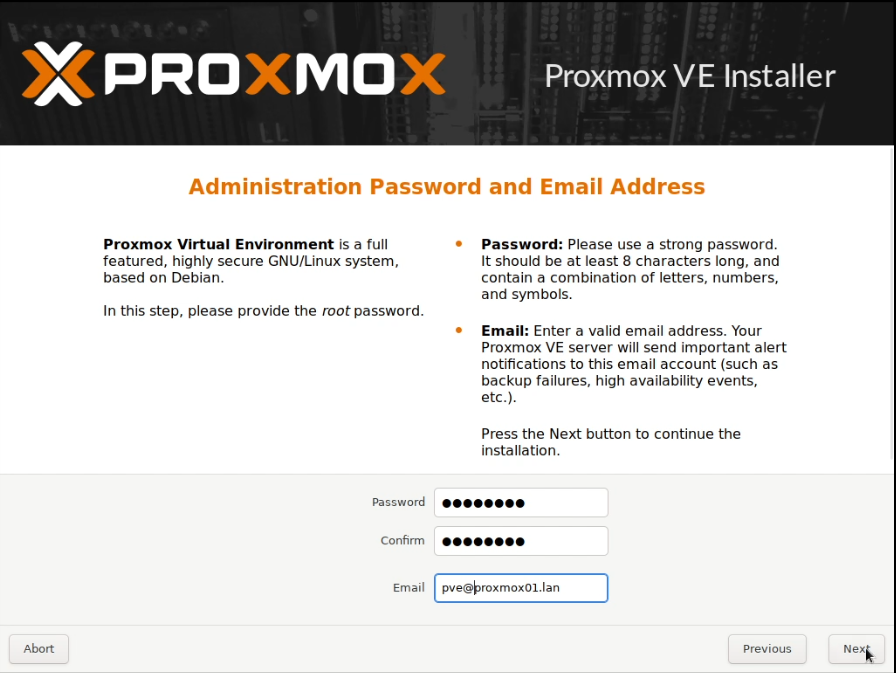
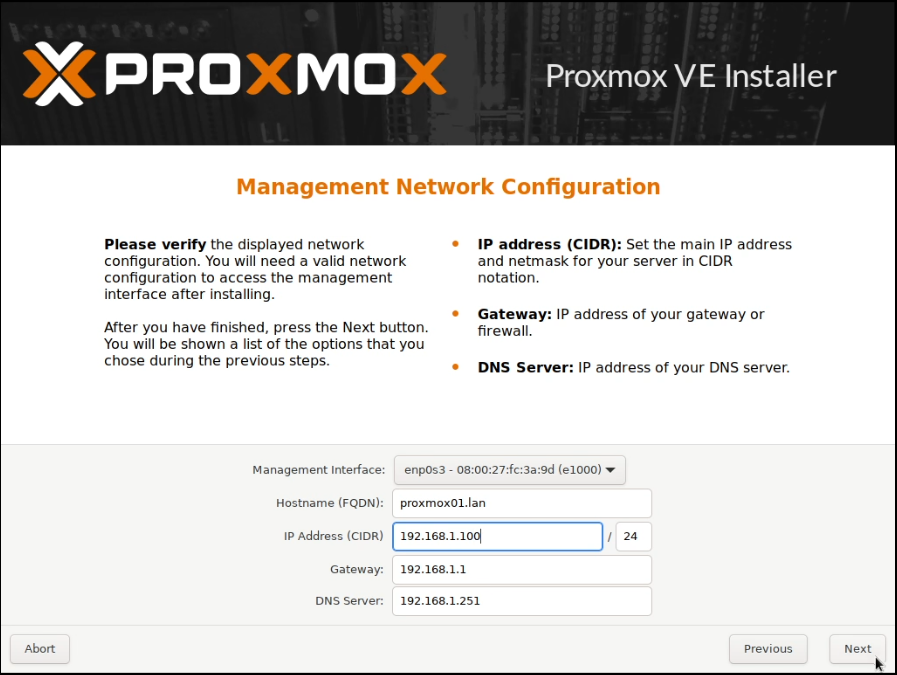
Note that these screenshots were built on one pass, and have been rebuilt with new IPs that are used later.

As I don’t have an enterprise subscription, I ran these commands to use tteck’s Post PVE Install script to change the repositories.
wget https://raw.githubusercontent.com/tteck/Proxmox/main/misc/post-pve-install.sh
# Run the following to confirm the download looks OK and non-corrupted
less post-pve-install.sh
bash post-pve-install.sh
This results in the following (time-lapse) output, which is a series of options asking you to approve making changes to the system.

[Most of the following are derived from this YouTube video: “1/2 Create a 2-node Proxmox VE Cluster. Gluster as shared storage. With High Availability! First ep”]
Clustering
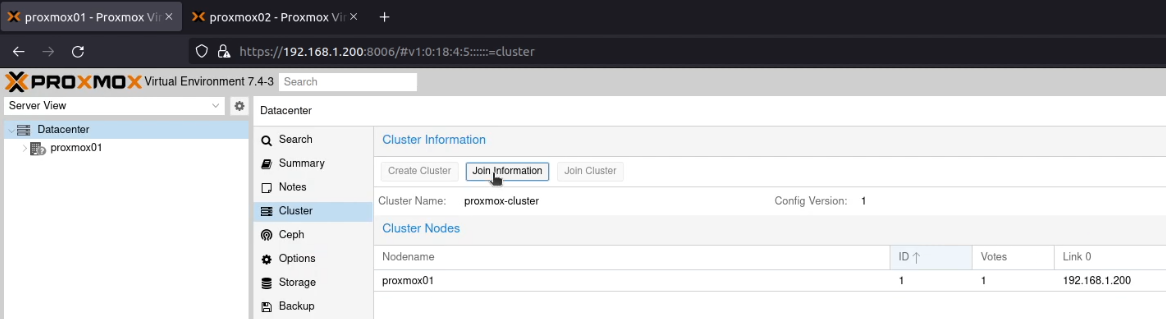
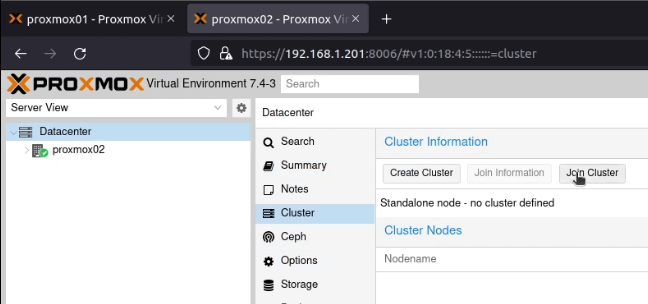
After signing into both Proxmox nodes, I went to my first node (proxmox01), selected “Datacenter” and then “Cluster”.
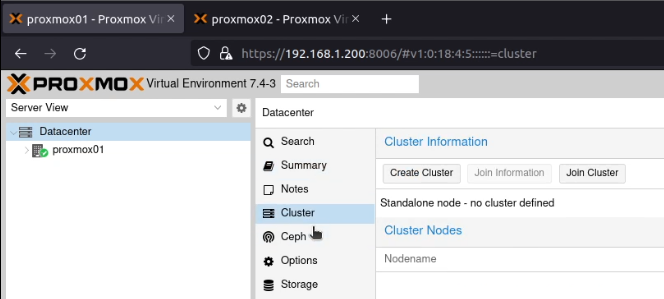
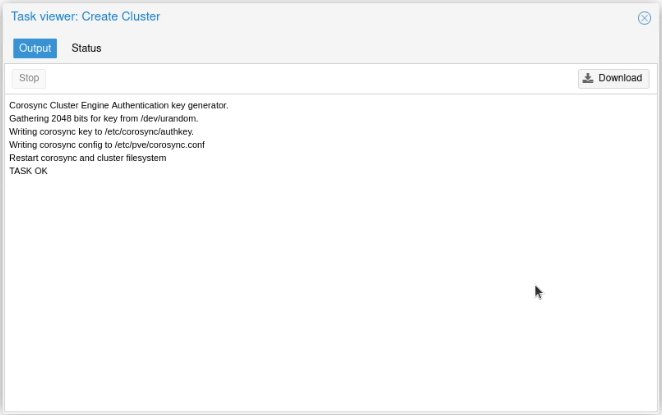
I clicked on “Create Cluster”, and created a cluster, called (unimaginatively) proxmox-cluster.
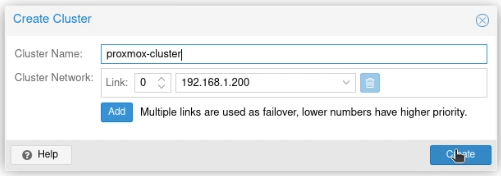
I clicked “Join Information”.
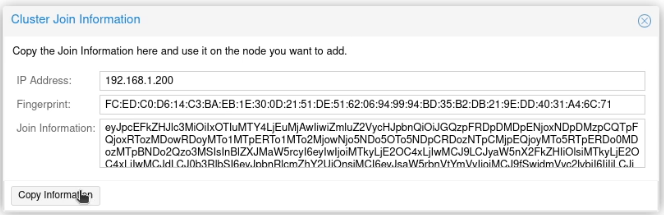
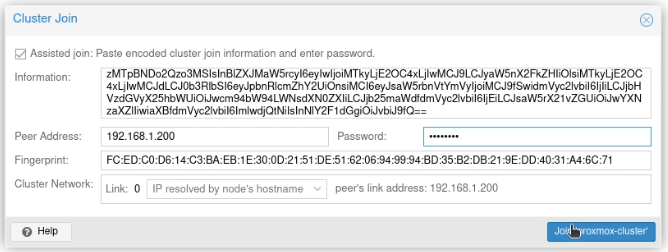
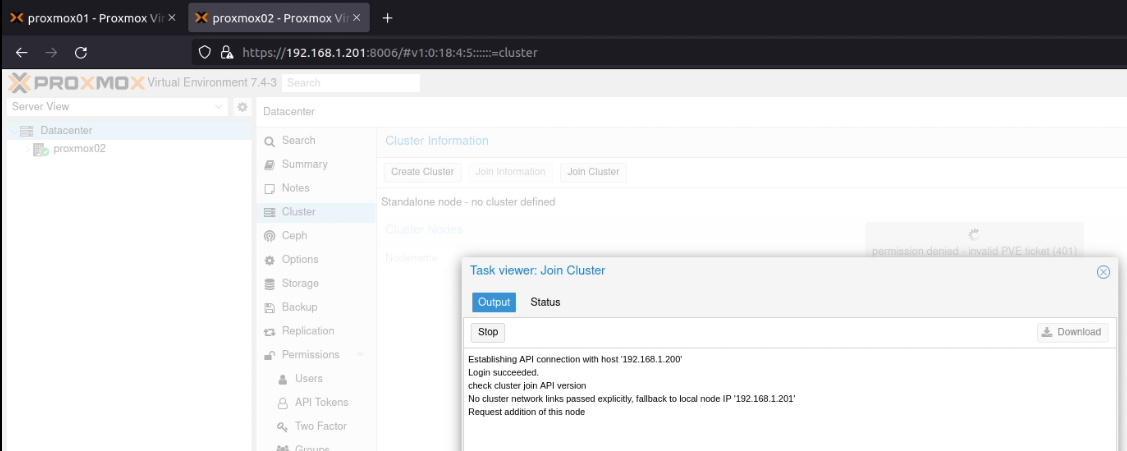
Next, on proxmox02 on the same screen, I clicked on “Join Cluster” and then pasted that information into the dialogue box. I entered the root password, and clicked “Join ‘proxmox-cluster'”.
When this finished running, if either screen has hung, check whether one of the screens is showing an error like permission denied - invalid PVE ticket (401), like this (hidden just behind the “Task Viewer: Join Cluster” dialogue box):
Or /etc/pve/nodes/NODENAME/pve-ssl.pem' does not exist! (500):

Refresh your browsers, and you’ll probably find that the joining node will present a new TLS certificate:

Accept the certificate to resume the process.
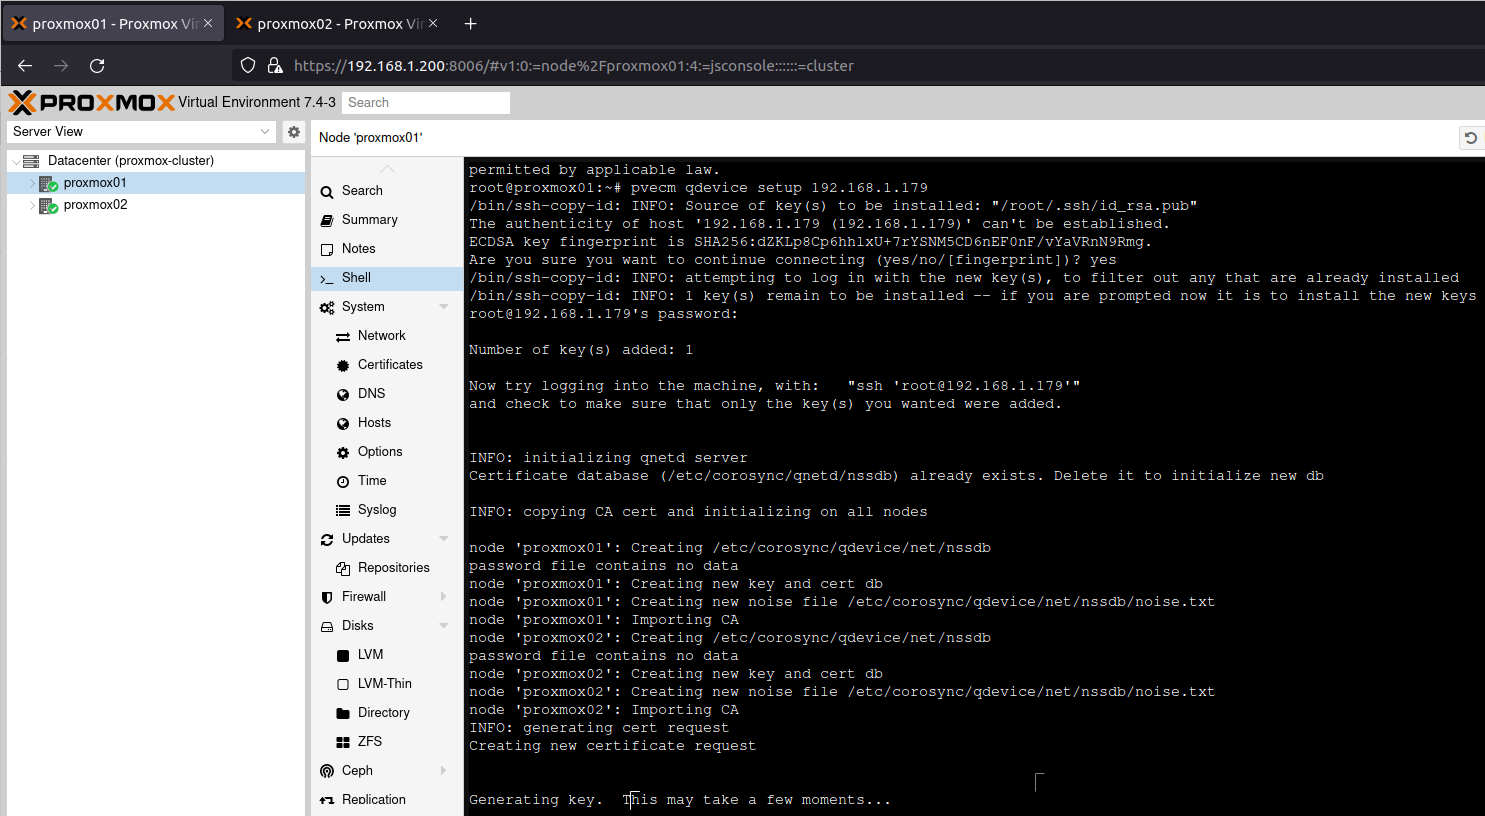
To ensure I had HA quorum, which requires three nodes, I added an unused Raspberry Pi 3 running Raspberry Pi OS.
With that, I enabled root SSH access:
echo "PermitRootLogin yes" | tee /etc/ssh/sshd_config.d/root_login.conf >/dev/null && systemctl restart ssh.serviceNext, I setup a password for the root account:
sudo passwdAnd I installed the package “corosync-qnetd” on it:
sudo apt update && sudo apt install -y corosync-qnetdBack on both of the Proxmox nodes, I installed the package “corosync-qdevice”:
apt update && apt install -y corosync-qdevice
On proxmox01 I then ran pvecm qdevice setup 192.168.1.179(where 192.168.1.179 is the IP address of the Raspberry Pi device).
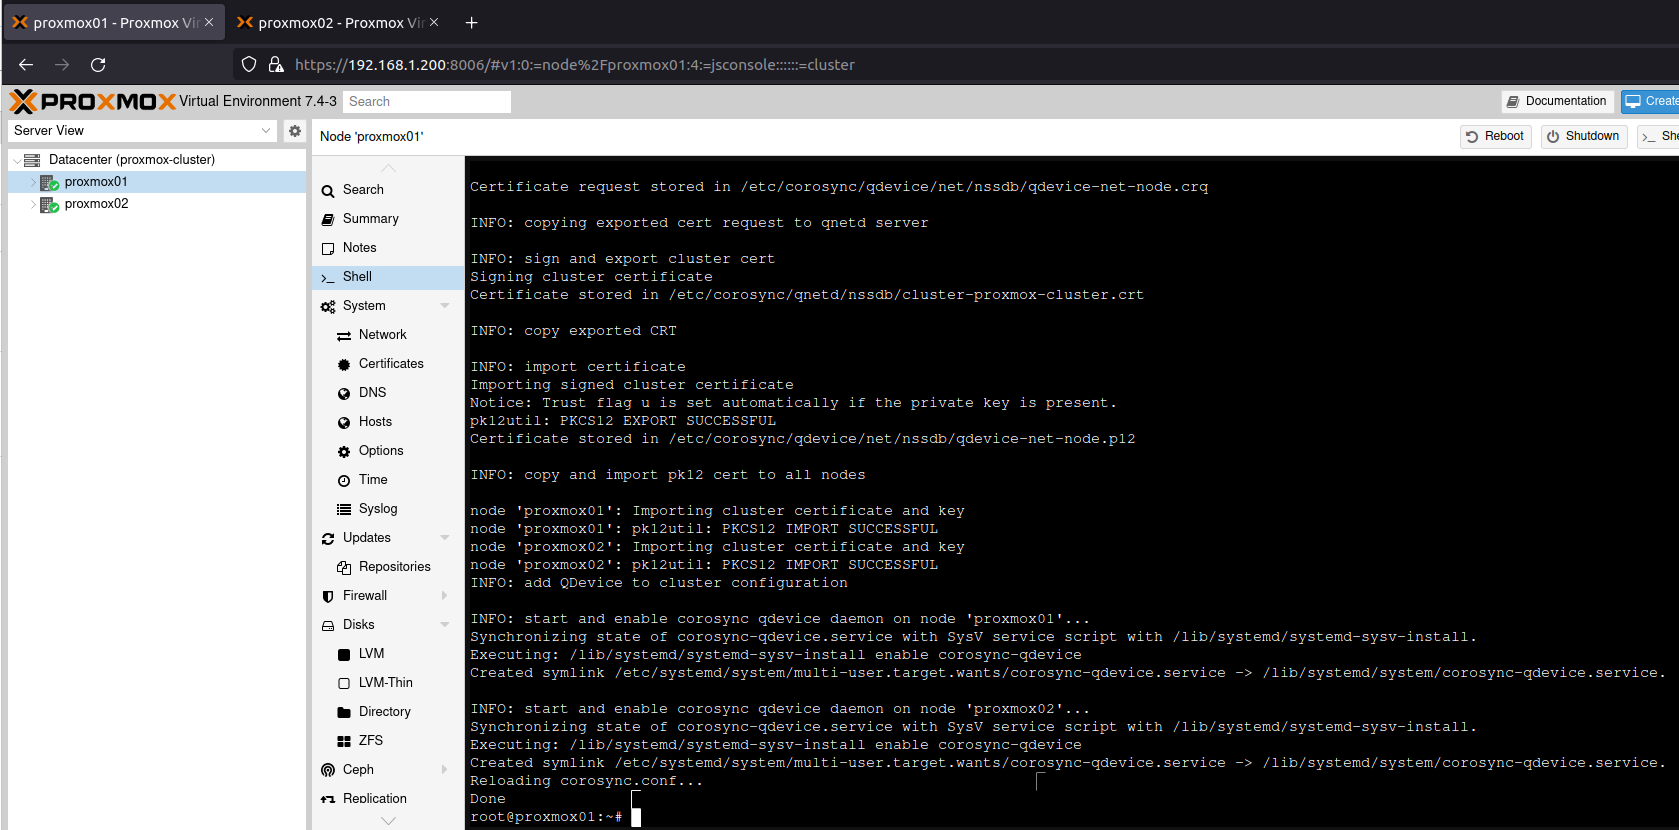
This gave me my quorum of 3 nodes. To confirm this, I ran pvecm statuswhich resulted in this output:
root@proxmox01:~# pvecm status
Cluster information
-------------------
Name:             proxmox-cluster
Config Version:   3
Transport:        knet
Secure auth:      on

Quorum information
------------------
Date:             Tue May 16 20:38:15 2023
Quorum provider:  corosync_votequorum
Nodes:            2
Node ID:          0x00000001
Ring ID:          1.9
Quorate:          Yes

Votequorum information
----------------------
Expected votes:   3
Highest expected: 3
Total votes:      3
Quorum:           2
Flags:            Quorate Qdevice

Membership information
----------------------
    Nodeid      Votes    Qdevice Name
0x00000001          1    A,V,NMW 192.168.1.200 (local)
0x00000002          1    A,V,NMW 192.168.1.201
0x00000000          1            Qdevice
root@proxmox01:~#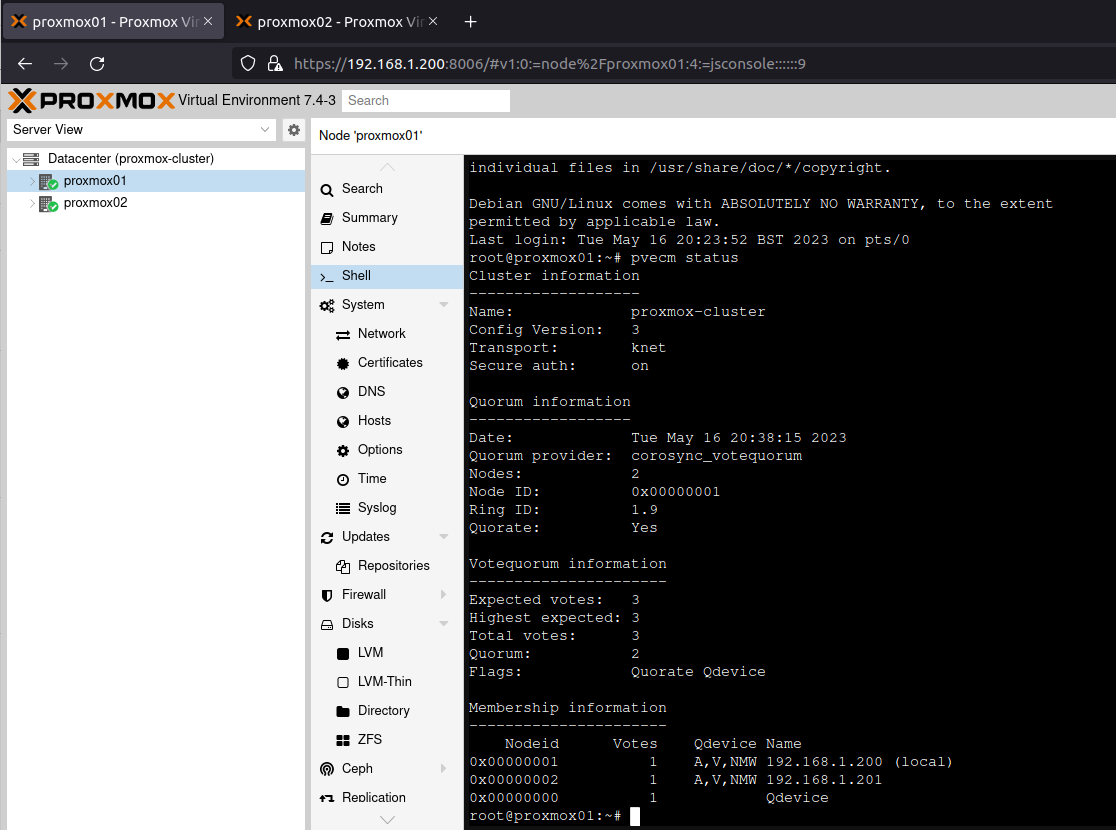
Storage
ZFS
Once the machines were built, I went into the Disks screen on each node, found the 3TB drive and selected “Wipe Disk”.
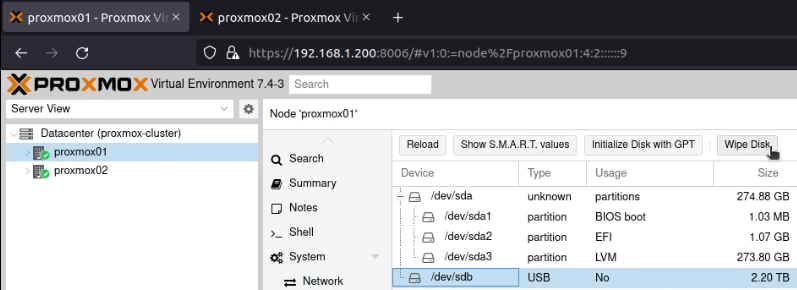
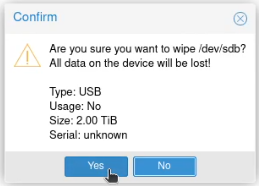

Next I clicked “Initialize Disk with GPT”.


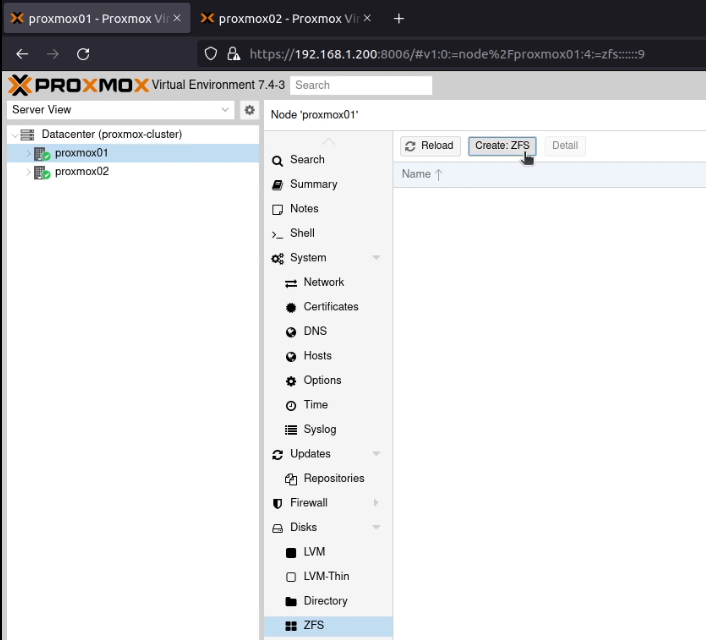
Next I went into the ZFS page in the node and created a ZFS Single Disk pool.
This pool was named “zfs-proxmox##” where “##” was replaced by the node number (so zfs-proxmox01 and zfs-proxmox02).
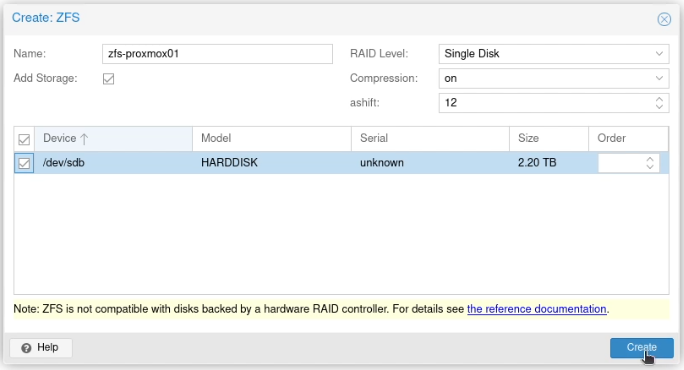
This mounts the pool as the pool name in the root (so /zfs-proxmox01 and /zfs-proxmox02).

GlusterFS
I added the Gluster debian repository by downloading the key from https://download.gluster.org/pub/gluster/glusterfs/10/rsa.pub and placing it in /etc/apt/keyrings/gluster.asc.
mkdir /etc/apt/keyrings
cd /etc/apt/keyrings
wget https://download.gluster.org/pub/gluster/glusterfs/10/rsa.pub
mv rsa.pub gluster.asc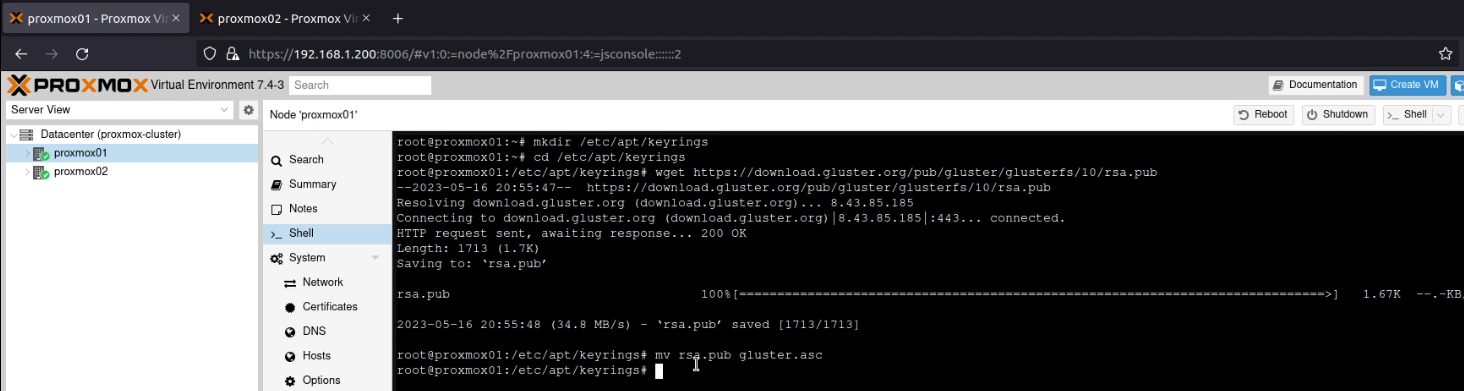
Next I created a new repository entry in /etc/apt/sources.list.d/gluster.listwhich contained the line:
deb [arch=amd64 signed-by=/etc/apt/keyrings/gluster.asc] https://download.gluster.org/pub/gluster/glusterfs/10/LATEST/Debian/bullseye/amd64/apt bullseye main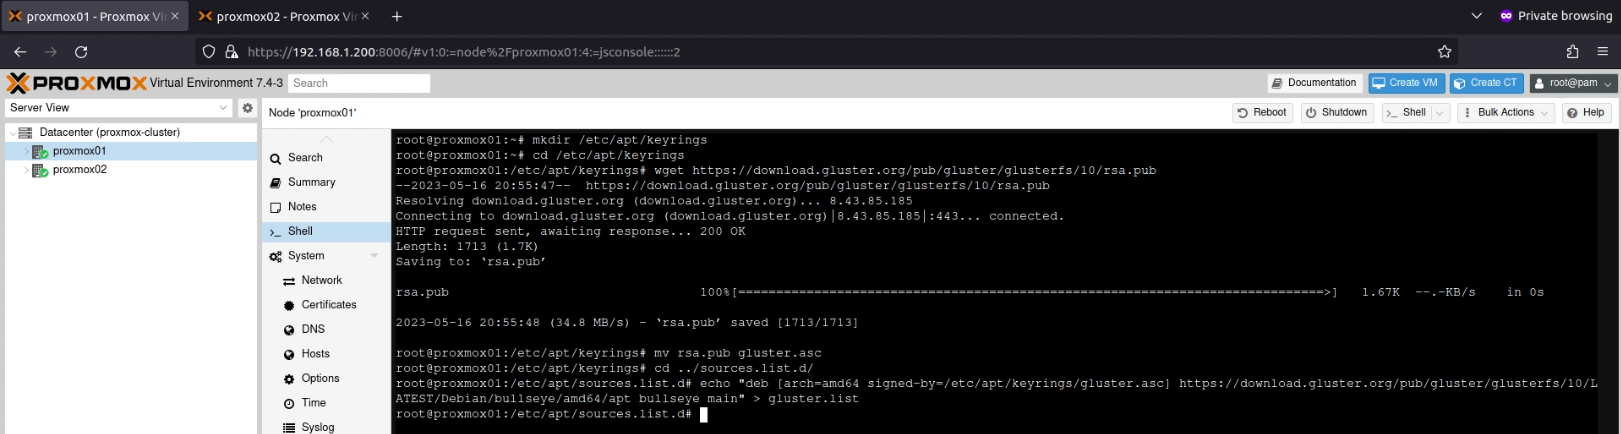
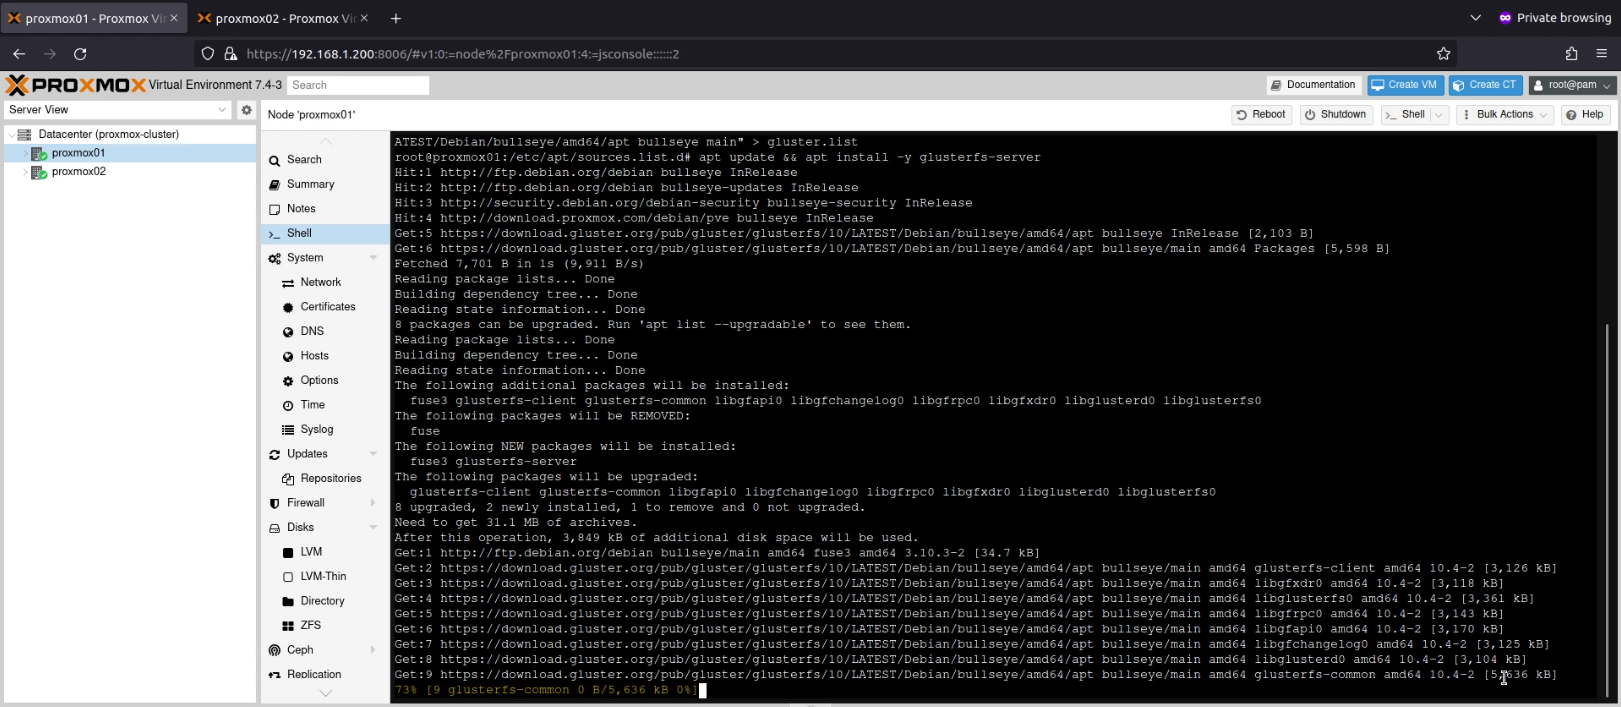
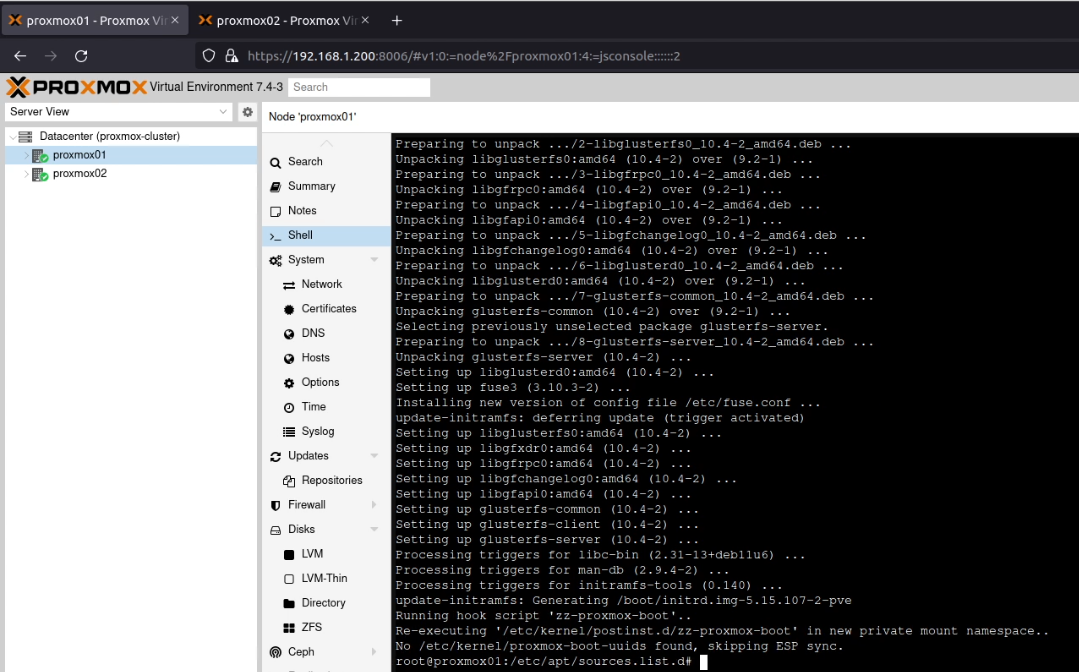
I next ran apt update && apt install -y glusterfs-serverwhich installed the Gluster service.
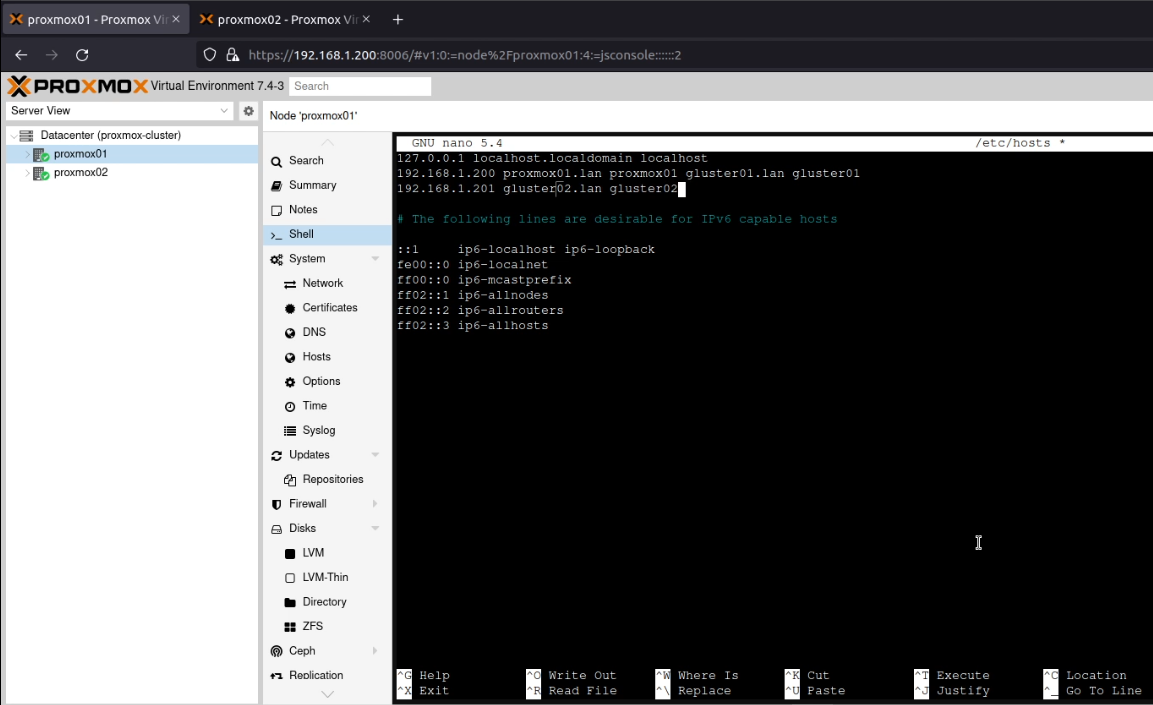
Following the YouTube link above, I created an entry for gluster01 and gluster02 in /etc/hosts which pointed to the IP address of proxmox01 and proxmox02 respectively.
Next, I edited /etc/glusterfs/glusterd.volso it contained this content:
volume management
    type mgmt/glusterd
    option working-directory /var/lib/glusterd
    option transport-type socket
    option transport.socket.keepalive-time 10
    option transport.socket.keepalive-interval 2
    option transport.socket.read-fail-log off
    option transport.socket.listen-port 24007
    option transport.rdma.bind-address gluster01
    option transport.socket.bind-address gluster01
    option transport.tcp.bind-address gluster01
    option ping-timeout 0
    option event-threads 1
#   option lock-timer 180
#   option transport.address-family inet6
#   option base-port 49152
    option max-port  60999
end-volume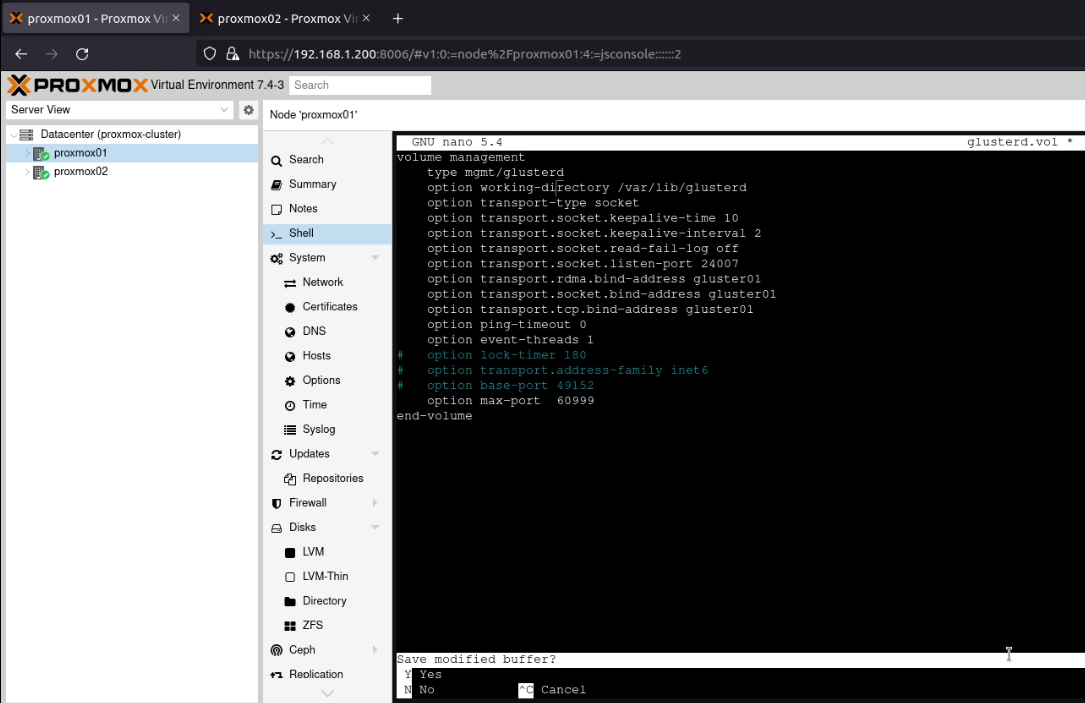
Note that this content above is for proxmox01. For proxmox02 I replaced “gluster01” with “gluster02”. I then ran systemctl enable --now glusterdwhich started the Gluster service.
Once this is done, you must run gluster probe gluster02from proxmox01 (or vice versa), otherwise, when you run the next command, you get this message:
volume create: gluster-volume: failed: Host gluster02 is not in 'Peer in Cluster' state
(This takes some backing out… ugh)
On proxmox01, I created the volume using this command:
gluster volume create gluster-volume replica 2 gluster01:/zfs-proxmox01/gluster-volume gluster02:/zfs-proxmox02/gluster-volume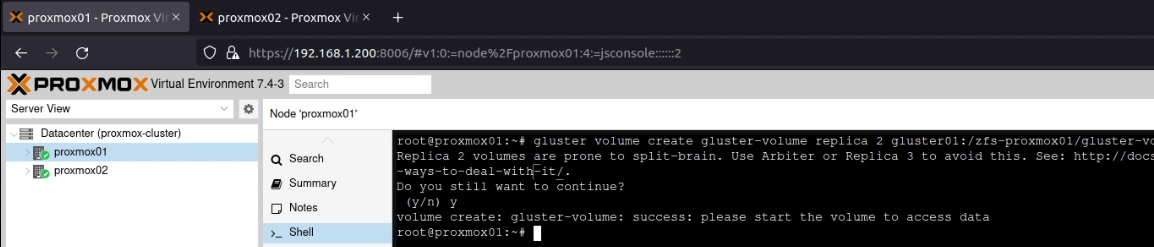
As you can see in the above screenshot, this warned about split brain situations. However, as this is for my home lab, I accepted the risk here. Following the YouTube video again, I ran these commands to “avoid [a] split-brain situation”:
gluster volume start gluster-volume
gluster volume set gluster-volume cluster.heal-timeout 5
gluster volume heal gluster-volume enable
gluster volume set gluster-volume cluster.quorum-reads false
gluster volume set gluster-volume cluster.quorum-count 1
gluster volume set gluster-volume network.ping-timeout 2
gluster volume set gluster-volume cluster.favorite-child-policy mtime
gluster volume heal gluster-volume granular-entry-heal enable
gluster volume set gluster-volume cluster.data-self-heal-algorithm full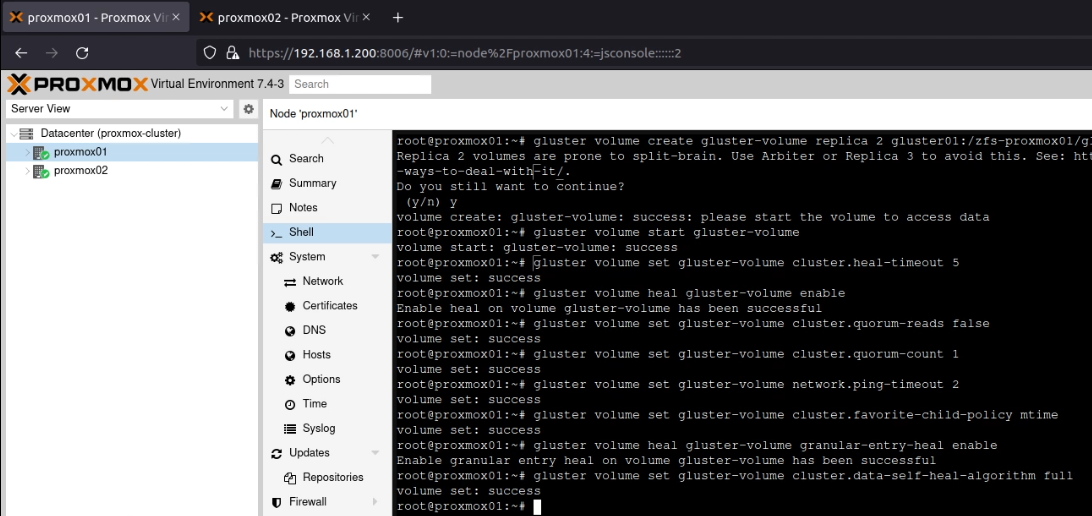
I created /gluster-volume on both proxmox01 and proxmox02, and then added this line to /etc/fstab(yes, I know it should really have been a systemd mount unit) on proxmox01:
gluster01:gluster-volume /gluster-volume glusterfs defaults,_netdev,x-systemd.automount,backupvolfile-server=gluster02 0 0
And on proxmox02:
gluster02:gluster-volume /gluster-volume glusterfs defaults,_netdev,x-systemd.automount,backupvolfile-server=gluster01 0 0On both systems, I ensured that /gluster-volume was created, and then ran mount -a.

In the Proxmox UI, I went to the “Datacenter” and selected “Storage”, then “Add” and selected “Directory”.
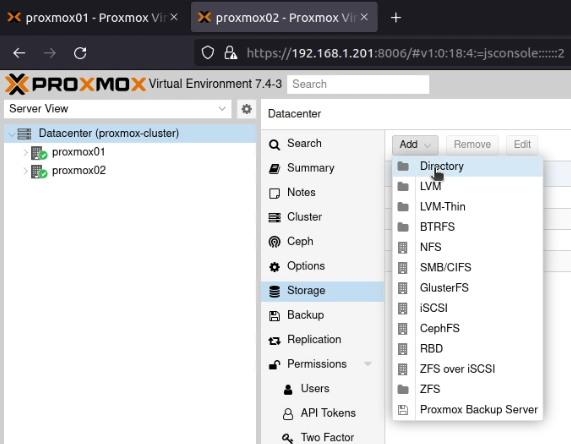
I set the ID to “gluster-volume”, the directory to “/gluster-volume”, ticked the “Shared” box and selected all the content types (it looks like a list box, but it’s actually a multi-select box).
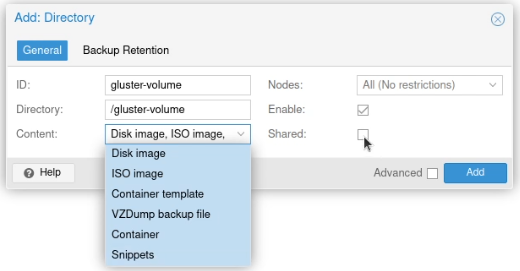
(I forgot to click “Shared” before I selected all the items under “Content” here.)
I clicked Add and it was available on both systems then.

Backups
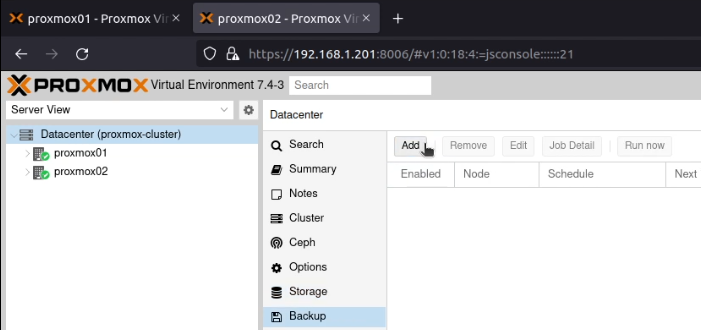
This one saved me from having to rebuild my Home Assistant system last week! Go into “Datacenter” and select the “Backup” option.
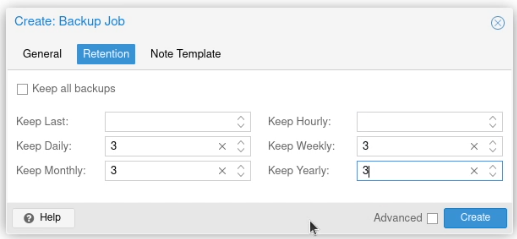
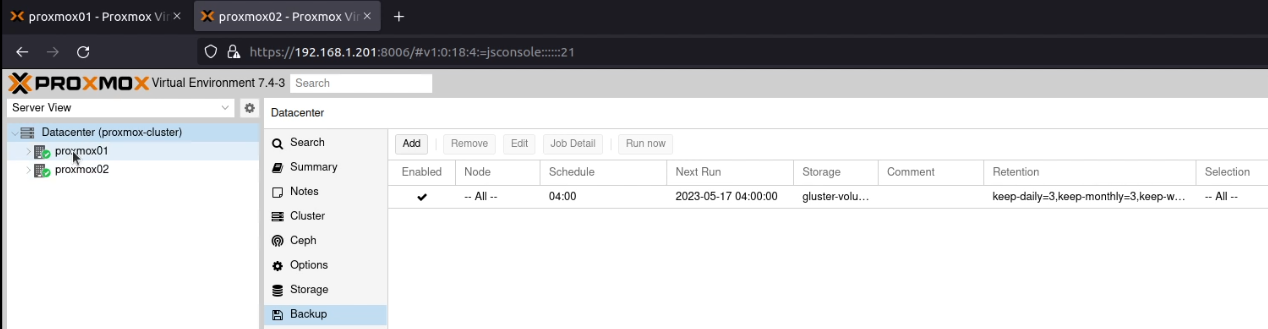
Click the “Add” button, select the storage you’ve just configured (gluster-volume) and a schedule (I picked daily at 04:00) and choose “Selection Mode” of “All”.

On the retention tab, I entered the number 3 for “Keep Daily”, “Keep Weekly”, “Keep Monthly” and “Keep Yearly”. Your retention needs are likely to be different to mine!
If you end up needing to restore one of these backups, you need a different tool depending on whether it’s a LXC container or a QEMU virtual machine. For a container, you’d run:
vmid=199
pct restore $vmid /path/to/backup-file
For a virtual machine, you’d run:
vmid=199
qmrestore /path/to/backup-file $vmid
…and yes, you can replace the vmid=199 \n $vmidwith just the number for the VMID like this:
pct restore 123 /backup/vzdump-lxc-100-1970_01_01-04_00_00.tar.zstIf you need to point the storage at a different device (perhaps Gluster broke, or your external drive) you’d add --storage storage-label(e.g. --storage local-lvm)
Networking
The biggest benefit for me of a home lab is being able to build things on their own VLAN. A VLAN allows a single network interface to carry traffic for multiple logical networks, in such a way that other ports on the switch which aren’t configured to carry that logical network can’t access that traffic.
For example, I’ve configured my switch to have a new VLAN on it, VLAN 30. This VLAN is exposed to the two Proxmox servers (which can access all the VLANs) and also the port to my laptop. This means that I can run virtual machines on VLAN 30 which can’t be accessed by any other machine on my network.
There are two ways to do this, the “easy way” and the “explicit way”. Both ways produce the same end state, it’s just down to which makes more logical sense in your head.
In both routes, you must create the VLANs on your switch first – I’m just addressing the way of configuring Proxmox to pass this traffic to your network switch.
Note that these VLAN tagged interfaces also don’t have a DHCP server or Internet gateway (unless you create one), so any addresses will need to be manually configured in any installation screens.
The easy way
Go into the individual nodes and select the Network option in the sidebar (nested under “System”). You’ll need to perform these actions on both nodes.
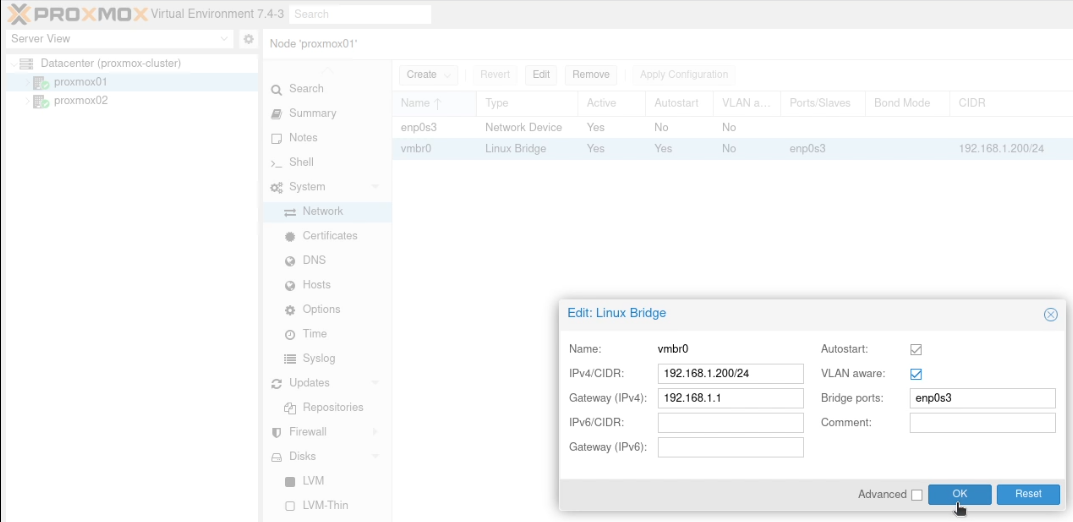
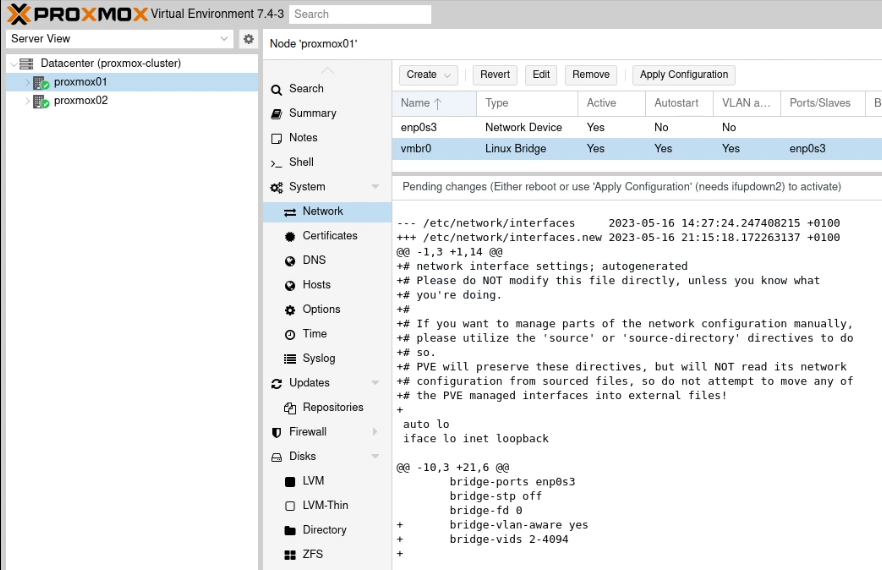
Click on the “Linux Bridge” line which is aligned to your “trunked” network interface. For me, as I have a single network interface (enp2s0) I have a single Linux Bridge (vmbr0). Click “Edit” and tick the “VLAN aware” box and click “OK”.
When you now create your virtual machines, on the hardware option in the sidebar, find the network interface and enter the VLAN tag you want to assign.

(This screenshot shows no VLAN tag added, but it’s fairly clear where you’d put that tag in there)
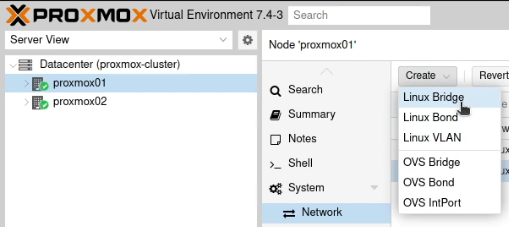
The explicit way
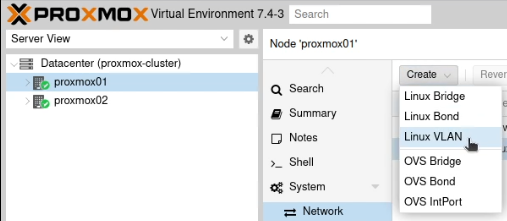
Go into the individual nodes and select the Network option in the sidebar. You’ll need to perform all the steps in the section on both nodes!
Create a new “Linux VLAN” object.
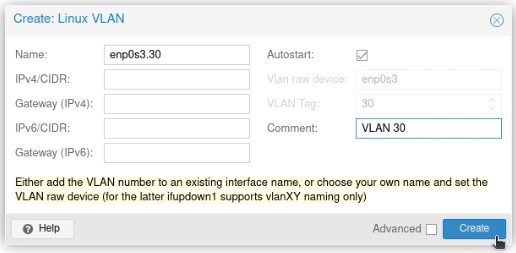
Call it by the name of the interface (e.g. enp2s0) followed by a dot and then the VLAN tag, like this enp2s0.30. Click Create.
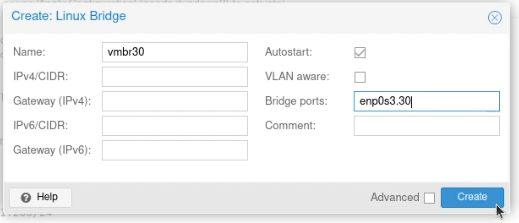
Next create a new “Linux Bridge”.
Call it vmbr and then the VLAN tag, like this vmbr30. Set the ports to the VLAN you just created (enp2s0.30)
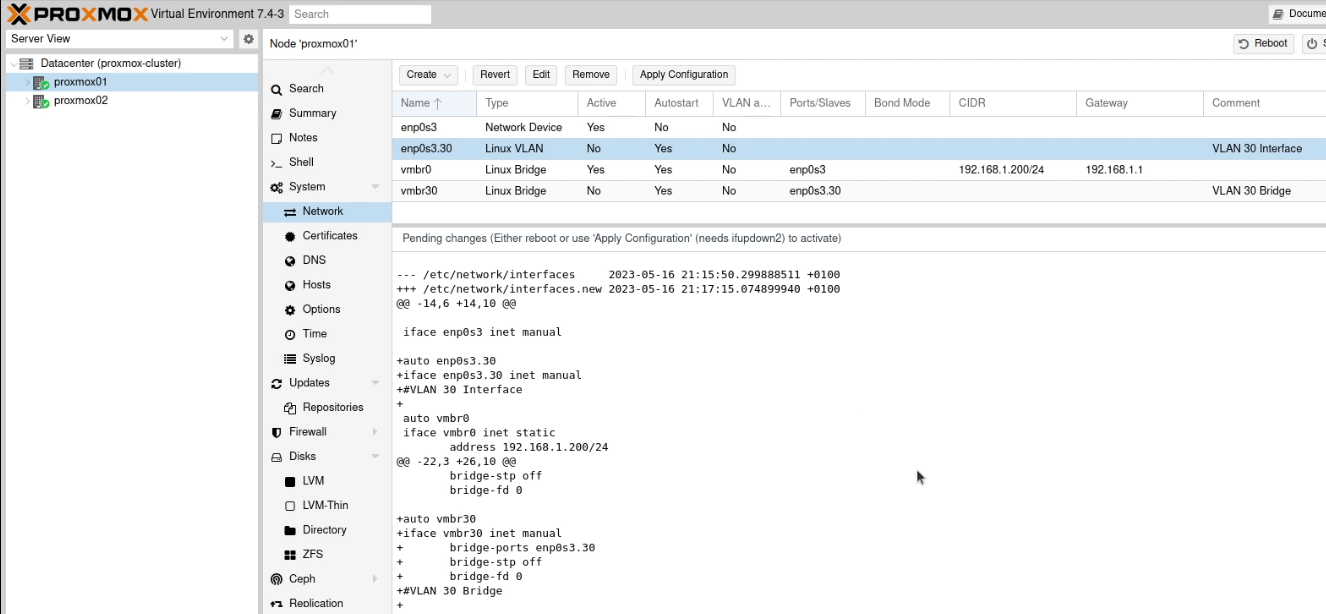
(I should note that I added the comment between writing this guide and taking these screen shots)
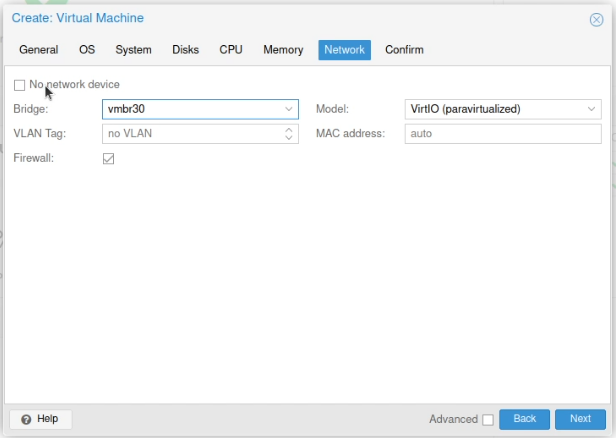
When you create your virtual machines select this bridge for accessing that VLAN.
Making machines run in “HA”
If you haven’t already done the part with the QDevice under clustering, go back there and run those steps! You need quorum to do this right!
YOU MUST HAVE THE SAME NETWORK AND STORAGE CONFIGURATION FOR HIGH AVAILABILITY AND MIGRATIONS. This means every VM which you want to migrate from proxmox01 to proxmox02 must use the same network interface and storage device, no matter which host it’s connected to.
- If you’re connecting enp2s0 to VLAN 55 by using a VLAN Bridge called vmbr55, then both nodes need this VLAN Bridge available. Alternatively, if you’re using a VLAN tag on vmbr0, that’s fine, but both nodes need to have vmbr0 set to be “VLAN aware”.
- If you’re using a disk on gluster-volume, this must be shared across the cluster
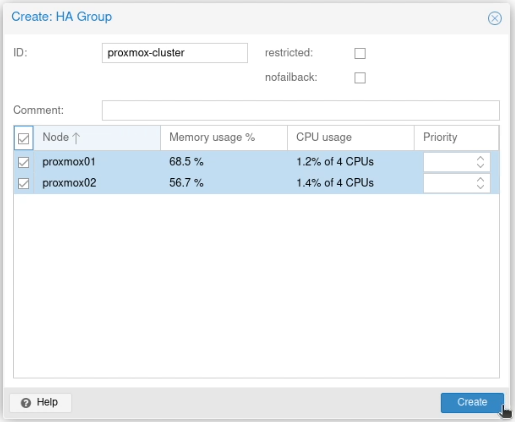
Go to “Datacenter” and select “Groups” which is nested under “HA” in the sidebar.
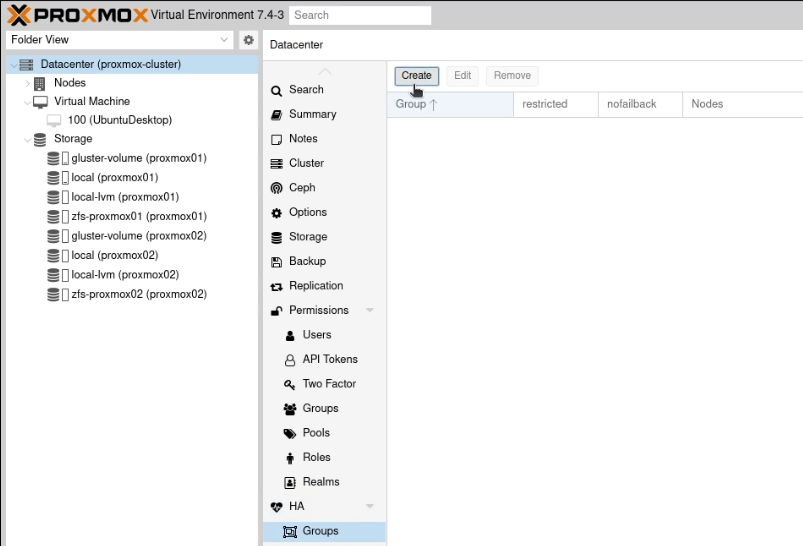
Create a new group (again, unimaginatively, I went with “proxmox”). Select both nodes and press Create.
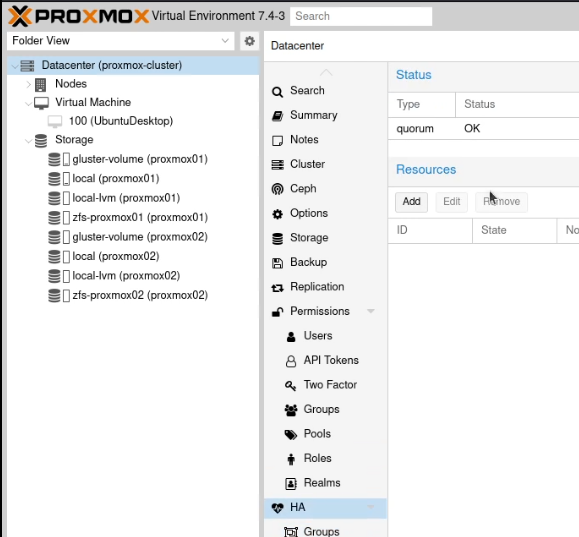
Now go to the “HA” option in the sidebar and verify you have quorum, although it doesn’t matter which is the master.
Under resources on that page, click “Add”.
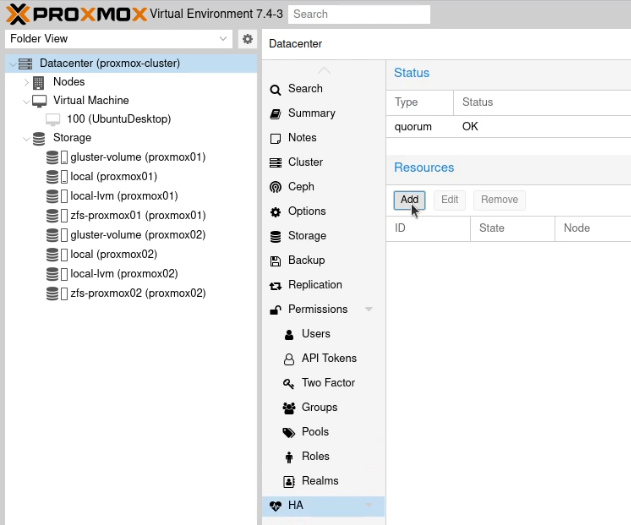
In the VM box, select the ID for the container or virtual machine you want to be highly available and click Add.
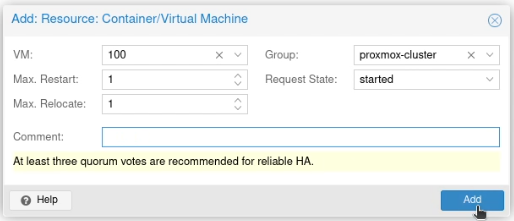
This will restart that machine or container in HA mode.

The wrap up!
So, after all of this, there’s still no virtual machines running (well, that Ubuntu Desktop is created but not running yet!) and I’ve not even started playing around with Terraform yet… but I’m feeling really positive about Proxmox. It’s close enough to the proprietary solutions I’ve used at work in the past that I’m reasonably comfortable with it, but it’s open enough to mess around under the surface. I’m looking forward to doing more experiments!
The featured image is of the comms rack in my garage showing how bad my wiring is when I can’t get to the back of a rack!! It’s released under a CC-0 license.