It’s only been a few months since I last attended an AWS Game Day, but the Microservices Game Day came up in the internal calendar, and I jumped at the chance.
To quote from my last post:
A Game Day (sometimes disambiguated as an “Adversarial Game Day”, because of sporting events) is a day where you either have a dummy environment, or, if you have the scale, a portion of your live network is removed from live service and used as a training ground. In this case, AWS provided a specific dummy environment “Unicorn.Rentals”, and all the attendees are the new recruits to the DevOps Team… Oh, and all the previous DevOps team members had just left the company… all at once.
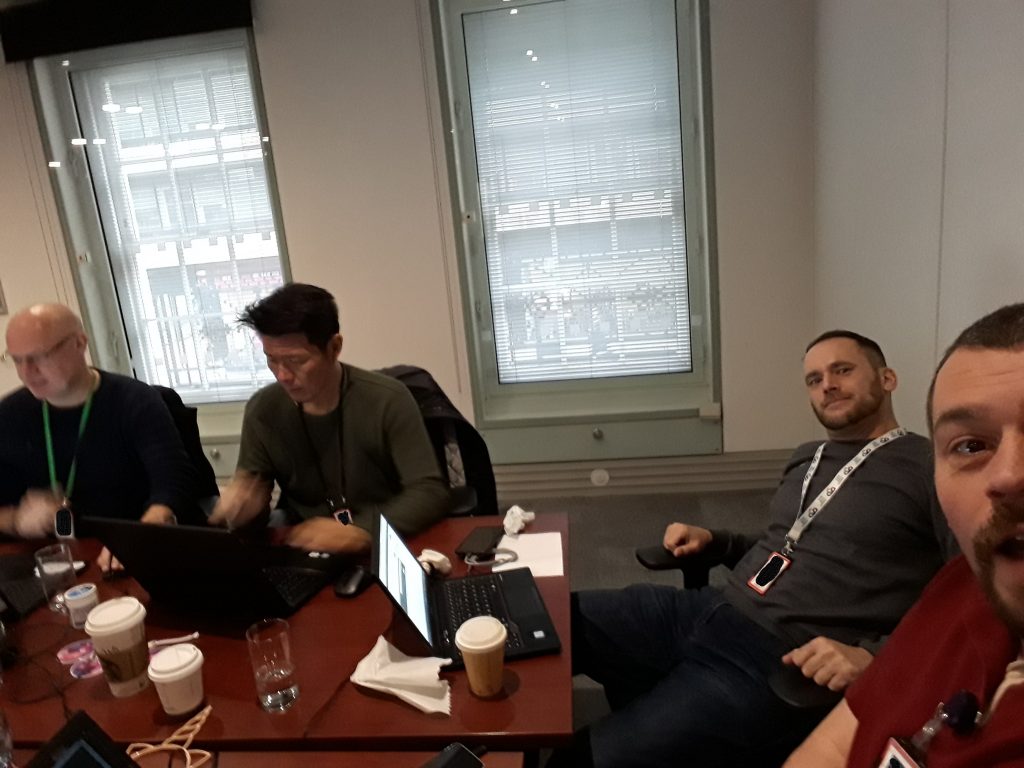
Guess what? We were recruited BACK by Unicorn.Rentals! Again, the Ops Team have all “quit” (someone needs to talk to their HR team, for crying out loud), and we’re left with their migration from a legacy system to a new microservices based system. Teams are groups of 4 people.
Team Red Hats – left to right: Paul Clarke, Ho Kingsley, Jason Daniels and Me (the owner of the mentioned Red Hat)
The task was to maintain a “service router”, and three micro services. Like the last session, there were moments where the stability of the network was challenged, with issues in code, environment and even external actors (no spoilers, remember).
The main take-away I had was that even though I’ve been cramming Docker and Kubernetes knowledge like crazy (more blog posts to come, folks), it doesn’t mean anything if you can’t actually put it into practice.
The pressure is on you right from the start – when you’re trying to get your head around the service you’re running, and working out how to make your microservices work right. There’s also an element of negotiation (admirably performed in our team by Jason) to get people to work together, and keep your eye on the “troubles” in your environment.
My role was mostly around getting on top of improving the condition of the Service Router, and about half way through the session, I decided to try and apply my newfound Docker knowledge to the problem. Naturally, as I’ve not done this under live fire before, I completely mangled the attempt, even managing to knock one of the working microservices off in the process. I was working with a great team as there were no recriminations or criticism for doing that, just an understanding that we needed to roll-back and fix things.
Trying to work out what needed to be done with that broken Docker container took a lot of effort and even right to the last minute, I still hadn’t managed to get my head around it enough to trust it at the end. I think it’s fair to say, though, that it gave me a lot of impetus to try to understand how a docker container should work and has made me want to try and build something less purposefully complex to see how it would work “in the real world”…
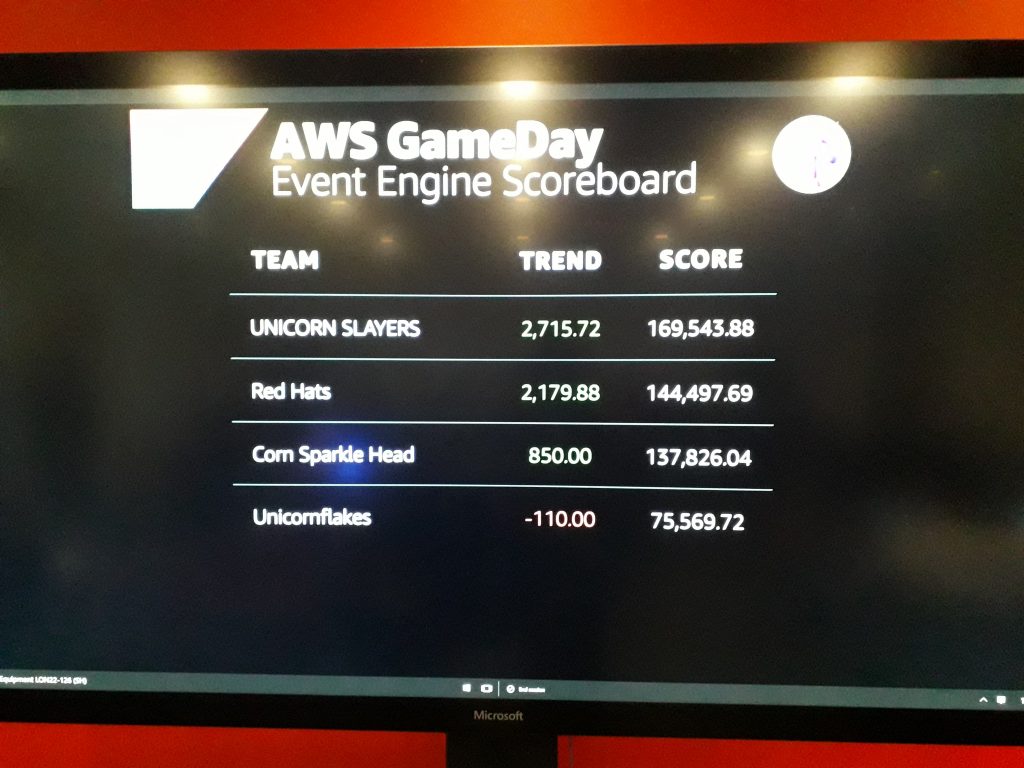
The AWS Microservices Game Day Scoreboard at the end
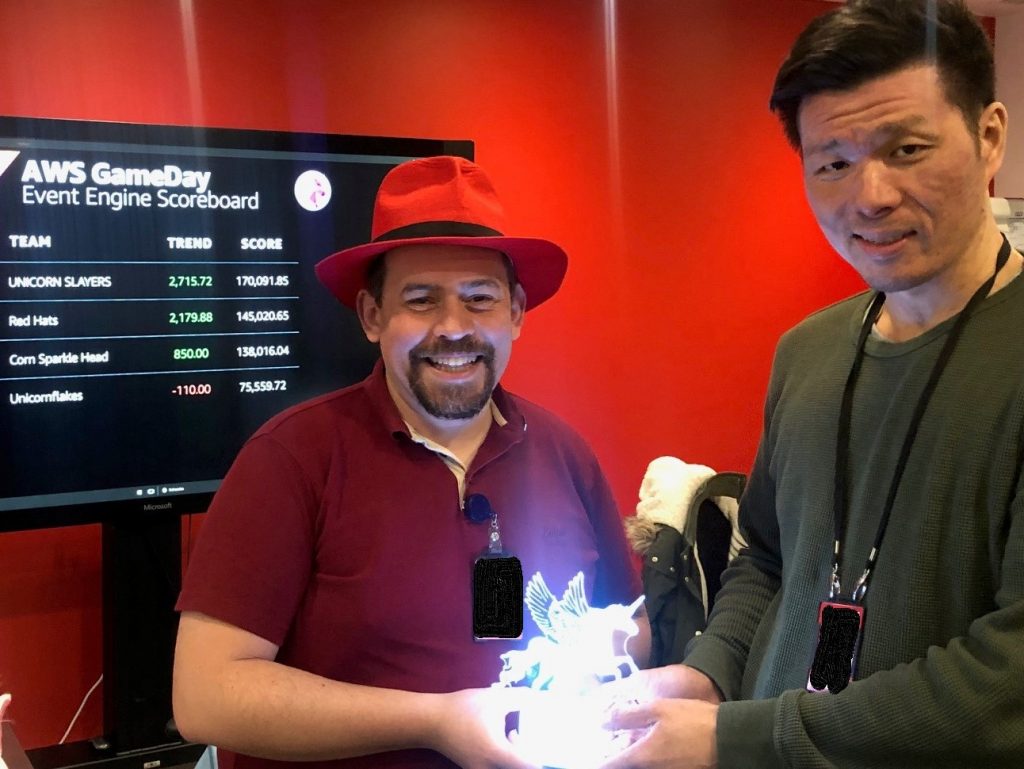
Even without doing something crazy with all the components, Team Red Hats came in second, so I came home with my second LED unicorn, currently sitting on my desk, waiting for a child to be good enough to award them A Unicorn from Unicorn Rentals!
Me and Ho accepting our prize for second place
If you’re offered the opportunity to do one of these, take it!!
Just so you know. This is a long article to explain my wandering path through understanding Kubernetes (K8S). It’s not an article to explain to you how to use K8S with your project. I hit a lot of blockers, due to the stack I’m using and I document them all. This means there’s a lot of noise and not a whole lot of Signal.
Note: I’m running all these commands as root. There’s a bit of weirdness going on because I’m using the snap of Docker and I had a few issues with running these commands as a user… While I could have tried to get to the bottom of this with sudo and watching logs, I just wanted to push on… Anyway.
This has three components – the MariaDB database, the nginx web server and the PHP-FPM CGI service that nginx consumes. The database service exposes a port (3306) to other containers, with a set of hard-coded credentials (yep, that’s not great… working on that one!), while the nginx service opens port 1980 to port 80 in the container. So far, so … well, kinda sensible :)
If we run kompose convert against this docker-compose file, we get five files created; db-deployment.yaml, nginx-deployment.yaml, phpfpm-deployment.yaml, db-service.yaml and nginx-service.yaml. If we were to run kompose up on these, we get an error message…
Well, actually, first, we get a whole load of “INFO” and “WARN” lines up while kompose builds and pushes the containers into the MicroK8S local registry (a registry is a like a package repository, for containers), which is served by localhost:32000 (hence all the image: localhost:3200/someimage lines in the docker-compose.yml file), but at the end, we get (today) this error:
INFO We are going to create Kubernetes Deployments, Services and PersistentVolumeClaims for your Dockerized application. If you need different kind of resources, use the 'kompose convert' and 'kubectl create -f' commands instead.

FATA Error while deploying application: Get http://localhost:8080/api: dial tcp 127.0.0.1:8080: connect: connection refused
Uh oh! Well, this is a known issue at least! Kubernetes used to use, by default, http on port 8080 for it’s service, but now it uses https on port 6443. Well, that’s what I thought! In this issue on the MicroK8S repo, it says that it uses a different port, and you should use microk8s.kubectl cluster-info to find the port… and yep… Kubernetes master is running at https://127.0.0.1:16443. Bah.
root@microk8s-a:~/glowing-adventure# microk8s.kubectl cluster-info
Kubernetes master is running at https://127.0.0.1:16443
Heapster is running at https://127.0.0.1:16443/api/v1/namespaces/kube-system/services/heapster/proxy
CoreDNS is running at https://127.0.0.1:16443/api/v1/namespaces/kube-system/services/kube-dns:dns/proxy
Grafana is running at https://127.0.0.1:16443/api/v1/namespaces/kube-system/services/monitoring-grafana/proxy
InfluxDB is running at https://127.0.0.1:16443/api/v1/namespaces/kube-system/services/monitoring-influxdb:http/proxy
Right then. Let’s run that kompose up statement again…
INFO We are going to create Kubernetes Deployments, Services and PersistentVolumeClaims for your Dockerized application. If you need different kind of resources, use the 'kompose convert' and 'kubectl create -f' commands instead.

Please enter Username:
Please enter Password:
INFO Deploying application in "default" namespace
INFO Successfully created Service: nginx
FATA Error while deploying application: the server could not find the requested resource
Bah! What resource do I need? Well, actually, there’s a bug in 1.20.0 of Kompose, and it should be fixed in 1.21.0. The “resource” it’s talking about is, I think, that one of the APIs refuses to process the converted YAML files. As a result, the “resource” is the service that won’t start. So, instead, let’s convert the file into the output YAML files, and then take a peak at what’s going wrong.
root@microk8s-a:~/glowing-adventure# kompose convert
INFO Kubernetes file "nginx-service.yaml" created
INFO Kubernetes file "db-deployment.yaml" created
INFO Kubernetes file "nginx-deployment.yaml" created
INFO Kubernetes file "phpfpm-deployment.yaml" created
So far, so good! Now let’s run kubectl apply with each of these files.
root@microk8s-a:~/glowing-adventure# kubectl apply -f nginx-service.yaml
Warning: kubectl apply should be used on resource created by either kubectl create --save-config or kubectl apply
service/nginx configured
root@microk8s-a:~# kubectl apply -f nginx-deployment.yaml
error: unable to recognize "nginx-deployment.yaml": no matches for kind "Deployment" in version "extensions/v1beta1"
Apparently the service files are all OK, the problem is in the deployment files. Hmm OK, let’s have a look at what could be wrong. Here’s the output file:
Well, the extensions/v1beta1 API version doesn’t seem to support “Deployment” options any more, so let’s edit it to change that to what the official documentation example shows today. We need to switch to using the apiVersion: apps/v1 value. Let’s see what happens when we make that change!
root@microk8s-a:~/glowing-adventure# kubectl apply -f nginx-deployment.yaml
error: error validating "nginx-deployment.yaml": error validating data: ValidationError(Deployment.spec): missing required field "selector" in io.k8s.api.apps.v1.DeploymentSpec; if you choose to ignore these errors, turn validation off with --validate=false
Hmm this seems to be a fairly critical issue. A selector basically tells the orchestration engine which images we want to be deployed. Let’s go back to the official example. So, we need to add the “selector” value in the “spec” block, at the same level as “template”, and it needs to match the labels we’ve specified. It also looks like we don’t need most of the metadata that kompose has given us. So, let’s adjust the deployment to look a bit more like that example.
root@microk8s-a:~/glowing-adventure# kubectl apply -f nginx-deployment.yaml
deployment.apps/nginx created
Woohoo! Let’s apply all of these now.
root@microk8s-a:~/glowing-adventure# for i in db-deployment.yaml nginx-deployment.yaml nginx-service.yaml phpfpm-deployment.yaml; do kubectl apply -f $i ; done
deployment.apps/db created
deployment.apps/nginx unchanged
service/nginx unchanged
deployment.apps/phpfpm created
Oh, hang on a second, that service (service/nginx) is unchanged, but we changed the label from io.kompose.service: nginx to app: nginx, so we need to fix that. Let’s open it up and edit it!
Ah, so this has the “annotations” field too, in the metadata, and, as suspected, it’s got the io.kompose.service label as the selector. Hmm OK, let’s fix that.
Fab! So, let’s review the state of the deployments, the services, the pods and the replication sets.
root@microk8s-a:~/glowing-adventure# kubectl get deploy
NAME     READY   UP-TO-DATE   AVAILABLE   AGE
db       1/1     1            1           8m54s
nginx    0/1     1            0           8m53s
phpfpm   1/1     1            1           8m48s
Hmm. That doesn’t look right.
root@microk8s-a:~/glowing-adventure# kubectl get pod
NAME                      READY   STATUS             RESTARTS   AGE
db-f78f9f69b-grqfz        1/1     Running            0          9m9s
nginx-7774fcb84c-cxk4v    0/1     CrashLoopBackOff   6          9m8s
phpfpm-66945b7767-vb8km   1/1     Running            0          9m3s
root@microk8s-a:~# kubectl get rs
NAME                DESIRED   CURRENT   READY   AGE
db-f78f9f69b        1         1         1       9m18s
nginx-7774fcb84c    1         1         0       9m17s
phpfpm-66945b7767   1         1         1       9m12s
Yep. What does “CrashLoopBackOff” even mean?! Let’s check the logs. We need to ask the pod itself, not the deployment, so let’s use the kubectl logs command to ask.
root@microk8s-a:~/glowing-adventure# kubectl logs nginx-7774fcb84c-cxk4v
2020/01/17 08:08:50 [emerg] 1#1: host not found in upstream "phpfpm" in /etc/nginx/conf.d/default.conf:10
nginx: [emerg] host not found in upstream "phpfpm" in /etc/nginx/conf.d/default.conf:10
Hmm. That’s not good. We were using the fact that Docker just named everything for us in the docker-compose file, but now in Kubernetes, we need to do something different. At this point I ran out of ideas. I asked on the McrTech slack for advice. I was asked to run this command, and would you look at that, there’s nothing for nginx to connect to.
root@microk8s-a:~/glowing-adventure# kubectl get service
NAME         TYPE        CLUSTER-IP      EXTERNAL-IP   PORT(S)    AGE
kubernetes   ClusterIP   10.152.183.1    <none>        443/TCP    24h
nginx        ClusterIP   10.152.183.62   <none>        1980/TCP   9m1s
It turns out that I need to create a service for each of the deployments. So, now I have a separate service for each one. I copied the nginx-service.yaml file into db-service.yaml and phpfpm-service.yaml, edited the files and now… tada!
root@microk8s-a:~/glowing-adventure# kubectl get service
NAME         TYPE        CLUSTER-IP      EXTERNAL-IP   PORT(S)    AGE
db           ClusterIP   10.152.183.61   <none>        3306/TCP   5m37s
kubernetes   ClusterIP   10.152.183.1    <none>        443/TCP    30h
nginx        ClusterIP   10.152.183.62   <none>        1980/TCP   5h54m
phpfpm       ClusterIP   10.152.183.69   <none>        9000/TCP   5m41s
But wait… How do I actually address nginx now? Huh. No external-ip (not even “pending”, which is what I ended up with), no ports to talk to. Uh oh. Now I need to understand how to hook this service up to the public IP of this node. Ahh, see up there it says “ClusterIP”? That means “this service is only available INSIDE the cluster”. If I change this to “NodePort” or “LoadBalancer”, it’ll attach that port to the external interface.
What’s the difference between “NodePort” and “LoadBalancer”? Well, according to this page, if you are using a managed Public Cloud service that supports an external load balancer, then putting this to “LoadBalancer” should attach your “NodePort” to the provider’s Load Balancer automatically. Otherwise, you need to define the “NodePort” value in your config (which must be a value between 30000 and 32767, although that is configurable for the node). Once you’ve done that, you can hook your load balancer up to that port, for example Client -> Load Balancer IP (TCP/80) -> K8S Cluster IP (e.g. TCP/31234)
So, how does this actually look. I’m going to use the “LoadBalancer” option, because if I ever deploy this to “live”, I want it to integrate with the load balancer, but for now, I can cope with addressing a “high port”. Right, well, let me open back up that nginx-service.yaml, and make the changes.
The key parts here are the lines type: LoadBalancer and nodePort: 30000 under spec: and ports: respectively. Note that I can use, at this point type: LoadBalancer and type: NodePort interchangably, but, as I said, if you were using this in something like AWS or Azure, you might want to do it differently!
So, now I can curl http://192.0.2.100:30000 (where 192.0.2.100 is the address of my “bridged interface” of K8S environment) and get a response from my PHP application, behind nginx, and I know (from poking at it a bit) that it works with my Database.
OK, one last thing. I don’t really want lots of little files which have got config items in. I quite liked the docker-compose file as it was, because it had all the services in as one block, and I could run “docker-compose up”, but the kompose script split it out into lots of pieces. In Kubernetes, if the YAML file it loads has got a divider in it (a line like this: ---) then it stops parsing it at that point, and starts reading the file after that as a new file. Like this I could have the following layout:
But, thinking about it, I quite like having each piece logically together, so I really want db.yaml, nginx.yaml and phpfpm.yaml, where each of those files contains both the deployment and the service. So, let’s do that. I’ll do one file, so it makes more sense, and then show you the output.
Next episode, I’ll start looking at making my application scale (as that’s the thing that Kubernetes is known for) and having more than one K8S node to house my K8S pods!
I’m going on a bit of a containers kick at the moment, and just recently I wanted to give Kubernetes (sometimes abbreviated to “K8S”) a try.
Kubernetes is an orchestration engine for Containers, like Docker. It’s designed to take the images that Docker (and other similar tools) produce, and run them across multiple nodes. You need to have a handle on how Docker works before giving K8S a try, but once you do, it’s well worth a shot to understand K8S.
Unlike Docker, K8S is a bit more in-depth on it’s requirements, and often people are pointed at Minikube as their introduction to K8S, however, my colleague and friend Nick suggested I might be better off with MicroK8S.
MicroK8S is an application released by Canonical as a Snap. A Snap is a Linux packaging format, similar to FlatPak and AppImage. It’s mostly used on Ubuntu based operating systems, but can also work on other Linux distributions.
I had an initial, failed, punt with the recommended advice for using MicroK8S on Windows (short story, Hyper-V did not work for me, and the VirtualBox back-end doesn’t expose any network ports, or at least, if it does, I couldn’t see how to make it work), and as I’m reasonably confident in using Vagrant work in Windows, I built a Vagrantfile to deliver MicroK8S.
To use this, you need Vagrant and VirtualBox, and then get the Vagrantfile from repo… then run vagrant up (it will ask you what interface you want to “bridge” to – this will be how you access the Kubernetes pods and Docker containers). Once the machine has finished building, you can run vagrant ssh to connect into it. From here, you can run your kubectl commands, as well as docker commands.
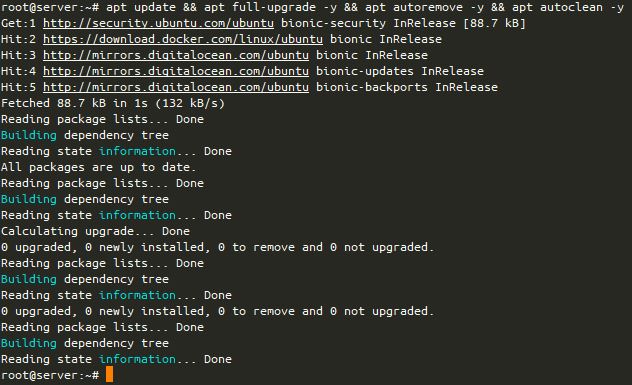
I’ve got a small Ansible script that I bundle up on Ubuntu boxes to do apt updates. This was originally a one-statement job, but I’ve added a few lines to it, so I thought I’d explain what I’m doing (more for myself, for later!)
Initally, I just had a task to do apt: upgrade=full update_cache=yes autoremove=yes autoclean-yes but if you’re running the script over and over again, well, this gets slow… So I added a tweak!
Here it is folks, in all it’s glory!
- hosts: all
  tasks:
  - name: Get stat of last run apt
    stat:
      path: /var/cache/apt/pkgcache.bin
    register: apt_run

  - name: "Apt update, Full-upgrade, autoremove, autoclean check"
    debug:
      msg: "Skipping apt-update, etc. actions as apt update was run today"
    when: "'%Y-%m-%d' | strftime(apt_run.stat.mtime) in ansible_date_time.date"

  - name: "Apt update, Full-upgrade, autoremove, autoclean"
    apt:
      upgrade: full
      update_cache: yes
      autoremove: yes
      autoclean: yes
    when: "'%Y-%m-%d' | strftime(apt_run.stat.mtime) not in ansible_date_time.date"
What does this do? Well, according to this AskUbuntu post, the best file to check if an update has been performed is /var/cache/apt/pkgcache.bin, so we check the status of that file. Most file systems available to Linux distributions provide the mtime – or “last modified time”. This is returned in the number of seconds since UTC 00:00:00 on the Unix Epoch (1970-01-01), so we need to convert that to a date., which we return as YYYY-MM-DD (e.g. today is 2020-01-06) and then compare that to what the system thinks today is. If the dates don’t equate (so one string doesn’t match the other – in other words, apt update wasn’t run today), it runs the update. If the dates do match up, we get a statement saying that apt update was already run.
Late edit 2020-01-16: The fantastic Jerry Steel, my co-host on The Admin Admin podcast looked at what I wrote, and made a few suggestions. I’ve updated the code in the git repo, and I’ll try to annotate below when I’ve changed something. If I miss it, it’s right in the Git repo!
One of the challenges I set myself this Christmas was to learn enough about Docker to put an arbitrary PHP application, that I would previously have misused Vagrant to contain.
Just before I started down this rabbit hole, I spoke to my Aunt about some family tree research my father had left behind after he died, and how I wished I could easily share the old tree with her (I organised getting her a Chromebook a couple of years ago, after fighting with doing remote support for years on Linux and Windows laptops). In the end, I found a web application for genealogical research called HuMo-gen, that is a perfect match for both projects I wanted to look at.
HuMo-gen was first created in 1999, with a PHP version being released in 2005. It used MySQL or MariaDB as the Database engine. I was reasonably confident that I could have created a Vagrantfile to deliver this on my home server, but I wanted to try something new. I wanted to use the “standard” building blocks of Docker and Docker-Compose, and some common containers to make my way around learning Docker.
I started by looking for some resources on how to build a Docker container. Much of the guidance I’d found was to use Docker-Compose, as this allows you to stand several components up at the same time!
In contrast to how Vagrant works (which is basically a CLI wrapper to many virtual machine services), Docker isolates resources for a single process that runs on a machine. Where in Vagrant, you might run several processes on one machine (perhaps, in this instance, nginx, PHP-FPM and MariaDB), with Docker, you’re encouraged to run each “service” as their own containers, and link them together with an overlay network. It’s possible to also do the same with Vagrant, but you’ll end up with an awful lot of VM overhead to separate out each piece.
So, I first needed to select my services. My initial line-up was:
MariaDB
PHP-FPM
Apache’s httpd2 (replaced by nginx)
I was able to find official Docker images for PHP, MariaDB and httpd, but after extensive tweaking, I couldn’t make the httpd image talk the way I wanted it to with the PHP image. Bowing to what now seems to be conventional wisdom, I swapped out the httpd service for nginx.
One of the stumbling blocks for me, particularly early on, was how to build several different Dockerfiles (these are basically the instructions for the container you’re constructing). Here is the basic outline of how to do this:
In this docker-compose.yml file, I tell it that to create the yourservice service, it needs to build the docker container, using the file in ./relative/path/to/Dockerfile. This file in turn contains an instruction to import an image.
Each service stacks on top of each other in that docker-compose.yml file, like this:
Late edit 2020-01-16: This previously listed Dockerfile/service1, however, much of the documentation suggested that Docker gets quite opinionated about the file being called Dockerfile. While docker-compose can work around this, it’s better to stick to tradition :) The docker-compose.yml files below have also been adjusted accordingly. I’ve also added an image: somehost:1234/image_name line to help with tagging the images for later use. It’s not critical to what’s going on here, but I found it useful with some later projects.
To allow containers to see ports between themselves, you add the expose: command in your docker-compose.yml, and to allow that port to be visible from the “outside” (i.e. to the host and upwards), use the ports: command listing the “host” port (the one on the host OS), then a colon and then the “target” port (the one in the container), like these:
Now, let’s take a quick look into the Dockerfiles. Each “statement” in a Dockerfile adds a new “layer” to the image. For local operations, this probably isn’t a problem, but when you’re storing these images on a hosted provider, you want to keep these images as small as possible.
I built a Database Dockerfile, which is about as small as you can make it!
FROM mariadb:10.4.10
Yep, one line. How cool is that? In the docker-compose.yml file, I invoke this, like this:
OK, so this one is a bit more complex! I wanted it to build my Dockerfile, which is “mariadb/Dockerfile“. I wanted it to restart the container whenever it failed (which hopefully isn’t that often!), and I wanted to inject some specific environment variables into the file – the root and user passwords, a user account and a database name. Initially I was having some issues where it wasn’t building the database with these credentials, but I think that’s because I wasn’t “building” the new database, I was just using it. I also expose the MariaDB (MySQL) port, 3306 to the other containers in the docker-compose.yml file.
Let’s take a look at the next part! PHP-FPM. Here’s the Dockerfile:
FROM php:7.4-fpm
RUN docker-php-ext-install pdo pdo_mysql
ADD --chown=www-data:www-data public /var/www/html
There’s a bit more to this, but not loads. We build our image from a named version of PHP, and install two extensions to PHP, pdo and pdo_mysql. Lastly, we copy the content of the “public” directory into the /var/www/html path, and make sure it “belongs” to the right user (www-data).
I’d previously tried to do a lot more complicated things with this Dockerfile, but it wasn’t working, so instead I slimmed it right down to just this, and the docker-compose.yml is a lot simpler too.
See! Loads simpler! Now we need the complicated bit! :) This is the Dockerfile for nginx.
FROM nginx:1.17.7
COPY nginx/default.conf /etc/nginx/conf.d/default.conf

COPY public /var/www/html
Weirdly, even though I’ve added version numbers for MariaDB and PHP, I’ve not done the same for nginx, perhaps I should!Late edit 2020-01-16: I’ve put a version number on there now, previously where it said nginx:1.17.7 it actually said nginx:latest.
I’ve created the configuration block for nginx in a single “RUN” line.Late edit 2020-01-16: This Dockerfile now doesn’t have a giant echo 'stuff' > file block either, following Jerry’s advice, and I’m using COPY instead of ADD on his advice too. I’ll show that config file below. There’s a couple of high points for me here!
server_name _;means “use this block for all unnamed requests”.
access_log /proc/self/fd/1; and error_log /proc/self/fd/2;These are links to the “stdout” and “stderr” file descriptors (or pointers to other parts of the filesystem), and basically means that when you do docker-compose logs, you’ll see the HTTP logs for the server! These two files are guaranteed to be there, while /dev/stderr isn’t!
Because nginx is “just” caching the web content, and I know the content doesn’t need to be written to from nginx, I knew I didn’t need to do the chown action, like I did with the PHP-FPM block.
Lastly, I need to configure the docker-compose.yml file for nginx:
I’ve gone for a slightly unusual ports configuration when I deployed this to my web server… you see, I already have the HTTP port (TCP/80) configured for use on my home server – for running the rest of my web services. During development, on my home machine, the ports line instead showed “1980:80” because I was running this on Instead, I’m running this application bound to “localhost” (127.0.0.1) on a different port number (1980 selected because it could, conceivably, be a birthday of someone on this system), and then in my local web server configuration, I’m proxying connections to this service, with HTTPS encryption as well. That’s all outside the scope of this article (as I probably should be using something like Traefik, anyway) but it shows you how you could bind to a separate port too.
Anyway, that was my Docker journey over Christmas, and I look forward to using it more, going forward!
Around 2-3 years ago, Slack– the company who produces Slack the IM client, started working on a meshed overlay network product, called Nebula, to manage their environment. After two years of running their production network on the back of it, they decided to open source it. I found out about Nebula via a Medium Post that was mentioned in the HangOps Slack Group. I got interested in it, asked a few questions about Nebula in the Slack, and then in the Github Issues for it, and then recently raised a Pull Request to add more complete documentation than their single (heavily) commented config file.
So, let’s go into some details on why this is interesting to me.
1. Nebula uses a flat IPv4 network to identify all hosts in the network, no matter where in the network those hosts reside.
This means that I can address any host in my (self allocated) 198.18.0.0/16 network, and I don’t need to worry about routing tables, production/DR sites, network tromboneing and so on… it’s just… Flat.
2. Nebula has host-based firewalling built into the configuration file.
This means that once I know how my network should operate (yes, I know that’s a big ask), I can restrict my servers from being able to reach my laptops, or I can stop my web server from being able to talk to my database server, except for on the database ports. Lateral movement becomes a LOT harder.
This firewalling also looks a lot like (Network) Security Groups (for the AWS and Azure familiar), so you have a default “Deny” rule, and then layer “Allow” rules on top. You also have Inbound and Outbound rules, so if you want to stop your laptops from talking anything but DNS, SSH, HTTPS and ICMP over Nebula…. well, yep, you can do that :)
3. Nebula uses a PKI environment. Where you can have multiple Certificate Authorities.
This means that I have a central server running my certificate authority (CA), with a “backup” CA, stored offline – in case of dire disaster with my primary CA, and push both CA’s to all my nodes. If I suddenly need to replace all the certificates that my current CA signed, I can do that with minimal interruption to my nodes. Good stuff.
Nebula also created their own PKI attributes to identify the roles of each device in the Nebula environment. By signing that as part of the certificate on each node too, means your CA asserts that the role that certificate holds is valid for that node in the network.
Creating a node’s certificate is a simple command:
This certificate has the IP address of the node baked in (it’s 198.18.0.1) and the groups it’s part of (admin, laptop and support), as well as the host name (jon-laptop). I can use any of these three items in my firewall rules I mentioned above.
4. It creates a peer-to-peer, meshed VPN.
While it’s possible to create a peer-to-peer meshed VPN with commercial products, I’ve not seen any which are as light-weight to deploy as this. Each node finds all the other nodes in the network by using a collection of “Lighthouses” (similar to Torrent Seeds or Skype Super Nodes) which tells all the connecting nodes where all the other machines in the network are located. These then initiate UDP connections to the other nodes they want to talk to. If they are struggling (because of NAT or Double NAT), then there’s a NAT Punching process (called, humourously, “punchy”) which lets you signal via the Lighthouse that you’re trying to reach another node that can’t see your connection, and asks it to also connect out to you over UDP… thereby fixing the connection issue. All good.
5. Nebula has clients for Windows, Mac and Linux. Apparently there are clients for iOS in the works (meh, I’m not on Apple… but I know some are) and I’ve heard nothing about Android as yet, but as it’s on Linux, I’m sure some enterprising soul can take a look at it (the client is written in Go).
2 VPCs (AWS) and 1 VNet (Azure) 6 subnets (3 public, 3 private) 1 public AWX (the upstream project from Ansible Tower) Server 1 private Nebula Certificate Authority 2 public Web Servers (one in AWS, one in Azure) 2 private Database Servers (one in AWS, one in Azure) 2 public Bastion Servers (one in AWS, one in Azure) – that lets AWX reach into the Private sections of the network, without exposing SSH from all the hosts.
If you don’t want to provision the Azure side, just remove load_web2_module.tf from the Terraform directory in that repo… Job’s a good’n!
I have plans to look at a couple of variables, like Nebula’s closest rival, ZeroTier, and to look at using SaltStack instead of Ansible, to reduce the need for the extra Bastion servers.
Hello bold traveller! I recently got into a discussion with someone about how I put content into my blog and I realised that people don’t write this stuff down enough!
At the end of this post, I’d expect you to be able to use this information to be able to create your own, similar stack. If you don’t have the technical knowledge to be able to do so, you should at least have the pieces of information to ask someone else to help you build it. While I’d be flattered if you asked me for similar advice, I’m afraid I have limited time for new projects, even consultancy ones, and all I can do is point you back to this blog!
That said, consider this a bit of the “making the sausage” that most people don’t tend to share! 😀
Firstly, an apology! It’s more than a week after OggCamp. I’m quite aware that this is very very late for me!
About OggCamp for those who weren’t there!
OggCamp is an annual semi-scheduled Unconference. An Unconference (sometimes known as a “BarCamp”) is where when you arrive on the first day, the schedule (also known as the “Grid”) is blank, with a stack of post-it notes next to the grid. You’re encouraged to put talks on the grid, and keep checking the grid to see what’s up next.
OggCamp is a conference which encourages people to talk about Free Culture (Free and Open Source Software, Open Hardware, Creative Commons Content) and other permissively licensed works. It’s also a “Geeky” conference, so games will often appear, they encourage hardware makers to attend, and this year the event also contained “FlawCon”, a security conference, so the event also had a higher-than-usual proportion of Infosec people there!
OggCamp was started by podcasters in 2009, and so there’s usually at least one or two podcasts being recorded. This year, there was a panel session, Linux Outlaws “rode for one last time”, Hacker Public Radio (HPR) were out and about to talk to people at the event, and the podcast I co-host, The Admin Admin Podcast, found a quiet spot to record a show too. Sadly, with the exception of my own podcast recording, I didn’t make it to any of the other recordings I mentioned, as I was attending talks by other people at those times.
Differences, for me, from previous years
Since OggCamp ’10, I was either not at the event (on the years each of my children were born), was running the Talk Scheduling Software; CampFireManager, crewing, or organising the event. This was the first year I managed to get to see talks all day since the very first OggCamp, so that was a big change for me.
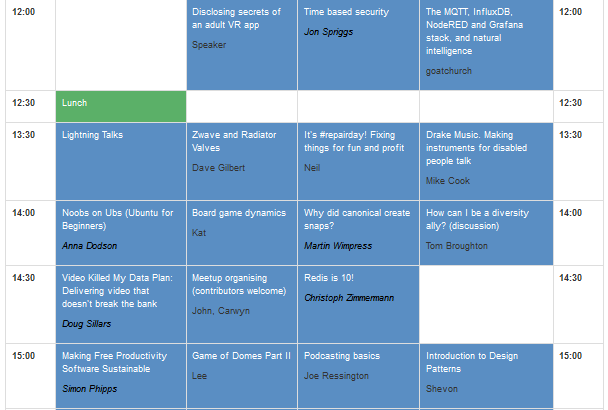
This year, Lorna organised the grid, from right in front of it. Except for the welcome and closing talks, I don’t think she left the grid for the entire day both days. In previous years, when we weren’t using CampFireManager, the grid was left unattended, with an occasional drive-by crew member transferring the grid to Joind.In. Talking of which, here’s the Joind.In view of Saturday…
Saturday
A screen shot of the grid from Saturday. Talks marked with a * are talks I attended.
I went to the “Opening Talk” first. This is your usual “Here’s how to get on the Wi-fi, here’s how to participate, here’s the sort of things we want from you” talk, and was run by Dan and Lorna.
OpenBenches is a project that records what is on the plaques on benches that people arrange for their relatives, sometimes when they die. I’ve been aware of this project for some time, but never contributed. Until now I thought you had to manually type in what was on each plaque (and I think, at the beginning you had to), but NO, they’re now doing Optical Character Recognition (OCR) to copy the text out of the photos.
The talk discussed the statistics of the project, the technology stack and why the project was started. It was just lovely and really well delivered.
— Jon Spriggs – toot.io/@JonTheNiceGuy (@jontheniceguy) October 19, 2019
Next I went to see Jeroen talking about Self Publishing.
Jeroen first attended OggCamp last year, giving a talk about Mainframes. This year he was back, talking about running a project with a very small community. Before he got to that though, he wanted to talk about self publishing. He endorsed Lulu for paper printing, AsciiDoc and AsciiDoctor to produce the content (PanDoc to convert between formats, if you started with something that isn’t AsciiDoc(tor)) and then Inkscape to create the cover. I asked him if he would suggest anything for eBooks, but he doesn’t create eBooks so couldn’t make any suggestions.
We got a demo of publishing a finished book on Lulu, with a running translation from Jeroen’s native language :) It was a great talk, and very well delivered in 25 minutes!
After that, I gave a late-pitched talk on Time Based Security (TBS). I made a few mistakes here – not least of which was failing to charge my laptop having used it while I was travelling in – so my laptop wouldn’t actually boot… I couldn’t even put up a single slide with my details! Trying to explain the maths around TBS without something to show it is hard, and involves walking around and waving your hands about. I had about 20 people in the room and I felt woefully underprepared.
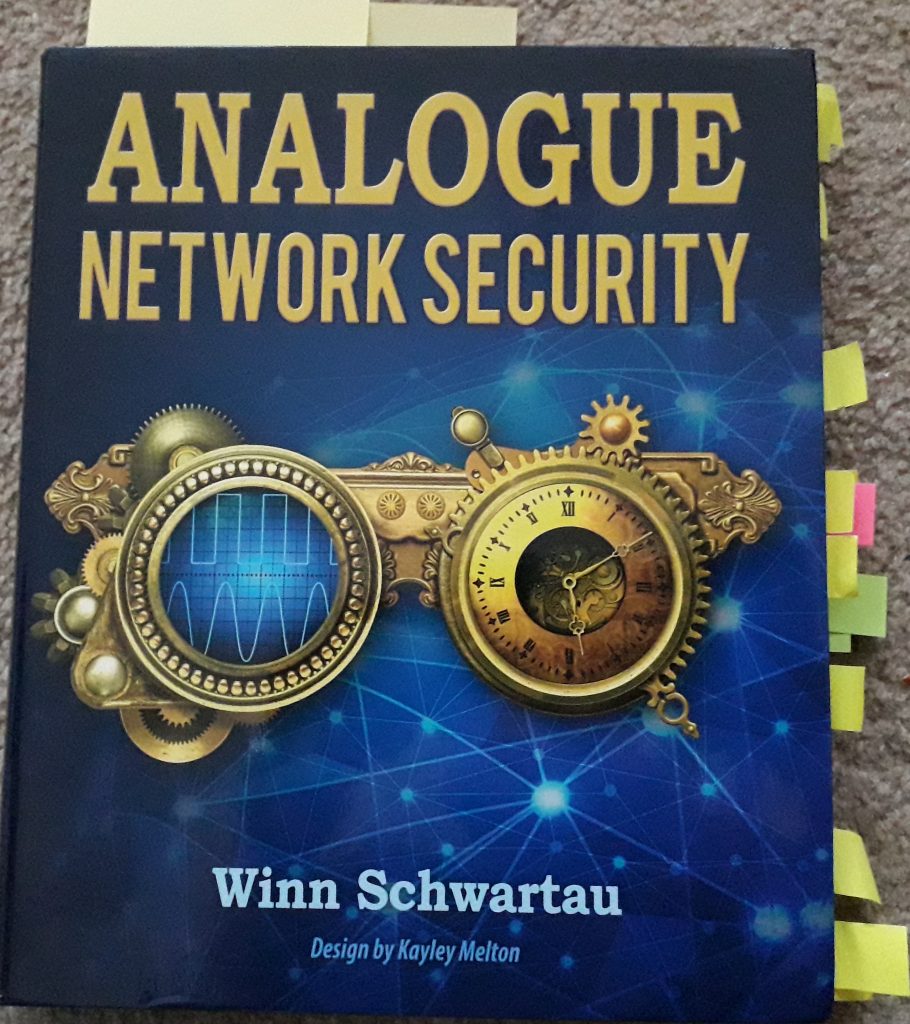
Because I ended up running much shorter than I expected, I also started to bring in other material from the Analogue Network Security book (pictured above, with post-it-note reference markers for my review) that I’m currently writing a review on. This was my next mistake. So, I mentioned about feedback loops (which about 1/3 of the book is about) and that in the later sections of the book it’s mentioned that this can improve workflow where you need sign-off to complete changes. I mixed up a few terms and it sounded like I was endorsing having changes made without approvals. I tried to pull it back, but not having brought the book with me or having enough experience in vocalising the material… yehr, it was never going to go well. Oh well, I’m hoping to get the review nailed down and then start writing proper presentations on the matter, so I can try and deliver it better next year!
Then… Lunch. Phil, my father-in-law, plus Kian and Cat went to a Chinese Bakery for lunch.
— Jon Spriggs – toot.io/@JonTheNiceGuy (@jontheniceguy) October 19, 2019
Neil’s talk was my next talk to see; an ad-hoc review of web pages about Repair Day
After I gave my talk, I headed to see Neil give an ad-hoc talk about Repair Day. Neil had a collection of pages he wanted to show off. Neil works with The Restart Project to help people fix their own broken things, not just computers (which is Neil’s area of interest) but also white goods, radios, home electronics, clothes and furniture.
In the audience was Stuart Ward (featured later) who also mentioned about running Repair Cafes. After the talk was complete, Stuart posted a collection of links to the Joind.In page for people to find out more for themselves later.
— Jon Spriggs – toot.io/@JonTheNiceGuy (@jontheniceguy) October 19, 2019
This was my stand-out talk for Day 1. Anna had come to OggCamp last year, and thought there wasn’t sufficient content for people new to Linux, so she proposed, wrote and delivered a blinder!
I went to Anna’s talk next. I went in, amongst other reasons, because thought I would be going in to support someone “new to Ubuntu”, and came out stunned at how well the talk was delivered!
Someone wise* wrote on twitter a few months ago something like “The point when someone new joins your team is when you get to challenge implied knowledge. If they ask ‘Why’ and you have to say ‘I don’t know’ it means you need to justify why you do something, and perhaps stop doing it.”
* Someone in this case means I can’t find the tweet!
In this case, I wanted to know what being “New” to Ubuntu (my preferred desktop Linux distribution right now) meant to people. Anna’s talk was fantastic, and got right to the heart of what someone new to Linux would feel like. She mentions downloading “things” from the Internet, setting them to be executable by everyone, and then running them. She also mentions running everything under “sudo” or as root, and then went into where she found she should put things. This was sprinkled with a lot of appropriate emojis. It was a really great talk.
— Jon Spriggs – toot.io/@JonTheNiceGuy (@jontheniceguy) October 19, 2019
As an event organiser, I’m always interested in what other groups are doing!
After Anna’s talk, I went to a round-table session about meetup and event organisers. This was inspired by something new that Lorna had organised this year for the unconference schedule. Next to the board, showing what talks were going to be given, was another board asking for talks to be given. Someone had asked for a talk about organising meet-ups, and so several of the attendees who are organisers of local groups came together to give their views on how to start a group, how to motivate attendees to come to your groups, and how to keep the momentum going.
I’m sorry to say that this was one of the weaker sessions I went to over the weekend. Because no-one had really planned anything in this slot, and none of the people running the session were really comfortable in what they were delivering, it was hard to get any points out of the speakers, and there was very little interaction with the audience. This could have been run as a Q&A session from experienced group organisers, or even a round-table… but never mind!
Towards the end of the session, I stood up and asked about whether any groups like TechNW.UK existed in their regions, and asked people who organised groups like this to put pull requests to get their groups added to that website. I hope to see something come out of that!
After I left this session, I went to look at the exhibition hall and the Kids Track room.
In the exhibition hall was the Merch Stand, the grid, two stands that were apparently about musical things – one of which basically had a guitar and amp constantly being used by a very good musician. After that was Matrix.org, The FSFE, Hacker Public Radio. Along the other wall was a lock picking stand from FlawCon, Manchester Grey Hats and InfoSec Hoppers, a telepresence bot and more!
In the kids room were computers, micro:bits and willing instructors! It looked like a lot of fun for kids, but there wasn’t much room! I had a bit of a chat with a few friends I met along the way, before I went to see my co-host, Al, talking about Wireguard.
— Jon Spriggs – toot.io/@JonTheNiceGuy (@jontheniceguy) October 19, 2019
Al hadn’t expected to be giving this talk today!
Al has been talking about Wireguard a few times over the past year-or-so, and wanted to give a talk about it. He’d planned to propose it for Sunday, but was encouraged by Lorna to talk about it on Saturday. As a result, he hadn’t had a chance to run though the demo he’d planned to give, and it tripped him up at the end of his demo, when the notes he was following mixed up private and public keys at each end… Aside from that, it was a great talk, and made me want to look at Wireguard again!
— Jon Spriggs – toot.io/@JonTheNiceGuy (@jontheniceguy) October 19, 2019
My final talk for the day was one I didn’t expect to be in!
Kian is a friend of mine from days of old, and when he walked into the room I’d just been in for Al’s talk… I decided to sit in whatever he was talking about. Kian spoke to a small audience about hardware builds he’d done over the years, and the mishaps that had occurred on them. A very entertaining talk, albeit one that I couldn’t really empathise with, as I’ve not done any hardware builds since I did my Radio Amateur Exam. Hearing the story of the halloween pumpkin with eyes that were supposed to look at you was very funny though, and the videos really completed the story!
After the talks were done, I went to get dinner with my co-hosts from the Admin Admin podcast, and a few of the other attendees. After we were done, I went back to the venue, but couldn’t settle as I’d had a headache coming on.
While I was gearing up to leave, I ended up having a good chat with Ben Grubert, who changed my view somewhat on how to deliver a talk. He said that people, particularly those who are very process focused, struggle to explain something that links back to the goal, for example, explaining how to win at a board game. It made me completely re-think how my talk I wanted to give on Sunday would go, and I left soon after that conversation so I could re-write my talk. I’ve since gone on to share that advice with several other people!
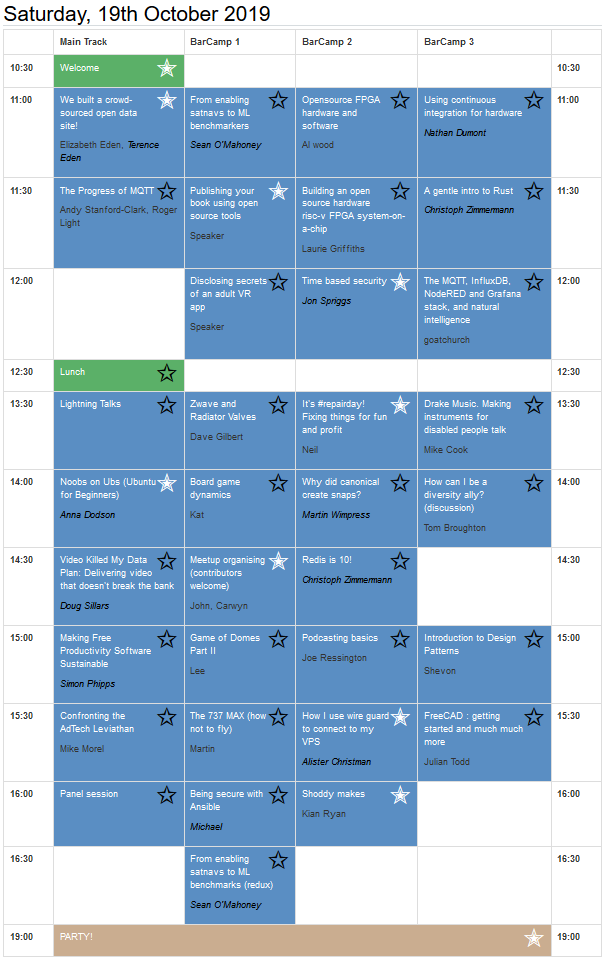
Sunday
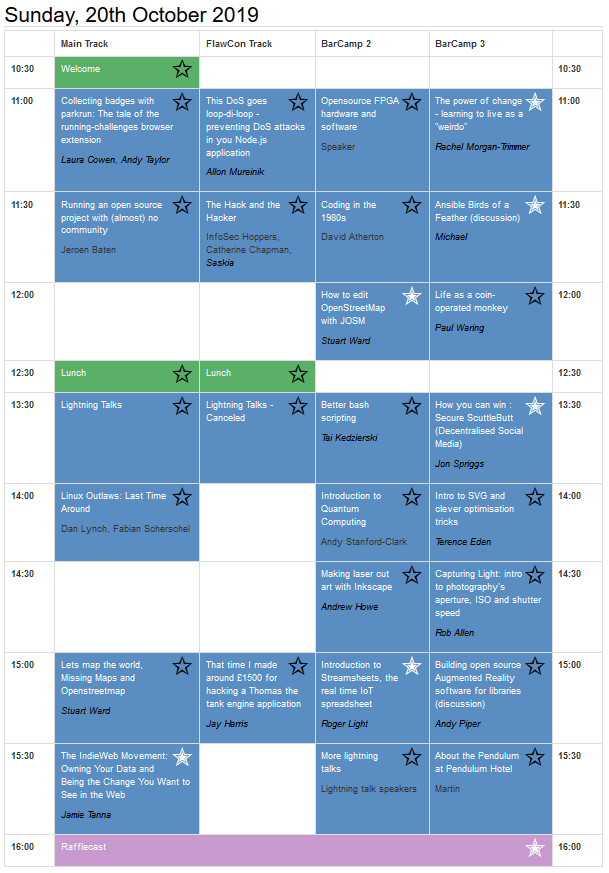
A screen shot of the Sunday Schedule. Again, starred talks are the ones I attended.
— Jon Spriggs – toot.io/@JonTheNiceGuy (@jontheniceguy) October 20, 2019
My hands-down favourite talk from the entire weekend!
At Barcamp Manchester 9, which I attended a few weeks before OggCamp, I missed a talk by Rachel. I saw a picture of one of her slides, and I think I might even have caught the last slide of it… Either way, I was desperately sad that I’d missed the talk, and so encouraged her to attend OggCamp to deliver it. Once I saw she was on the grid, I knew exactly where I was going!
Rachel’s talk did not fail to deliver. I’ve heard from lots and lots of people that they were moved by this talk. Rachel was talking about her life, mostly undiagnosed with Autism, ADHD and depression. She enriched the talk with fun comments, including asking someone to play the part of Romeo from Romeo and Juliet, and then asking him, without having seen the book, why he didn’t know his lines. It sounds quite brutal, but actually, it sets the scene quite well on her life. There’s a fantastic photo of the spectrum of issues related to autism that just keeps having more and more artefacts being added to it.
I’ve heard that she wants to take this talk to more people, businesses and conferences, so I won’t spoil any more of the surprises, but it’s a really powerful talk and I’d strongly encourage anyone to bring Rachel into their environment to hear her talk.
While sitting in Kian’s talk the day before, I missed a session on Ansible Security. I’d made the point, in the morning, of finding Michael from the Matrix Project who gave the talk, and they said that they’d planned to host a “Birds of A Feather” (BOF) session on the Sunday following the feedback from the talk.
I managed to make it to this session, but unfortunately, I didn’t get any photos.
Having been to the meet-up session the day before, I was partially dreading this session, as Ansible is something I’m still very keen on. I needn’t have worried, as Michael managed to control several very chatty people (myself very much included). He managed to engage people but then stop them from going on too much. I wish there was somewhere the people who attended this talk to join to catch up and share knowledge, but… oh well.
Next I went to a talk on the Java Open Street Map editor, JOSM. It was very much a show-and-tell “This is how I use the tool”, but I struggled to follow it, and, sadly left early.
LATE EDIT 2019-11-04: Stuart contacted my on Twitter to apologise for making his talk hard to follow. I wanted to add some extra notes. The problem I had was not with Stuart’s talk per-sey, but more that I couldn’t focus on the subject, and wasn’t sure if I wasn’t in the right head-space for the talk or perhaps I was just hungry. I wanted to become more involved in Open Street Map, and thought I could get a better idea on how to contribute from this talk, but as I said, I wasn’t tracking the content. I walked out more to clear my head than because I didn’t enjoy the talk.
I realised I was getting hungry, so went to Subway for my lunch, and came back refreshed in time to give my second talk.
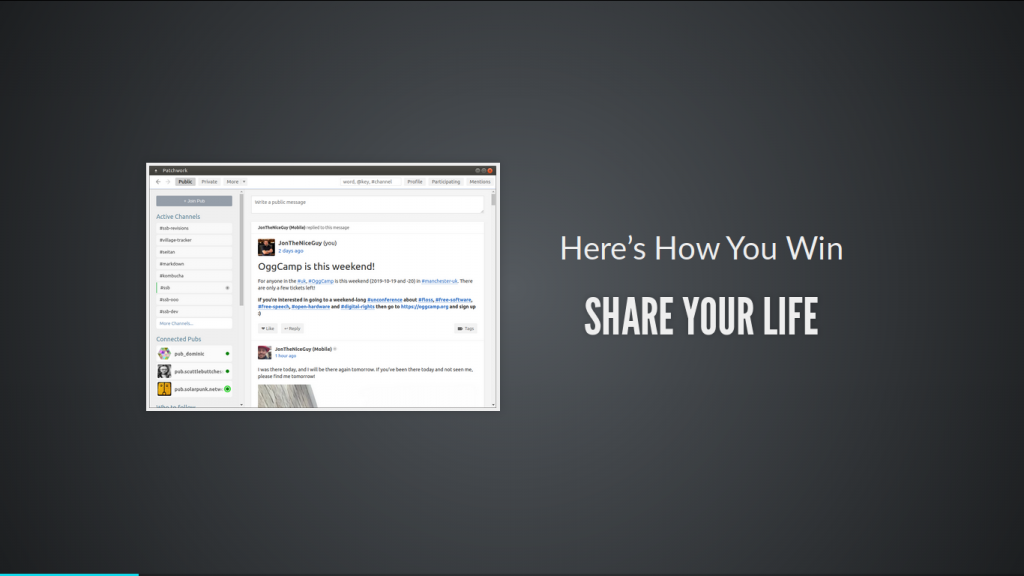
A screen shot from the talk “Here’s how you win: Secure Scuttlebutt”
This talk was on Secure Scuttlebutt (SSB), a decentralised social media platform. There were about 20 people in the audience, and I had some very sensible questions about the project. At the end of the talk, I’d encouraged three people to give it a try, two of whom fell at the first hurdle, and the third persisted in the bar at the end of the day, and has since connected with me on there. Woohoo!
The talk was a stark contrast to the talk I felt I’d not done justice to the day before, and I felt like I’d really nailed this talk. I’m still exceptionally grateful to Ben who’d pointed me in the right direction for the talk layout the night before.
At the end of my talk, I wandered around a bit – I wasn’t really sure what I wanted to see next, so instead I caught up with friends who also weren’t in talks. I bumped into Rachel, and recorded a quick promo for her speaking career and then saw some friends start a Dungeons and Dragons (D&D) game up in the exhibition area!
This looks like a great talk at #OggCamp for people who are interested in IoT. @ralight talking about "Introduction to Streamsheets, the real time IoT spreadsheet". The first talk this weekend that made me go "Oh, that's clever"!https://t.co/wzXsHhhDVZpic.twitter.com/KKVJYBdQZu
— Jon Spriggs – toot.io/@JonTheNiceGuy (@jontheniceguy) October 20, 2019
The first talk at OggCamp about a technology I’d not seen the likes of before.
I made my way to Roger’s talk about Stream Sheets, an Internet Of Things (IoT) connected tool like Google Sheets. It can read content from MQTT, REST APIs and other similar data sources, tweak and convert them, and then publish them back again. All very interesting, although I’m unlikely to use it somewhere any time soon! I was glad though to popularise it with colleagues when I got back to work on Monday!
— Jon Spriggs – toot.io/@JonTheNiceGuy (@jontheniceguy) October 20, 2019
My last talk attended of the day – Jamie Tanner
Jamie had talked at OggCamp ’18, and I was very glad to see him back at OggCamp this year – particularly on the main stage!
His talk was about self hosting and the Indie Web movement. He talked about why he self hosts, and what sort of content he “owns” when he can (spoiler: all of it!) He not only stores bookmarks in a public blog, but his Google Fit step counter results, his RSVPs to events and … yes, even blog posts. He talked about why he felt that you too should be part of the Indie Web.
After Jamie’s talk, was the annual rafflecast. A laptop was given away, but not to me (boo!) And then I went to record the Admin Admin Podcast.
From left to right, Jerry, Gary, Al, and then Me (with my red hat from Red Hat). Out of shot is Mr Joe Ressington, who let us use his recording gear. Because he’s lovely.
On the way to Joe’s hotel (where we did this recording), I got us a bit lost, and ended up walking us clear across to the Northern Quarter of Manchester. We then had to walk back to just near Piccadilly station, where his hotel was! Oops. The show has since been released, if you want to hear us talking about OggCamp, and guest host Gary.
We went to the Lass O’Gowry pub for a drink before I had to catch my rail replacement bus home, and catch up on some sleep!
On the last replacement bus home from #oggcamp/#flawcon. I had an amazing time and hope all the other attendees did too! ❤️ Together we made a conference! 👊
— Jon Spriggs – toot.io/@JonTheNiceGuy (@jontheniceguy) October 20, 2019
And that was OggCamp ’19. The featured image is of the OggCamp Grid on Saturday.
OggCamp are looking for someone to take over the organising in 2020 (supported by past organisers, like me!) so if you’re interested, please getintouch!
Oh wow. If ever you were looking for a reason to write expressive Git commits – this is the one to go for! Found via Jamie Tanner’s blog at https://www.jvt.me and well worth a 2 minute read!