"Exam" by "Alberto G." on Flickr

My no-spoilers thoughts on the GitLab Certified Associate certification course and exam

On Wednesday, 21st April, I saw a link to a blog post in a chat group for the Linux Lads podcast. This blog post included a discount code to make the GitLab Certified Associate course and exam free. I signed up, and then shared the post to colleagues.

Free GitLab certification course and exam – until 30th April 2021.

GitLab has created a “Certified Associate” certification course which normally costs $650, but is available for free until 30th April using the discount code listed on this blog post and is available for one year after purchase (or free purchase).

I’ve signed up for the course today, and will be taking the 6 hour course, which covers:

Section 1: Self-Study – Introduction to GitLab

* GitLab Overview
* GitLab Comparison
* GitLab Components and Navigation
* Demos and Hands On Exercises

Section 2: Self-Study – Using Git and GitLab

* Git Basics
* Basic Code Creation in GitLab
* GitLab’s CI/CD Functions
* GitLab’s Package and Release Functions
* GitLab Security Scanning

Section 3: Certification Assessments

* GitLab Certified Associate Exam Instructions
* GitLab Certified Associate Knowledge Exam
* GitLab Certified Associate Hands On Exam
* Final Steps

You don’t need your own GitLab environment – you get one provided to you as part of the course.

Another benefit to this course is that you’ll learn about Git as part of the course, so if you’re looking to do any code development, infrastructure as code, documentation as code, or just learning how to store any content in a version control system – this will teach you how 😀

Good luck to everyone participating in the course!

After sharing this post, the GitLab team amended the post to remove the discount code as they were significantly oversubscribed! I’ve heard rumours that it’s possible to find the code, either on Gitlab’s own source code repository, or perhaps using Archive.org’s wayback machine, but I’ve not tried!

On Friday I started the course and completed it yesterday. The rest of this post will be my thoughts on the course itself, and the exam.

Signing up for the course and getting started

Signing up was pretty straightforward. It wasn’t clear that you had a year between when you enrolled for the course and until you first opened the content, but that once you’d opened the link to use the Gitlab demo environment, you had 21 days to use it. You’re encouraged to sign up for the demo environment on the first stage, thereby limiting you to the 21 days from that point. I suspect that if you re-visit that link on a second or third time, you’d get fresh credentials, so no real disaster there, but it does make you feel a bit under pressure to use the environment.

First impressions

The training environment is pretty standard, as far as corporate training goes. You have a side-bar showing the modules you need to complete before the end of the course, and as you scroll down through each module, you get various different media-types arriving, including youtube videos, fade-in text, flashcards which require clicking on and side-scrolling presentation cards. (Honestly, I do wonder whether this is particularly accessible to those with visual or motor impairments… I hope so, but I don’t know how I’d check!)

As you progress through each module, in the sidebar to the left, a circle outline is slowly turned from grey to purple, and when you finish a module the outline is replaced by a filled circle with a white tick in it. At the bottom of each module is a link to the next module.

The content

You have a series of 3 sections:

  • “Introduction to Gitlab” (aka, “Corporate Propaganda” 😉) which includes the history of the GitLab project and product, how many contributors it has, what it’s primary objective is, and so on. There’s even an “Infotainment” QVC-like advert about how amazing GitLab is in this section, which is quite cute. At the end of this first section, you get a “Hands On” section, where you’re encouraged to use GitLab to create a new Project. I’ll come back to the Hands on sections after this.
  • “Using Git and Gitlab”, which you’d expect to be more hands-on but is largely more flashcards and presentation cards, each with a hands on section at the end.
  • “Certification Assessments” has two modules to explain what needs to happen (one before, one after) and then two parts to the “assessment” – a multiple-choice section which has to be answered 100% correctly to proceed, and a “hands on” exam, which is basically a collection of “perform this task” questions, which you are expected to perform in the demo environment.

Hands-on sections focus on a specific task – “create a project”, “commit code”, “create an issue”, “create a merge request” and so-on. There are no tasks which will stretch even the freshest Git user, and seeing the sorts of things that the “Auto DevOps” function can enable might interest someone who wants to use GitLab. I was somewhat disappointed that there was barely any focus on the fact that GitLab can be self-hosted, and what it takes to set something like that up.

We also get to witness the entire power (apparently) of upgrading to the “Premium” and “Ultimate” packages of GitLab’s proprietary add-ons… Epics. I jest of course, I’ve looked and there’s loads more to that upgrade!

The final exams (No Spoilers)

This is in two parts, a multiple-choice selection on a fixed set of 14 questions, with 100% accuracy required to move on to the next stage that can be retaken indefinitely, and a hands-on set of… from memory… 14ish tasks which must be completed on a project you create.

The exam is generally things about GitLab which you’ve covered in the course, but included two questions about using Git that were not covered in any of the modules. For this reason, I’d suggest when you get to those questions, open a git environment, and try each of the commands offered given the specific scenario.

Once you’ve finished the hands-on section, using the credentials you were given, you’re asked to complete a Google Forms page which includes the URL of the GitLab Project you’ve performed your work in, and the username for your GitLab Demo Environment. You submit this form, and in 7 days (apparently, although, given the take-up of the course, I’m not convinced this is an accurate number) you’ll get your result. If you fail, apparently, you’ll be invited to re-try your hands-on exam again.

At least some of the hands-on section tasks are a bit ambiguous, suggesting you should make this change on the first question, and then “merge that change into this branch” (again, from memory) in the next task.

My final thoughts

So, was it worth $650 to take this course? No, absolutely not. I realise that people have put time and effort into the content and there will be people within GitLab Inc checking the results at the end… but at most it’s worth maybe $200, and even that is probably a stretch.

If this course was listed at any price (other than free) would I have taken it? …. Probably not. It’s useful to show you can drive a GitLab environment, but if I were going for a job that needed to use Git, I’d probably point them at a project I’ve created on GitHub or GitLab, as the basics of Git are more likely to be what I’d need to show capabilities in.

Does this course teach you anything new about Git or GitLab that just using the products wouldn’t have done? Tentatively, yes. I didn’t know anything about the “Auto DevOps” feature of GitLab, I’d never used the “Quick Actions” in either issues or merge requests, and there were a couple of git command lines that were new to me… but on the whole, the course is about using a web based version control system, which I’ve been doing for >10 years.

Would this course have taught you anything about Git and GitLab if you were new to both? Yes! But I wouldn’t have considered paying $650… or even $65 for this, when YouTube has this sort of content for free!

What changes would you make to this course? For me, I’d probably introduce more content about the CI/CD elements of GitLab, I might introduce a couple of questions or a module about self-hosting and differences about the tiers (to explain why it would be worth paying $99/user/month for the additional features in the software). I’d probably also split the course up into several pieces, where each of those pieces goes towards a larger target… so perhaps there might be a “basic user” track, which is just “GitLab inc history”, “using git” and “using Gitlab for issues and changes”, then an advanced user, covering “GitLab tiers”, “GitLab CI/CD”, “Auto DevOps”, running “Git Runners”, and perhaps a Self Hosting course which adds running the service yourself, integrating GitLab with other services, and so on. You might also (as GitLab are a very open company) have a “marketing GitLab” course (for TAMs, Pre-Sales and Sales) which could also be consumed externally.

Have you passed? Yep

Read More
"Honey pots" by "Nicholas" on Flickr

Adding MITM (or “Trusted Certificate Authorities”) proxy certificates for Linux and Linux-like Environments

In some work environments, you may find that a “Man In The Middle” (also known as MITM) proxy may have been configured to inspect HTTPS traffic. If you work in a predominantly Windows based environment, you may have had some TLS certificates deployed to your computer when you logged in, or by group policy.

I’ve previously mentioned that if you’re using Firefox on your work machines where you’ve had these certificates pushed to your machine, then you’ll need to enable a configuration flag to make those work under Firefox (“security.enterprise_roots.enabled“), but this is talking about Linux (like Ubuntu, Fedora, CentOS, etc.) and Linux-like environments (like WSL, MSYS2)

Late edit 2021-05-06: Following a conversation with SiDoyle, I added some notes at the end of the post about using the System CA path with the Python Requests library. These notes were initially based on a post by Mohclips from several years ago!

Start with Windows

From your web browser of choice, visit any HTTPS web page that you know will be inspected by your proxy.

If you’re using Mozilla Firefox

In Firefox, click on this part of the address bar and click on the right arrow next to “Connection secure”:

Clicking on the Padlock and then clicking on the Right arrow will take you to the “Connection Security” screen.
Certification Root obscured, but this where we prove we have a MITM certificate.

Click on “More Information” to take you to the “Page info” screen

More obscured details, but click on “View Certificate”

In recent versions of Firefox, clicking on “View Certificate” takes you to a new page which looks like this:

Mammoth amounts of obscuring here! The chain runs from left to right, with the right-most blob being the Root Certificate

Click on the right-most tab of this screen, and navigate down to where it says “Miscellaneous”. Click on the link to download the “PEM (cert)”.

The details on the Certificate Authority (highly obscured!), but here is where we get our “Root” Certificate for this proxy.

Save this certificate somewhere sensible, we’ll need it in a bit!

Note that if you’ve got multiple proxies (perhaps for different network paths, or perhaps for a cloud proxy and an on-premises proxy) you might need to force yourself in into several situations to get these.

If you’re using Google Chrome / Microsoft Edge

In Chrome or Edge, click on the same area, and select “Certificate”:

This will take you to a screen listing the “Certification Path”. This is the chain of trust between the “Root” certificate for the proxy to the certificate they issue so I can visit my website:

This screen shows the chain of trust from the top of the chain (the “Root” certificate) to the bottom (the certificate they issued so I could visit this website)

Click on the topmost line of the list, and then click “View Certificate” to see the root certificate. Click on “Details”:

The (obscured) details for the root CA.

Click on “Copy to File” to open the “Certificate Export Wizard”:

In the Certificate Export Wizard, click “Next”
Select “Base-64 encoded X.509 (.CER)” and click “Next”
Click on the “Browse…” button to select a path.
Name the file something sensible, and put the file somewhere you’ll find it shortly. Click “Save”, then click “Next”.

Once you’ve saved this file, rename it to have the extension .pem. You may need to do this from a command line!

Copy the certificate into the environment and add it to the system keychain

Ubuntu or Debian based systems as an OS, or as a WSL environment

As root, copy the proxy’s root key into /usr/local/share/ca-certificates/<your_proxy_name>.crt (for example, /usr/local/share/ca-certificates/proxy.my.corp.crt) and then run update-ca-certificates to update the system-wide certificate store.

RHEL/CentOS as an OS, or as a WSL environment

As root, copy the proxy’s root key into /etc/pki/ca-trust/source/anchors/<your_proxy_name>.pem (for example, /etc/pki/ca-trust/source/anchors/proxy.my.corp.pem) and then run update-ca-trust to update the system-wide certificate store.

MSYS2 or the Ruby Installer

Open the path to your MSYS2 environment (e.g. C:\Ruby30-x64\msys64) using your file manager (Explorer) and run msys2.exe. Then paste the proxy’s root key into the etc/pki/ca-trust/source/anchors subdirectory, naming it <your_proxy_name>.pem. In the MSYS2 window, run update-ca-trust to update the environment-wide certificate store.

If you’ve obtained the Ruby Installer from https://rubyinstaller.org/ and installed it from there, assuming you accepted the default path of C:\Ruby<VERSION>-x64 (e.g. C:\Ruby30-x64) you need to perform the above step (running update-ca-trust) and then copy the file from C:\Ruby30-x64\mysys64\etc\pki\ca-trust\extracted\pem\tls-ca-bundle.pem to C:\Ruby30-x64\ssl\cert.pem

Using the keychain

Most of your Linux and Linux-Like environments will operate fine with this keychain, but for some reason, Python needs an environment variable to be passed to it for this. As I encounter more environments, I’ll update this post!

The path to the system keychain varies between releases, but under Debian based systems, it is: /etc/ssl/certs/ca-certificates.crt while under RedHat based systems, it is: /etc/pki/tls/certs/ca-bundle.crt.

Python “Requests” library

If you’re getting TLS errors in your Python applications, you need the REQUESTS_CA_BUNDLE environment variable set to the path for the system-wide keychain. You may want to add this line to your /etc/profile to include this path.

Sources:

Featured image is “Honey pots” by “Nicholas” on Flickr and is released under a CC-BY license.

"The Guitar Template" by "Neil Williamson" on Flickr

Testing (and failing inline) for data types in Ansible

I tend to write long and overly complicated set_fact statements in Ansible, ALL THE DAMN TIME. I write stuff like this:

rulebase: |
  {
    {% for var in vars | dict2items %}
      {% if var.key | regex_search(regex_rulebase_match) | type_debug != "NoneType"
        and (
          var.value | type_debug == "dict" 
          or var.value | type_debug == "AnsibleMapping"
        ) %}
        {% for item in var.value | dict2items %}
          {% if item.key | regex_search(regex_rulebase_match) | type_debug != "NoneType"
            and (
              item.value | type_debug == "dict" 
              or item.value | type_debug == "AnsibleMapping"
            ) %}
            "{{ var.key | regex_replace(regex_rulebase_match, '\2') }}{{ item.key | regex_replace(regex_rulebase_match, '\2') }}": {
              {# This block is used for rulegroup level options #}
              {% for key in ['log_from_start', 'log', 'status', 'nat', 'natpool', 'schedule', 'ips_enable', 'ssl_ssh_profile', 'ips_sensor'] %}
                {% if var.value[key] is defined and rule.value[key] is not defined %}
                  {% if var.value[key] | type_debug in ['string', 'AnsibleUnicode'] %}
                    "{{ key }}": "{{ var.value[key] }}",
                  {% else %}
                    "{{ key }}": {{ var.value[key] }},
                  {% endif %}
                {% endif %}
              {% endfor %}
              {% for rule in item.value | dict2items %}
                {% if rule.key in ['sources', 'destinations', 'services', 'src_internet_service', 'dst_internet_service'] and rule.value | type_debug not in ['list', 'AnsibleSequence'] %}
                  "{{ rule.key }}": ["{{ rule.value }}"],
                {% elif rule.value | type_debug in ['string', 'AnsibleUnicode'] %}
                  "{{ rule.key }}": "{{ rule.value }}",
                {% else %}
                  "{{ rule.key }}": {{ rule.value }},
                {% endif %}
              {% endfor %}
            },
          {% endif %}
        {% endfor %}
      {% endif %}
    {% endfor %}
  }

Now, if you’re writing set_fact or vars like this a lot, what you tend to end up with is the dreaded dict2items requires a dictionary, got instead. which basically means “Hah! You wrote a giant blob of what you thought was JSON, but didn’t render right, so we cast it to a string for you!”

The way I usually write my playbooks, I’ll do something with this set_fact at line, let’s say, 10, and then use it at line, let’s say, 500… So, I don’t know what the bloomin’ thing looks like then!

So, how to get around that? Well, you could do a type check. In fact, I wrote a bloomin’ big blog post explaining just how to do that!

However, that gets unwieldy really quickly, and what I actually wanted to do was to throw the breaks on as soon as I’d created an invalid data type. So, to do that, I created a collection of functions which helped me with my current project, and they look a bit like this one, called “is_a_string.yml“:

- name: Type Check - is_a_string
  assert:
    quiet: yes
    that:
    - vars[this_key] is not boolean
    - vars[this_key] is not number
    - vars[this_key] | int | string != vars[this_key] | string
    - vars[this_key] | float | string != vars[this_key] | string
    - vars[this_key] is string
    - vars[this_key] is not mapping
    - vars[this_key] is iterable
    success_msg: "{{ this_key }} is a string"
    fail_msg: |-
      {{ this_key }} should be a string, and is instead
      {%- if vars[this_key] is not defined %} undefined
      {%- else %} {{ vars[this_key] is boolean | ternary(
        'a boolean',
        (vars[this_key] | int | string == vars[this_key] | string) | ternary(
          'an integer',
          (vars[this_key] | float | string == vars[this_key] | string) | ternary(
            'a float',
            vars[this_key] is string | ternary(
              'a string',
              vars[this_key] is mapping | ternary(
                'a dict',
                vars[this_key] is iterable | ternary(
                  'a list',
                  'unknown (' ~ vars[this_key] | type_debug ~ ')'
                )
              )
            )
          )
        )
      )}}{% endif %} - {{ vars[this_key] | default('unset') }}

To trigger this, I do the following:

- hosts: localhost
  gather_facts: false
  vars:
    SomeString: abc123
    SomeDict: {'somekey': 'somevalue'}
    SomeList: ['somevalue']
    SomeInteger: 12
    SomeFloat: 12.0
    SomeBoolean: false
  tasks:
  - name: Type Check - SomeString
    vars:
      this_key: SomeString
    include_tasks: tasks/type_check/is_a_string.yml
  - name: Type Check - SomeDict
    vars:
      this_key: SomeDict
    include_tasks: tasks/type_check/is_a_dict.yml
  - name: Type Check - SomeList
    vars:
      this_key: SomeList
    include_tasks: tasks/type_check/is_a_list.yml
  - name: Type Check - SomeInteger
    vars:
      this_key: SomeInteger
    include_tasks: tasks/type_check/is_an_integer.yml
  - name: Type Check - SomeFloat
    vars:
      this_key: SomeFloat
    include_tasks: tasks/type_check/is_a_float.yml
  - name: Type Check - SomeBoolean
    vars:
      this_key: SomeBoolean
    include_tasks: tasks/type_check/is_a_boolean.yml

I hope this helps you, bold traveller with complex jinja2 templating requirements!

(Oh, and if you get “template error while templating string: no test named 'boolean'“, you’re probably running Ansible which you installed using apt from Ubuntu Universe, version 2.9.6+dfsg-1 [or, at least I was!] – to fix this, use pip to install a more recent version – preferably using virtualenv first!)

Featured image is “The Guitar Template” by “Neil Williamson” on Flickr and is released under a CC-BY-SA license.

"Main console" by "Steve Parker" on Flickr

Running services (like SSH, nginx, etc) on Windows Subsystem for Linux (WSL1) on boot

I recently got a new laptop, and for various reasons, I’m going to be primarily running Windows on that laptop. However, I still like having a working SSH server, running in the context of my Windows Subsystem for Linux (WSL) environment.

Initially, trying to run service ssh start failed with an error, because you need to re-execute the ssh configuration steps which are missed in a WSL environment. To fix that, run sudo apt install --reinstall openssh-server.

Once you know your service runs OK, you start digging around to find out how to start it on boot, and you’ll see lots of people saying things like “Just run a shell script that starts your first service, and then another shell script for the next service.”

Well, the frustration for me is that Linux already has this capability – the current popular version is called SystemD, but a slightly older variant is still knocking around in modern linux distributions, and it’s called SystemV Init, often referred to as just “sysv” or “init.d”.

The way that those services work is that you have an “init” file in /etc/init.d and then those files have a symbolic link into a “runlevel” directory, for example /etc/rc3.d. Each symbolic link is named S##service or K##service, where the ## represents the order in which it’s to be launched. The SSH Daemon, for example, that I want to run is created in there as /etc/rc3.d/S01ssh.

So, how do I make this work in the grander scheme of WSL? I can’t use SystemD, where I could say systemctl enable --now ssh, instead I need to add a (yes, I know) shell script, which looks in my desired runlevel directory. Runlevel 3 is the level at which network services have started, hence using that one. If I was trying to set up a graphical desktop, I’d instead be looking to use Runlevel 5, but the X Windows system isn’t ported to Windows like that yet… Anyway.

Because the rc#.d directory already has this structure for ordering and naming services to load, I can just step over this directory looking for files which match or do not match the naming convention, and I do that with this script:

#! /bin/bash
function run_rc() {
  base="$(basename "$1")"
  if [[ ${base:0:1} == "S" ]]
  then
    "$1" start
  else
    "$1" stop
  fi
}

if [ "$1" != "" ] && [ -e "$1" ]
then
  run_rc "$1"
else
  rc=3
  if [ "$1" != "" ] && [ -e "/etc/rc${$1}.d/" ]
  then
    rc="$1"
  fi
  for digit1 in {0..9}
  do
    for digit2 in {0..9}
    do
      find "/etc/rc${rc}.d/" -name "[SK]${digit1}${digit2}*" -exec "$0" '{}' \; 2>/dev/null
    done
  done
fi

I’ve put this script in /opt/wsl_init.sh

This does a bit of trickery, but basically runs the bottom block first. It loops over the digits 0 to 9 twice (giving you 00, 01, 02 and so on up to 99) and looks in /etc/rc3.d for any file containing the filename starting S or K and then with the two digits you’ve looped to by that point. Finally, it runs itself again, passing the name of the file it just found, and this is where the top block comes in.

In the top block we look at the “basename” – the part of the path supplied, without any prefixed directories attached, and then extract just the first character (that’s the ${base:0:1} part) to see whether it’s an “S” or anything else. If it’s an S (which everything there is likely to be), it executes the task like this: /etc/rc3.d/S01ssh start and this works because it’s how that script is designed! You can run one of the following instances of this command: service ssh start, /etc/init.d/ssh start or /etc/rc3.d/S01ssh start. There are other options, notably “stop” or “status”, but these aren’t really useful here.

Now, how do we make Windows execute this on boot? I’m using NSSM, the “Non-sucking service manager” to add a line to the Windows System services. I placed the NSSM executable in C:\Program Files\nssm\nssm.exe, and then from a command line, ran C:\Program Files\nssm\nssm.exe install WSL_Init.

I configured it with the Application Path: C:\Windows\System32\wsl.exe and the Arguments: -d ubuntu -e sudo /opt/wsl_init.sh. Note that this only works because I’ve also got Sudo setup to execute this command without prompting for a password.

Here I invoke C:\Windows\System32\wsl.exe -d ubuntu -e sudo /opt/wsl_init.sh
I define the name of the service, as Services will see it, and also the description of the service.
I put in MY username and My Windows Password here, otherwise I’m not running WSL in my user context, but another one.

And then I rebooted. SSH was running as I needed it.

Featured image is “Main console” by “Steve Parker” on Flickr and is released under a CC-BY license.

Unicorn Rentals and the Red Hat

A No-Spoilers AWS Micro services GameDay review (Go team RedHat)

It’s only been a few months since I last attended an AWS Game Day, but the Microservices Game Day came up in the internal calendar, and I jumped at the chance.

To quote from my last post:

A Game Day (sometimes disambiguated as an “Adversarial Game Day”, because of sporting events) is a day where you either have a dummy environment, or, if you have the scale, a portion of your live network is removed from live service and used as a training ground. In this case, AWS provided a specific dummy environment “Unicorn.Rentals”, and all the attendees are the new recruits to the DevOps Team… Oh, and all the previous DevOps team members had just left the company… all at once.

My AWS Game Day blog post from 2019-0918

Guess what? We were recruited BACK by Unicorn.Rentals! Again, the Ops Team have all “quit” (someone needs to talk to their HR team, for crying out loud), and we’re left with their migration from a legacy system to a new microservices based system. Teams are groups of 4 people.

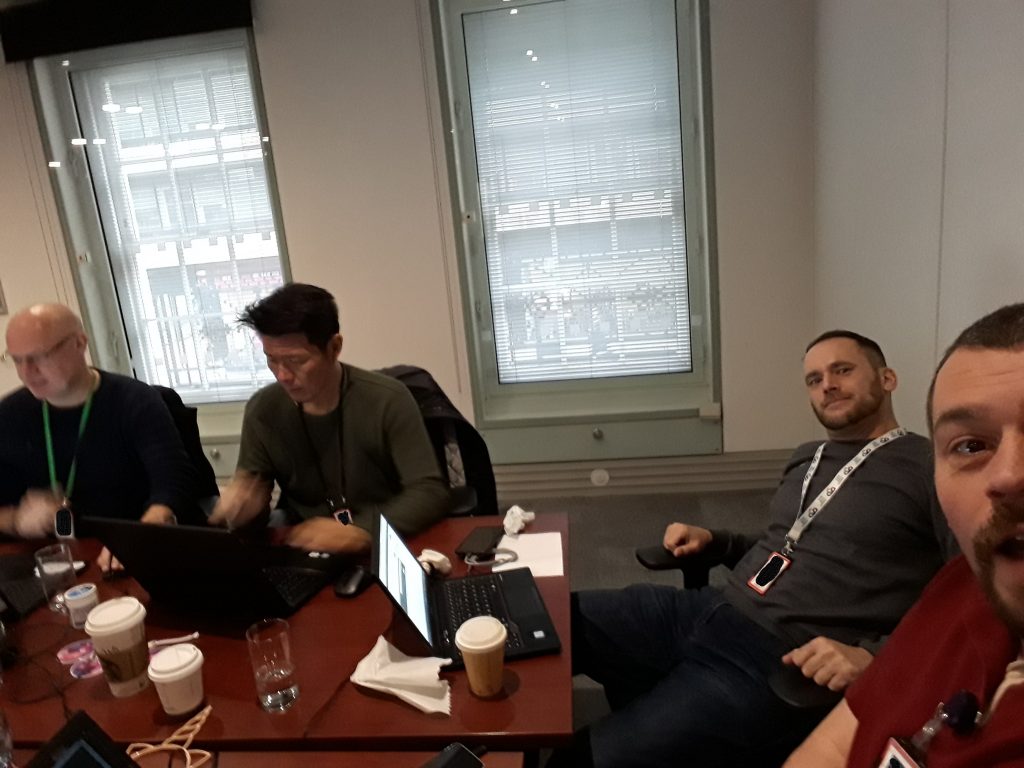
Team Red Hats - left to right: Paul Clarke, Ho Kingsley, Jason Daniels and Me (the owner of the mentioned Red Hat)
Team Red Hats – left to right: Paul Clarke, Ho Kingsley, Jason Daniels and Me (the owner of the mentioned Red Hat)

The task was to maintain a “service router”, and three micro services. Like the last session, there were moments where the stability of the network was challenged, with issues in code, environment and even external actors (no spoilers, remember).

The main take-away I had was that even though I’ve been cramming Docker and Kubernetes knowledge like crazy (more blog posts to come, folks), it doesn’t mean anything if you can’t actually put it into practice.

The pressure is on you right from the start – when you’re trying to get your head around the service you’re running, and working out how to make your microservices work right. There’s also an element of negotiation (admirably performed in our team by Jason) to get people to work together, and keep your eye on the “troubles” in your environment.

My role was mostly around getting on top of improving the condition of the Service Router, and about half way through the session, I decided to try and apply my newfound Docker knowledge to the problem. Naturally, as I’ve not done this under live fire before, I completely mangled the attempt, even managing to knock one of the working microservices off in the process. I was working with a great team as there were no recriminations or criticism for doing that, just an understanding that we needed to roll-back and fix things.

Trying to work out what needed to be done with that broken Docker container took a lot of effort and even right to the last minute, I still hadn’t managed to get my head around it enough to trust it at the end. I think it’s fair to say, though, that it gave me a lot of impetus to try to understand how a docker container should work and has made me want to try and build something less purposefully complex to see how it would work “in the real world”…

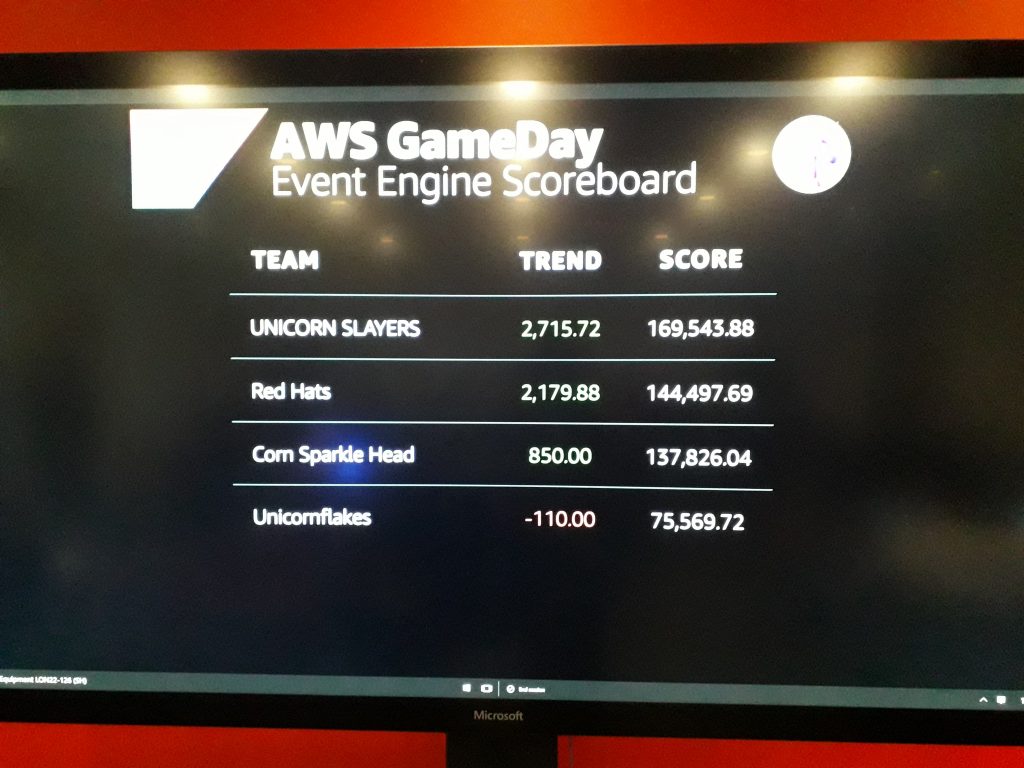
The AWS Microservices Game Day Scoreboard at the end

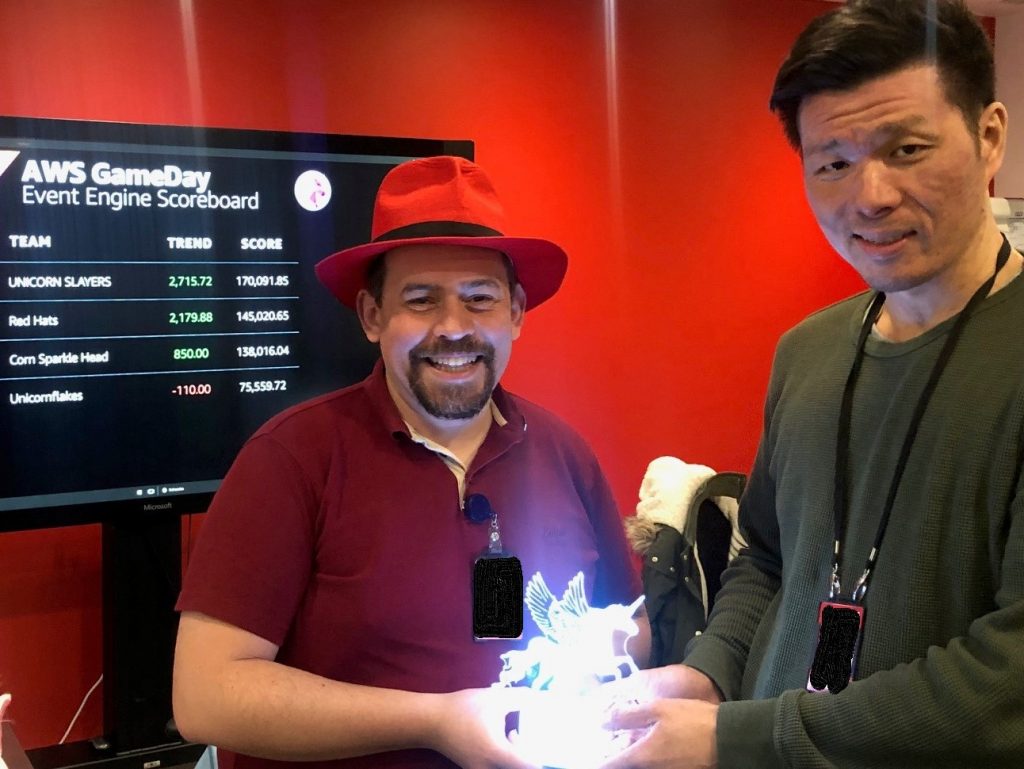
Even without doing something crazy with all the components, Team Red Hats came in second, so I came home with my second LED unicorn, currently sitting on my desk, waiting for a child to be good enough to award them A Unicorn from Unicorn Rentals!

Me and Ho accepting our prize for second place

If you’re offered the opportunity to do one of these, take it!!

"Captain" by "The Laddie" on Flickr

Trying out Kubernetes (K8S) with MicroK8S in Vagrant

I’m going on a bit of a containers kick at the moment, and just recently I wanted to give Kubernetes (sometimes abbreviated to “K8S”) a try.

Kubernetes is an orchestration engine for Containers, like Docker. It’s designed to take the images that Docker (and other similar tools) produce, and run them across multiple nodes. You need to have a handle on how Docker works before giving K8S a try, but once you do, it’s well worth a shot to understand K8S.

Unlike Docker, K8S is a bit more in-depth on it’s requirements, and often people are pointed at Minikube as their introduction to K8S, however, my colleague and friend Nick suggested I might be better off with MicroK8S.

MicroK8S is an application released by Canonical as a Snap. A Snap is a Linux packaging format, similar to FlatPak and AppImage. It’s mostly used on Ubuntu based operating systems, but can also work on other Linux distributions.

I had an initial, failed, punt with the recommended advice for using MicroK8S on Windows (short story, Hyper-V did not work for me, and the VirtualBox back-end doesn’t expose any network ports, or at least, if it does, I couldn’t see how to make it work), and as I’m reasonably confident in using Vagrant work in Windows, I built a Vagrantfile to deliver MicroK8S.

To use this, you need Vagrant and VirtualBox, and then get the Vagrantfile from repo… then run vagrant up (it will ask you what interface you want to “bridge” to – this will be how you access the Kubernetes pods and Docker containers). Once the machine has finished building, you can run vagrant ssh to connect into it. From here, you can run your kubectl commands, as well as docker commands.

If you want to experiment with a multi-node environment, then I also built a Vagrantfile to deliver two virtual machines, both running MicroK8S, and used the shared storage element of Vagrant to transfer the “join” instruction from the first node to the second.

Of course, now I just need to work out how the hell I do Kubernetes 🤣

Featured image is “Captain” by “The Laddie” on Flickr and is released under a CC-BY-ND license.

"Shipping Containers" by "asgw" on Flickr

Creating my first Docker containerized LEMP (Linux, nginx, MariaDB, PHP) application

Want to see what I built without reading the why’s and wherefore’s? The git repository with all the docker-compose goodness is here!

Late edit 2020-01-16: The fantastic Jerry Steel, my co-host on The Admin Admin podcast looked at what I wrote, and made a few suggestions. I’ve updated the code in the git repo, and I’ll try to annotate below when I’ve changed something. If I miss it, it’s right in the Git repo!

One of the challenges I set myself this Christmas was to learn enough about Docker to put an arbitrary PHP application, that I would previously have misused Vagrant to contain.

Just before I started down this rabbit hole, I spoke to my Aunt about some family tree research my father had left behind after he died, and how I wished I could easily share the old tree with her (I organised getting her a Chromebook a couple of years ago, after fighting with doing remote support for years on Linux and Windows laptops). In the end, I found a web application for genealogical research called HuMo-gen, that is a perfect match for both projects I wanted to look at.

HuMo-gen was first created in 1999, with a PHP version being released in 2005. It used MySQL or MariaDB as the Database engine. I was reasonably confident that I could have created a Vagrantfile to deliver this on my home server, but I wanted to try something new. I wanted to use the “standard” building blocks of Docker and Docker-Compose, and some common containers to make my way around learning Docker.

I started by looking for some resources on how to build a Docker container. Much of the guidance I’d found was to use Docker-Compose, as this allows you to stand several components up at the same time!

In contrast to how Vagrant works (which is basically a CLI wrapper to many virtual machine services), Docker isolates resources for a single process that runs on a machine. Where in Vagrant, you might run several processes on one machine (perhaps, in this instance, nginx, PHP-FPM and MariaDB), with Docker, you’re encouraged to run each “service” as their own containers, and link them together with an overlay network. It’s possible to also do the same with Vagrant, but you’ll end up with an awful lot of VM overhead to separate out each piece.

So, I first needed to select my services. My initial line-up was:

  • MariaDB
  • PHP-FPM
  • Apache’s httpd2 (replaced by nginx)

I was able to find official Docker images for PHP, MariaDB and httpd, but after extensive tweaking, I couldn’t make the httpd image talk the way I wanted it to with the PHP image. Bowing to what now seems to be conventional wisdom, I swapped out the httpd service for nginx.

One of the stumbling blocks for me, particularly early on, was how to build several different Dockerfiles (these are basically the instructions for the container you’re constructing). Here is the basic outline of how to do this:

version: '3'
services:
  yourservice:
    build:
      context: .
      dockerfile: relative/path/to/Dockerfile

In this docker-compose.yml file, I tell it that to create the yourservice service, it needs to build the docker container, using the file in ./relative/path/to/Dockerfile. This file in turn contains an instruction to import an image.

Each service stacks on top of each other in that docker-compose.yml file, like this:

version: '3'
services:
  service1:
    build:
      context: .
      dockerfile: service1/Dockerfile
    image: localhost:32000/service1
  service2:
    build:
      context: .
      dockerfile: service2/Dockerfile
    image: localhost:32000/service2

Late edit 2020-01-16: This previously listed Dockerfile/service1, however, much of the documentation suggested that Docker gets quite opinionated about the file being called Dockerfile. While docker-compose can work around this, it’s better to stick to tradition :) The docker-compose.yml files below have also been adjusted accordingly. I’ve also added an image: somehost:1234/image_name line to help with tagging the images for later use. It’s not critical to what’s going on here, but I found it useful with some later projects.

To allow containers to see ports between themselves, you add the expose: command in your docker-compose.yml, and to allow that port to be visible from the “outside” (i.e. to the host and upwards), use the ports: command listing the “host” port (the one on the host OS), then a colon and then the “target” port (the one in the container), like these:

version: '3'
services:
  service1:
    build:
      context: .
      dockerfile: service1/Dockerfile
    image: localhost:32000/service1
    expose:
    - 12345
  service2:
    build:
      context: .
      dockerfile: service2/Dockerfile
    image: localhost:32000/service2
    ports:
    - 8000:80

Now, let’s take a quick look into the Dockerfiles. Each “statement” in a Dockerfile adds a new “layer” to the image. For local operations, this probably isn’t a problem, but when you’re storing these images on a hosted provider, you want to keep these images as small as possible.

I built a Database Dockerfile, which is about as small as you can make it!

FROM mariadb:10.4.10

Yep, one line. How cool is that? In the docker-compose.yml file, I invoke this, like this:

version: '3'
services:
  db:
    build:
      context: .
      dockerfile: mariadb/Dockerfile
    image: localhost:32000/db
    restart: always
    environment:
      MYSQL_ROOT_PASSWORD: a_root_pw
      MYSQL_USER: a_user
      MYSQL_PASSWORD: a_password
      MYSQL_DATABASE: a_db
    expose:
      - 3306

OK, so this one is a bit more complex! I wanted it to build my Dockerfile, which is “mariadb/Dockerfile“. I wanted it to restart the container whenever it failed (which hopefully isn’t that often!), and I wanted to inject some specific environment variables into the file – the root and user passwords, a user account and a database name. Initially I was having some issues where it wasn’t building the database with these credentials, but I think that’s because I wasn’t “building” the new database, I was just using it. I also expose the MariaDB (MySQL) port, 3306 to the other containers in the docker-compose.yml file.

Let’s take a look at the next part! PHP-FPM. Here’s the Dockerfile:

FROM php:7.4-fpm
RUN docker-php-ext-install pdo pdo_mysql
ADD --chown=www-data:www-data public /var/www/html

There’s a bit more to this, but not loads. We build our image from a named version of PHP, and install two extensions to PHP, pdo and pdo_mysql. Lastly, we copy the content of the “public” directory into the /var/www/html path, and make sure it “belongs” to the right user (www-data).

I’d previously tried to do a lot more complicated things with this Dockerfile, but it wasn’t working, so instead I slimmed it right down to just this, and the docker-compose.yml is a lot simpler too.

  phpfpm:
    build:
      context: .
      dockerfile: phpfpm/Dockerfile
    image: localhost:32000/phpfpm

See! Loads simpler! Now we need the complicated bit! :) This is the Dockerfile for nginx.

FROM nginx:1.17.7
COPY nginx/default.conf /etc/nginx/conf.d/default.conf

COPY public /var/www/html

Weirdly, even though I’ve added version numbers for MariaDB and PHP, I’ve not done the same for nginx, perhaps I should! Late edit 2020-01-16: I’ve put a version number on there now, previously where it said nginx:1.17.7 it actually said nginx:latest.

I’ve created the configuration block for nginx in a single “RUN” line. Late edit 2020-01-16: This Dockerfile now doesn’t have a giant echo 'stuff' > file block either, following Jerry’s advice, and I’m using COPY instead of ADD on his advice too. I’ll show that config file below. There’s a couple of high points for me here!

server {
  index index.php index.html;
  server_name _;
  error_log /proc/self/fd/2;
  access_log /proc/self/fd/1;
  root /var/www/html;
  location ~ \.php$ {
    try_files $uri =404;
    fastcgi_split_path_info ^(.+\.php)(/.+)$;
    fastcgi_pass phpfpm:9000;
    fastcgi_index index.php;
    include fastcgi_params;
    fastcgi_param SCRIPT_FILENAME $document_root$fastcgi_script_name;
    fastcgi_param PATH_INFO $fastcgi_path_info;
  }
}
  • server_name _; means “use this block for all unnamed requests”.
  • access_log /proc/self/fd/1; and error_log /proc/self/fd/2;These are links to the “stdout” and “stderr” file descriptors (or pointers to other parts of the filesystem), and basically means that when you do docker-compose logs, you’ll see the HTTP logs for the server! These two files are guaranteed to be there, while /dev/stderr isn’t!

Because nginx is “just” caching the web content, and I know the content doesn’t need to be written to from nginx, I knew I didn’t need to do the chown action, like I did with the PHP-FPM block.

Lastly, I need to configure the docker-compose.yml file for nginx:

  nginx:
    build:
      context: .
      dockerfile: Dockerfile/nginx
    image: localhost:32000/nginx
    ports:
      - 127.0.0.1:1980:80

I’ve gone for a slightly unusual ports configuration when I deployed this to my web server… you see, I already have the HTTP port (TCP/80) configured for use on my home server – for running the rest of my web services. During development, on my home machine, the ports line instead showed “1980:80” because I was running this on Instead, I’m running this application bound to “localhost” (127.0.0.1) on a different port number (1980 selected because it could, conceivably, be a birthday of someone on this system), and then in my local web server configuration, I’m proxying connections to this service, with HTTPS encryption as well. That’s all outside the scope of this article (as I probably should be using something like Traefik, anyway) but it shows you how you could bind to a separate port too.

Anyway, that was my Docker journey over Christmas, and I look forward to using it more, going forward!

Featured image is “Shipping Containers” by “asgw” on Flickr and is released under a CC-BY license.
FDE Flag by the dock side in Berlin, with a WECC sign in the background.

#FDEConf2019 – My Impressions

Last year, I was very fortunate be selected as a Fujitsu Distinguished Engineer (FDE), and earlier this year I was advised that my membership of that group was renewed (this is not a forgone conclusion – it’s something you need to achieve each year!)

Some FDEs have occasional local meet-ups, but our whole group’s “big do”, when we induct new members into the group, the “FDE Conference” was held this year (#FDEConf2019 on Social Media) at WECC, Berlin.

The FDE Conference spans two days (plus travelling) and this year was no exception. I travelled from Manchester with Associate FDE, Lucy McGrother, and stayed at the Ellington Hotel in Berlin. On arrival, several of the FDEs who were at the Ellington created a chat group on Linked In and organised going out for dinner at the Bavarian Berlin restaurant (which was really tasty!)

I’d already started eating before I remembered to take a photo! D’oh!
I did better with Desert!

The following day, the first “real” day of the event, a few of us caught an Uber to the conference (I’ve never used Uber before, but was very impressed with the UX of it!) where we discovered that a “Uber X” (the bigger ones) for 6 people can’t fix 6 people into! I had my knees around my ears, which was fun!

I was speaking at the event on the first day, so I made my way to my room, only to discover that not only was the venue “HDMI only” (damn you DisplayPort-only laptop!) but also that an update overnight on my blog (to update syntax highlighting I don’t use any more) had taken out the presentation software I was using. Cue running around looking for an DisplayPort/HDMI Adaptor, and then trying to figure out what had actually broken on the site! Oh well – soon sorted!

Welcome speech delivered by the ever enthusiastic Joseph Reger, and then we were off to the “Breakout Sessions”!

The first talk I attended was by Caragh O’Carroll, on Data Maturity. I’d had a bit of a preview of the talk a week or so before the talk was actually given (a dry-run, so to speak), and it was great to hear that I’d literally had 10% of what would actually be in the talk. Some of my suggestions had been incorporated, and the whole room was up and moving around for one piece of the story half way through. It was really energising!

After that, I was on stage. Because Joseph had run over slightly, the speaker in the slot before me had timed his talk to the minute and so overran into the “moving around” block. I was slightly nervous as this meant my timing could have gone out (but as it turned out, I nailed it to the minute!) I’ve written up some notes on my talk already elsewhere on this blog, so I won’t go into too much detail, aside from to add that after I wrote that post, I was told that people were being turned away from the door, so that’s a bit of an ego boost :)

I’d intended next to attend a talk on Microservices Architectures, but unfortunately the room was rammed (it wasn’t even “standing room only” – they’d run out of room for people to stand!) Instead, I went away and spoke to some of the vendors. RedHat were there, dispensing Red Fedora hats to anyone who deposited a “contact card”. Yep, I went for it!

Jon in a Red Hat from RedHat standing in front of the Fujitsu Distinguished Engineers banner
After I received the hat, it didn’t come off… until I got home and my wife’s raised eyebrow suggested it wouldn’t have a long life if it remained there…

I also spoke to Pluralsight, a training vendor I’d previously sidelined in favour of another platform, but who appeared to have a much broader scope of content… so they convinced me to give it another try.

I spoke briefly to SUSE, but more-so because I wanted to find out how people I knew working for SUSE were doing than to find out about what SUSE were offering. I’m reasonably well switched on with SUSE as a project and a company so I didn’t feel like I needed to get much from them. Also, sadly, none of the people who were there knew the people I was talking about, which wasn’t a good start! :)

I also spent a couple of minutes talking to a partner I’ve had reasonably close dealings with, Symantec, and agreed to a conversation in the next couple of months. Again, it wasn’t a long talk, as I knew the product set and context quite well.

The other sponsors had interesting content, but generally didn’t cover areas that overlap with my work or my personal interests, so, while I interacted with them, I don’t recall much of what was discussed.

The last break-out session of the day was Scott Pendlebury and Dave Markham‘s session on “Cyber Threat Intelligence and Dark Web Research” – a cumulative talk on the research they’ve done into various aspects of their jobs in the Advanced Threat Centre. This was a very in-depth talk, covering a large number of subjects in a very short space of time. Several people I spoke to after their talk were very interested in lots of little aspects of their talk… because it touched so many areas!

All Meme’d up, Dave and Scott’s front slide was my favourite one!

There was a closing speech for the day, and then the rooms were re-jigged for the evening games and food. In one room was a big-screen, phone controlled, multi-player “Pong” game (hosted by Piing) and a spin of “Cards Against Humanity” called “Cards Against Complexity” (hosted by Citrix). Both were fun, but what was much MORE fun was the game after Pong – a big-screen, phone controlled, multi-player buggy racing game. The first round, naturally, I won!

Me winning the first round of Buggy Racing. I didn’t manage to achieve *that* feat again! Photo courtesy of Caragh, who spotted me celebrating and snapped it!

Following the games, I went back to the hotel with a couple of the other FDEs (discovering how not-Uber, non-Uber services are), and had a couple of drinks in the bar. Bed and awake for breakfast the following morning.

Day two was about the UN’s 17 Sustainable Development Goals, and what ideas we, as a company, could come up with to help progress those goals.

A slide from the morning, showing the Sustainable Development Goals

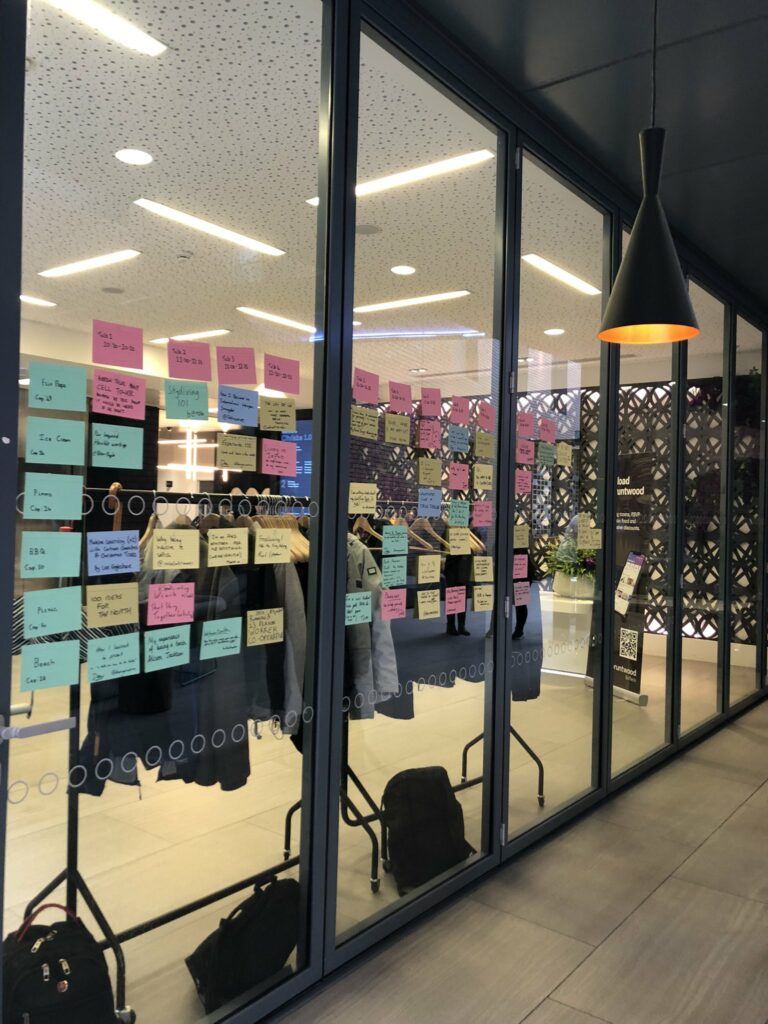
We had talks from three different individuals who are helping to steer the conversation. Neil Bennett, Dr. Leonardo Gheller Alves (link to his latest project) and Thomas Deloison. Our speakers, talking over individual radio channels to tuned headphones, told us about how we could impress them with our projects… and talking of the projects, there were three “target” cities – Berlin (naturally), Bangalore and Tokyo (also, naturally). Each city was prompted to look at three areas of interest – Homes & Communities, Transport and Environment. Each city/interest set was split into three groups (numbered 1-9), each of whom were to approach the subject and come up with a project to solve an issue in their chosen area.

The process, orchestrated by the co-creation conductor – Jo Box, took us on a journey, looking at the city and it’s issues, pushing us into looking at how those issues impact a single member of that city and, then pulling us into how we might help that person improve their lives.

My team, Tokyo 9 (dealing with “Environment”) considered the path of an elderly Japanese lady “Mikika” and thought about what issues she had. We explored the fact that she lived in a “Walk-up” apartment, and probably was concerned with the fates of all of her family (including her own brother, as well as their children and grandchildren). We expanded on that to work out what things in Mikika’s environment would cause her issues, and how we might help to solve those issues… As it worked out, we ended up crossing from “Environment” into “Housing”, as we imagined building a new town on a brownfield environment inside Tokyo, and how that town might be better engineered to support family lives for all stages of life, from rearing children near home, to supporting young adults in their quest for a career, and later to the care and support of elderly family members who might be living nearby.

Our final presentation board
The physical view of our final presentation – what makes up our project?

Sadly, we didn’t win, but I loved being a part of the team. I have to give lots of respect to all my team members, but particularly to Liz Parnell, a recent member of the FDE community and Sean Barker. These were both our voices for the pitches to our fellow Tokyo teams, and also in our final pitch to the judges.

Following the pitches, we went off-site for a walk around (I managed to do some tourist-y shopping for the family and then chatted with some other FDEs at the “Other” hotel) before heading back for drinks and dinner.

During the dinner, I was approached by someone from the RedHat stand, who asked if they could borrow my hat. I was, by this point, the only person at the event still wearing my coveted red fedora. I finally let him borrow my hat, only to find it on the head of Dr. Joseph!

In the latter part of the dinner were speeches from members of the Management Team, essentially reminding us that we’re amazing and need to keep being so great. I subsequently managed to talk to my local management representative – Tim White, with whom I got a great selfie!

Jon Spriggs and Tim White. Jon wears a Red Hat.
Yes, I’ve got my red fedora back by now!

We also saw all the new FDEs and Associate FDEs being inducted in, and also those staff who were awarded for significant internal research papers.

And then, we all had a lot more drinks, and when the bar shut down, we returned to the bar at the hotel, and had some more.

A reasonable handful of us ended up on the same flight back to Manchester the following day, so it was nice to catch up with a few of the FDEs on the return.

I should say though, it took me a few days to recover! Hence, this post only arriving now… so, erm, perhaps that’ll teach me for taking my own vodka to a venue that’s only serving beer and wine? (#ThePerilsOfOnlyDrinkingSpirits)

Nah, didn’t think so! 😁

If you work for Fujitsu, and want to know more about the FDE program, want to become an FDE or just want to know more about what I do for Fujitsu, please get in touch. I’m in the Address Book and I am frequently on our IM system. I’d be more than happy to talk with you!

If you don’t work for Fujitsu, but would be interested, start by looking at the roles available in your region (e.g. via this page). Each region may have a different recruiting tool (that’s big business for you!) but if you spot something and want to know whether it might be the right sort of role for you, you can contact me via one of the options up the top of my blog and I’d be glad to try to help you, if it’s right for you!

Featured image is “Inspiring couple of days in Berlin attending #FDEConf2019” by Paul Clarke.

BarCamp Manchester Logo, from barcampmanchester.co.uk

My talk summaries from BarCamp Manchester 9

BarCamp Manchester 9 (#BcMcr9) is a BarCamp style Unconference. It was held in the offices of Auto Trader in the centre of Manchester. It was a two day event, however, I was unable to attend the Saturday. Sundays are usually quieter days, and apparently the numbers were approximately half of the peak of Saturday on the Sunday.

Lunch was provided by Auto Trader. The day was split into 7 slots, or sessions, running for 25 minutes each, with 5 minutes between slots to change rooms. There were three theatre layout rooms, each with a projector, and one room with soft chairs around the edges.

There and Back Again/How The Internet Works

Format: Presentation with slides. 30ish attendees.

Slot: Slot 1 Sunday 11:00-11:25

Notes: This slide deck was reused from when I delivered it in 2012. Some stuff had changed (the prevalence of WiFi being one, CAT5e being referenced raised some giggles), but most had not.

There were some comments raised during the talk about the slides, but nothing significant (mostly by network engineers, commenting on things like routing a local network. Ugh.)

Following the talk, someone came up to suggest some changes (primarily that the slides need to link back to the graphics created). Someone else noted that there were too many acronyms that should probably have been explained. As such, this deck is likely to change and be published here at some point soon.

I sent a tweet, following this talk:

At #BCMCR9? See my talk on “How The Internet Works” and looking for the slides? See here: https://www.slideshare.net/JonTheNiceGuy/there-and-back-again-15506394 And feel free to message me if you’ve got any questions!

Jon Spriggs (@jontheniceguy) @ Sep 22 12:03pm

Automation in an Infrastructure as Code World

Format: Presentation with slides. 8 attendees, reduced to 4 half way through.

Slot: Slots 5 and 6 Sunday 14:00-14:55

Notes: This was a trial run of my talk for the Fujitsu FDE Conference I’m attending in a couple of weeks. The audience were notified as such. I took two slots on the “grid”, and half way through my session, half the audience walked out.

Following the talk, someone came and suggested some changes, which I’ll be implementing.

The slides for this talk are still being developed and will be shared after the FDE conference on this site.

Decentralised Social Media? – Secure Scuttlebutt

Format: Conversation with a desktop client application (Patchwork) loaded on the projector, and the Google Play entry for Manyverse on a browser tab. 3 attendees.

Slot: Slot 7 (last slot of the day) Sunday 15:00-15:25

Notes: This was an unplanned session, and probably should have been run earlier in the day. The audience members were very interactive, and asked lots of sensible questions.

I sent a tweet, following this talk:

Did you come to my talk at #BcMcr9 about #SecureScuttleButt? If you run a SSB client (patchwork, patchbay, patchfox or manyverse) and want to follow me, I’m @p3gu8eLHxXC0cuvZ0yXSC05ZROB4X7dpxGCEydIHZ0o=.ed25519 and @3SEA7qNZQPiYFCzY6K57f0LTc9l+Bk6cewQc6lbs/Ek=.ed25519

Jon Spriggs (@jontheniceguy) @ Sep 22 4:46pm

And if you want to know more about #SecureScuttlebutt, take a look at http://Scuttlebutt.nz! It’s fun!

Jon Spriggs (@jontheniceguy) @ Sep 22 4:49pm
Fujitsu AWS Game Day Attendees

AWS Game Day

I was invited, through work, to participate in an AWS tradition – the AWS Game Day. This event was organised by my employer for our internal staff to experience a day in the life of a fully deployed AWS environment… and have some fun with it too. The AWS Game Day is a common scenario, and if you’re lucky enough to join one, you’ll probably be doing this one… As such, there will be… #NoSpoilers.

A Game Day (sometimes disambiguated as an “Adversarial Game Day”, because of sporting events) is a day where you either have a dummy environment, or, if you have the scale, a portion of your live network is removed from live service and used as a training ground. In this case, AWS provided a specific dummy environment “Unicorn.Rentals”, and all the attendees are the new recruits to the DevOps Team… Oh, and all the previous DevOps team members had just left the company… all at once.

Attendees were split into teams of four, and each team had a disparate background.

We’re given access to;

  • Our login panel. This gives us our score, our trending increase or decrease in score over the last “period” (I think it was 5 minutes), our access to the AWS console, and a panel to update the CNAME for the DNS records.
  • AWS Console. This is a mostly unrestricted account in AWS. There are some things we don’t get access to – for example, we didn’t get the CloudFormation Template for setting up the game day, and we couldn’t make changes to the IAM environment at all. Oh, and what was particularly frustrating was not being able to … Oh yes, I forgot, #NoSpoilers ;)
  • A central scoreboard of all the teams
  • A running tally of how we were scored
    • Each web request served under X seconds received one score
    • Each request served between X and Y seconds received another score,
    • Each request served over Y seconds received a third score.
    • Failing to respond to a request received a negative score.
    • Infrastructure costs deducted points from the score (to stop you just putting stuff at ALL THE SERVERS, ALL THE TIME).
  • The outgoing DevOps team’s “runbook”. Not too dissimilar to the sort of documentation you write before you go on leave. “If this thing break, run this or just reboot the box”, “You might see this fail with something like this message if the server can’t keep up with the load”. Enough to give you a pointer on where to look, not quite enough to give you the answer :)

The environment we were working on was, well, relatively simple. An auto-scaling web service, running a simple binary on an EC2 instance behind a load balancer. We extended the reach of services we could use (#NoSpoilers!) to give us greater up-time, improved responsiveness and broader scope of access. We were also able to monitor … um, things :) and change the way we viewed the application.

I don’t want to give too many details, because it will spoil the surprises, but I will say that we learned a lot about the services in AWS we had access to, which wasn’t the full product set (just “basic” AWS IaaS tooling).

When the event finished, everyone I spoke to agreed that having a game day is a really good idea! One person said “You only really learn something when you fix it! This is like being called out, without the actual impact to a customer” and another said “I’ve done more with AWS in this day than I have the past couple of months since I’ve been looking at it.”

And, as you can probably tell, I agree! I’d love to see more games days like this! I can see how running something like this, on technology you use in your customer estate, can be unbelievably powerful – especially if you’ve got a mildly nefarious GM running some background processes to break things (#NoSpoilers). If you can make it time-sensitive too (“you’ve got one day to restore service”, or like in this case, “every minute we’re not selling product, we’re losing points”), then that makes it feel like you’ve been called out, but without the stress of feeling like you’re actually going to lose your job at the end of the day (not that I’ve ever actually felt like that when I’ve been called out!!)

Anyway, massive kudos to our AWS SE team for delivering the training, and a huge cheer of support to Sara for getting the event organised. I look forward to getting invited to a new scenario sometime soon! ;)

Here are some pictures from the event!

The teams get to know each other, and we find out about the day ahead! Picture by @Fujitsu_FDE.
Our team, becoming a team by changing the table layout! It made a difference, we went to the top of the leader board for at least 5 minutes! Picture by @Fujitsu_FDE.
The final scores. Picture by @Fujitsu_FDE
Our lucky attendees got to win some of these items! Picture by @Fujitsu_FDE
“Well Done” (ha, yehr, right!) to the winning team (“FIX!”) “UnicornsRUs”. Picture by @Fujitsu_FDE.

The featured image is “AWS Game Day Attendees” by @Fujitsu_FDE.